Farmhouse Coffee Table
Built this for my mom’s birthday since she’s been wanting a farmhouse coffee table. Modified it by using a project panel as the top rather than the 2x6’s.
Ana's Flip Top Storage Bench. I made this ASAP, after I saw it in the book, and then online. I thought it was going to be longer and was thinking it would go great in the mudroom, but after it was finished it turned out to be the perfect size for a fireside seat.
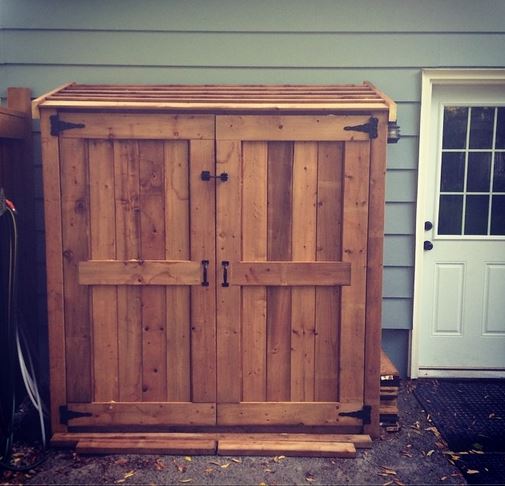
This is my first time using hinges....are they supposed to show? By the time I got them on and working I was pooped and didn't want to test my luck. Maybe I'll have to get some more decorative looking ones!
Used my Kreg Jig, still had splitting issues.
Used finishing nails around the shelves to secure a bit.
Oh and HD didn't have a 1x12x12 so I had to get three 1x12x6 . Bet that cost more, but I'm happy to have some more scrap wood to play around with.
Thanks Ana!
Sun, 10/21/2012 - 09:27
You did a great job on this table. What color stain did you use? And did you put a coat of poly on it?
Yes, the hinges are supposed to show. I made this table about two years ago when Ana first posted the pans, but I don't use it as a table. I use it as a bench in my entryway to hold gloves, hats, etc. It's held up great all these years, and now I'm thinking of building another one for by my garage door, since that's where we come in and out most times.
Sun, 10/21/2012 - 09:38
Thanks, I used Minwax color expressions in walnut, I haven't put poly on it yet, I thought I might just put a wax over it to make it a bit smoother. I don't really know what I'm doing quite yet, so I'll have to learn my options!
I'm thinking of making the longer version for the mud room....should go quicker on round two right!
:) Valerie
Mon, 10/22/2012 - 09:06
I think in order to get your hinges to be more minimally showing you can inset them by using wood chisels to shave a rectangle of wood from the surface where the hinge lays. I've used hinges on a couple things so far and that's what my husband said to do but I was being to lazy to get some chisels. You can get them at any hardware store for pretty cheap I think. Now I'm not positive on any of this since I haven't been doing this hobby for too long. Your bench looks great by the way!
My wife does puzzles and most of her school work on a coffee table. We had bought one from that large blue and yellow warehouse furniture store. I liked its size but never the materials. When I saw the Haven Turned Coffee table, I knew I could make that. Using the pocket screws made this an easy build. I made the top out of 1 x 8's and used biscuits to hold them together. I attached the top using a series of cleats around the inside edge. I stained it with an cherry Minwax stain and polyurethaned the top. Project took about four days on and off not including the staining and urethane.
I found this plan through a YouTube video unrelated to DIY. It has been to long since I had done any woodworking and I knew we needed a table. I modified the plans some and made the table wider and the benches to fit under when not in use. I bought the wood and ended up with yellow pine top and Douglas fir bases. It was what that had at my Home Depot. But the contrasting woods gave me the idea for the finish I ended up with. Love the outcome. Hope you all like it too. Now on to the next project.
I used scrape wood for the headboard to save money. Wood cost approx $15, paint from oops section $3 and screws from my Kreg jig box set.
This was my first real project and I'm hooked.
Thanks Ana!
Built from MODERN INDSUTRIAL ADJUSTABLE SAWHORSE DESK TO COFFEE TABLE. I used a solid table top reinforced underneath so my wife can can use the table as a craft table. I also used 3/4 in allthread
This was the first project my husband requested to help with! It was a great for teaching easy cuts with a miter saw and pocket holes with a kreg jig. Thanks to this end table we now build things together!
Great build for the patio!
I built this bed for my parent's guest room at my sister's house. It is very similar to a bed mom had been wanting. They wanted a king size so I had to do some modifications to the original plan - primarily adding 16" to all width measurements. I also used 10 - 1x8s for the headboard panels. That made the panels slightly too wide, so I had to rip a little bit off the 2 end panels.
The hardest part of the project was getting it in her house! The legs made it about 1/4" too wide to fit it thru the door. We were about to remove the legs (which would have been a disaster since they were glued, screwed and painted on) when we finally figured out the right angle to squeeze it in. I had to touch up the paint in a few spots once we got it in position, but that was much better than having to remove legs and put them back on. We still need to get plywood for the mattress to sit on and I'm going to add a middle leg for extra support since it's a king. I will probably eventually build nightstands to go with it. Overall, I'm pretty happy with how it turned out since this is my largest and "fanciest" project so far.
Tue, 04/09/2013 - 12:41
I really love this bed, however, being military we move quite often. Is there a way that you would recommend I could alter it so that it can be broken down a little to make it easier for moving? Thank you much :D
In reply to How to alter for easy moving? by bran2511
Tue, 04/09/2013 - 14:29
For easy moving I can not recommend the highly enough. You attach them to the side rails and the head and foot of the bed and instead of screwing the whole bed together it just locks into place. They are THE BEST! http://www.rockler.com/m/product.cfm?page=11
Tue, 04/09/2013 - 15:59
Attach the sides to the headboard and footboard with bed rail brackets so you can knock the bed apart to move
http://woodworking.rockler.com/search#w=bed%20rail%20brackets&asug=&sli…
There is even a bracket for the center rail of a king-sized bed.
Tue, 04/09/2013 - 12:41
I really love this bed, however, being military we move quite often. Is there a way that you would recommend I could alter it so that it can be broken down a little to make it easier for moving? Thank you much :D
Sat, 08/24/2013 - 18:31
I just posted a brag post with this bed in black. I will see if I can upload a photo of how I built this bed for very easy break down. I looked at all the brackets etc.. with this being built out of pine I was not 100% confident in the Rockler / Wood craft brackets. I used a forstner bit and a 4.5" bolt with some washers.
We needed something to hold our garbage cans and recycling.
We made this little shed with fence board floor and fence board roof a lot shorter in depth and height - We also used 2x4's as we already had them - fits perfect and was amazingly easy to do.
Looks fantastic in our yard - we are still working on the yard so ignore the extra fence boards and 2*4s laying next to it.
Thanks so much for the great plans.
My husband and I have little wood-working experience, and were able to assemble this in an afternoon. I love how it came out!
This bench was meant to be used around our fire pit in the back yard which is where is it for now. This is only our second wood build. This bench turned out great and seems to be to nice to be outdoors.
We built this as a birthday gift for family members and boy were they excited. We, though, were not excited to let it go. So happy with how it turned out. The plans are good for reference but make sure to make your own measurements when using milled lumber from a big box store. Some of the the changes we had to make on the fly were to the back and front panels having to use a different combination of board sizes to fill it in without massive gaps. Its recommended that you lay them out first before attaching them to the frames. Also the measurements on the cooler lid were smaller by 1/4" to 1/2" of what's listed in order to get a snug fit. The shelf on ours is two 1x6's cut to the width of the whole project (around 16.5") and then the shelf brackets were also 1x6's cut to a length of 10". Brackets are mounted inside the legs using wood glue and three 2.5" screws through the backside/inside of the cooler box to hide (obviously done before the cooler was inserted). For drainage we attached a 2" piece of 1/2" inside diameter clear tubing that was fed/jammed through the cooler drain and pulled through the other side and then a 1/2" push on adapter, threaded on the other end screwed unto a 1/2" faucet head. Drilled a 3/4" hole about 2.5" (center mass) from the 2x4 cooler base through the middle piece on the side. We placed the cooler in first and used a pair of pliers to grab the clear tube and line it up with the hole and then pushed a long screw driver through the tube from inside the cooler in order to guide the faucet head/adapter combo into the tube and stiffening the tube so it didn't collapse when pushing it on. We couldn't decide what do to with the center display piece and then remembered we had a can of chalkboard spray paint left over from another project. We spray painted the whole menu board and then painted the "logo" at the top before clear-coating it with a protective enamel. Its a snug fit so the pressure holds it in place but you could also use velcro strips on the back if that tickles your fancy. We took the snug fit route that way if they didn't want the menu board in. A 1/2' hole was drilled towards the top so they can use a finger to pull the board out.
This was a fun project. The plans are written so that many of the boards don't need to be cut. It's made from cedar that (thank goodness) was on sale. I made the raised beds twice as deep as was called for in the plans because I wanted to minimize bending while I garden. That added to the cost of the lumber and the soil. I also like the way it looks.
I found it helpful to measure and cut the boards as I went. This was crucial for fitting the door. The most difficult part for us was working with the hardware cloth and trying to make it as smooth as possible.
It has been effective keeping deer and rabbits out of the garden. Things that can fly in are another issue.
Another project for my wife. She loves it and I loved building it. Fairly simple.
Really happy with the final product and the hubby is glad I have finally finished a project. This project was an answer to the piles of washing crowding our small laundry. I found 3 sturdy family sized (huge) rectangular laundry baskets for $10ea at Kmart and then used Sketchup to adjust the plans to allow for the bigger baskets (Sketchup is so much fun to use). I ended up having to buy an extra piece of wood for the top because I forgot to allow for the thickness of the sides when measuring the top and base. (I know, I know, measure twice cut once...) I used the piece I had cut for the top as the base and then got a new piece for the top. When I finally got all the pieces cut to size it all went together pretty quickly. I used melamine for the box because it was cheap and I wouldn't have to paint it. It did chip a little bit along the edges when I cut it but it's not too bad. I used 30 x 30mm pine for the basket supports and had to countersink the screws 1cm so I could use 30mm screws. I used iron-on melamine edging to finish the exposed edges of chipboard and used paint on the back and supports. Actual construction didn't take long but the painting took about a day by the time I'd done one basecoat and two top-coats.
Sun, 11/04/2012 - 02:17
Yey a fellow aussie ... love the job. i am going to try stetchup yet again, last time i tried it didn't want to play nice, did it take long to get the hang of? & the melamine ... did you get it at bunnings & did they cut it for u?
Mon, 11/05/2012 - 01:06
Thanks for the feedback. I cut the melamine myself. I clamped a straight edge on top of the melamine (allowing for the distance from the edge of the saw to the blade) and then used my jigsaw to cut. My local bunnings didn't seem too interested in cutting specific sizes. They were happy to just cut lengths down so I can fit them in my car but said their saw could be inaccurate up to 10mm from one end of the cut to the other. (Personally I think the guy just couldn't be bothered) Since I wanted my project to be square I figured it was much easier to just do it myself.
With sketchup I just play around and learn as I go. I got the hang of it pretty quickly although I'm still figuring out some of the more complicated stuff like using the protractor tool to do angles etc.
In reply to Thanks for the feedback. I by rosiejane
Mon, 11/05/2012 - 01:38
Thanks for that... very helpful. yes bunnings, all depends on the assistant hey! Definitely going to have another go at sketchup... must conquer it!
Thu, 01/01/2015 - 22:05
I love this. These baskets are very sturdy. Is there anyway you can post the measurements. I have never made anything but this looks perfect. I have never used sketch up. Please let me know if you are able to post the measurements. Thanks!
For my second-ever project, I built the step-up side table! It actually came together much faster than the "updated simplest console," which is listed as a starter project. However, I learned the importance of keeping square on this build!
I don't have a Kreg jig, so I followed the steps in a slightly different order since I couldn't do pocket holes. I also avoided ripping plywood to make 1x16s by using 1x12s instead. The dimensions fit my narrow space between two chairs better this way.
I LOVE this easy build and modern design. I'm pretty sure the cats are going to try to take it over, though. Thank you, Ana!
I have loved this bed since I first saw it probably 8 years ago. Hubby finally got it built for me. It took him one weekend day. I was able to get the finishing done in a couple of days with plenty of dry time between coats of finish. Thank you Ana for this amazing plan!
Used cedar fence planks. These were pretty cheap at Home Depot. My husband wanted to use them for another project, but ended up not needing them. So instead of returning, I used them! I needed a caddy to hold a planter well over 150lbs. My husband and I had to load on a dolly to move around. It was made out of 2 planks and I added copper wheels (each wheel holds about 80lbs) from Lowe’s. I had a few extra planks, and made an herb window planter...I’ll post on that too!!
I used the plans from the Camp Loft bed and adjusted to exactly what I needed. Two twin beds in a small bedroom without losing any floor space. I found the slide on craigslist while I was building this and it made the best addition. I also added a shelf along the base of one bed for the boys to have a play table and adds stability to the base of the bed to keep it from rocking.
Mon, 11/05/2012 - 17:38
Great Bed! Can I get the plans the way that they were modified? I am a beginner and definately need the step by step plans. This would be great for my nephew's!
Wed, 11/07/2012 - 14:09
I just made the first bed as the plans had. Instead of doing the stairs I just did an extra 2x4 across the legs so they can get up onto the platform. For the 2nd bed I followed the same instructions as the first but only doing one end and the rails (made a giant L) then flipped and screwed right into the side of the other bed. I used pocket holes all around so it went together very quickly.
Wed, 11/07/2012 - 20:57
I really like this bed!my boys will love it! I am a beginner can I please get the plans and tell me how to make the bed with 5 feet high for more space
It will be my first time I can't wait. Thank you !
Mon, 06/24/2013 - 10:36
I have scoured the web for this loft for my two youngest girls! As I am terribly untalented at drawing up plans PRETTY PRETTY PLEASE WITH SUGAR ON TOP make your adjusted plans available? I have until the end of next month to build this for my princesses birthday and I'm more than a touch frazzled that I cannot find these plans anywhere. Take pity on the less talented and please post your plans? Or email them? [email protected]
Thank a ton in advance!
Mon, 12/08/2014 - 13:48
Great work with the modifications! Can you please share the new plans for the changes you made or let me know what exactly that you did to achieve the finished results. Thanks in advanced!
Mon, 12/08/2014 - 13:48
Great work with the modifications! Can you please share the new plans for the changes you made or let me know what exactly that you did to achieve the finished results. Thanks in advanced!
Thu, 06/30/2016 - 20:16
I know it's been a while, but if you would share your finished plans, that would be great. We have the original camp loft, bought from someone else who built it, and we'd like to modify it to be an L-shape loft.