
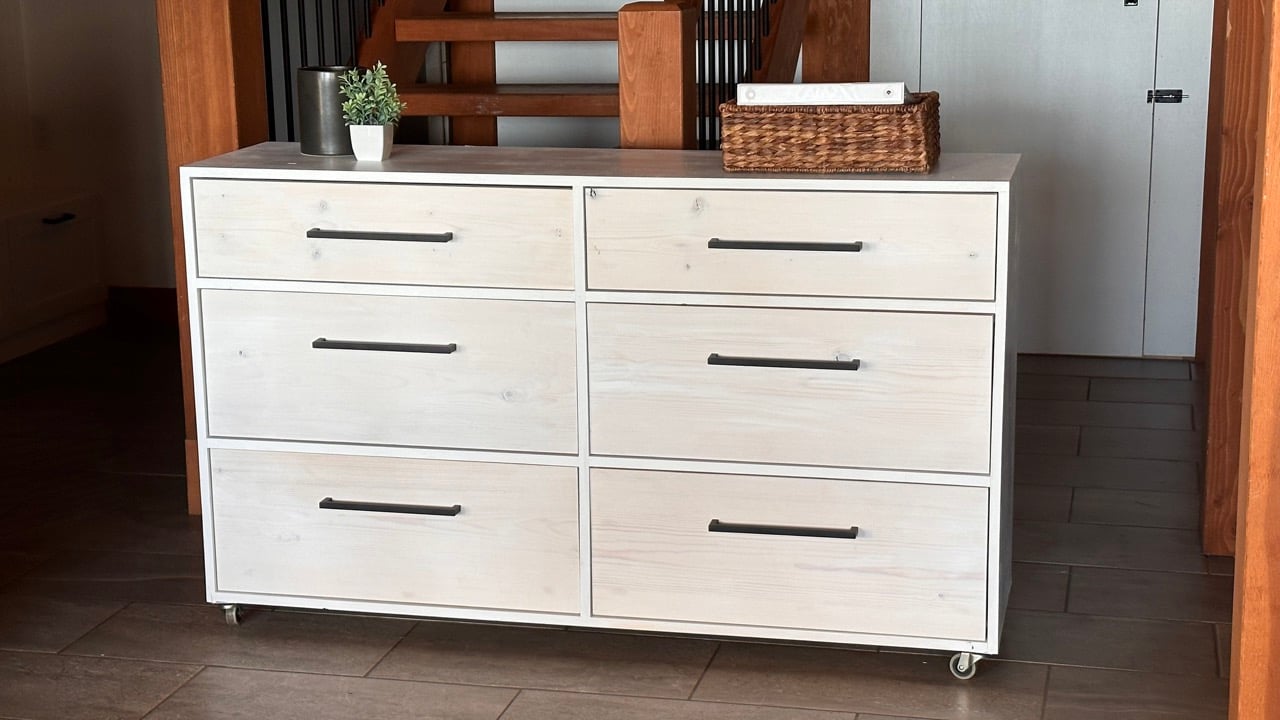

Build your own dress with maximum storage! You can customize the size for a perfect fit.
This dresser is a no frills, frameless design that spares the ornate detail in favor of maximum storage. This dresser is perfect in closets, as a console table, or anywhere you need lots of storage in a sleek profile.
This is a free step by step project plans with detailed diagrams, build video, shopping and cut list and more from Ana-White.com
Why I Built this Dresser
I have a space under out stairs in our basement entryway that I wanted to add storage for extra hats, gloves, scarves, googles, and other outdoor accessories. Because it's under the stairs, I knew I wanted a dresser that is enclosed to minimize dusting and cleaning. And it needed to be on wheels so I can roll it out and clean under it. And finally, it had to be the exact perfect size to fit.
With a tall order like this, it's impossible to get exactly what you need. So I decided to build my own dresser.
With not a ton of space to work with, but an Alaska (lifestyle) sized amount of gear to store, I knew I needed maximum storage for the footprint. No fancy trim, no bulky detailing - just all drawers in the most minimal of framing.

Video of Me Building this Dresser
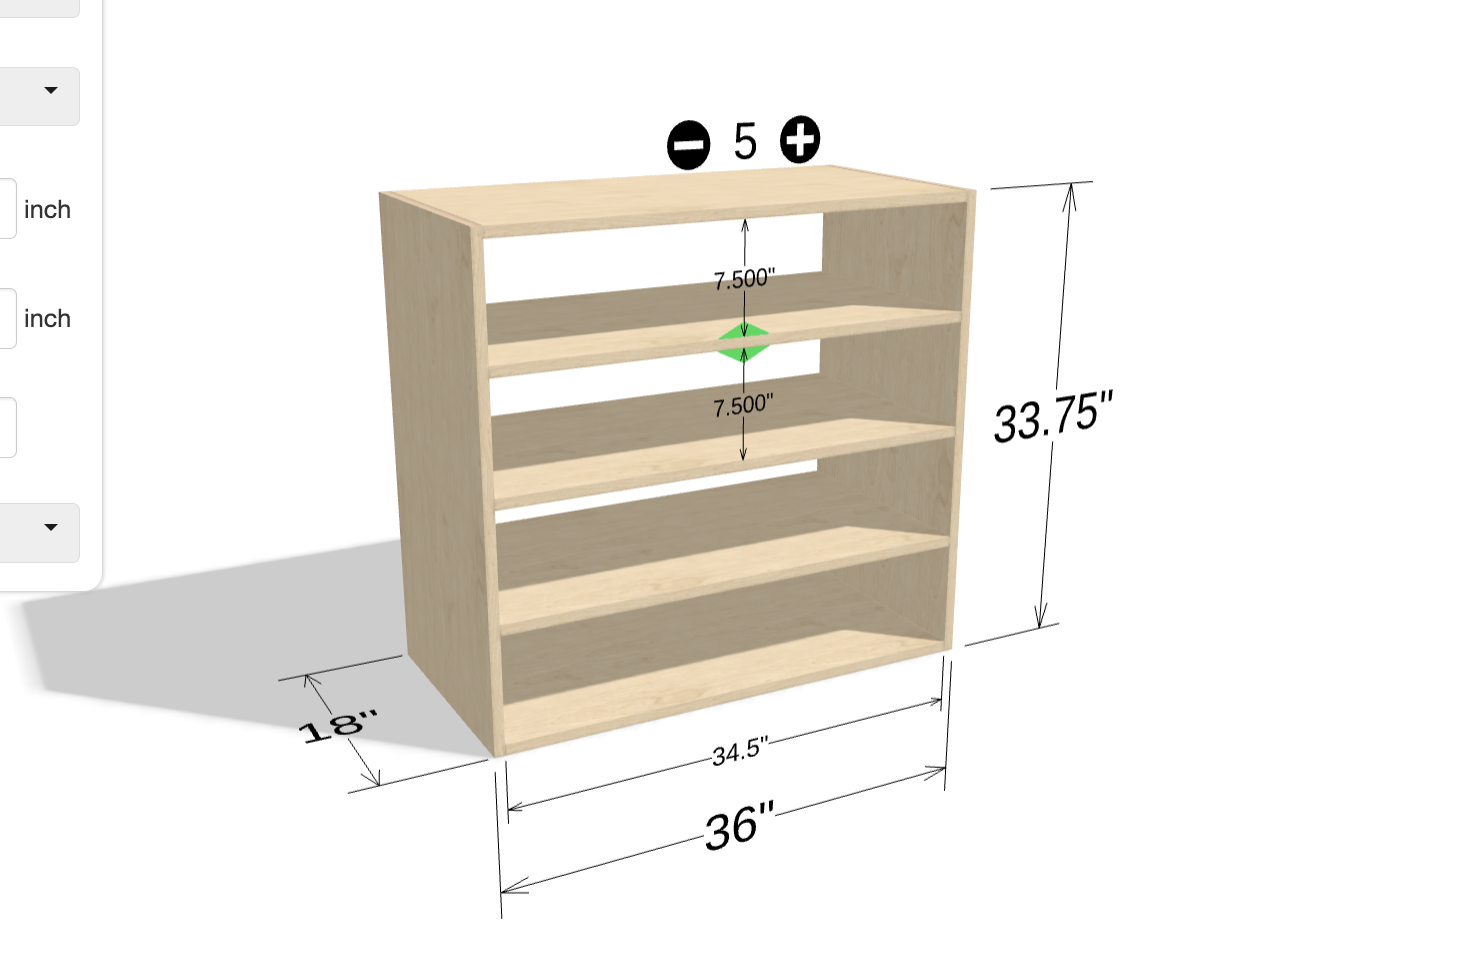
How to Customize This Dresser to the Perfect Size
You can easily customize this dresser to any size! The easiest way to do this is using my free online design app here. In this example, I'm using 16" drawer slides and 1x8 drawer faces that are 7-1/4" wide.
- Cabinet depth (the plywood rip you'll use for the carcass) should be 2" more than your drawer slide length
- Drawer widths - Keep drawers about 32" wide or less - any wider, and they might sag or get out of square when sliding. If you want a wider dresser, go with multiple columns of drawers.
- Heights - figure the heights depending on your drawer face sizes. I used standard 1x6 and 1x12 boards for the drawer faces, so I spaced the openings to fit these sizes. Keep in mind you'll need 1/8" on all sides of the drawer faces (so add 1/4" to your drawer face for the opening width.
- Shelves - Instead of the full plywood shelves, I substitute with 1x4 boards (vertical) or 1x2 boards between drawer faces.
Free Plans to Build this Dresser
Pin For Later!
Preparation
- (1) 4x8 sheet of 3/4" hardwood plywood
- (2) 4x8 sheets of 1/4" hardwood plywood or underlayment
- 4- 1x4 @ 8 feet long
- 2 - 1x2 @ 8 feet long
- 4 - 1x8 @ 8 feet long
- 1 - 1x6 @ 5 feet long
- 1 - 1x12 @ 10 feet long
- 1-1/4" pocket hole screws
- 1-1/4" and 3/4" brad nails
- wood glue
- (4) 3" caster wheels
- (6) knobs or handles
- (6) 18" euro style drawer slides
Carcass
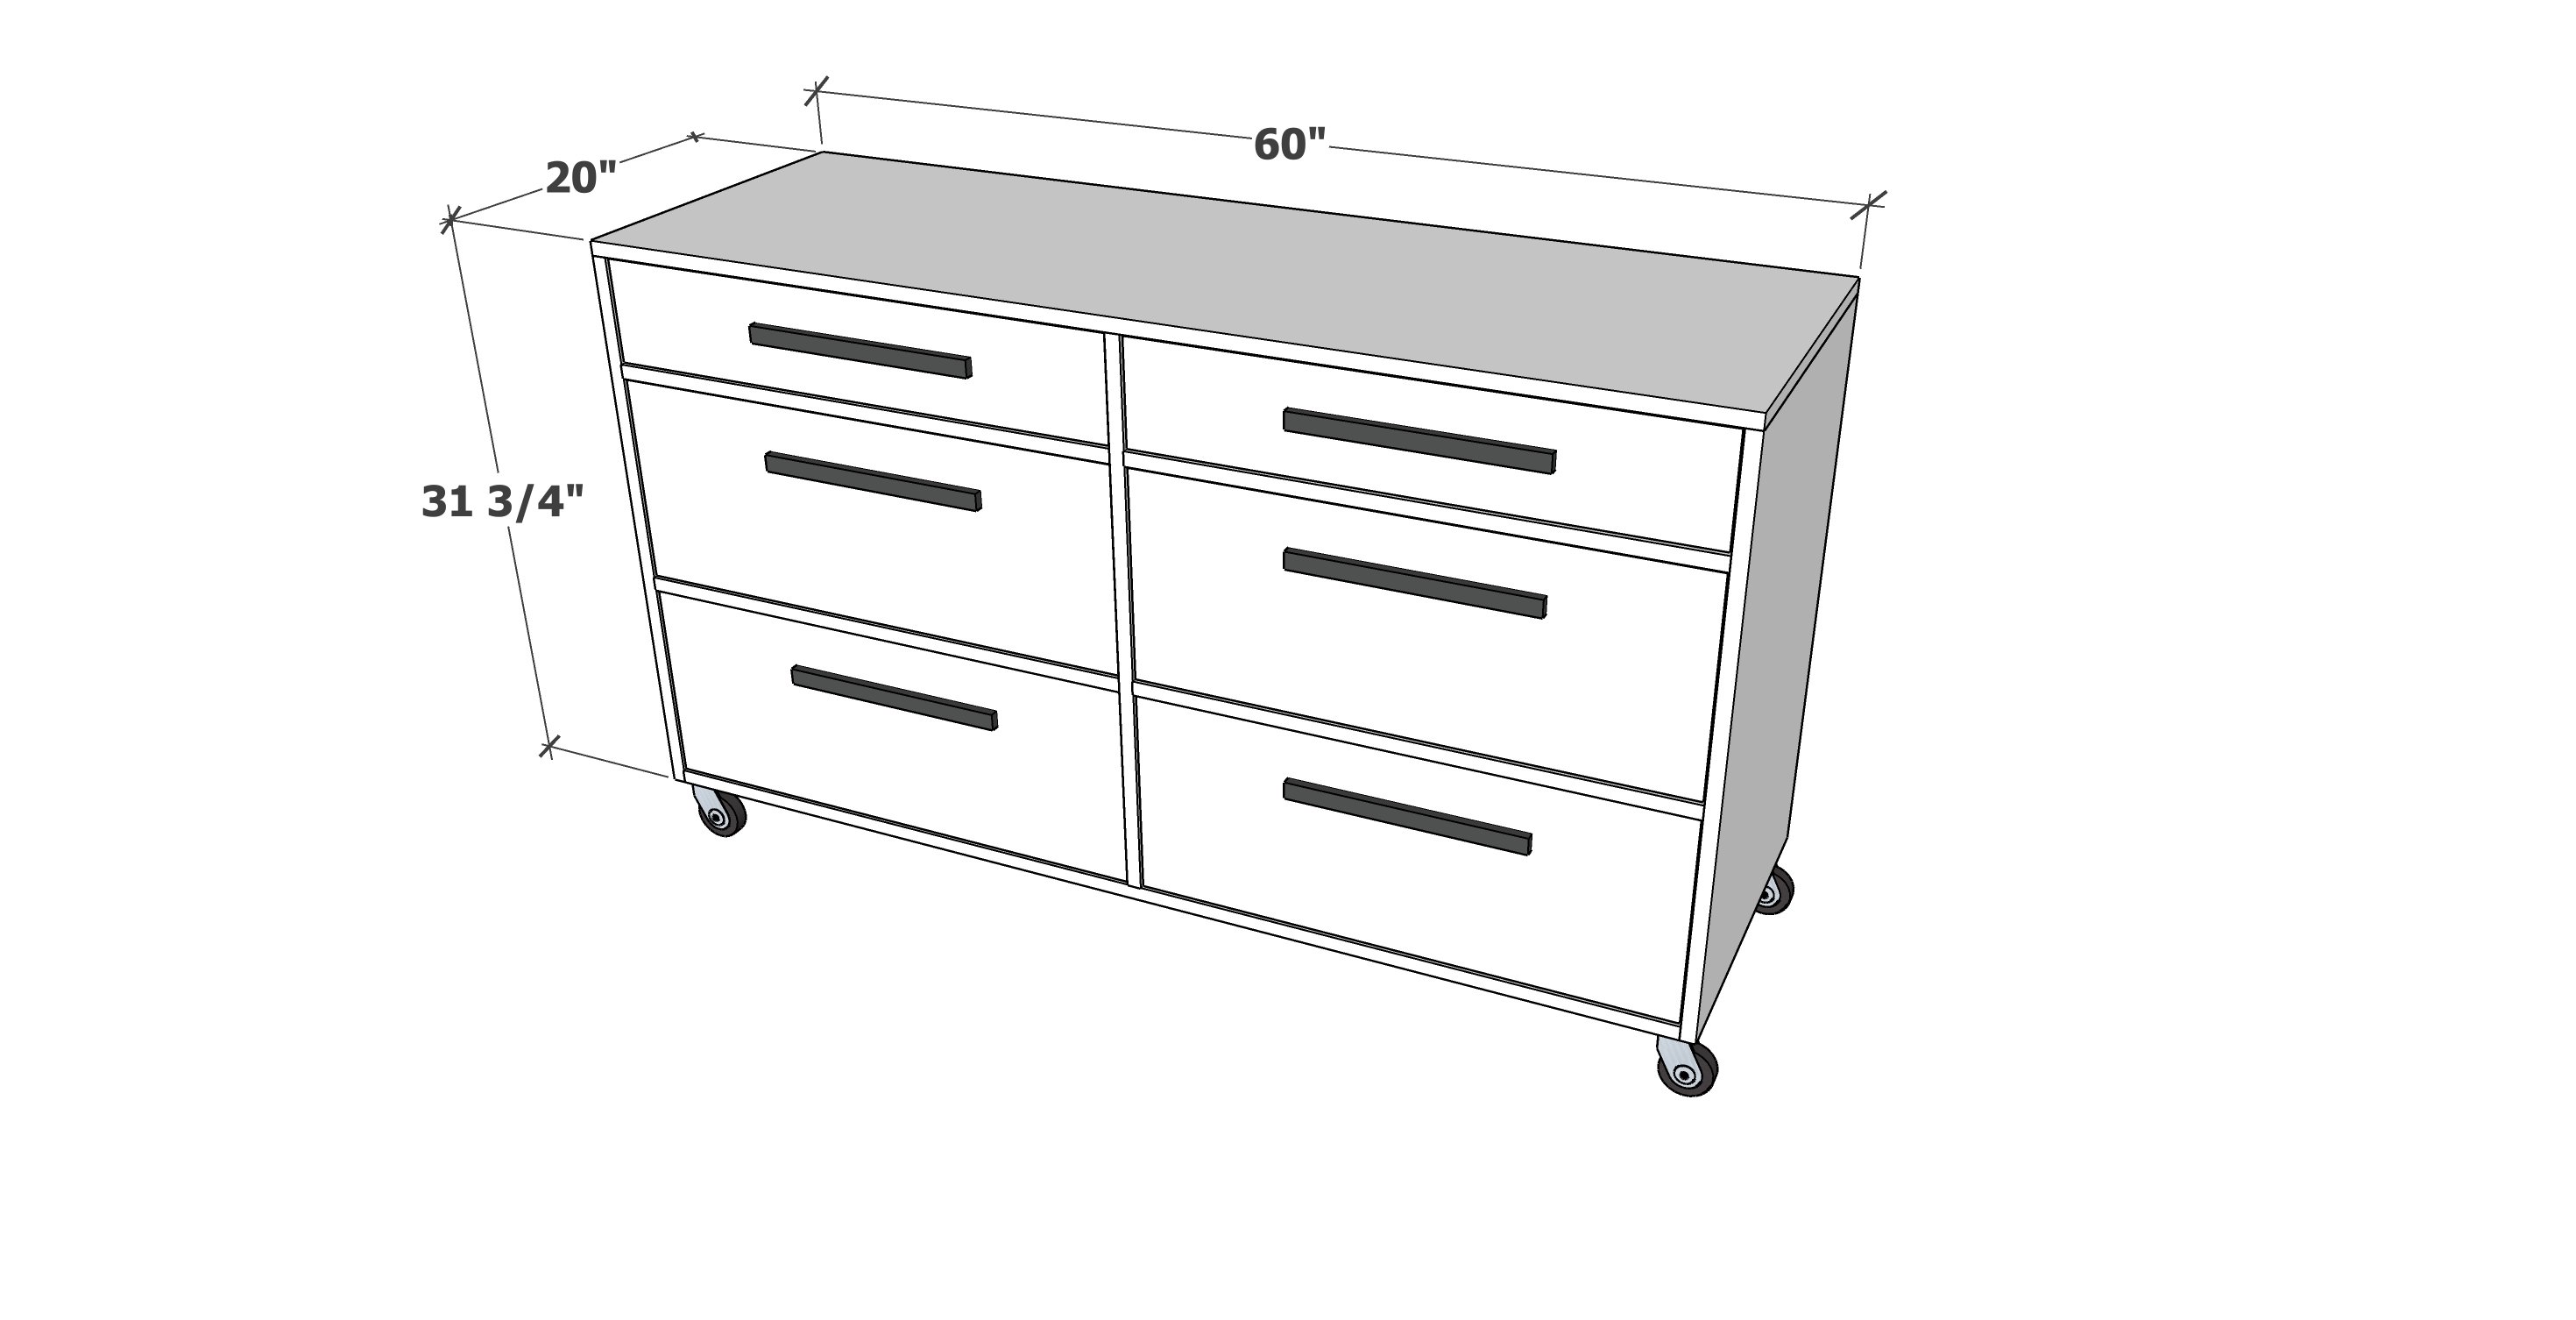
- 1 - 3/4" plywood @ 20" x 60" - top, edge band front and end edges
- 2 - 3/4" plywood @ 20" x 31" - sides, edge band front edge only
- 2 - 1x4 @ 58-1/2" - bottoms
- 2 - 1x4 @ 30-1/4" - center
- 4 - 1x2 @ 28-7/8" - between drawer trim
- 1 - 1/4" plywood @ 60" x 31-3/4"
Drawers
- 4 - 1x4 @ 20"
- 4 - 1x4 @ 26-3/8" - front and back, should be 2-1/2" less than opening width
- 8 - 1x8 @ 20"
- 8 - 1x8 @ 26-3/8" - front and back, should be 2-1/2" less than opening width
- 6 - 1/4" plywood @ 20" x 27-7/8"- drawer bottoms
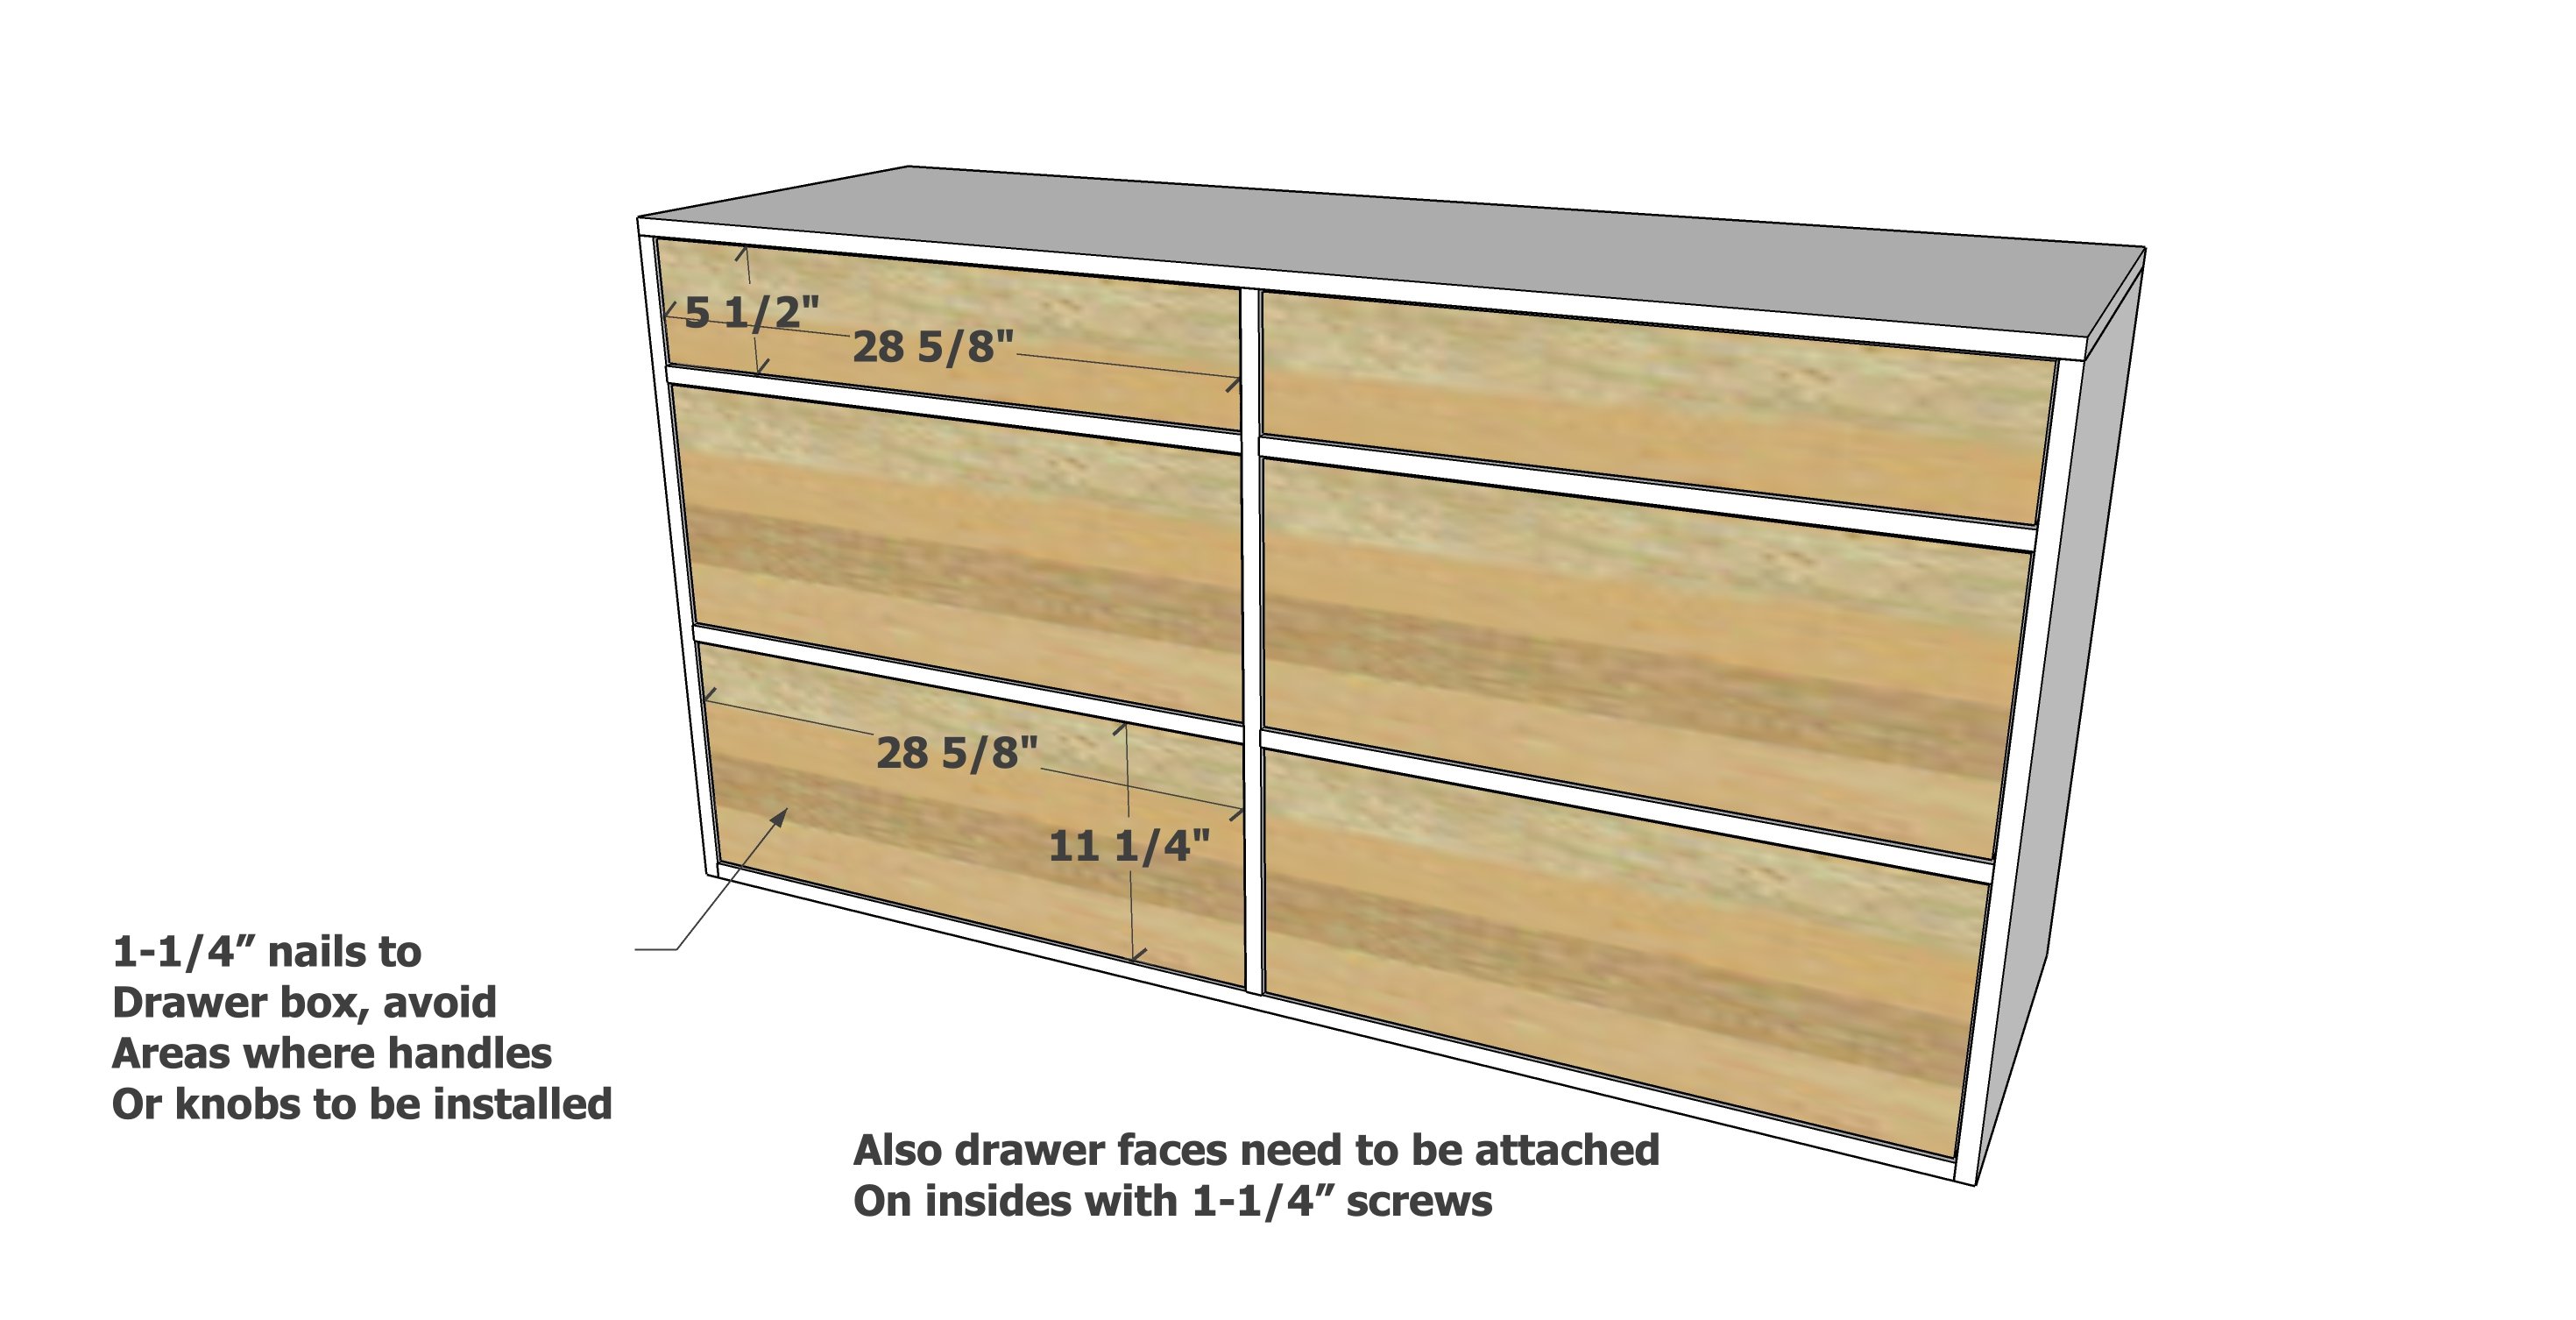
- 2 - 1x6 @ 28-5/8" - top drawer faces
- 4 - 1x12 @ 28-5/8" - lower drawer faces
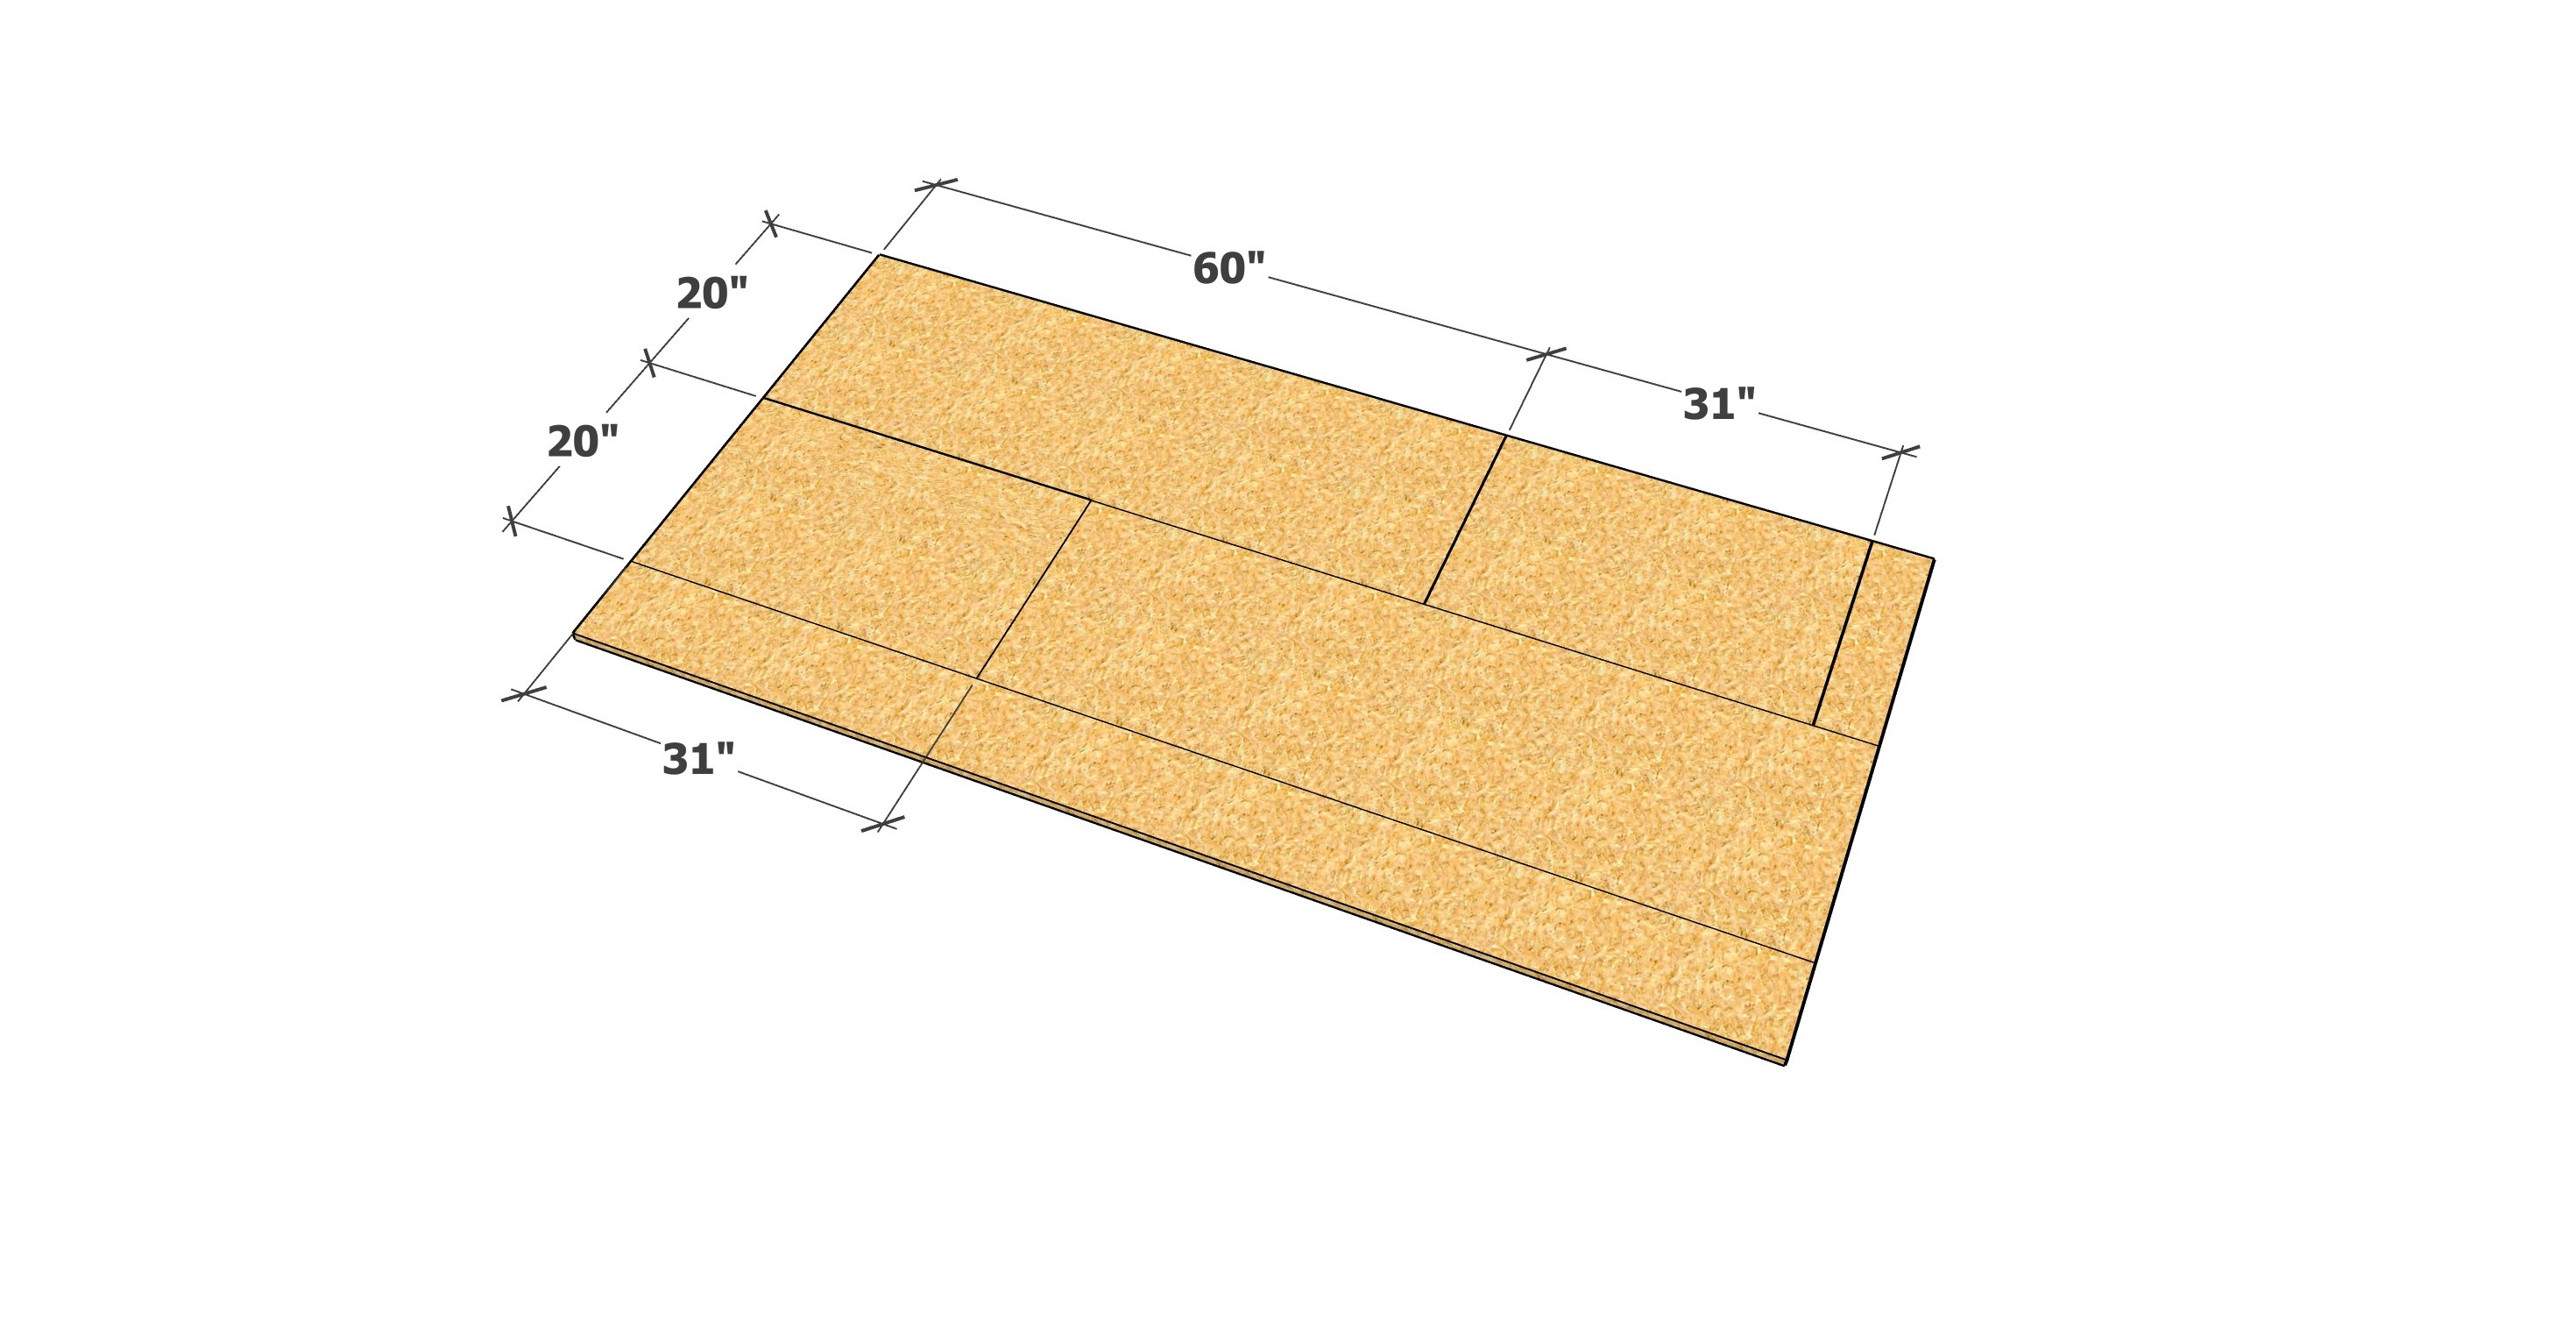
Rip the 3/4" plywood first into strips 20" wide. Then cross cut one piece at 60" and two pieces at 31"
Apply edge banding to all front edges and the two end edges of the top.


Instructions
Step 1
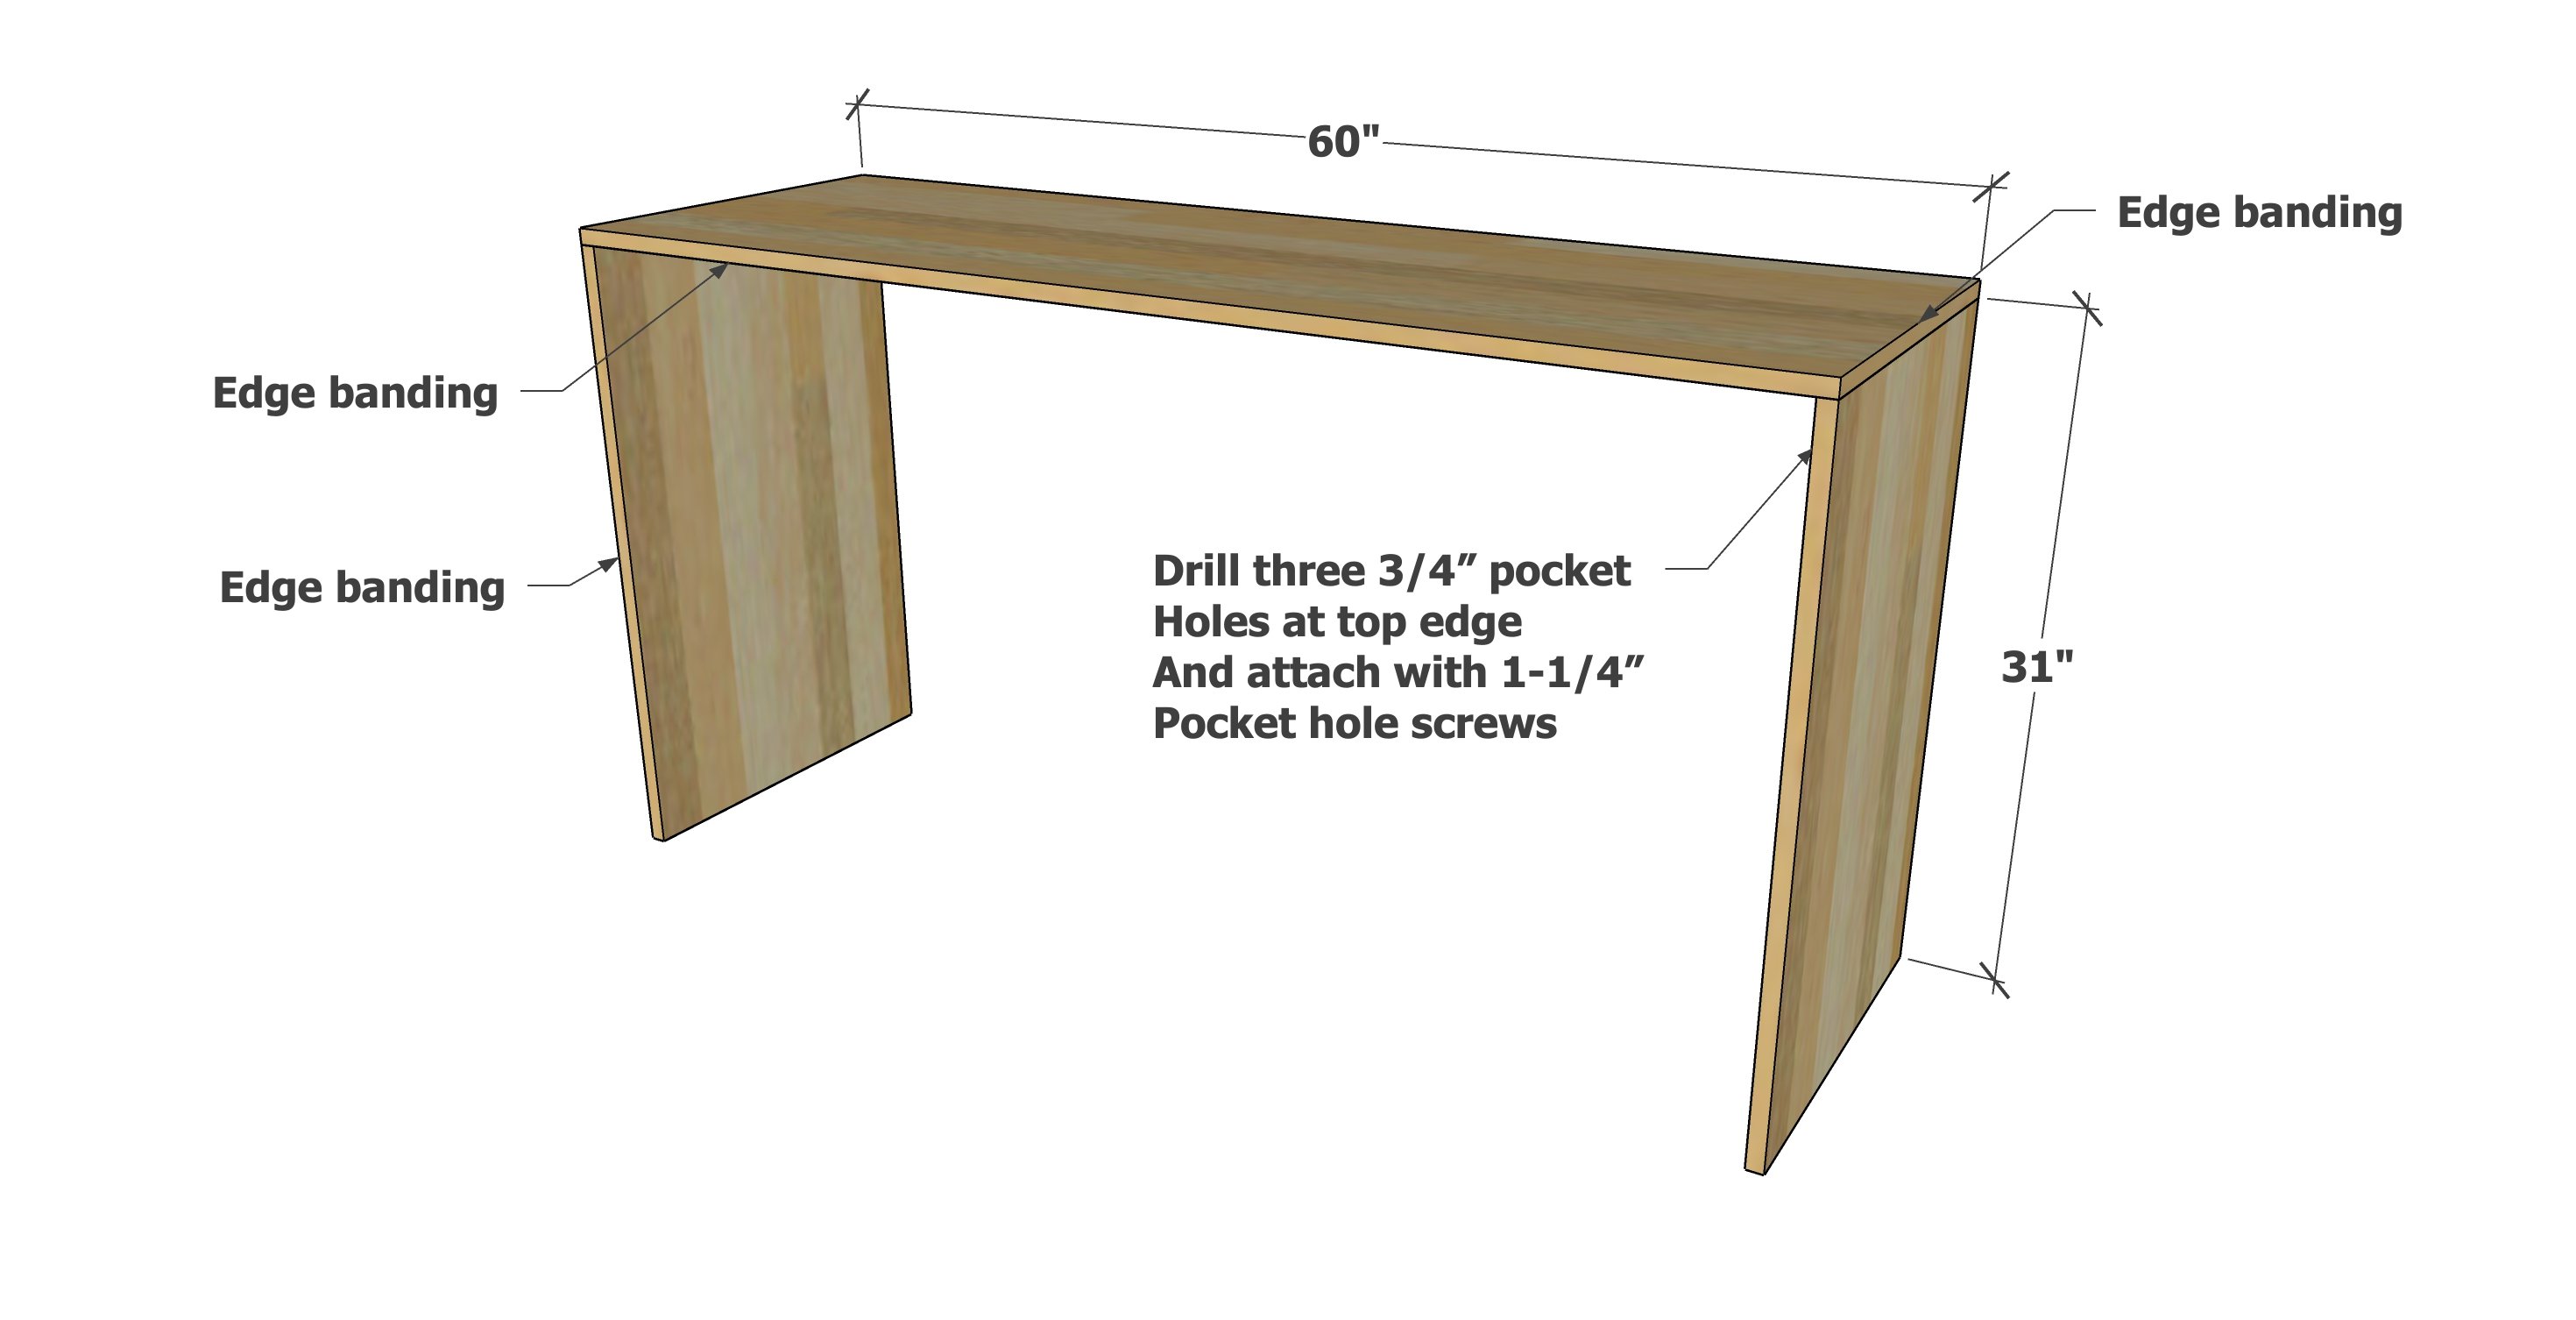
Drill 3/4" pocket holes along the inside edge of the sides.
Attach to the underside of the top with 1-1/4" pocket hole screws.
TIP: First nail the top to the sides to hold in place. Then secure with pocket hole screws.
Step 2

Attach the inner framing. This must be precise for the drawers to work out.
1x2 trim is not needed on the back.
Step 3
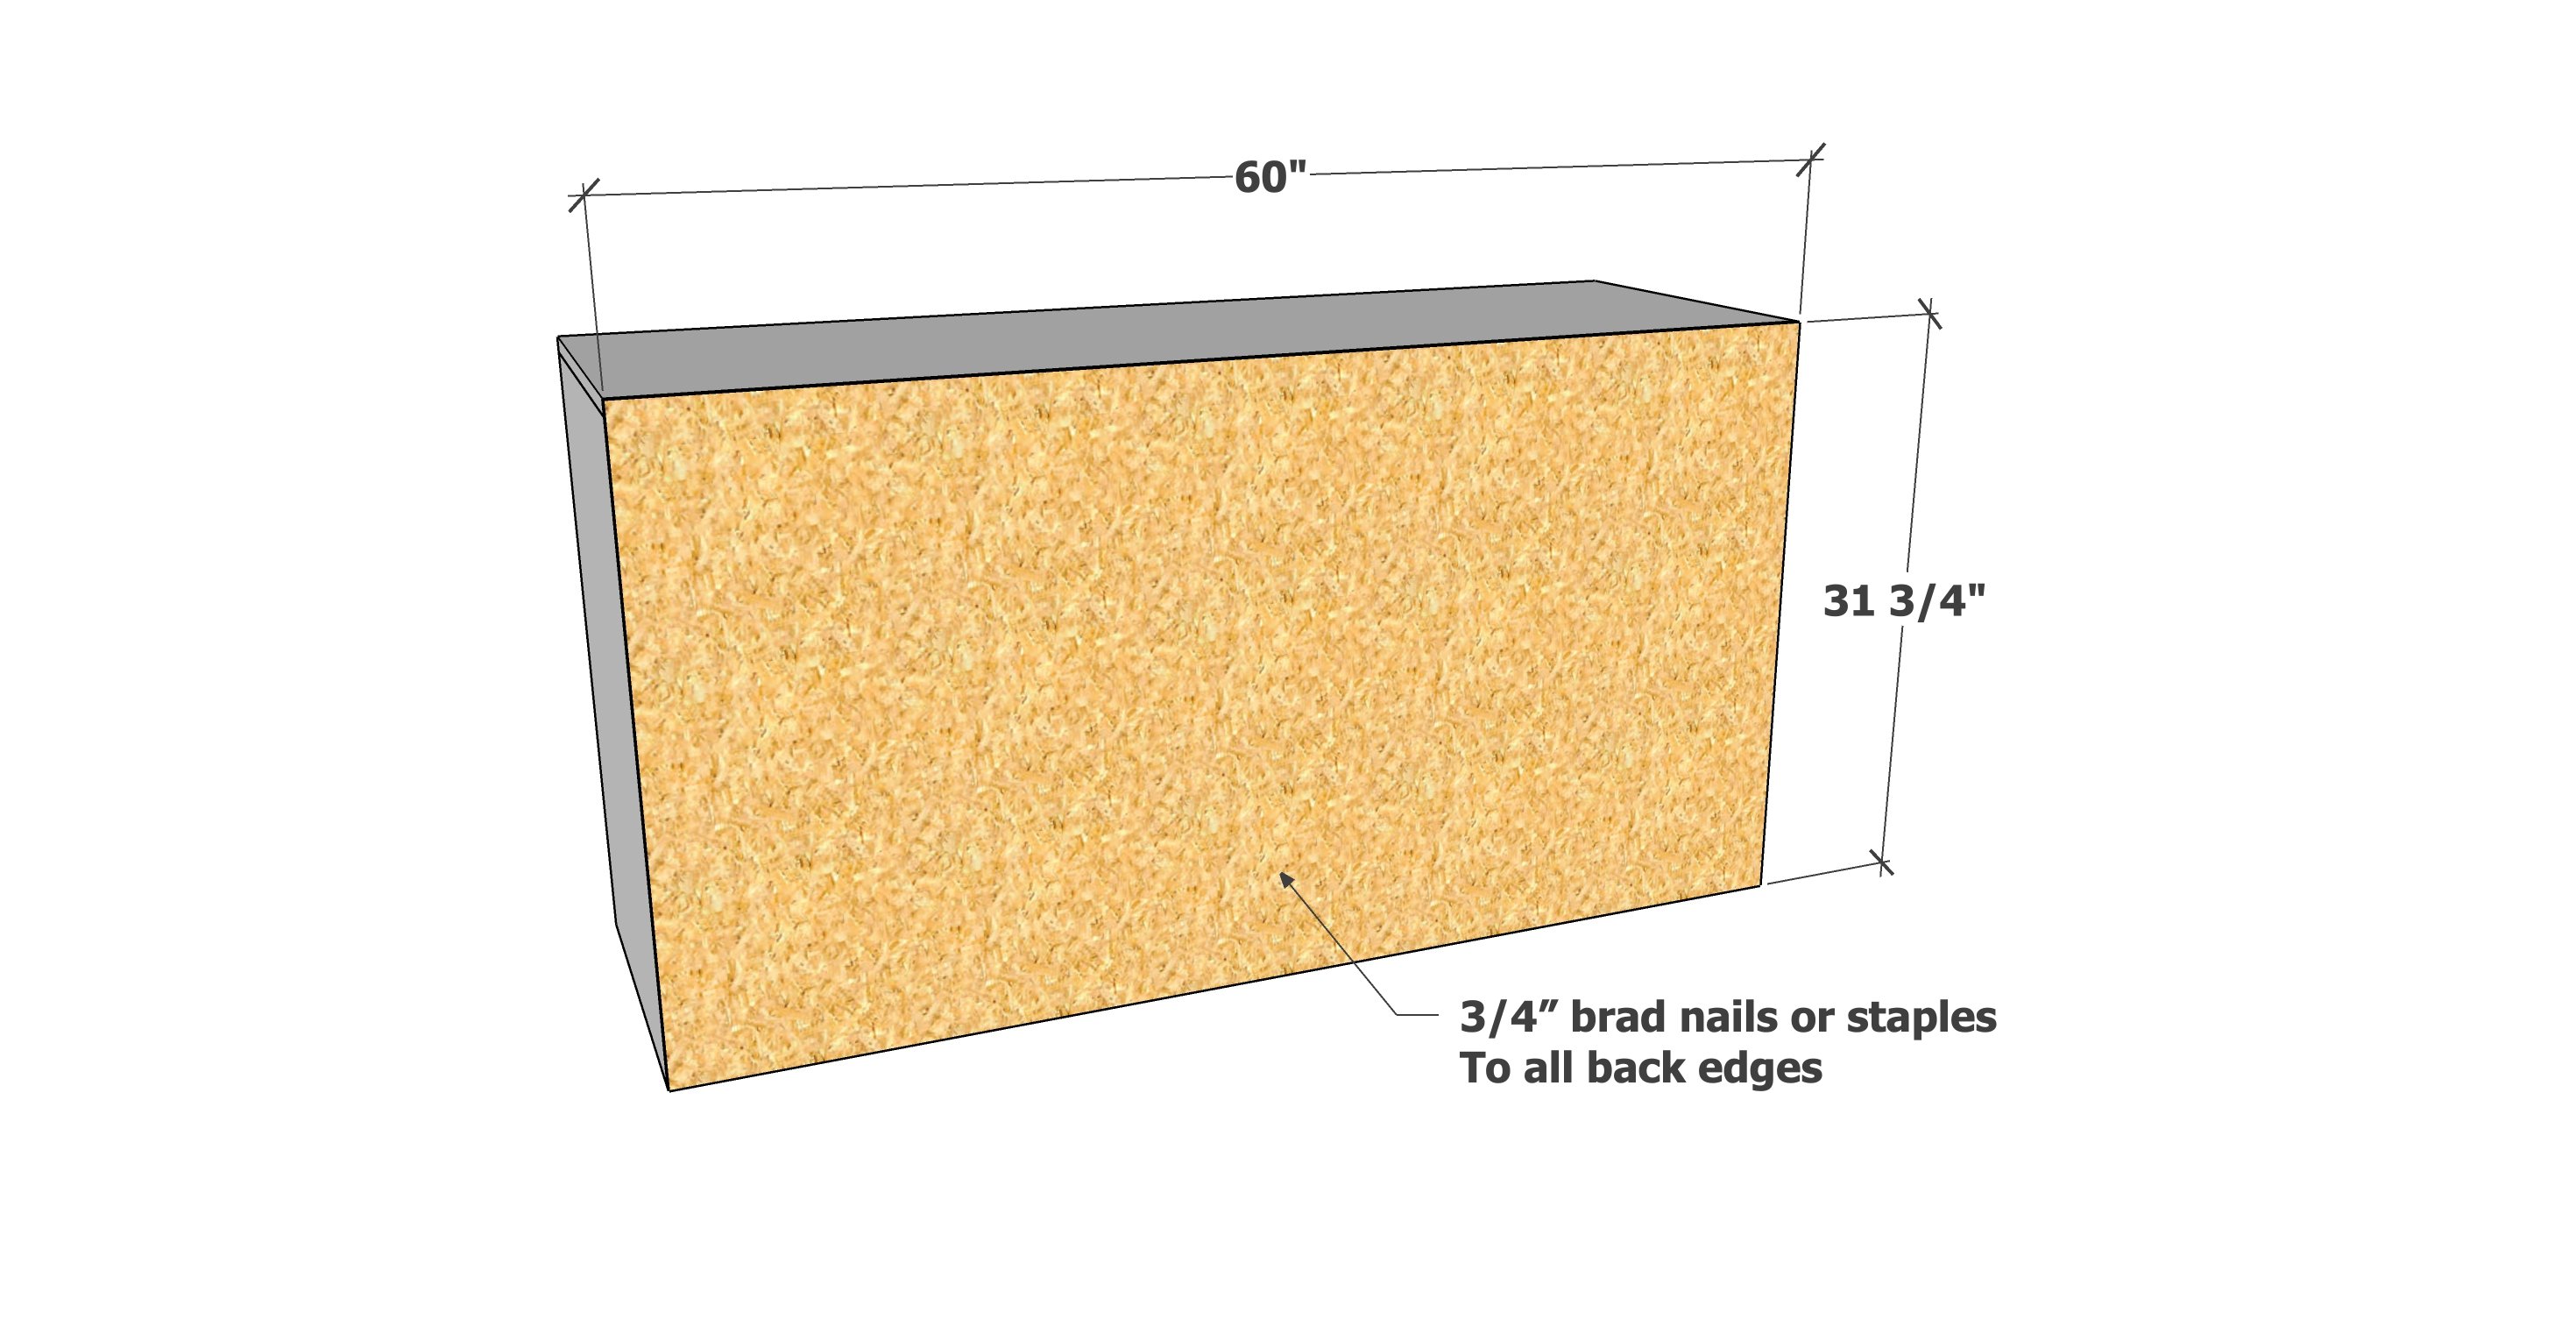
Apply glue and attach 1/4" plywood to the back.
Use the 1/4" plywood to square up the carcass as you attach it.
Step 4
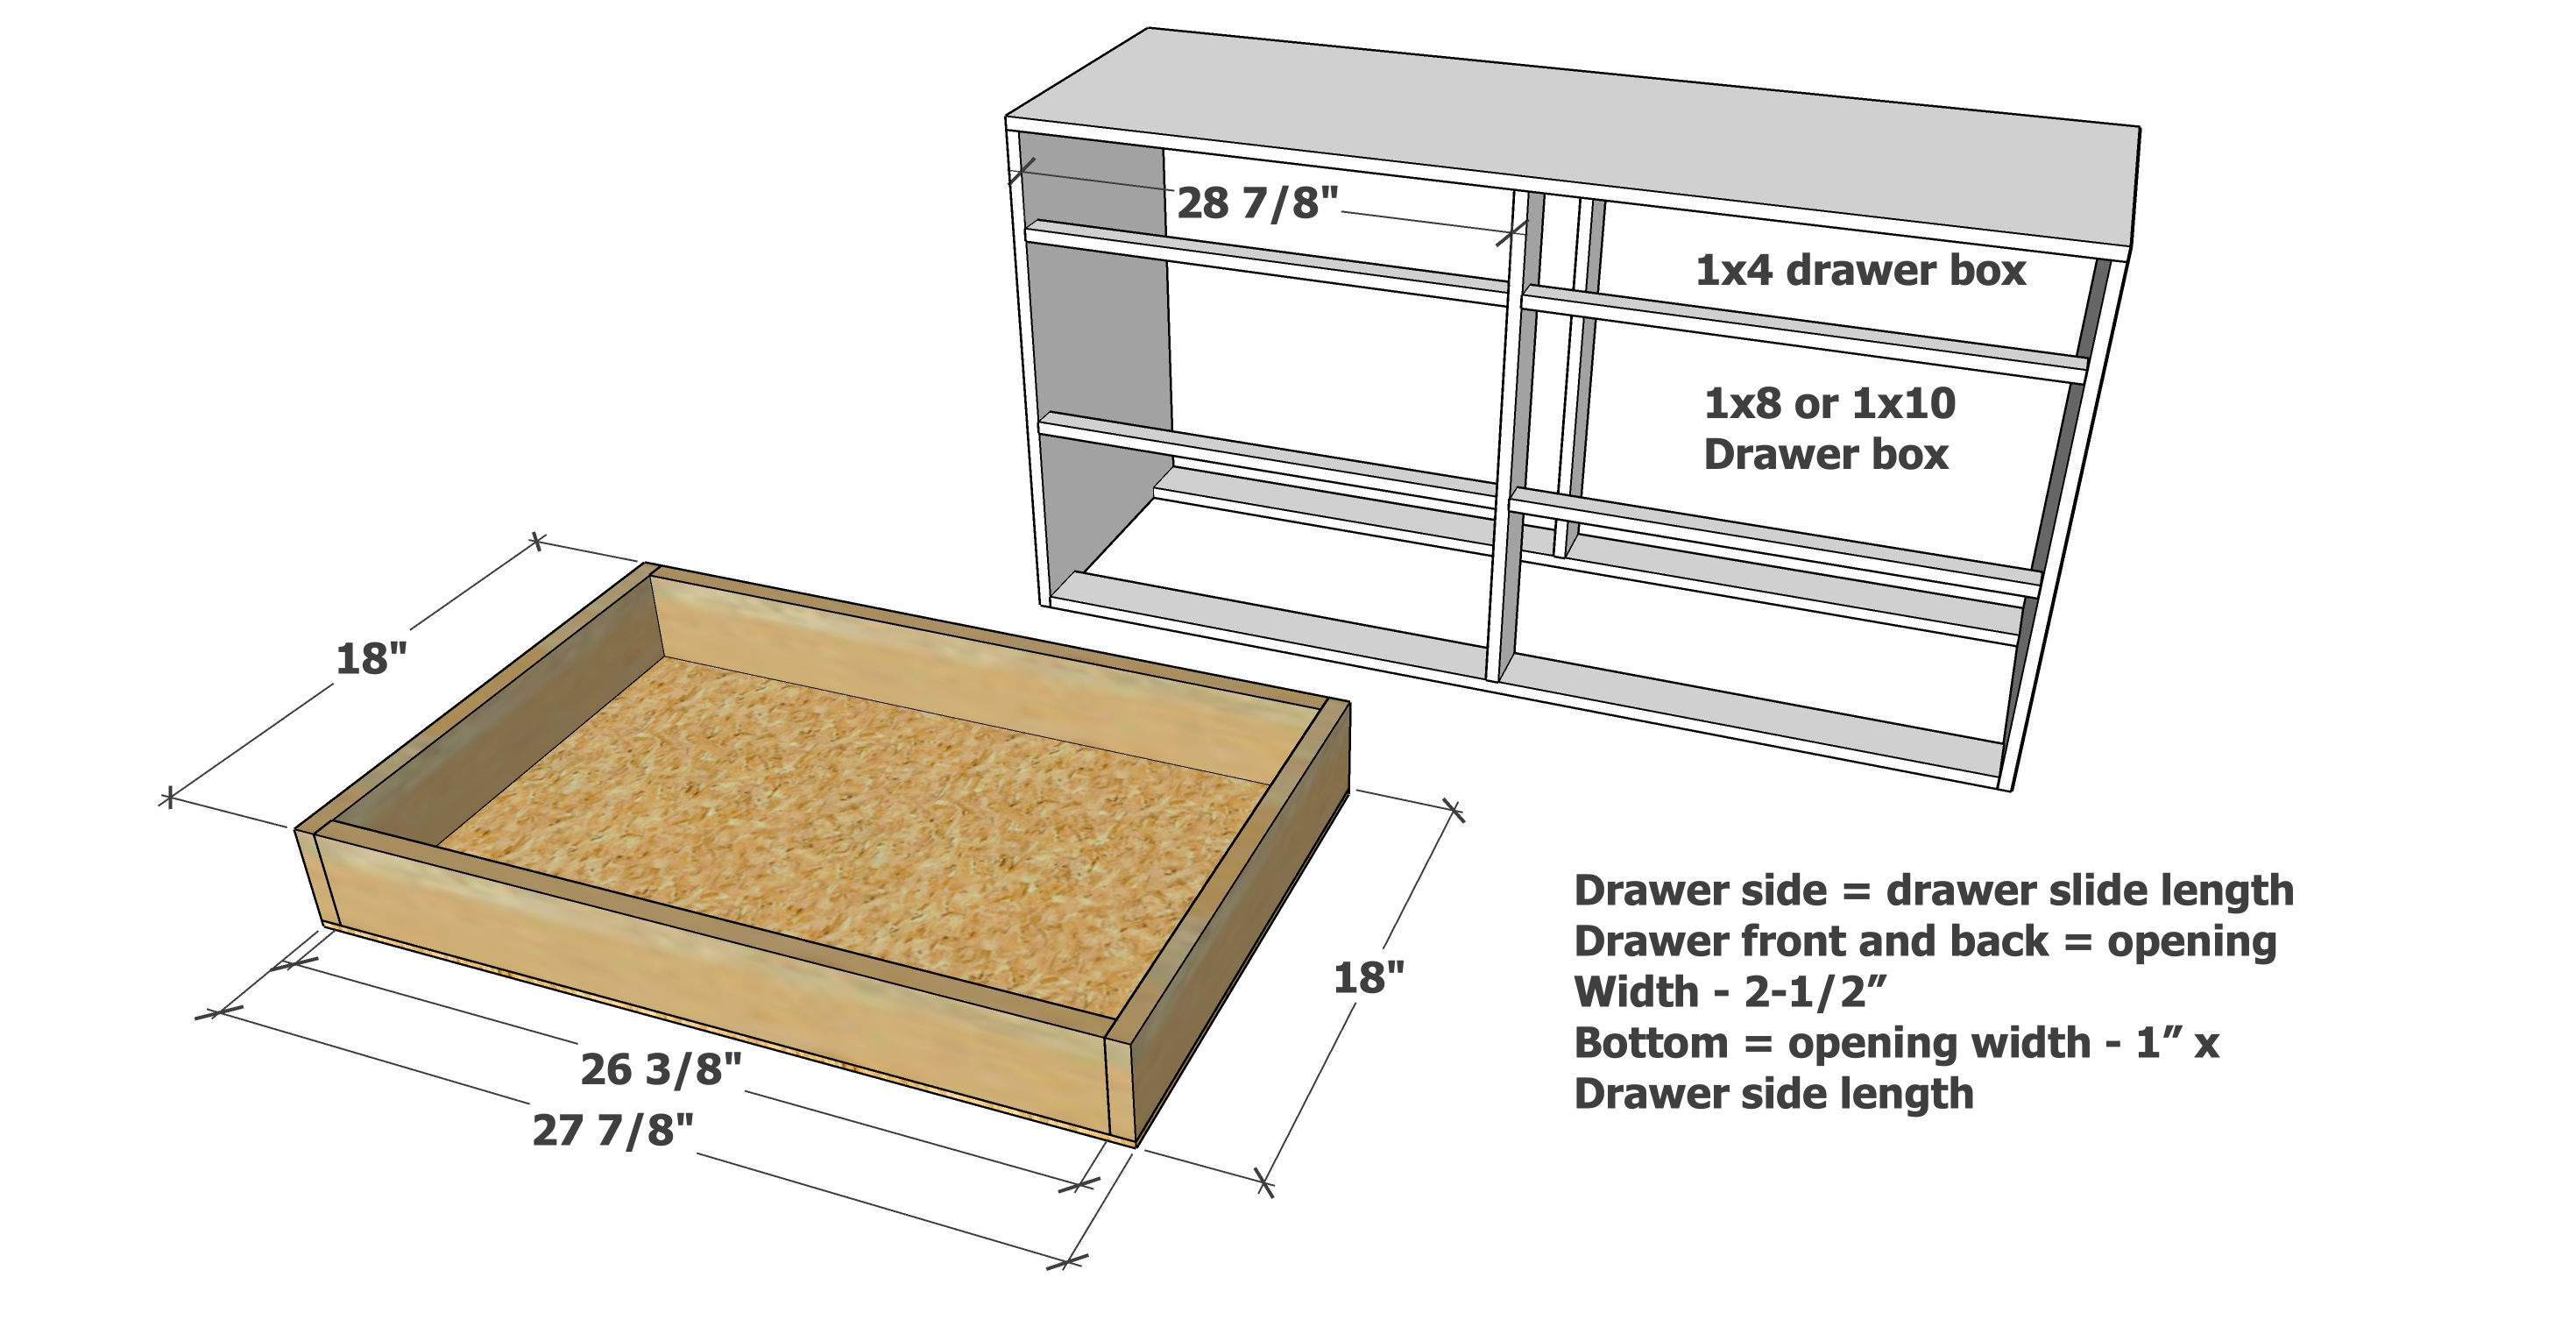
Measure the openings for your drawers and confirm they match the diagram, or adjust as needed.
Build the drawers with 1-1/4" brad nails and glue. Attach the bottom with 3/4" brad nails or staples and glue.
Step 5

Check to make sure your cabinet is level in all directions.
Install the cabinet member inset in the opening 7/8".
Here's a video tutorial on installing these drawer slides.
Step 6
TIP: Paint or stain drawer faces first. It may easier to attach hardware before the drawer face is attached to the drawer box.
Attach drawer faces to the drawer boxes with 1-1/4" brad nails, so there is an even 1/8" gap around all four sides.
Further secure from inside with 1-1/4" screws (I use pocket hole screws)
Step 7
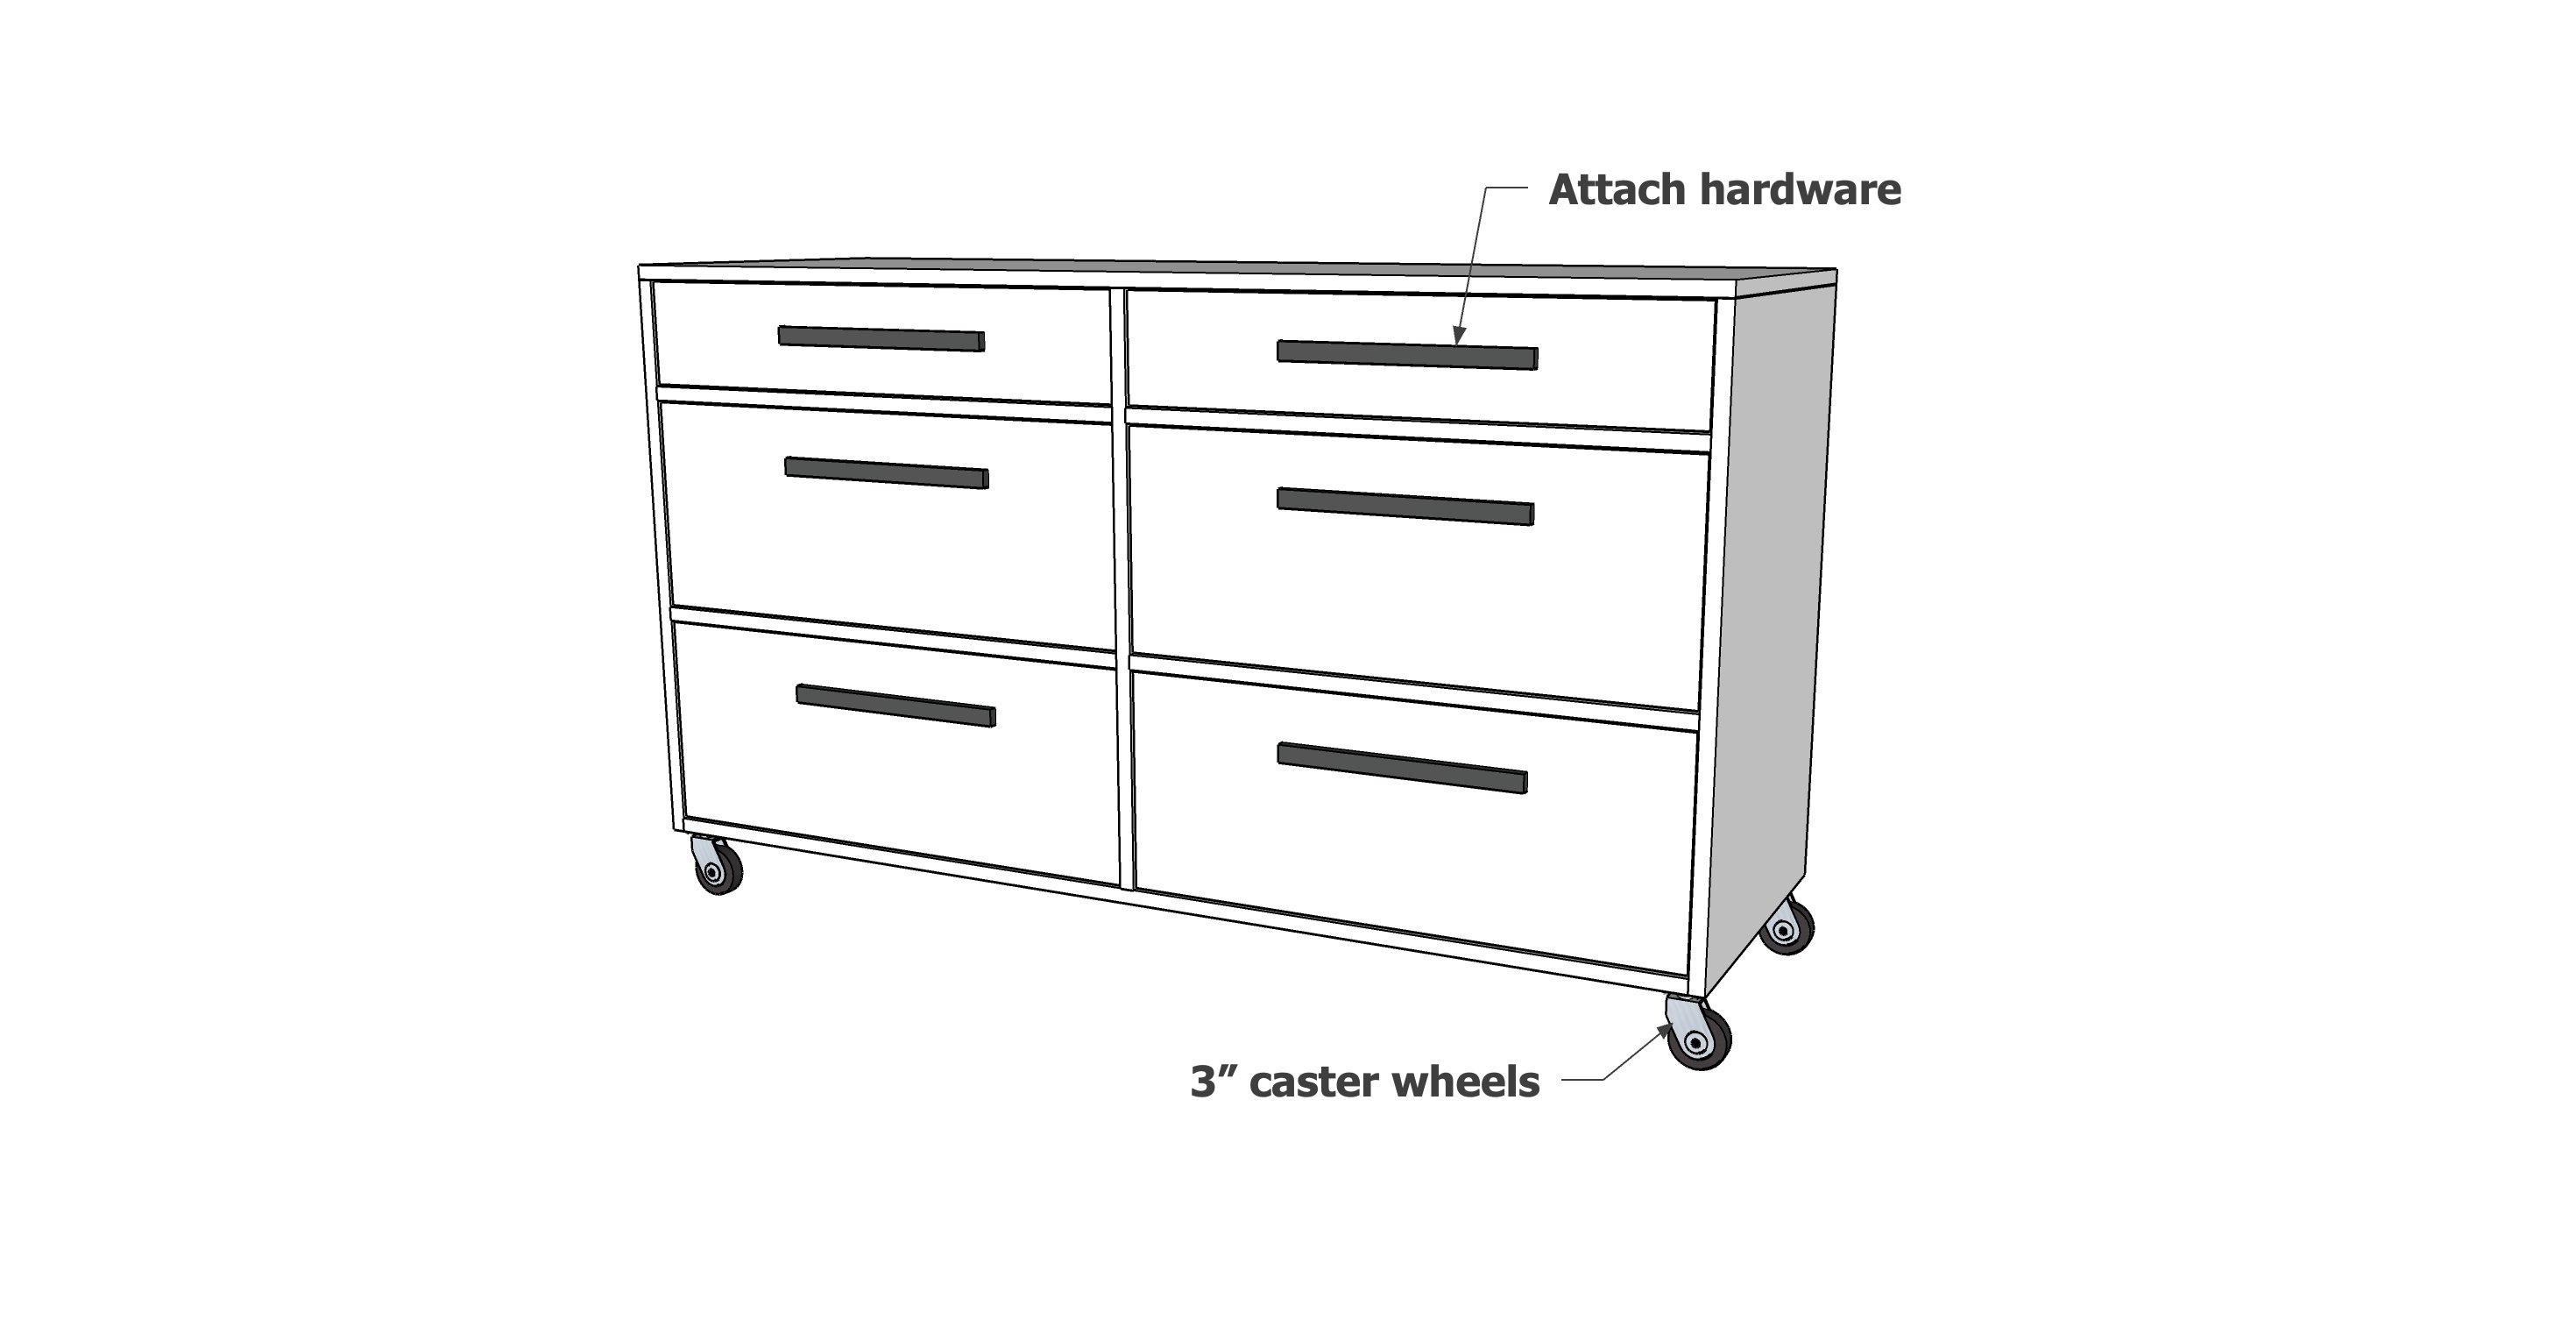
Attach handles to the drawer faces and caster wheels to the base.
Remove all sanding residue with a vacuum and a damp, lint free cloth.
For the drawer faces, I used a watered down white paint and wiped it on.
