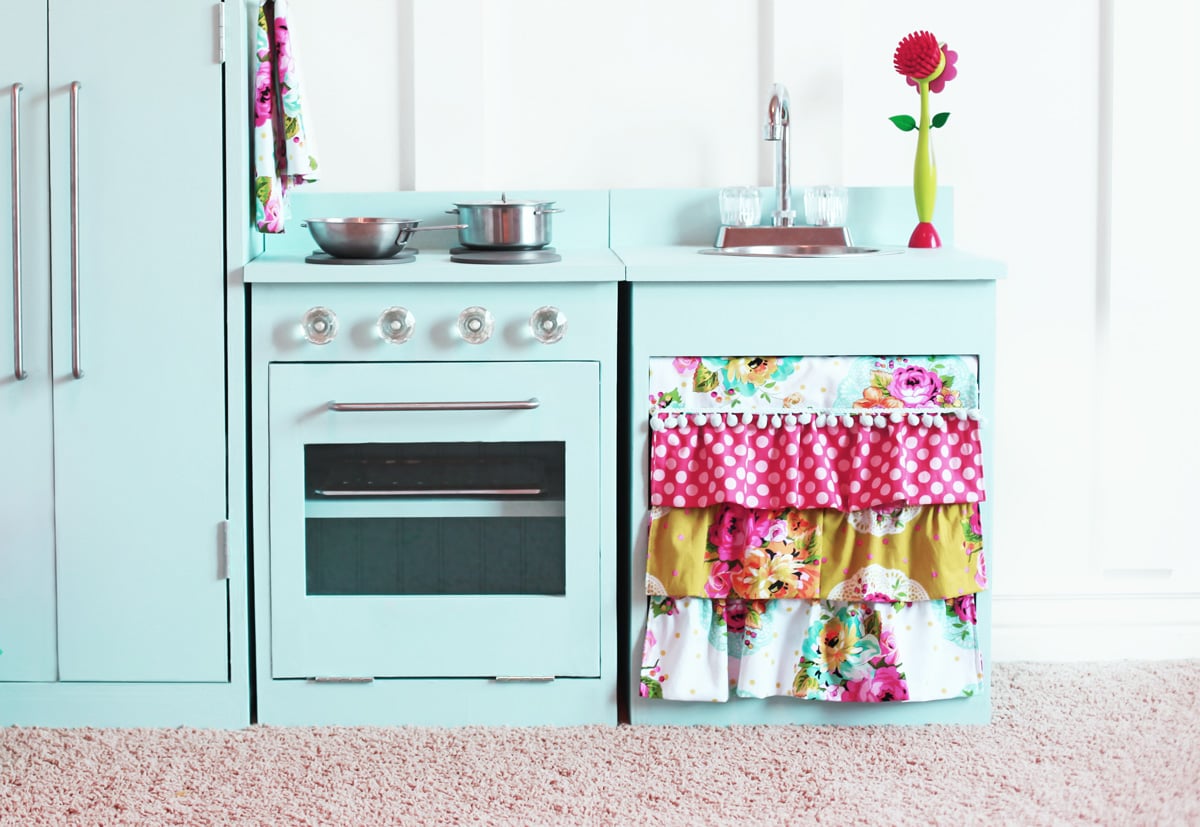


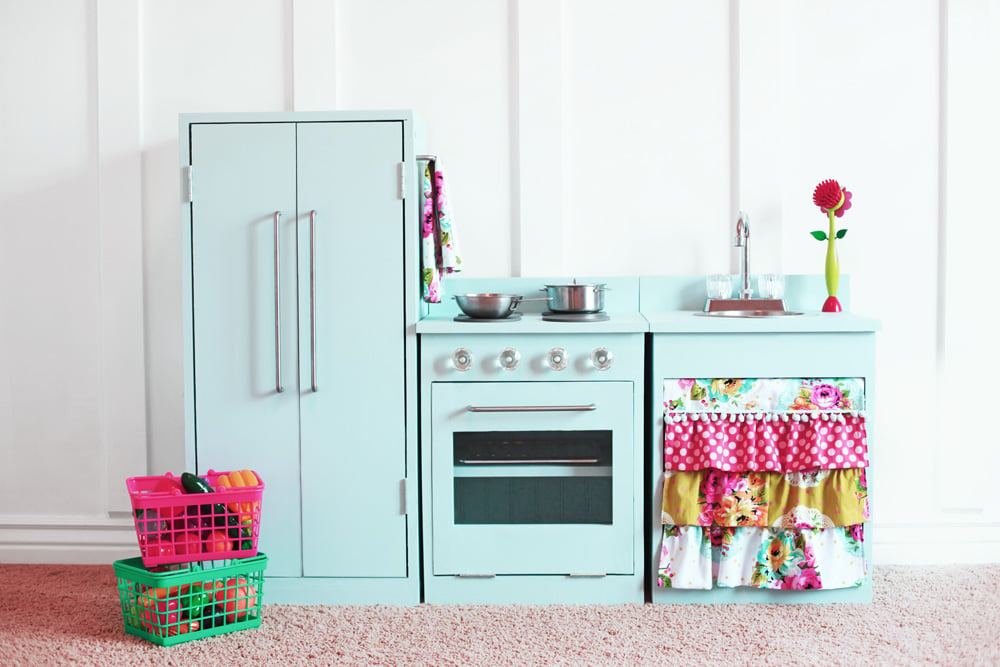
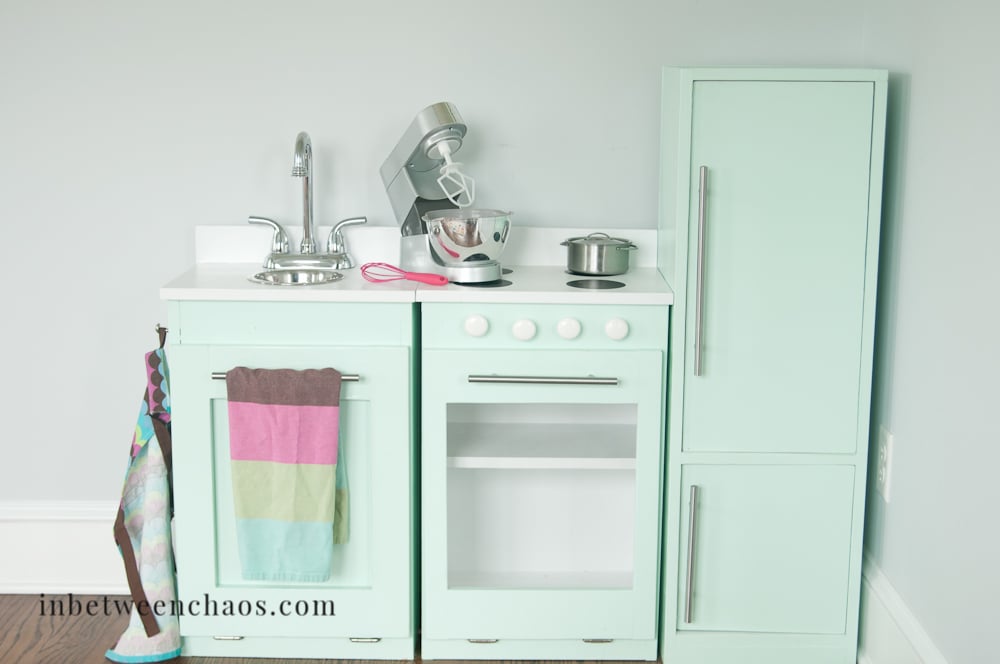
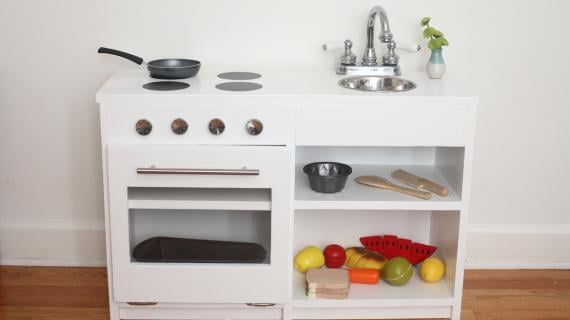
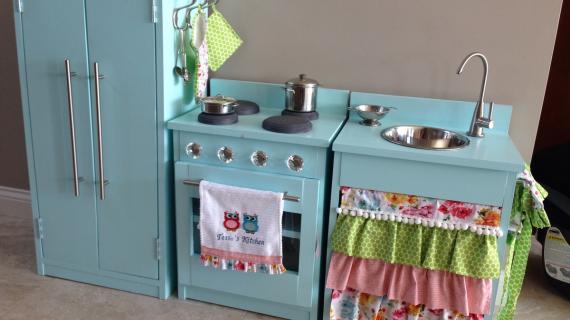
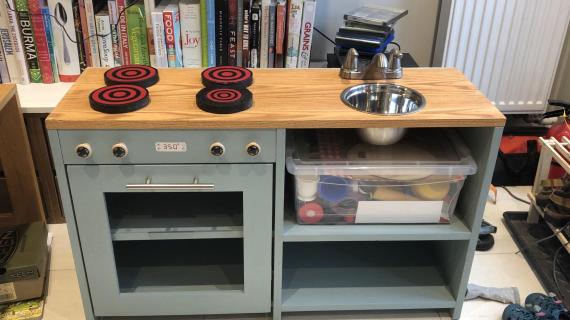
Build your own play kitchen and customize and accessorize to match your home. This childrens kitchen is so adorable! Our free plans use off shelf materials and simple building skills. This plan is for the play kitchen sink and stove. We also have free plans for the matching play kitchen fridge. Step by step diagrams, shopping and cut list from Ana-White.com
Photos by Kirsten from The Crafting Chicks
Play Kitchen Stove and Sink Features
- Built thousands of times over almost a decade!
- Easy to build using all 1x materials - just chop and screw or nail togethter
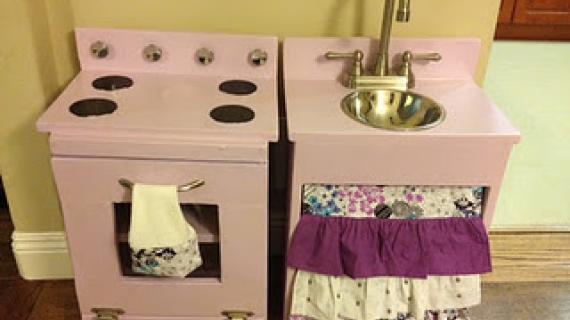
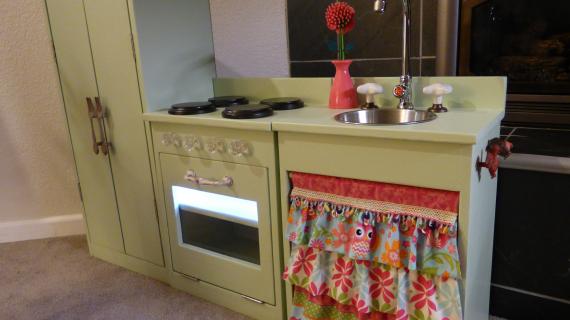
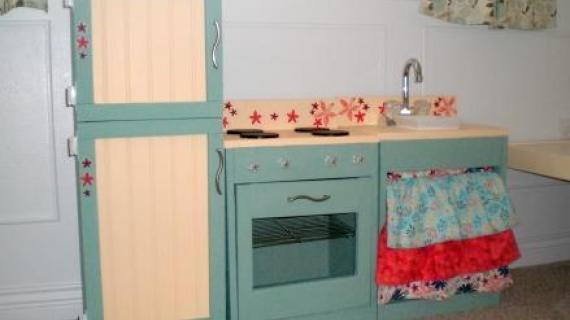
- Easy to paint, decorate and customize to match your home's decor or child's preference
- Solid wood construction - no particle board and no MDF
- Fully biodegradable
- Perfectly sized to work with most accessories
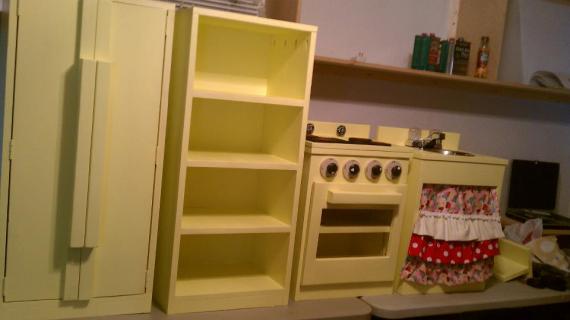
- Modular design - easy to move and you can build exactly what you want
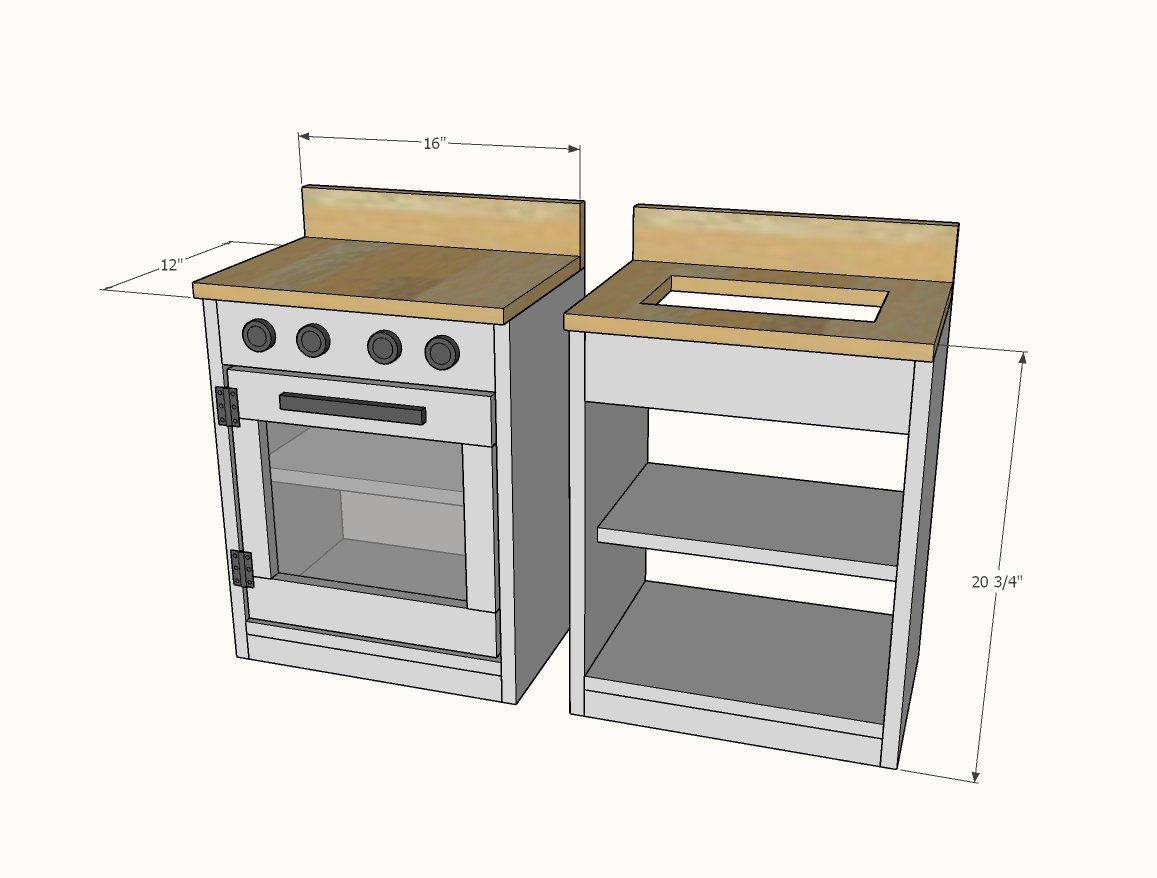
How It's Build
This play kitchen is built using 1x12s for the carcass. Then, 1x2s, 1x3s and 1x4s are added to create support and finish the shape of the play kitchen.

You can used 2" self tapping screws, 1-1/4" brad nails or 1-1/4" pocket holes to build. You will need a couple of pocket holes in the doors.
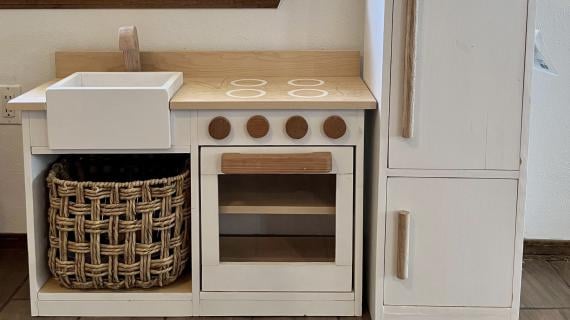
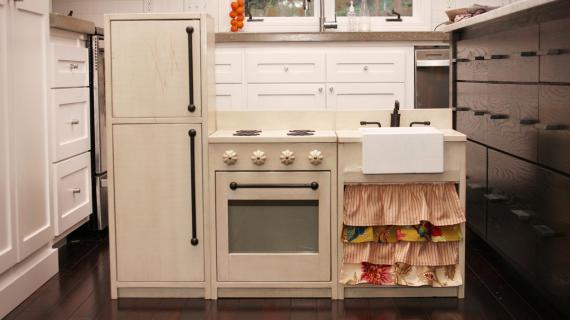
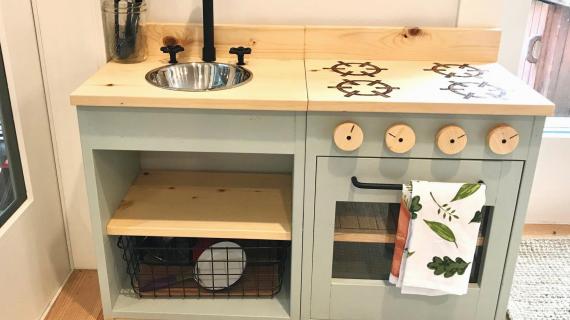
Apron Sink Modification
We love how may of our readers are adding apron sinks to the sink bases.
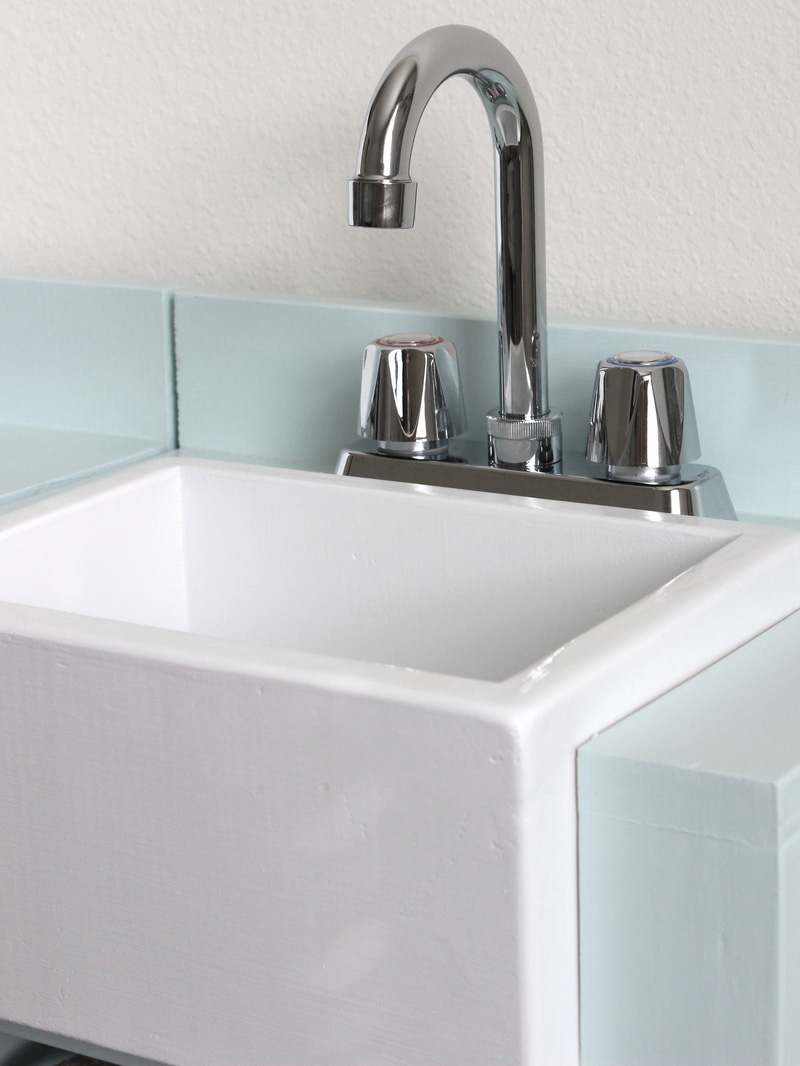
Photos and Design by Carol Noel
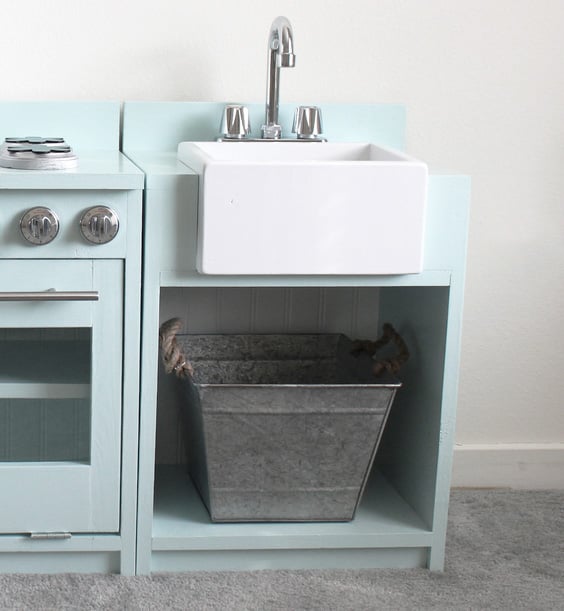
Here's how to make this apron sink modification:
- Build the base as directed in the plans below without the 1x4 front apron and without the middle shelf
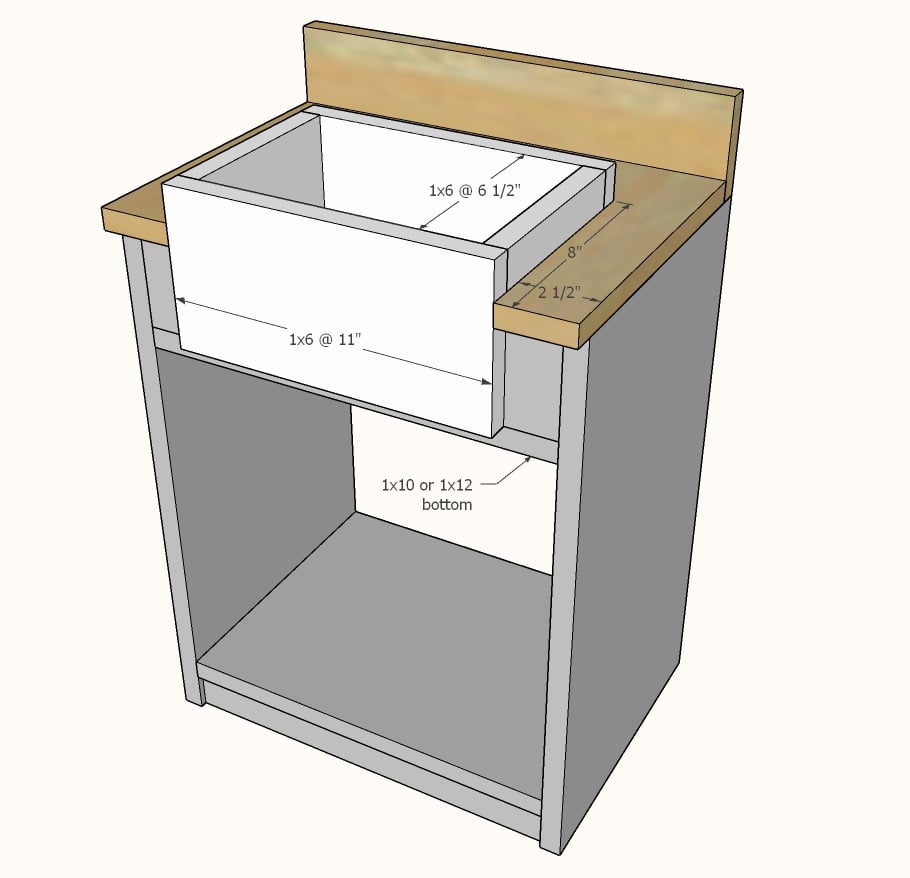
- Cut 2 - 1x4 @ 1-3/4" long and attach to sides at top (will be directly below the countertop, and to the right and left of the sink)
- Add a shelf directly below the 1x4 side pieces (this will be the bottom of the sink) 1x12 or 1x10 @ 14-1/2" long
- Build the farm sink with 1x6s (with no bottom)
- Place the farm sink on the shelf and attach with nails and glue
- Cut the countertop out around the sink and attach
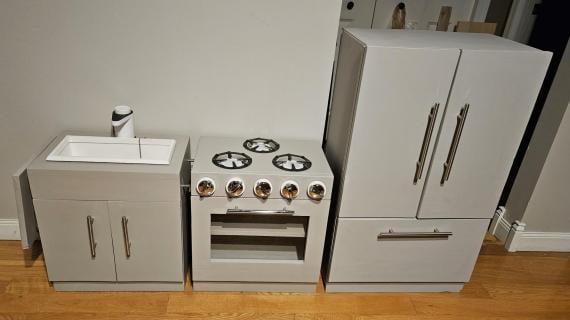
Play Kitchen Fridge Plan Options
To complete your childrens kitchen, add a play fridge! We have two options -
The Simple Play Kitchen French Door Fridge is a little wider and features double doors.
The narrower single door fridge plans are available here.
Preparation
Shopping List is For ONE base (sink or stove)
- 1 - 1x12 @ 8’ long
- 1 - 1x10 @ 14-1/2" long
- 1 - 1x2 @ 30"
- 1 - 1x4 @ 30"
- 1 – scrap piece of plywood (I use beadboard) 16"x20". You could omit this if needed.
Additional Supplies for Stove
- 1 - 1x3 @ 30"
- 2 - 1x2 @ 18"
- 4 knobs
- 1 set of hinges
- 1 magnetic clasp
- 1 - 11" x 20" piece of acrylic glass
Base for Both Sink and Stove (cut list is for one)
- 2 - 1x12 @ 20” Sides
- 2 - 1x2 @ 14 1/2” Toekick
- 1 - 1x12@ 14 1/2” Bottom Shelf
- 1 - 1x10 @ 14-1/2" Middle Shelf
- 1 - 1x12@ 16 1/2” Countertop
- 1 - 1x4 @ 16 1/2” Backsplash
- 1 - 1x4 @ 14 1/2" Front of Sink
- 1 - 16" x 20" piece of plywood for the back (optional)
Stove Door (large gaps)
- 2 - 1x3 @ 14"
- 2 - 1x2 @ 8-3/4"
Stove Door (small gaps)
- 2 - 1x3 @ 14-1/4"
- 2 - 1x2 @ 9"
Cut all the boards first with either a compound miter saw or a circular saw with a straight edge used as a guide.


You can use different methods depending on your tool set to build this play kitchen stove or sink.
- 2" self tapping screws like these
- 1-1/4" brad nails and wood glue (recommend an 18 gauge brad nailer)
- A Kreg Jig with 1-1/4" pocket hole screws
I personally would just nail and glue this together.
Instructions
Step 1

Attach the 1x2 and 1x4 apron to the sides.
Recommend: 1-1/4" brad nails and glue.
Step 2

Add the bottom shelf, fasten to both the sides and the 1x2s.
Step 3

The shelf can be placed at any height.
Step 4

Attach the backsplash to the top first.
Then attach the entire top to the base.
Step 5

Build the door with 3/4" pocket holes and 1-1/4" pocket hole screws.
Attach acrylic glass to the back with either craft glue or hot glue or predrill holes and attach with screws. Just make sure the screws DO NOT have a bevel on the back of the screw head.
This completes the sink base build. You can now accessorize by adding a sink bowl, curtains, faucet - the options are endless.
Step 6

To make the base into a play kitchen stove, you'll need to add a stove door.
Install the stove door. I recommend a side swing so no little toes get bruised with a up and down swing. Install a magnet to keep the door closed.
Install handle and four knobs.
Comments
Adriana (not verified)
Wed, 11/18/2009 - 16:17
You are amazing! We have the
You are amazing! We have the stove and sink, but I wish we had been this creative and tried to make knock offs! I might use your plans to add a fridge to her collection. Did you post plans for the loft bed anywhere?
Ana White (not verified)
Thu, 11/19/2009 - 10:06
Adriana,Thank you, I am so
Adriana,
Thank you, I am so happy you were able to make the matching fridge! Will you please send me photos? (Just click on contact me button at the top of the page) I would love to post reader's success!
Expect playhouse loft beds soon!
Miss Liz (not verified)
Fri, 01/08/2010 - 15:56
This is absolutely
This is absolutely gorgeous!!!
Amy (not verified)
Fri, 03/05/2010 - 11:20
AnaMy husband and I would
Ana
My husband and I would like to build the play kitchen for our daughter's birthday, coming up in May. We really liked the original fridge that you built for Grace. At one point I thought I'd seen the plans for it, but now I can only find the new plans for the side by side refrigerator. Can you help me find the original plans with the freezer over top of the fridge?
Thank you so much!!
Amy
Angie (not verified)
Sun, 04/18/2010 - 18:22
I think it amazing what you
I think it amazing what you do, a definate fan right here!
I just have a question regarding the plywood, it says to get a piece of wood 12 X 20, but in the cutting list it askes to cut a 16 X 20 piece... is there something I have missed here? or how am I able to gain 4 inches? also just another question regarding the fridge instructions, under materials needed it askes for a 1 X 2 board.. is that inches or feet? and it doesnt state the length like the other measurements. Sorry to be a pain I am very new to DIY building and really want to make this for my daughters 3rd birthday. Cheers Angie
Ana White (not verified)
Sun, 04/18/2010 - 18:28
Hi Angie, the cut list is
Hi Angie, the cut list is correct and you will need plywood cut at 16" x 20" for the back. No worries, if I have time, I love to help. Most boards are given in dimensional sizes, shown in inches. But it gets a little more confusing than that. A 1x2 stands for 1" x 2", but the board is actually 3/4" x 1 1/2" in actual measurement. Check out the FAQ post (on the sidebar) for more information on boards and such. You'll get the hang of it faster than you think. Can't wait to see your kitchen!
Jenna (not verified)
Sat, 05/01/2010 - 20:16
These plans are soo cute, I
These plans are soo cute, I actually purchased my daughter the PB kids Classic kitchen and love it, had I see this I would have built it.
Your daughter is sooo precious!!!
efranklin (not verified)
Tue, 06/22/2010 - 03:51
Loved the plans and my
Loved the plans and my daughter loves the kitchen. Thanks so much. My wife wants a headboard now and I can't wait to get started
efranklin (not verified)
Tue, 06/22/2010 - 03:52
Loved the plans and my
Loved the plans and my daughter loves the kitchen thank you so much for the plans. My wife wants me to build a headboard next and I can't wait to get started.
Becca (not verified)
Tue, 07/27/2010 - 05:58
I am loving your site. It has
I am loving your site. It has inspired me to no end. We are currently putting my kids playroom together and I have completely designed it based on what has been shown here. I'm curious as to the final dimensions of each kitchen unit though. I need to know if I need to make adjustments so it can fit under the reading loft I hope to build, or even make it taller. My daughter is 4'. Thanks.
Mandi (not verified)
Tue, 09/28/2010 - 14:47
Hi there, My husband and I
Hi there,
My husband and I are going to tackle this project for my daughter's Christmas present. I just haven't seen anything I love and am thrilled to be able to put my own touches on it. Do you have the finished dimensions of each piece available? I just want to make sure we have the space for all three pieces. I really appreciate it.
Thanks,
Mandi
joy (not verified)
Fri, 10/22/2010 - 02:44
Hi We are from Australia &
Hi
We are from Australia & we really love your plans but dont understand the cutting guide. I know its in inches but what does the @ mean?
eg 1x12 @16 1/2 " Is that 12"x16 1/2" What does the 1 at the beginning mean?
Thankyou
Ana White (not verified)
Sun, 10/24/2010 - 19:44
Hi, I'm so glad you found us!
Hi, I'm so glad you found us! Check out our community for an entire forum about converting plans to metric. I know it's not going to be easy :( . The 1x12 refers to a standard US board size, actually measuring dimensionally 3/4" x 11 1/2" . So 1 - 1x12 @ 16" would mean 1 1x12 board cut 16" long. The actual dimensions for the cut would be 3/4" x 11 1/2" x 16". Hope this makes sense. Ana
Dan K (not verified)
Fri, 11/05/2010 - 18:18
Australians refer to lumber
Australians refer to lumber differently than we do here in the US. The larger dimension is listed first so a 2x4 is called a "4 by 2" down under. That probably accounts for some of the confusion.
Chessa (not verified)
Wed, 11/10/2010 - 17:48
Ana, Where did you find
Ana,
Where did you find the round mirrors for the side of the sink (they are mirrors, right?) Do they already have adhesive on the back or did you use liquid nails?
-Chessa
Ana White (not verified)
Thu, 11/11/2010 - 07:04
The kitchen with the mirrors
The kitchen with the mirrors was built by Kirsten of Crafting Chicks. You can see the guest post here where she does details about all the accessories. http://ana-white.com/2010/04/i-built-it-kirsten-from-crafting-chicks-am…
Guest (not verified)
Wed, 05/18/2011 - 08:11
Pink Kitchen
I love your site and it has inspired to tackle many projects. Before you converted over to this site you had many other pictures from other readers kitchens. One in particular was a pink retro style kitchen. Do you still have that info. I love these plans and would like to modify to be similar to that kitchen but now have no way to find it again! Thank you so much for being such an inspiration!
Guest (not verified)
Wed, 05/18/2011 - 11:47
Pink Kitchen
I love your site and it has inspired to tackle many projects. Before you converted over to this site you had many other pictures from other readers kitchens. One in particular was a pink retro style kitchen. Do you still have that info. I love these plans and would like to modify to be similar to that kitchen but now have no way to find it again! Thank you so much for being such an inspiration!
Laura Fama
Mon, 06/27/2011 - 05:53
Pink kitchen
http://ana-white.com/2011/03/kitchen-set
I think this is what you are looking for.
kimthomp (not verified)
Sun, 11/20/2011 - 19:02
kitchen plans
I love the look of these...but my daughter is 7 and quite tall for her age. Wondering if there were plans available for a similiar set that was maybe 48 inches high? (fridge) and
KarenK1122 (not verified)
Thu, 08/16/2012 - 19:04
Great Little Sink!
Thanks for this awesome plan, Ana! I was sent a link to your site this afternoon and immediately fell in love with this kitchen. My son is 18 months and absolutely loves to "cook" with my pots and pans and his play food. We decided to get him a play kitchen for Christmas, but I was having the hardest time finding a good quality one at non-PBKids prices. I was SO excited when I saw this (3pm), that I went straight to Lowe's (4pm), borrowed my neighbor's nail gun and jigsaw (5pm), ate dinner and put my guy to bed (6-8pm), and had the sink done by 9pm. It looks incredible and it came together so perfectly. I can't wait to build the rest of the set! Thank you so much! :D
MrsJDT
Wed, 12/11/2019 - 07:26
Suggested age/height?
Hello! We love your site and have built many things over the years. One of these days I’ll get some brag posts up!
Next up is this play kitchen for our girls. Yay! Can you please tell me what age/height this is geared for? Our girls are 6, 4, and 2, so I know it’ll fit some better than others. However, I was looking online at play kitchen kits too, and this looks smaller than those. Any rough guesstimate would be helpful. Thanks!
~MelissA