


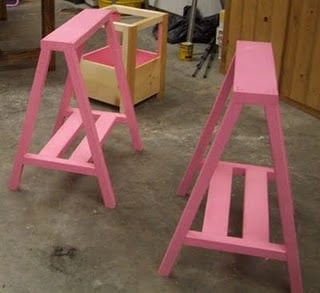
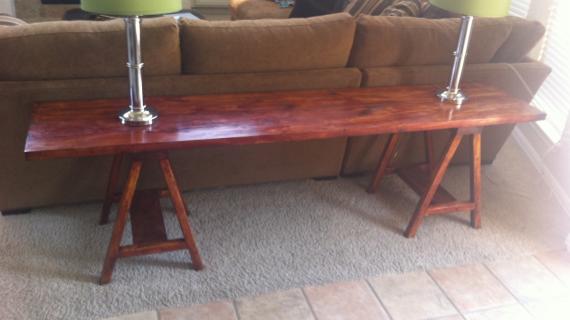
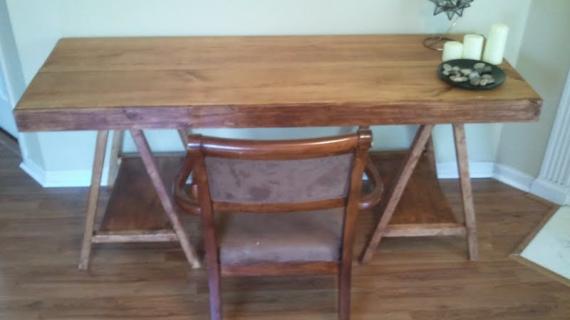
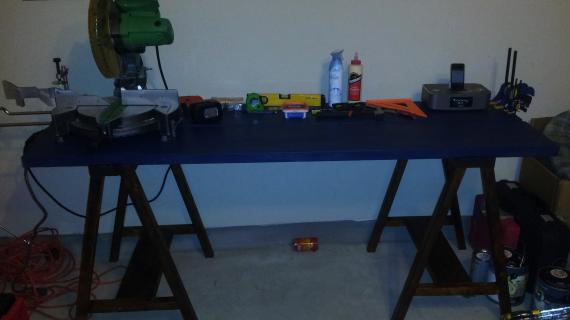
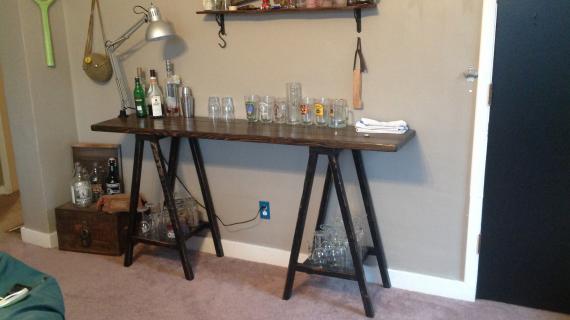
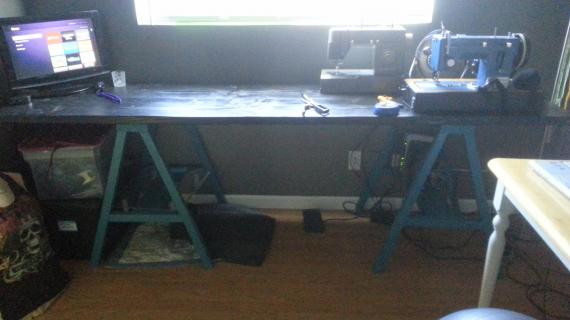
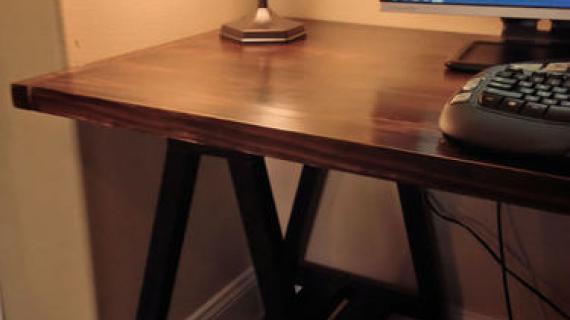
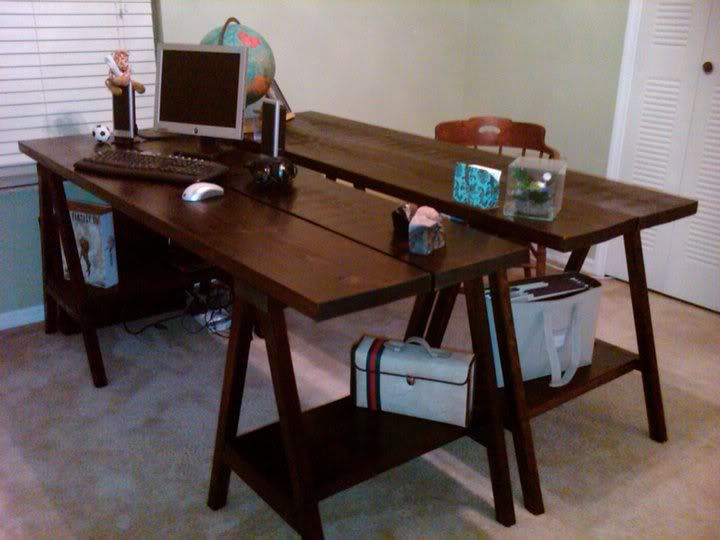
From Cindy: Thank you so much for this amazing DIY instructions! I just completed 2 desks! One for me and one for Hubby! It took me a little while longer than 2 hours…but well worth it! Even with no experience it turned out amazing! I attached pictures of the ones I made! Thanks again! Hubby & I are very excited about our new desks! Oh BTW! 2 Desks = $80!!!!

Preparation
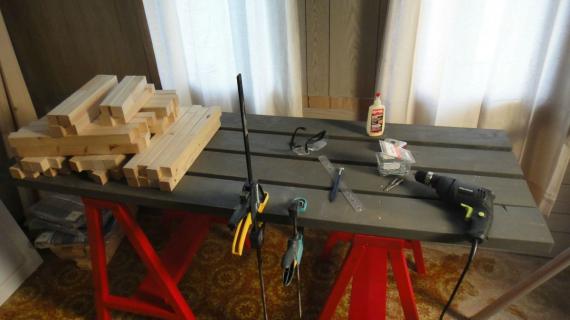
3 – 2″x2″ 8 foot length
1 – 2″x6″
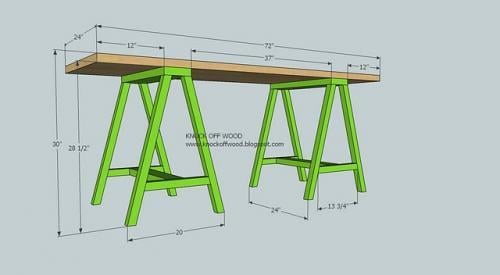
24″ x 72″ x 1 1/2″ Thick Project Panel/Tabletop (Can be found at Lowe’s or Home Depot in the woodworking section) OR 2 - 2x12 @ 6 feet long (like Cindy did)
8 2x2s @ 29″ (cut at 29″, then we will cut these at an angle again for the legs)
4 2x2s @ 13 3/4″ (we will cut these at an angle for the bottom support)
2 – 2×6 @ 24″ (Tops of the sawhorses)
2 – 2x6s @ 21″ (Stretcher between the bottom supports)


Instructions
Step 1

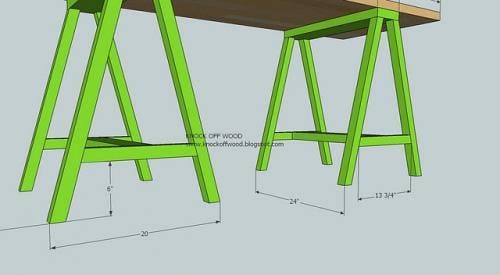
Cut the 8 legs as shown above. Take 15 degrees off the bottom and the top of the legs, so that the overall length on both ends is 28″, with the angle. This is shown above. It is a good idea to mark your boards first before cutting so that you are sure of how the angles are set.
Step 2

Cut the 4 bottoms supports as shown above. Again, follow the diagram above, taking 15 degrees off both ends to get the above cuts.
Step 3
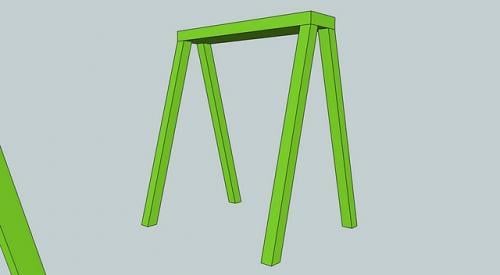
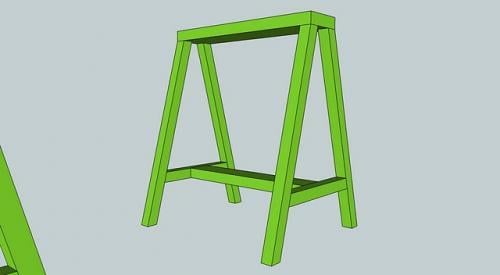
Start with the top of the sawhorse board, the 2×6 cut at 24″ and screw through the top of it into each of the legs. Keep the outside edges flush, as shown above.
Step 4
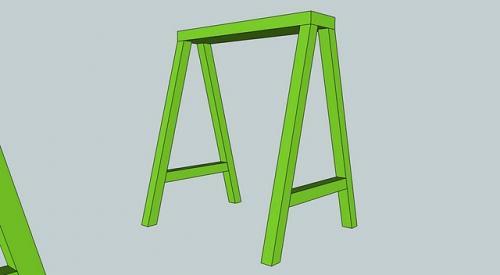
Add the bottom supports as shown above. See the below diagram for exact measurements.
Step 5
Step 6
Center the stretcher on the bottom support and predrill and screw into the stretcher, as shown above. Your sawhorses are done!
Step 7
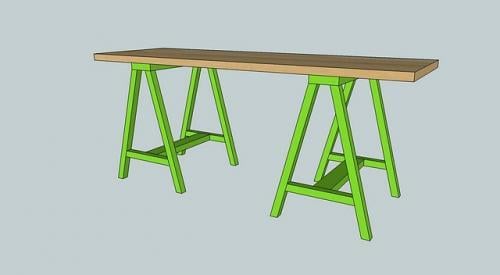
Attach the finished tabletop using 2 1/2″ screws and predrilling and screwing through the underside of the top of the sawhorses into the underside of the countertop.
Using this method, you can easily transport the table just by unscrewing the tabletop. To make life easier, trace the top of the sawhorse on to the underside of the tabletop to mark where the sawhorse screws to the tabletop.
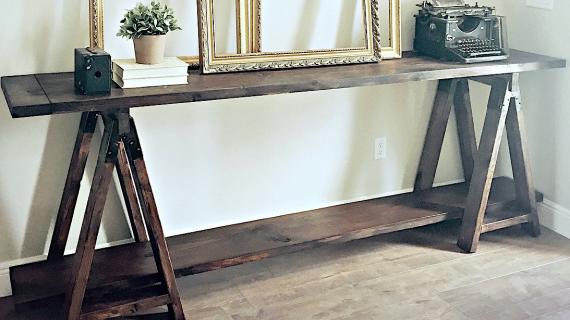
As Cindy did, you can use the 2 - 2x12s for the top.
Comments
Ana White (not verified)
Fri, 11/27/2009 - 13:45
COOL TABLETOP IDEA!!!! Cut
COOL TABLETOP IDEA!!!! Cut sheet of MDF 24x72 (same as project panel) and apply Modge Podge and fabric, photos, or scrapbooking paper (you could even cutout letters of a name), and then more modge podge. Trim out the edges in 1x2s and you've got the coolest table ever!
Ana White (not verified)
Fri, 11/27/2009 - 13:46
One more idea - add 2 bottom
One more idea - add 2 bottom stretchers (from step 5)to each sawhorse and use the stretchers as a shelf.
Erin I (not verified)
Sat, 01/09/2010 - 17:22
How would you adjust the
How would you adjust the measurements if I wanted it be higher, say 36". I didn't know if there would be an angle adjustment needed? Thanks for these amazing plans.
Ana White (not verified)
Sun, 01/10/2010 - 11:20
It would be difficult to add
It would be difficult to add height to the plan by just making the boards longer because the bottom shelf would be higher and the leg spread would be wider. I'm not saying it can't be done, but you might want to make the angle slightly less, perhaps 10 degrees, and then measure and cut your bottom shelf braces to the new width of the sawhorse legs.
Jessica W (not verified)
Sun, 01/24/2010 - 12:13
I think your shopping list is
I think your shopping list is wrong for the number of 2x2's. I can't for the life of me fit all 8 legs and 4 supports onto 3 boards. Lucky me I have a couple extra pieces left over from the plank dining table that are long enough to work.
"m" (not verified)
Tue, 02/16/2010 - 08:19
Thanks Ana for the sawhorse
Thanks Ana for the sawhorse plans! I posted the desk I built using them on my blog:http://onceuponadandelion.blogspot.com/2010/02/office-re-do-1.html
"m" (not verified)
Tue, 02/16/2010 - 19:07
You asked about the cost on
You asked about the cost on my sawhorse desk, Ana.....
4) 2x2x8 $6.60
1) 2x6 $2.78
screws, we had already
Stain/Finish about $7, but there is LOTS left over for another project. Used less than 1/2, and that included a touch up on the chair and another desk in the room.
Since I was able to use the top from my old desk, I was able to get a brand spankin' new one for under $15.00!
Jennifer (not verified)
Mon, 03/15/2010 - 11:04
Looking at your photos, since
Looking at your photos, since you did two stretchers at the bottom, it appears you used two 2x4's instead of a one 2x6. Is that the case?
Ana White (not verified)
Mon, 03/15/2010 - 15:30
that is correct, I used 2 -
that is correct, I used 2 - 2x4s instead of a 2x6. it's up to you. I used the 2x4s because it is what I had in the scrap pile and also liked the idea of having a shelf.
Jennifer (not verified)
Sun, 03/21/2010 - 11:58
I built these this morning in
I built these this morning in about 3 hours with the help of an almost-6-year-old and a 7-year-old. Fun project! We're surprising hubby! His saw horses are sooooo wobbly, so I thought he could use some new ones. :)
I found it much easier to build the legs first (flat on the floor), then attach both sets of legs to the top, then attach stretchers.
I cut a scrap piece of 2x2 6 inches long to help me get the legs lined up properly (6 inches up, legs spread 20 inches).
And all I can say is Thank God for clamps! I don't know how I would have held the legs still while trying to drill the top on!
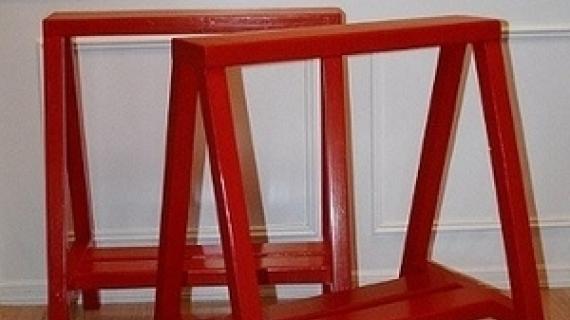
We're going to paint them bright red to match hubby's garage theme. :) Yay! Great plans!
Mari Merchant (not verified)
Sun, 04/25/2010 - 14:12
I wasn't able to get the 8
I wasn't able to get the 8 legs and 4 supports with 3 of the 2x4x8's either. If you're going to make this then buy 4 of them or you will have to make an extra trip as I have to.
I thought the sawhorses were pretty easy--I used a different technique than shown. I can't wait to sand and paint mine. I have a nice bright lime green to use on them!
Ana White (not verified)
Mon, 05/03/2010 - 18:15
A hollow core door is an
A hollow core door is an inexpensive and effective top!
**Danielle** (not verified)
Sat, 07/31/2010 - 14:40
I guess I should have read
I guess I should have read the comments before heading to Orange :( I have to go back tomorrow for a 4th 2x2.
Ana, did you really only use 3?? How?? Lol, I can't figure this out!!
In reply to I guess I should have read by **Danielle** (not verified)
splunking
Thu, 04/07/2011 - 21:16
Me too - although I'm off for
Me too - although I'm off for the third time, the second time they were sold out lol
matte (not verified)
Tue, 08/24/2010 - 04:36
I've never used a power tool
I've never used a power tool in my life and I want to make these for my first project. We have a drill can I use this instead of a screw gun? Is there any info. on tool recommendations on the blog? I'm feeling intimidated by all of the options out there.
QuackMeHard (not verified)
Wed, 08/25/2010 - 14:21
Aww, Matte! That's how I
Aww, Matte! That's how I felt, too! And you know what? All I've used is my jig saw, drill and hand saw. That's how I've done every project so far (even using plywood!). Just goes to show, you can use what you have on-hand! The saw horses are a great beginner project (just make sure you have a protractor/square to measure the angles). You can do it with a hand saw and hammer and nails.... After you do it, you'll realize how easy it is.
Cindy (not verified)
Mon, 11/22/2010 - 15:30
Thank you so much for this
Thank you so much for this amazing DIY instructions! I just completed 2 desks! One for me and one for Hubby! It took me a little while longer than 2 hours...but well worth it! Even with no experience it turned out amazing! I attached pictures of the ones I made! Thanks again! Hubby & I are very excited about our new desks! Oh BTW! 2 Desks = $80!!!!
Margaret V (not verified)
Sun, 01/02/2011 - 18:49
This was/is my first project
This was/is my first project ever. I have a hand saw and a drill. So far the first sawhorse took me 2 1/2 hours and it's a bit wobbly because not all my angles are spot on. Plus I somehow got two screws stuck so they're sticking out. I'm exhausted and want to cry, but I'm still pretty proud! Here's hoping I'm a fast learner. Considering I know absolutely NOTHING, it was fairly simple. The hard part is figuring out how to get it to all stay together while drilling straight (and cutting the angles without a miter saw).
Arlene (not verified)
Fri, 01/28/2011 - 21:02
I don't actually own any
I don't actually own any sawhorses to use with building. Is the basic plan for these sawhorses okay to use out in the garage for working on projects? Or do I need a more utilitarian plan?
Guest (not verified)
Thu, 03/24/2011 - 17:02
love this plan but get one extra 2x2 if you are making two desk!
I also was short one 2x2. When you are making one table the plans are perfect with some extra, when you double you need one more 2x2 though.Everything else is perfect!
AmberKK (not verified)
Thu, 06/30/2011 - 09:46
Thank you!
I've been looking for simple plans for a sawhorse desk for my craft room. This looks perfect! I can't wait to try it. I plan on buying the extra 2x2 (thank you other commenters!) and using the extra boards on the bottoms to make shelves.
AmberKK (not verified)
Sat, 07/30/2011 - 13:40
I did it!
Here is my finished table!
http://twinfamous.blogspot.com/2011/07/40-b4-40-build-something.html
Jon (not verified)
Sun, 02/26/2012 - 15:54
Saw-Horse Desk
I seen a Saw-Horse Desk today at "Pier One" and thought that that would be a great thng to build for my daughter who is starting all over again. Then I googled it and got this- - -great and thanks a bunch. I know my daughter will be thrilled for a desk.
claydowling
Sun, 02/26/2012 - 20:33
Building with your daughter
Let me strongly recommend building this desk -with- your daughter. As she's starting over, there are likely skills she may have relied on somebody else for that she needs to develop, and some confidence she would like to build.
Tash@akitchencat (not verified)
Mon, 10/29/2012 - 06:48
Dimensions?
Hi there, I just noticed that your dimensions say 24" x 48" table, but the plans look like they say 72".
Looking forward to trying out this project - love your blog!
MikeG7 (not verified)
Wed, 12/12/2012 - 20:27
Great idea
Here's mine: http://i.imgur.com/nTTdL.jpg