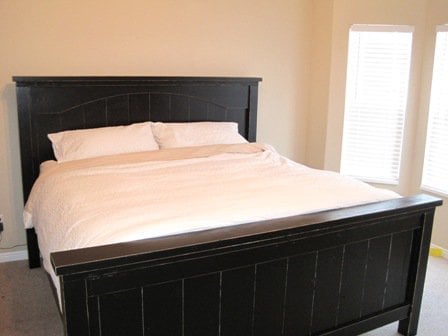


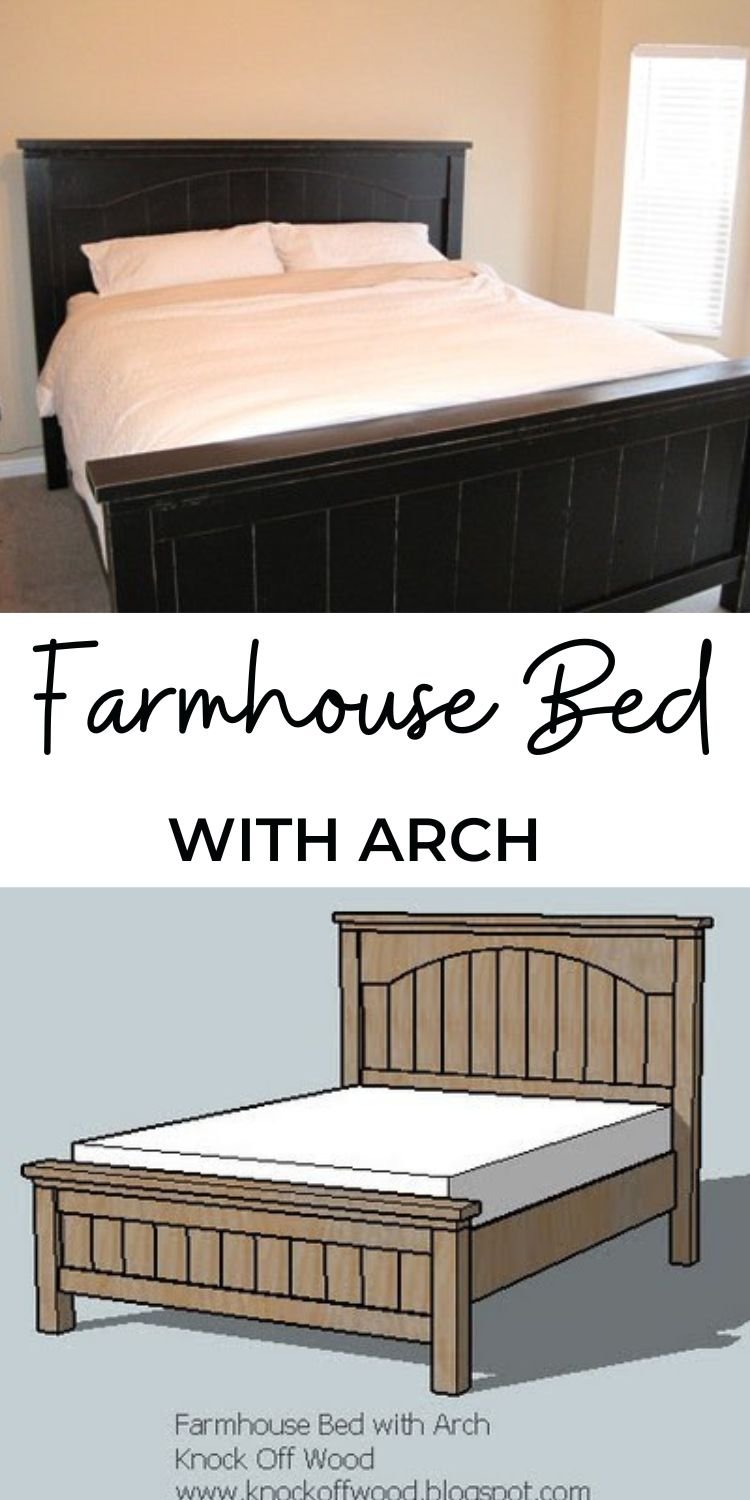
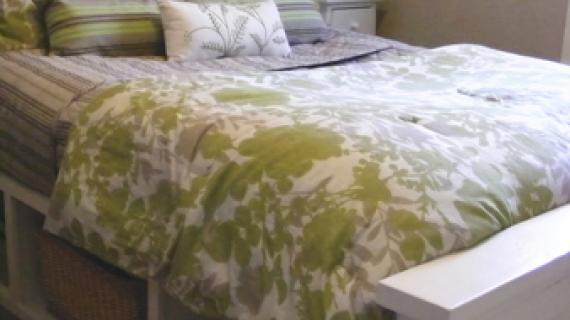
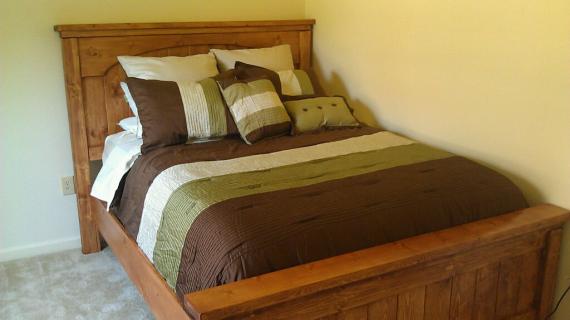
Special thanks to Julianne for sharing her photo. Add a touch of fancy to our Farmhouse Beds with this modification.
Pin For Later!
Preparation
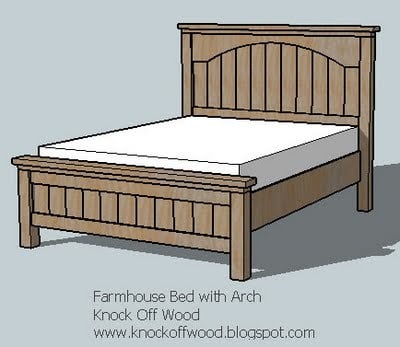
Shopping List for Queen - see other Farmhouse House Beds for different sizes that can be converted to an arch with this technique 6 - 1x6 @ 8 feet long 7 - 1x4 @ 6 feet long 1 - 1x10 @ 6 feet long 2 - 4x4 posts, 8 feet long 2 - 2x4 @ 8 feet or stud length 2 - 2x6 @ 8 feet or stud length
A) 11 – 1×6 @ 30″ (panels for the headboard) B) 11 – 1×6 @ 15″ (panels for the footboard) C) 7 - 1×4 @ 60 1/2″ (top and bottom trim for the headboard and footboard panels) D) 1 – 1×10 @ 60 1/2″ (arch cutout for the arched header) E) 2 – 4×4 posts @ 54 1/2″ (Headboard posts) F) 2 – 4×4 posts @ 21″ (Footboard Posts G) 2 – 2×4 @ 67 1/2″ (Top of Panels and Posts for Footboard and Headboard) H) 2 – 2×6 @ 69 1/2″ (Top of Headboard and Footboard) Siderails and Frame Pieces (optional if you have a bed frame) I) 2 – 2×4 @ 84 3/4″ (Cleats for the Siderails) J) 1 – 2×4 @ 57″ (Footboard piece of the frame) K) 2 – 1×10 @ 80″ (Siderails)
This plan assumes that your 1x6s are 5 1/2" wide. Measure yours - if they are not, you could find your panel is short or long on your panel trim. Adjust accordingly. Best advice is to not cut any boards until after you have constructed and measured your panel boards.


Instructions
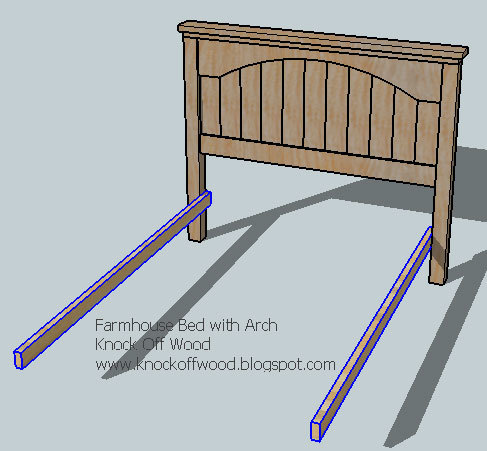
Step 1
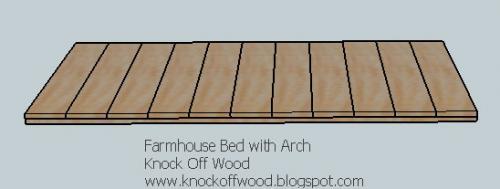
Start with 2 of the pieces C, the 1×4 trim pieces. Begin by lining up the panel pieces for the headboard, A, on top of the 2 trim pieces, C, as shown above. Use glue and 1 1/4″ nails to nail through the panel pieces, A, into the back side of C. Check for square (visit the HOW-TO section to learn how to check for square). Nail all 11 headboard pieces to the back side of C.
Do the same for the footboard, this time using the panel pieces B, and two more of the 1×4 trim pieces, C.
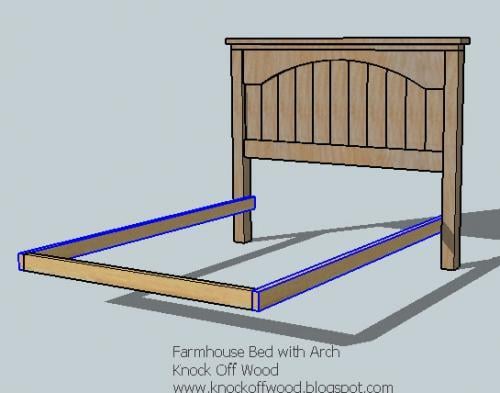
Step 2
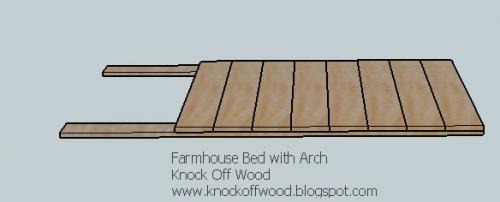
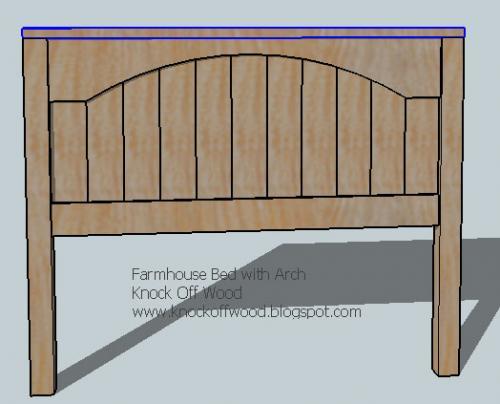
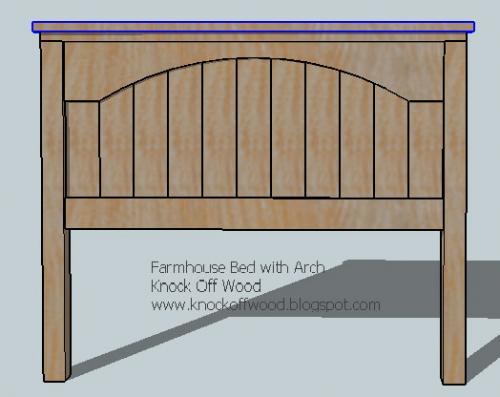
Your Headboard and Footboard panels should look like the above diagram. Make sure these panels are square.
Step 3
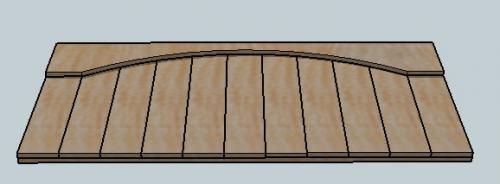
Begin with piece D, and cut out with a jigsaw the desired arch. The arch used above begins 5 1/2″ on either end and reaches up 6″ at the highest point in the center. After the arch is cut out of the header piece, D, for the headboard, flip the larger panel over, as shown above, and secure the header piece, D, as shown above, using 2″ nails and glue. Keep all outside edges flush.
Step 4

Mark the 4×4 posts 5/8″ in on either end on the side that will be connected to the center panel. Line up the center panel with these marks to center the panel on the 4×4 post as shown above. Predrill 1/2 way through the post and then screw with 4 1/2″ screws through the predrilled hole into the center panel. Make sure you are lining up your screws with the panel where it is sandwiched 3 boards thick.
Do the same with the footboard pieces, using the shorter posts and the footboard panel.
Step 5
Step 6
Then add H, the 2×6 top piece, as shown above, over pieces G, to both the headboard and footboard. There will be a 1″ overhand on all sides.
Step 7
Attach the cleats (I), as shown above, with the bottom edge 9 1/2″ from the bottom. Predrill and use long screws to secure, 4 screws per cleat.
Step 8
Next add the end piece for the cleats, J, inset to the cleats as shown above. Use long screws, 3 per end, predrilling through the cleat (I) into the end edges of J.
Step 9
Now position the footboard so that piece J lays flush with the panel piece, as shown above. Use 2″ screws to screw through J into the footboard, screwing all the way down J. Make sure the cleats are level.
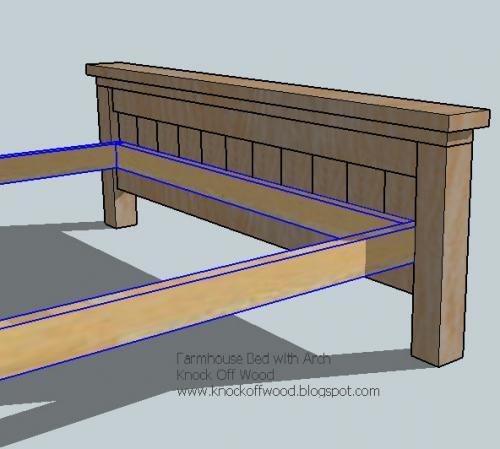
Step 10

Here is a view from behind the headboard.
Add the siderail pieces, keeping the bottom edge of the siderail, K, flush with the cleats (I). Use screws to screw from the inside of the cleat, through the cleat and into the siderail. Predrill and use 2″ screws, screwing down the length of the siderail.
Comments
Ana White (not verified)
Mon, 11/23/2009 - 23:16
If you do not have a box
If you do not have a box spring, you can screw 2x2s or 2x4s with 1" space between each as slats to rest your mattress on. Just cut the slats at 60 1/2" and lay perpendicular to the cleats, and screw into the cleats from the top. Just saved you $500 dollars!
Isabel (not verified)
Mon, 01/11/2010 - 09:36
Ana, thank you for sharing
Ana, thank you for sharing your amazing talent! I love furniture and I love to make stuff. I am so grateful that you are sharing your talent with all of us! I cant wait to start bulding some furniture, specially this farmhouse bed that I could never afford store-bought!
courteneykay (not verified)
Wed, 01/13/2010 - 16:44
hey, just to clarify, the
hey, just to clarify, the plans for the farmhouse bed assume that you do have a box spring, right?
Ana White (not verified)
Wed, 01/13/2010 - 17:29
This plans assumes that you
This plans assumes that you have a boxspring. But if you do not have a box spring, you can simply raise the cleats (the 2x4s on the inside of the siderails) to the desired height and run slats acrossed the top of the cleats. The spacing and thickness of your slats will depend on your wood type. I would say if you are using pine, use 2x2s spaced 2" appart.
Michelle and Landon (not verified)
Mon, 01/18/2010 - 12:58
SO amazing Im in love! What
SO amazing Im in love! What would you have to do to make this bed for a king size mattress?
Kathy (not verified)
Tue, 01/19/2010 - 10:36
Maybe I'm not understanding
Maybe I'm not understanding correctly, but #13 says:
13. Add the siderail pieces, keeping the bottom edge of the siderail, K, flush with the cleats (I). Use screws to screw from the inside of the cleat, through the cleat and into the siderail. Predrill and use 2" screws, screwing down the length of the siderail.
What I am not getting is this: if the cleats are 2" thick, how will 2" screws be able to get through the cleat and into the siderail to properly hold the siderail?
Thanks in advance and I apologize if I'm "just not getting it"! :)
Ana White (not verified)
Tue, 01/19/2010 - 10:42
Hi Kathy, it's not you, it's
Hi Kathy, it's not you, it's the dimensional lumber. A 2x4 actually measures 1 1/2" x 3 1/2". A 1x10 is actually only 3/4" thick. So when you screw through the 1x2 you will have at least 1/2" left over on the screw, adding to the amount you countersinked the screw in. You do not want the screw to show all the way through. Also, the side rails are mostly decorative and not for main support, so you won't need long fasteners.
Hope this helps!
Ana
Kathy (not verified)
Tue, 01/19/2010 - 12:54
Yes, Ana it helps a lot!Guess
Yes, Ana it helps a lot!
Guess it would have helped if I had actually gone to the lumber store and became educated!
Thank you for your time!
rushtonfamily (not verified)
Wed, 01/27/2010 - 08:32
I am soooo excited to have
I am soooo excited to have found your site. We are getting ready to make the queen bed and I have one question. The box spring I have is about 8" tall. With the use of 2x4s for the cleats there will about 2"of the box spring that will show. What would be the best way to change this?
I can't wait to get building some of the fantastic things you have posted!!
Thanks!
Ana White (not verified)
Thu, 01/28/2010 - 07:32
If you need your cleats to be
If you need your cleats to be shorter so your boxspring will not show, use 2x2s instead of 2x4s. This will give you a little more clearance (about 2"). Or you can make your siderails out of 1x12s instead of 1x10s. This would also give you 2" of extra coverage over the box spring.
Scott & Lindsay (not verified)
Thu, 01/28/2010 - 09:36
Ana,What if we have a King
Ana,
What if we have a King bed, but our box springs are two different pieces?
Sabrina (not verified)
Fri, 02/12/2010 - 09:49
Same question as Scott &
Same question as Scott & Lindsay. Do we need to do the slats because our box springs are in 2 pieces?
Ana White (not verified)
Fri, 02/12/2010 - 10:27
If your box spring is in 2
If your box spring is in 2 pieces, you will still need slats, but you could probably get away with less slats. Or you could create an "I" shaped brace in the center where the boxsprings meet.
JANEAL (not verified)
Sat, 02/13/2010 - 04:19
Is there a shopping list for
Is there a shopping list for this or just the cut list?
the letter "J" (not verified)
Wed, 03/10/2010 - 19:26
So maybe I missed the info
So maybe I missed the info for a TWIN bed, but I couldn't find the dimensions or plans for the Farmhouse twin bed anywhere. If you could point me in the right direction I would really appreciate it!!
Thanks...
Julie
Ana White (not verified)
Wed, 03/10/2010 - 20:48
Twin plans are
Twin plans are here
http://knockoffwood.blogspot.com/2010/01/plans-how-to-modify-farmhouse-…
the letter "J" (not verified)
Thu, 03/11/2010 - 00:29
AWESOME!! Thank you, thank
AWESOME!! Thank you, thank you, thank you!! I am so going to build these for my son and daughter...right now they have VERY cheap VERY squeaky headboards! :o)
tnyshas_mom (not verified)
Fri, 03/12/2010 - 15:33
Where are the king size
Where are the king size plans?
Christopher (not verified)
Mon, 03/15/2010 - 13:48
Just wondering, if the frame
Just wondering, if the frame footboard piece is 59" and the side pieces of the frame are 1 1/2" thick doesnt this make the frame too big for the footboard/headboard space of 60"?
Just wondering if it should be 57" for the footboard piece of the frame so it fits with the side pieces into the footboard?
Thanks
Ana White (not verified)
Mon, 03/15/2010 - 15:28
Christopher, You are correct.
Christopher, You are correct. I fixed the typo, thanks for taking your time to let me know. Blessings, Ana
Carrie (not verified)
Sun, 04/04/2010 - 13:43
My daughter sent me a link to
My daughter sent me a link to your blog... I LOVE it! You are so talented and inspiring. I sew and quilt but have never felt like I could do this, but you have changed my mind :o)
I love this bed and a number of other things you have posted. I definitely want to try my had at this. Thank you! (will send pictures when I do!)
Katherine (not verified)
Sun, 04/18/2010 - 13:16
Just the clarify, these plans
Just the clarify, these plans are for a standard queen bed, 60" by 79.5"?
Can't wait - this will be a father/daughter bonding project this summer!
Chuck (not verified)
Wed, 05/12/2010 - 13:18
Ana, I love your site and
Ana, I love your site and this bed, it rocks, but I have two questions.
I see you have the 4x4-less option, but have you (or anyone else) thought of using timber instead of lumber to give the bed a more rustic look? I know it would take a lot more work to do, but the look might be worth it.
Second, is any reinforcement needed to the plans as they are now for heavier beds like a Tempurpedic?
Matthew (not verified)
Sun, 08/15/2010 - 02:55
Ana, can you speak to the
Ana, can you speak to the 1/2" difference in overall width between the arched plan and the original farmhouse bed plan? I started cutting all my pieces from the original plan before I realized that the arched plan is longer, so now I'm wondering if I need to get some more lumber.
Thanks!
Jamie (not verified)
Wed, 10/20/2010 - 16:03
I just started cutting my
I just started cutting my lumber for this bed and I am so excited to see the results. Thank you so much for your plans. It should be finished (not stained) by this weekend. I will send you some pictures.
Jamie (not verified)
Sat, 10/23/2010 - 15:44
So I got the headboard and
So I got the headboard and footboard done except for attaching the 4x4 post. The screws I got did not want to stick into the wood and hold it tight enough so went out and bought joiners for added support. Straight pieces for the top(before you add the trim) and corner joints for under the headboard and footboard. It seemed to hold better than just screws alone.
CarrieW (not verified)
Wed, 12/08/2010 - 12:02
Hi Ana - I am making this bed
Hi Ana - I am making this bed as a birthday/Christmas gift for my sister who is in her first "real" apartment after graduating from med school and she needs a classy bed to match. She is using her box spring and would like to keep it. Am I understanding correctly that if the box spring is one piece, it is OK to just rest on the cleats without adding additional slats? I'm looking forward to making this - adding in one small modification for detachable siderail hardware from Rockler since she won't be in this apartment forever and she'll eventually need to move it. Much easier to do if the rails pop off and it becomes 4 pieces (headboard, footboard and 2 side rails) instead of 1 finished bed.
John Tillack (not verified)
Mon, 01/10/2011 - 19:25
Is the headboard made with
Is the headboard made with tongue and groove and if it's not how do you achieve this look? What's your recommendation.
John (not verified)
Wed, 02/02/2011 - 22:47
I am trying to find these
I am trying to find these plans for a twin bed. Thanks
Swilliams987
Thu, 03/31/2011 - 20:34
Need an arch template?
I cut and sanded the wood for this bed today and had a bit of a difficult time with the arch but managed to make a home-made compass that did the trick. I looked around for suggestions or a template online but didn't find one- so, if anyone needs help with this arch I can send you a home-made template, just let me know!
In reply to Need an arch template? by Swilliams987
tracysmith
Thu, 03/31/2011 - 23:32
YES!!!
This will be one of our next projects so I would LOVE to get a template for the arch part...I keep looking at this and then putting it off cause I'm unsure of the arch part. Thanks for offering your help!
Swilliams987
Fri, 04/01/2011 - 10:49
Sent you an email!
Sent you an email!
Guest (not verified)
Mon, 05/09/2011 - 13:58
Arch Template
Would love to get my hands on that arch template. Thanks in advance...
Angie Willoughby (not verified)
Thu, 04/12/2012 - 16:50
Farmhouse bed arch template
I would love to get the template for this bed if you still have it available.
Thanks
tatkinson623
Fri, 01/17/2014 - 12:37
I know this is an old post but...
I know this is an old post but would you still have the template you can send?
tatkinson623
Fri, 01/17/2014 - 12:37
I know this is an old post but...
I know this is an old post but would you still have the template you can send?
ErinCall
Wed, 04/13/2011 - 10:57
I need some king sized plans
I need some king sized plans PLEASE! Yes i have a box spring THANKS! :)
dmsdbt
Tue, 07/09/2013 - 18:18
I'm also looking for the king
I'm also looking for the king size plans.
Guest (not verified)
Sun, 04/17/2011 - 19:06
bed picture
Hi Anna
skichiiwa
Mon, 10/31/2011 - 16:44
ana- HOw would you reccomend ....
are slats sufficient for a king size with 2 box springs?
what spacing and could i use 2x2 instead of 2x4 for the slats to make it lighter? or is it better due to the strength and size of screw/ nails being used?
also is there any way you suggest making the siderails and frame removable? in case i want to take it apart and move it?
thanks
Muggs (not verified)
Sun, 11/06/2011 - 16:43
metal frame
If I don't use the wood frame, is there a way to attach headboard and footboard to a metal frame?
In reply to metal frame by Muggs (not verified)
claydowling
Sun, 11/06/2011 - 16:54
Bolts
If you have something like a california frame, there are bolt holes in the bottom of the frame for attaching to a head board. If instead there are little knobs on the frame sides, you can buy brackets from Rockler and other hardware suppliers for attaching them.
Laura Hines (not verified)
Tue, 02/07/2012 - 20:53
12 inch box spring and this bed frame?
I have a 10-12 inch deep box spring and mattress. Is there a way to modify the plans for the frame to fit both of them? I really like my box spring, and would like to have the bed at least 8 inches maybe higher off the ground, but need to accommodate the box spring and mattress!
Laura Hines, Washington State!
Laura Hines (not verified)
Tue, 02/07/2012 - 20:58
12 inch box spring and this bed frame?
I have a 12 inch box spring and Mattress. Is there a way to modify the plans to make a frame to fit the both of them!
claydowling
Wed, 02/08/2012 - 04:52
Accommodating Your Matress
Laura, just figure out how high up you want the top of the mattress, then subtract the thickness of the mattress and box spring from that. That's where the top of your mattress support goes.
Milca (not verified)
Mon, 04/16/2012 - 18:22
Love the arch! Love the farmhouse bed!
I love the farmhouse plans for the storage bed, but I also loooove the plank/arch look of this bed. Just printed out both plans tonight, and plan on modifying the sides of this bed to have storage drawers on both sides. Can not wait to put my new tools to work!! Thanks Ana :)
Cyndy M (not verified)
Fri, 06/29/2012 - 08:18
Daybed surround
Hi Ana, I just went thru your site, decided to make that bed; but only the headboard n foot board........I have a twin sized bed, but would like to make it into a daybed. After looking at your plans for the headboard n footboard, I know I can do this. Would use the King sized plans for the back of the headboard, and make the footboard in 2 pieces to attach at right angles.
Will post pics when I get it done................
Cyndy
Caz (not verified)
Wed, 12/12/2012 - 13:37
making a bed
Hi Cyndy M, did you ever make that daybed? I am planning to do the same - I have been searching for ideas on the internet for months but have found nothing until now. Is it possible to see pictures of yours?
Jimmy44 (not verified)
Wed, 12/05/2012 - 22:03
Is there a way I can get a
Is there a way I can get a copy of the template? I'm having a hard time getting the arch to turn out nice.
Thanks
jhharrington
Tue, 01/29/2013 - 18:19
I would love a copy of the template too!
I would love a copy of the arch template too! My husband and I are about to start this project.