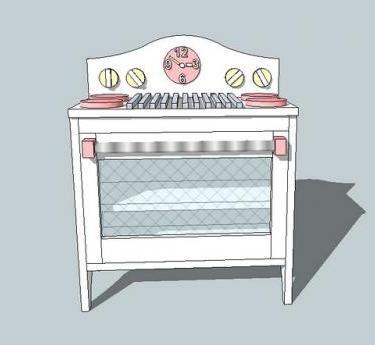


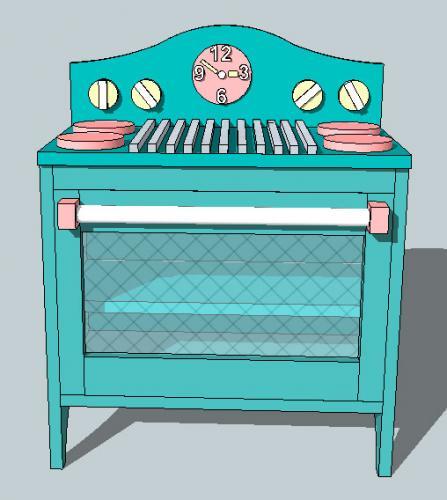
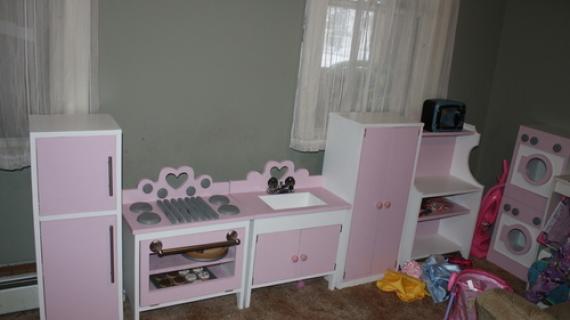
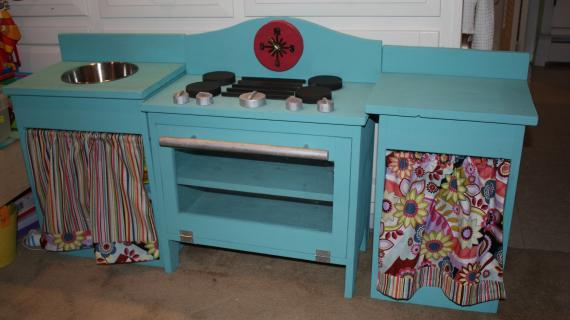
This cute play stove is a tad bigger and a ton fancier - just what your little one's need to pretend to be you! Have fun making this stove - it's all in the details!
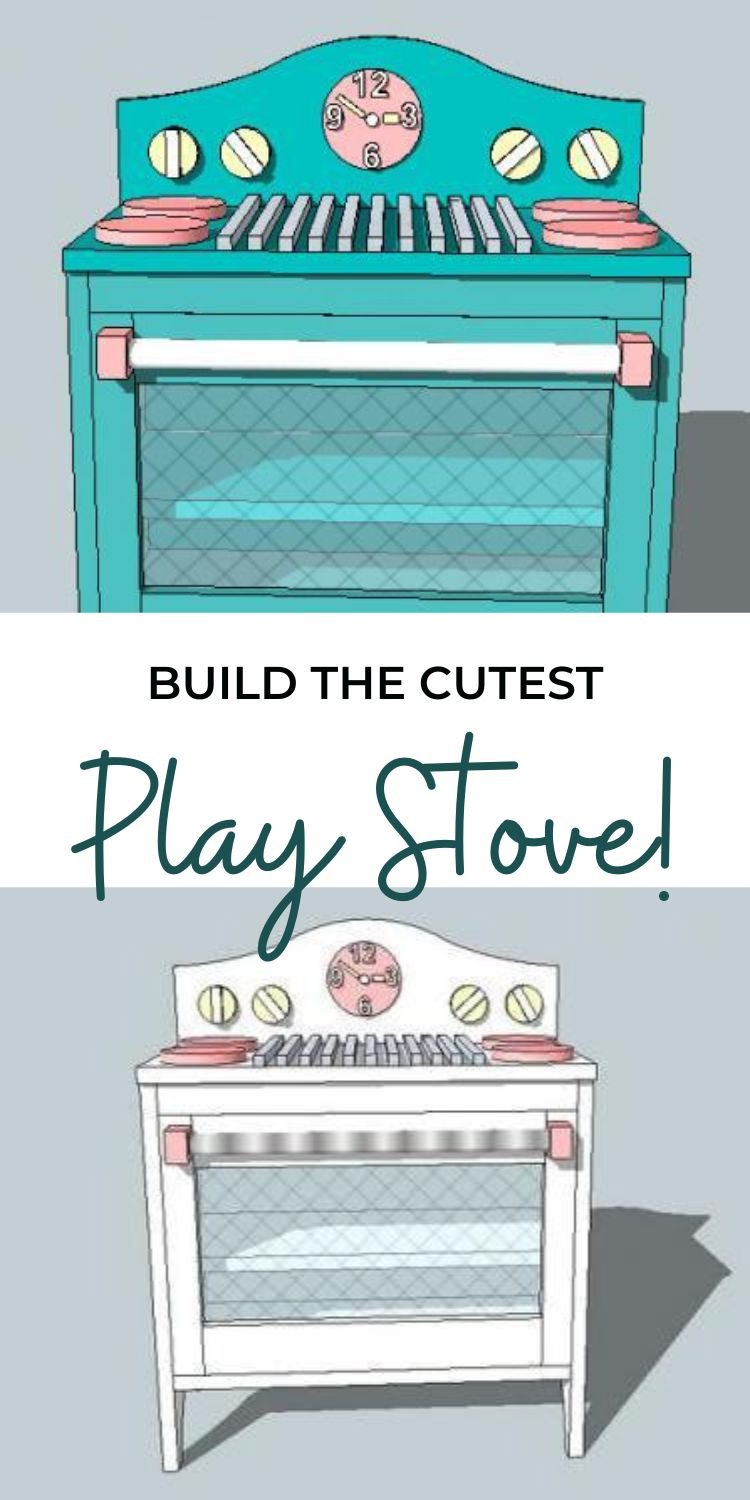
Pin For Later!
Preparation
1 - 1x12 @ 8 feet long 1 - 1x10 @ 2 feet long 1 - 1x8 @ 2 feet long 1 - 1x2 @ 8 feet long 1 - 1x3 @ 8 feet long You will also need a scrap of plywood for the back, a set of self closing hinges, nails, glue, handle, a piece of plexiglass (9"x18") and your creative spark!
Cut List for the Frame (Does not include the decorative accessories) A) 2 - 1x12 @ 19 1/4" (Sides, Cut Out Legs) B) 1 - 1x12 @ 19 1/2" (Bottom Shelf) C) 1 - 1x10 @ 19 1/2" (Middle Shelf) D) 1 - 1x2 @ 19 1/2" (Top Trim) E) 1 - 1/4" to 1/2" piece of plywood for the back cut at 21" wide x 16" tall (I used scrap beadboard pieces) F) 1 - 1x8 @ 22" (Back Splash, Cut Out Top) G) 1 - 1x12 @ 22" (Stove Top) Cut List for the Door (Does not include the handle) H) 2 - 1x2 @ 12 1/2 (Stiles) I) 2 - 1x3 @ 16 1/4" (Rails)
The success of this project greatly depends on good jigsaw cuts. Practice cuts first and use precut scraps as patterns so all of your cuts match.


Instructions
Step 1

Start off by cutting the foot of the piece. Draw out the above pattern on each of pieces A. Make sure the two cuttout patterns are exactly the same. Use a protractor or a large round object to trace out your arc. You can cut one foot, and then trace the competed foot to transfer the pattern to the other foot. I use a jigsaw to cut out the foot.
Step 2

So now we should have two of piece A, cut exactly the same, as shown above.
Step 3

So now we should have two of piece A, cut exactly the same, as shown above.
Step 4
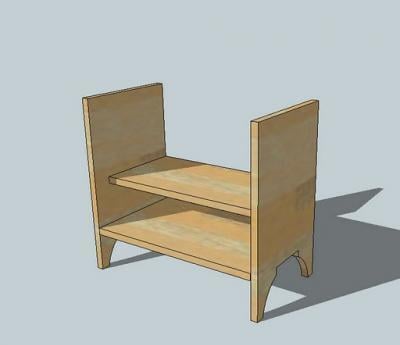
Next, add C, the middle shelf, as shown above. Keep the back edge of C flush with the back of the stove, as pictured above. Set C 5" above the bottom shelf B, or 10" from the bottom of the stove. Use 2" nails and glue.
Step 5

Step 6
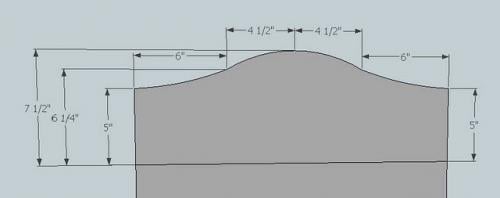
Now cut out your backsplash (F), using the guides above to make your pattern.
Step 7

Then take the completed backsplash (F) and line it up behind the countertop (G) as shown above. Use 2" nails and glue to nail through the backsplash (F) into the counterop (G). This is shown above.
Step 8
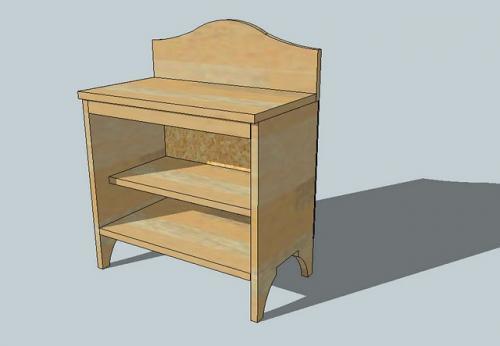
Start by adding the plywood to the back of the stove. Make sure you check for square at this point. If you do not know how to check for square, go here and I will show you. When the stove is squared up, glue and nail with 1 1/2" nails through the back of the plywood into the sides and shelves. Leave a 1" lip at the top of the stove. The bottom edge of the plywood will be flush with the bottom shelf of the stove. Then add the completed countertop/backsplash piece (not shown above) to the stove. There will be a 3/4" overhang on the front and a 1/2" overhand on either side.
Step 9
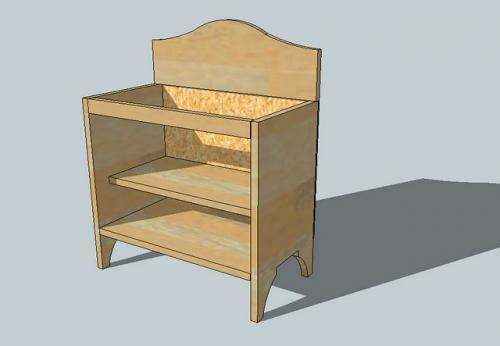
Your piece should look like the above diagram.
Step 10
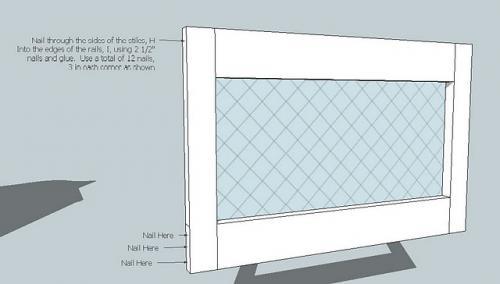
As shown above, nail through the stiles, H, into the end edges of the rails, I, to make a door. Use 2 1/2" nails and glue. After you have completed the door frame fill holes with putty, sand and paint, and then add your plexiglass. Fasten to the finished stove with hinges.
4 - 4" discs cut from plywood as the burners.
1/2 pieces of 1x12 glued to the top for the grate
2" Wooden wheels for the nobs with a piece of plywood glued to the face (I did not screw this in all the way to allow the knobs to turn.
Another wooden disc and wooden numbers for the clock
A 1/2" wooden dowel and pieces of 1x2s drilled out for the dowel as the oven handle
You know your child better than anyone, and I hope you will customize this stove for your child's taste and needs. Happy cooking!
Comments
stacy krager (not verified)
Sat, 02/20/2010 - 16:16
I know this is an old post,
I know this is an old post, but I cannot believe you have no comments on it! That is absolutely GORGEOUS! I just found your blog last night and my poor husband literally has a stack of paper 5 feet high of plans for the projects he is now responsible for :). I might give a go at one of the "easy" ones though!
Karen (not verified)
Tue, 03/30/2010 - 13:34
I am so hooked too and about
I am so hooked too and about this stove I am going to modify it for my new vanity in the bathroom. Thanks.
Aubrey (not verified)
Thu, 04/08/2010 - 10:11
My husband went to Home Depot
My husband went to Home Depot with me to get the wood for the stove, fridge, and sink... He said he would make the cuts, and I could put it together... He was so excited and having so much fun, he put them all together too, so now all I have to do is paint them and add the embelishments... I LOVE this blog! My husband is about to forbid me to come to this site, because I keep finding things I would like to make, and we don't have room in our house for anything else! Thanks Ana for all these plans... I will send pictures once our son's kitchen is finished!
Melissa (not verified)
Fri, 06/11/2010 - 19:16
I am sooo excited to start on
I am sooo excited to start on all of the kitchen items now and help out Santa's elves! Thank you for utilizing your gift! :-)
Andrea Pietragallo (not verified)
Mon, 08/06/2012 - 05:03
farmhouse sink pantry???
Is there any way you can post plans to make the pantry that went along with the PBKids version of this? I love the shape and want to add doors to the lower left and right to make oven and fridge/pantry?
PLEASE!!!!!