


I built this wine cabinet for some friends on their wedding day and still really love it! Don't try this as a beginner, but if you want an inexpensive method of storing wine and wine glasses, this might just be your plan.
Preparation
3 - 1x2 @ 8 feet long
1/2 sheet of plywood
A) 11 - 1x2 @ 7 1/2" stemware verticals


Work on a clean level surface. Take a square of your project. Use 2" nails and glue unless otherwise directed. Use proper safety equipment and guidelines. Also, you may wish to paint the smaller pieces first. From experience, it's going to be tough getting a brush in the stemware holders.
Instructions
Step 1

Stemware Holders. Begin by building the stemware holders by building 2 L-Shaped pieces with boards A and B and 9 T- Shaped pieces using A and C as shown above. If you are painting the piece with a brush, I recommend painting these pieces and board D now, because it will be very difficult to reach once this is put together.
Step 2
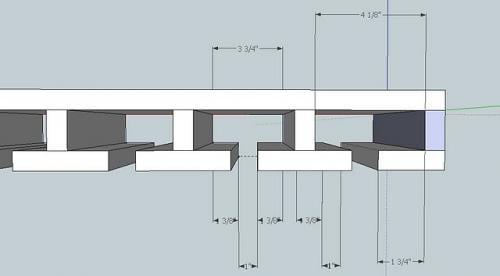
Stemware Shelf. Now mark board D as shown, spacing the center stemware supports the same, and the end spaces the same as shown above. There will be a 1" gap between all the supports. Your finished product should look like the above diagram.
Step 3

s. Once the stemware shelf is constructed, attatch it to the sides as shown.
Step 4
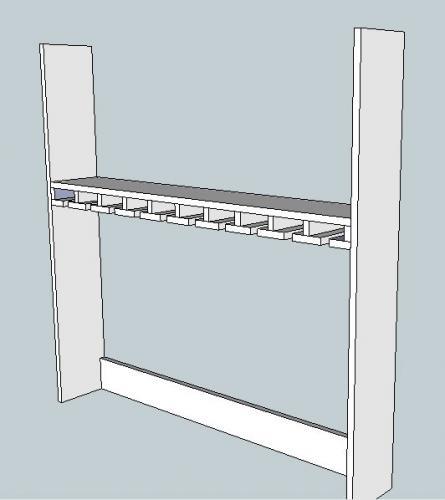
Back. Attach the bottom support, piece F, keeping the bottom edges flush.
Step 5
Step 6
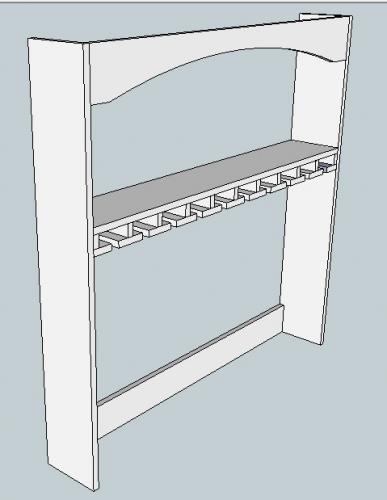
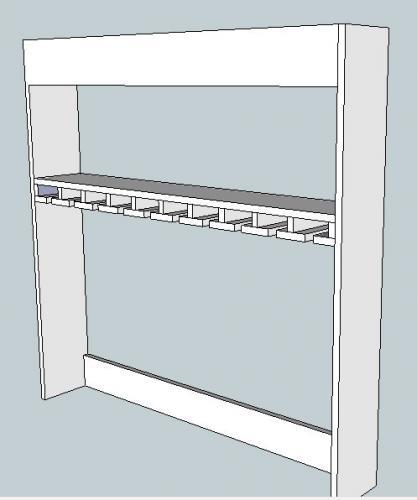
Header. Cut out the header as desired.
Step 7

Bottom of the Crown. Add the crown by placing the sides on, 3/4" from the top, and then the front pieces. If done correctly, step 8 will fit perfectly. If you have a router, I like to router out the bottom edge of the crown.
Step 8
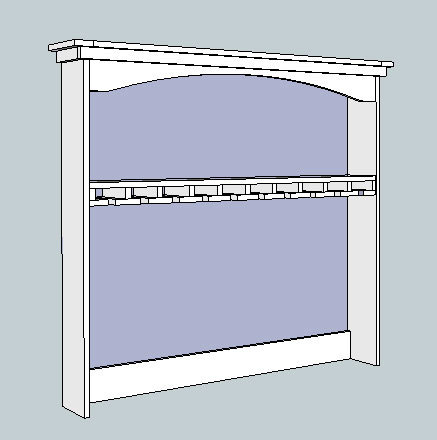
Top Crown. Attach the top crown pieces, the sides first, and then the front. Nail into both the bottom crown piece and the hutch. I like to router out the bottom outside edge of the top piece.
10. Back. Add the plywood to the back. I like to use beadboard.
And that is it! Fill nail holes with wood filler and, sand and finish as desired. Once in place, I recommend you attach to the wall to ensure there are no accidents.
Step 9

Make sure you attach to wall with a tip resistant kit - that's like 20 wine glasses that you don't want falling on you.


Comments
Ana White (not verified)
Mon, 11/02/2009 - 13:02
Correction - the wine base
Correction - the wine base and hutch together costed about $100.
Jana (not verified)
Wed, 01/19/2011 - 11:24
It took me for EVER to find
It took me for EVER to find this plan today after noticing it a few weeks ago...you might want to tag it in your "Wine Storage" section, among others!