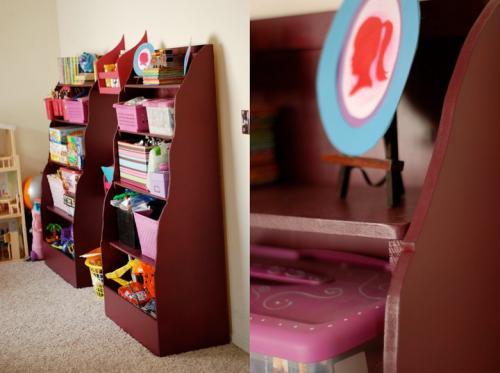


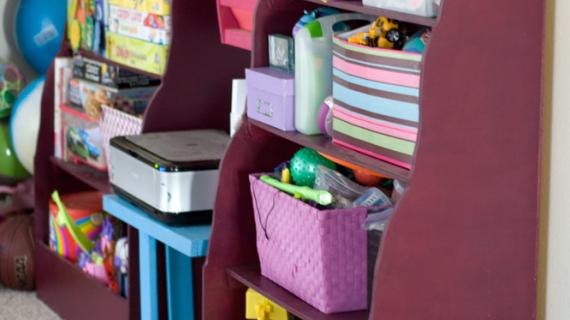
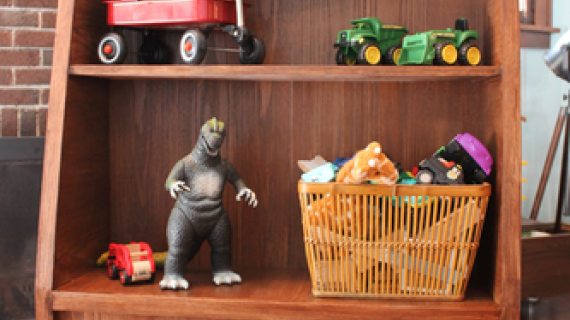
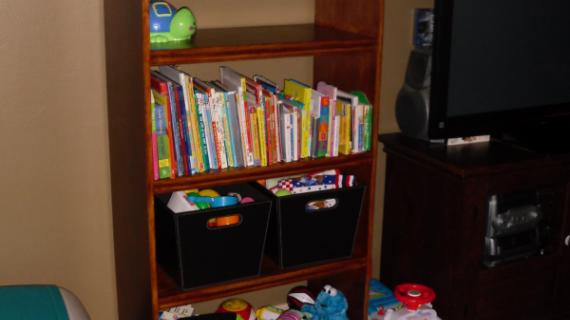
These bookcases are cute and extremely functional. I love the bottom bins. Even as young as three years old, your child could fill these bins with toys when instructed. Give your child a chance to be organized with the Banker's Bookcases.
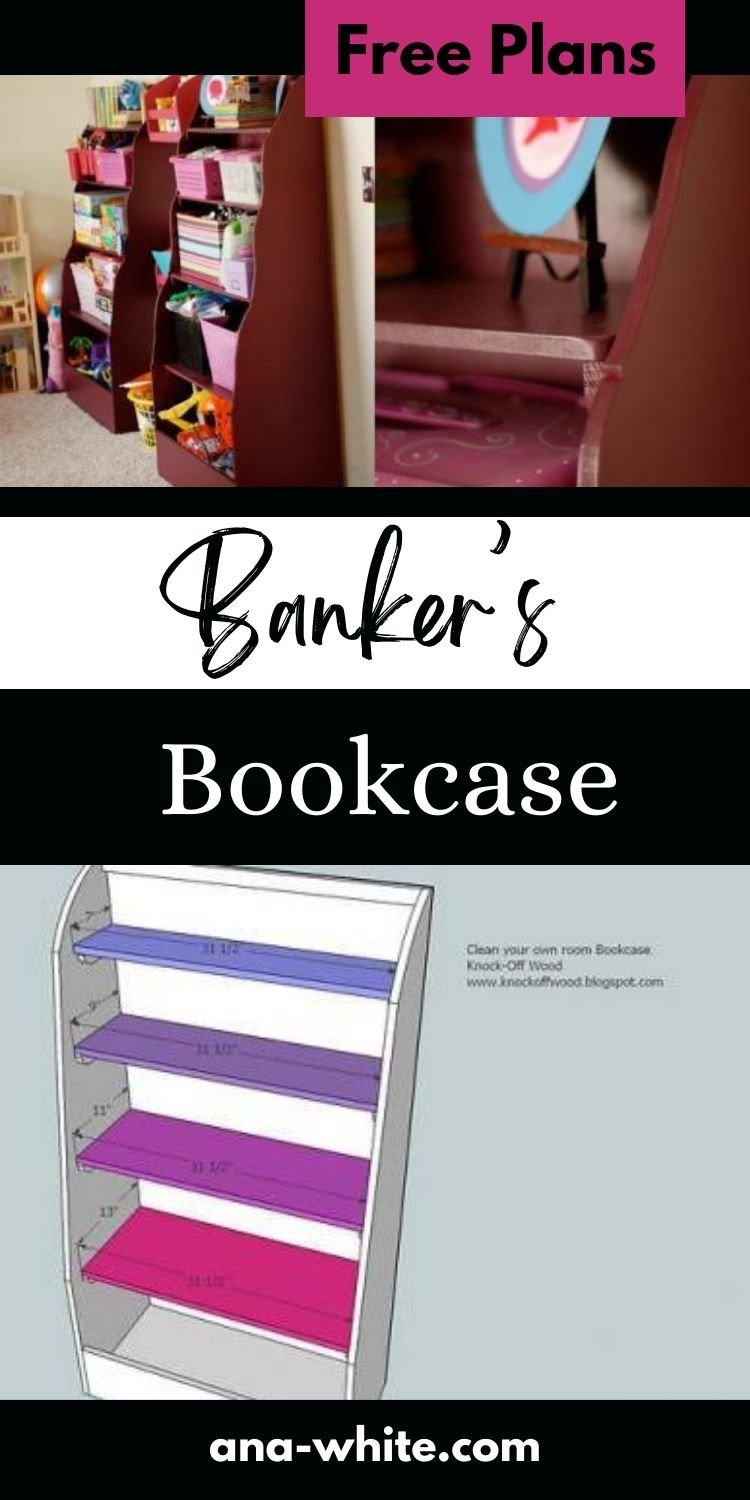
Pin For Later!
Preparation
- 1 sheet 3/4″ MDF or plywood
- 1 sheet 1/4″ plywood or paneling
- 2 – 1×2 boards
- 2″ screws
- 1 1/4″ screws
- 1 1/4″ nails
This bookcase is designed to be finished with paint and not to be stained as the front edges of the plywood will be difficult to stain or finish. It's tough to iron on edge banding on a curve.
A) 2 – 3/4″ MDF @ 60″ x 15″ (Sides, in step 2 you will cut to the proper shape)
B) 2 – 1×2 @ 13″ (Round edges as shown in diagram in step 3)
C) 2 – 1×2 @ 11″ (Round edges as shown in diagram in step 3)
D) 2 – 1×2 @ 9″ (Round edges as shown in diagram in step 3)
E) 2 – 1×2 @ 7″ (Round edges as shown in diagram in step 3)
F) 1 – 3/4″ MDF @ 31 1/2″ x 14 1/4″ (Bottom of Storage Bin)
G) 1 – 3/4″ MDF @ 31 1/2″ x 7 1/2″ (Front of Storage Bin)
H) 1 – 1×2 @ 31 1/2″ (Top Support)
I) 1 – 1/4″ Plywood or Paneling @ 33″ x 60″ (Back of Bookcase)
J) 1 – 3/4″ MDF @ 31 1/2″ x 13″ (Bottom Shelf)
K)1 – 3/4″ MDF @ 31 1/2″ x 11″ (2nd to Bottom Shelf)
L) 1 – 3/4″ MDF @ 31 1/2″ x 9″ (3rd to Bottom Shelf)
M) 1 – 3/4″ MDF @ 31 1/2″ x 7″ (Top Shelf)
Begin by cutting all your piece out. Do not forget that the saw blade takes up approximately 1/4″, so you CANNOT mark all the pieces out on the plywood and cut. You must cut, mark, cut, mark, and so forth. I will direct you on what type of fastner to use. Use glue on all your joints.


Instructions
Step 1

The above diagram shows a sample cutting layout for the 3/4″ MDF pieces. You will also need to cut the back out (33″ x 60″) from 1/4″ plywood or paneling. I say 1/4″ because this is the minimum I would recommend. Got an extra sheet of 1/2″? Use it up! Store bought pieces use cardboard. Yes, cardboard.
Step 2

Cutting the Sides. Draw out your desired sides for the bookshelf. The above is a simple design that I would recommend and would be easy to cut. If you are good with a jigsaw, go ahead and mark you board like the Land of Nod bookcase and cut away. Just remember where your shelves are located. It would be a good idea to mark out where the shelves are placed before cutting so you can square from both sides the shelf location.
Step 3
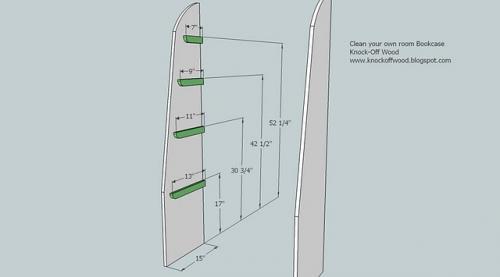
Attaching the Shelf Supports. With the shelves marked in step 2, screw with the 1 1/4″ screws the shelf supports as shown above. Use 3 screws per shelf support. I recommend rounding the front edge of the shelf support to avoid sharp corners. This is shown above. Remember, each set of shelf supports is a different length. Use the measurements in the above diagram to guide you.
Step 4

Attach the bottom, F (Blue) to the sides, A (White), as shown above. Keep the back edge flush. There will be a 1″ gap under the bottom shelf and the bottom of the bookshelf. This is shown above. There will also be a 3/4″ difference from the front of the bookshelf and the front of F. Use glue and 2″ screws.
Step 5

Step 6

Attach the top support, H, by screwing through the sides into the end edges of H. Use 2 2″ screws on each side.
Step 7

Add the Back. Use the 1 1/4″ nails to nail the back to the bookshelf, as shown above.
Step 8

Add the Shelves. I recommend screwing with 1 1/4″ screws the shelves in place. However, you can opt to only screw the top and middle shelf in place and leave the 13″ and 9″ shelf removeable.
Step 9
Finish the Bankable Bookshelf. Fill nail holes with putty, then sand and paint as desired. You may wish to first use a primer for MDF or wood, then paint.

Comments
shelly (not verified)
Mon, 12/28/2009 - 04:39
It looks like a Christmas
It looks like a Christmas tornado hit our house!!! I've been searching for a good storage system for the kids' toys...this is perfect! Thanks so much!
click Here (not verified)
Sat, 01/19/2013 - 17:18
Banker's Bookcase | Ana White
Have you ever considered writing an e-book
or guest authoring on other sites? I have a blog based upon on
the same information you discuss and would love to have you share some stories/information.
I know my subscribers would appreciate your work.
If you are even remotely interested, feel free to shoot me an email.
Anonymous (not verified)
Wed, 12/30/2009 - 08:27
My daughter now has more
My daughter now has more books than bookshelves! Saw this on the Land of Nod website and hubby told me he could build it, I am sure this will help him. Thank you!
Jamie (not verified)
Tue, 01/05/2010 - 04:09
Wow! I just posted about this
Wow! I just posted about this bookcase yesterday and someone referred me to your blog. We will be building one of these for sure!
steffany (not verified)
Fri, 01/08/2010 - 05:11
I think this is perfect for
I think this is perfect for my son's room. I usually wait for my husband, since he is in the middle our master bedroom remodel. You have inspired me, I can't wait to tackle into it myself.
Kelly Moore (not verified)
Fri, 01/08/2010 - 05:54
This project is 100% what I
This project is 100% what I need for my son's room! My only delema when looking at the photo is that my son has WAY more books than that, and they all come in weird shapes and sizes. not that it would affect the coolness of the shelf, but I am not so good at "dressing" the bookshelves.
Love your work!
shauna (not verified)
Fri, 01/08/2010 - 09:32
I love these! I can't wait to
I love these! I can't wait to go to Grampa's house again to use the garage and tools to start building. I saw your blog on U-Create today and am loving everything that I see. Fantastic work!
Annalee (not verified)
Fri, 01/08/2010 - 12:36
Just found your blog!! I'm in
Just found your blog!! I'm in LOVE!! I can't wait to show my husband. We NEED these bookshelves for our daughters room! THANK YOU!
Anonymous (not verified)
Fri, 01/08/2010 - 17:35
I just found your blog and
I just found your blog and YOU ROCK! I was so overwhelmed looking at the clutter in my house and so tired from trying to tackle it, that I thought I take a rest and surf the net. I sure am glad I did and found your blog. I feel so much better and ready to tackle this project. Thanks so much and keep up the great work! I appreciate your time and hard work.
Loren, Matt & Kaine (not verified)
Wed, 01/13/2010 - 10:26
I am so thrilled that I was
I am so thrilled that I was able to find this on here! We are currently making plans to make this! Now you have taken all of the guess work out of it! I you were here I would give you a giant hug! Thanks!
celestialmoon_6901 (not verified)
Fri, 01/15/2010 - 19:18
I just stumbled upon your
I just stumbled upon your blog tonight. Let me just say that you are amazing!! I can't wait to start building. I've always wanted to, but I've never had the know how. Thanks for inspiring me!
Anonymous (not verified)
Sat, 01/16/2010 - 14:45
This looks so nice. I'm a
This looks so nice. I'm a teacher and would love to build some of these for my classroom.
alison (not verified)
Tue, 01/19/2010 - 19:54
Darling katie, what a
Darling katie, what a beautiful blog...
I am enjoying your reads xxx Ali
Anonymous (not verified)
Thu, 02/04/2010 - 11:51
Wow! I just found your blog,
Wow! I just found your blog, it is very inspiring! My mind is starting to work. I will let you know if I do one of your projects!
Anonymous (not verified)
Tue, 02/23/2010 - 19:27
Love this I have a home
Love this I have a home daycare and I am always looking for new storage. I found your site tonight and I am just drooling and getting so excited however my hubby is looking at me like I have lost my mind as my list is growing LOL. I am totally looking forward to building together with him.
Michael Haren (not verified)
Sat, 03/13/2010 - 06:27
I am excited to get started
I am excited to get started on these today, now that it has finally warmed up enough to work in the garage. Thanks for the great, detailed plans!
I'll follow up with pictures when we're done.
Kelley (not verified)
Mon, 06/07/2010 - 06:04
Wow! I would love to build
Wow! I would love to build this for my daughter's room, but I am a carpentry novice! What tools do you need to round the edges, build the sides and cut the pieces? Thanks!
Brandon (not verified)
Sun, 06/27/2010 - 04:14
I really like this bookcase
I really like this bookcase as does my wife. Definitely need to give this build a try. Sucks I have a move coming up and have to wait to get settled in. My wife has a list of builds she wants me to get started only with a few inspired by you.
manygoats (not verified)
Fri, 09/10/2010 - 13:52
I just finished building two
I just finished building two of these, and would absolutely change the skill level to beginner. I got these from 4x8 boards to finished bookshelves in about 3 hours a piece. All while my hubby was at work and my 4 year old and 6 month old were roaming around me. Now I just need to decide on a paint color!!!
Momof4 (not verified)
Sun, 10/03/2010 - 05:47
Thanks for making your
Thanks for making your comment manygoats! I wanted to build a few of these and have waited because I am typically surrounded by my four children with hubby working late quite often. You have inspired me to get with it and build! Thanks!
DIY Playroom S… (not verified)
Mon, 11/15/2010 - 01:22
[...] find rolled out of the
[...] find rolled out of the house early afternoon with the printed out plans in hand. (Early birds, we are…not) Got over to the Holmes Depot. Yes, I just did write Holmes Depot. [...]
Kim (not verified)
Tue, 11/30/2010 - 05:13
I'm looking to make this, but
I'm looking to make this, but don't see the diagram. Any advice?
Tasha (not verified)
Wed, 12/01/2010 - 06:53
Thank you so much for the
Thank you so much for the plans!! I made two of these for toy storage in less than a day, using just my jigsaw and supplies (wood, glue, screws). Mommy needs a plug-in circular saw!!

Ana White (not verified)
Wed, 12/01/2010 - 19:41
Tasha, I LOVE your bookcases!
Tasha, I LOVE your bookcases! Also, love the 8 Merry Feet too!
Michael (not verified)
Thu, 12/23/2010 - 12:05
My first plans from your
My first plans from your site. Took me about six hours to cut and assemble. Birch 3/4" plywood, thin 1/4" Lauan plywood for the backing and aspen 1x3's. Had to do a lot of the work outside in the snow (it's winter here in Minnesota!). Final sanding and staining will have to wait for spring. That wood is beautiful to paint...
Thanks for the great plans and the inspirational site.

Michael (not verified)
Thu, 12/23/2010 - 15:01
Meant to say "that wood is
Meant to say "that wood is TOO beautiful to paint".
Lady Goats
Tue, 03/22/2011 - 17:48
WOW! You used my photo!
I'm flattered!!
Wifey
Sun, 03/16/2014 - 17:19
I've been looking for these forEVER!
I found these for sale on another website and have had them saved on my computer for like 2 years. I just can't justify $400 for shelves! I found this plan today and can't wait to get started! Finally a place to store all those dang stuffed animals. I've forbidden grandparents, from the birth of my first, from buying stuffed animals for my kids. We still have over a garbage bag full. :/