

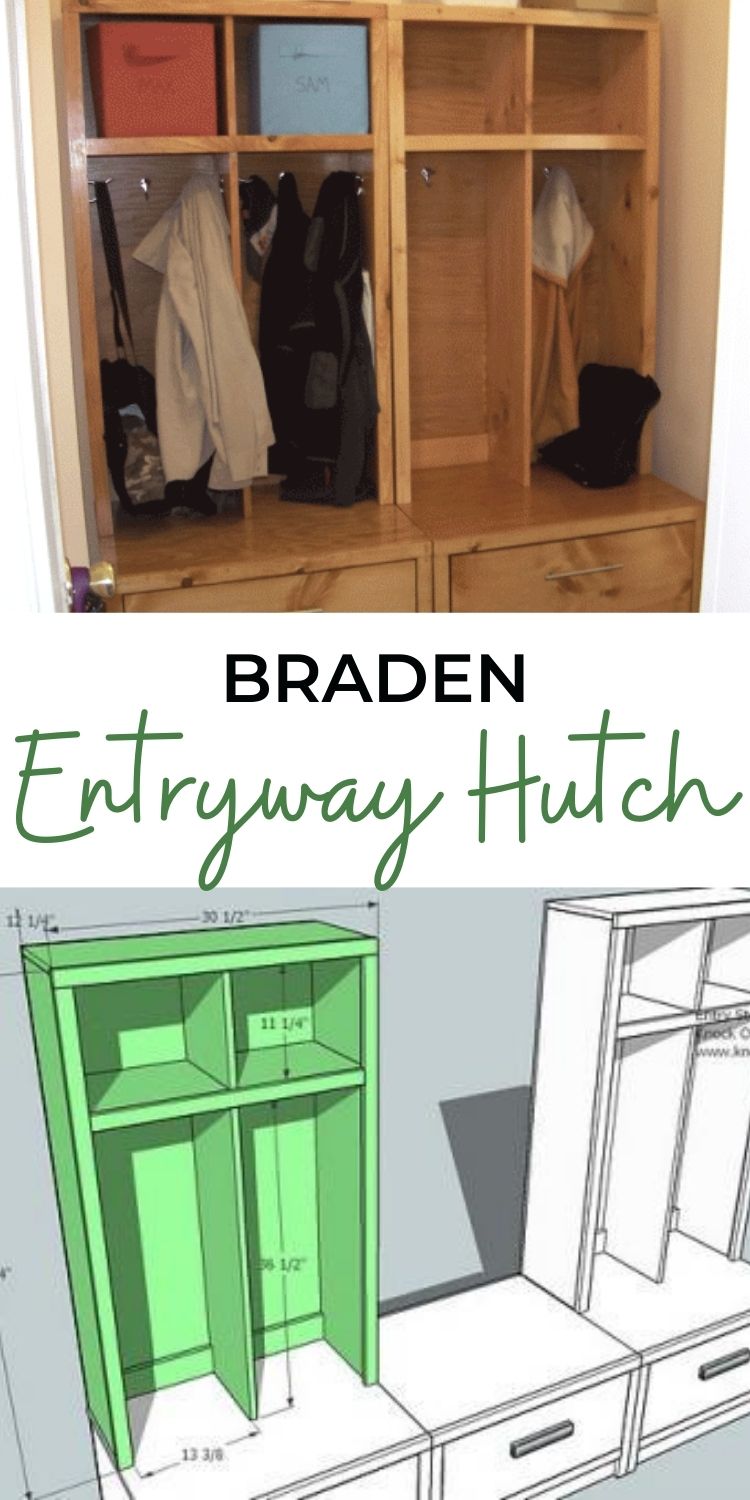
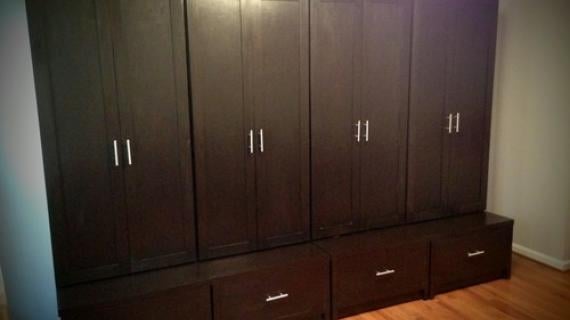
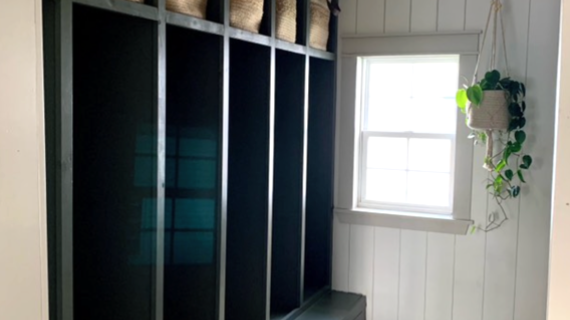
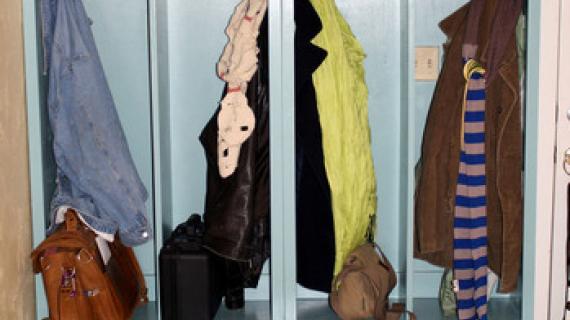
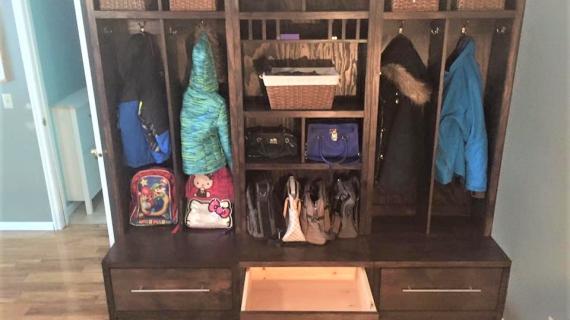
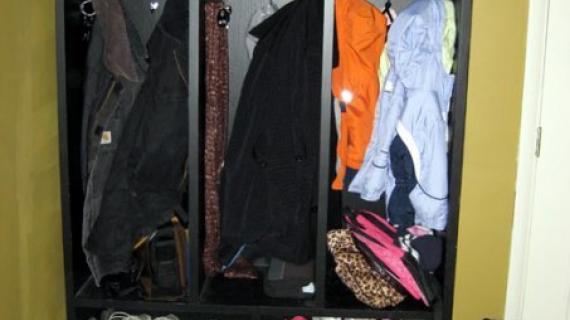
Part of our Braden Entryway Collection, this hutch plan can tidy up the busiest room in your home - the mudroom. Featuring two cubbies sized for bins or mittens and mail and keys, and two lockers for hooks, the hutch sits on top of the bench. Style and function marries up in this reader photo.
Pin For Later!
Preparation
- 3 - 1x12 @ 8 feet long
- 2 - 1x2 @ 8 feet long
- 1 - 1x4 @ 30" long
- 1/4" plywood for the back
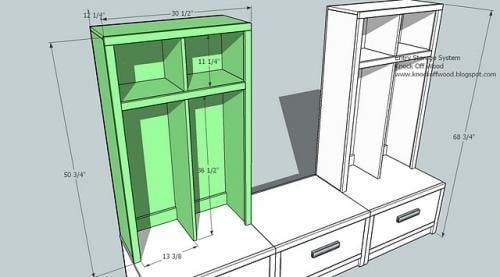
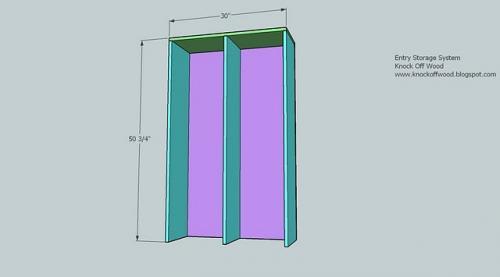
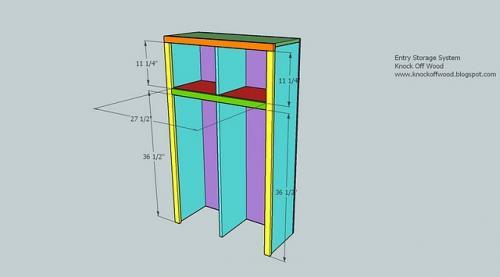
- A) 1 – 1×12 @ 30″ (Top, Shown in Green)
- B) 3 – 1×12 @ 50″ (Sides, Middle, shown in Turquoise)
- C) 1 – 1/4″ to 1/2″ plywood @ 30″ x 50 3/4″ (Back, shown in purple)
- D) 2 – 1×12 @ 13 7/8″ (Bottom of Top Cubbies, shown in red)
- E) 1 – 1×2 @ 30 1/2″ (Top Trim, Orange)
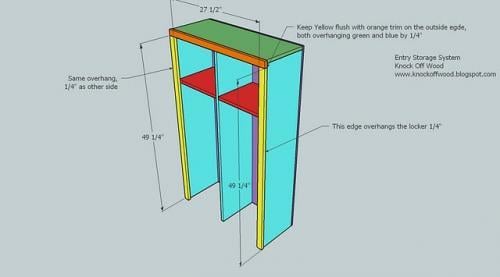
- F) 2 – 1×2 @ 49 1/4″ (Side Trim, Yellow)
- G) 1 – 1×2 @ 27 1/2″ (Shelf Trim, Green)
- H) 2 – 1×4 @ 13 7/8″ (Bottom Supports, Blue)


Instructions
Step 1
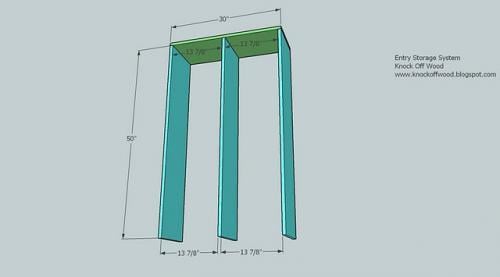
Begin by using nails and glue to nail through the top, shown in green, into the top edges of the sides and middle, shown in Turquoise above. Use the above measurements to guide you. Use 2″ nails.
Step 2
Square up the locker. See the HOW-TO section for a video on checking for square. Then glue and nail the plywood to the back of the locker. Make sure you nail into all the Sides, Middle, and Top boards. Use 1 1/4″ nails.
Step 3
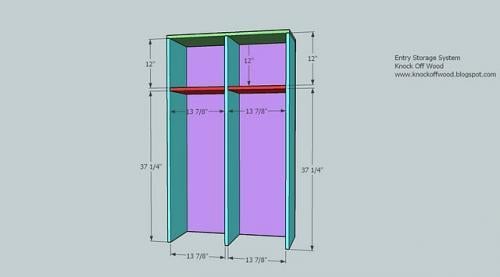
Use the measurements above to guide you as you fasten D, shown in red above, in place. Nail at an angle (toenail) through the face of D into the the middle board. Then nail at an angle from the middle board into the side edges of D. Use 2″ nails and glue. Also nail through the back into the back edge of D.
Step 4
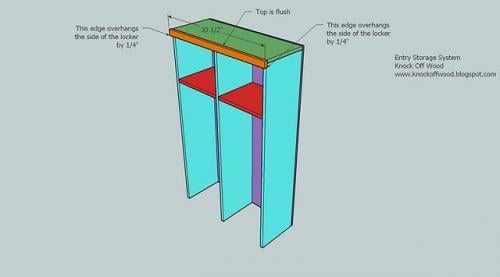
Use 2″ nails and glue to fasten the top trim in place. Follow the instructions in the diagram to center the top trim on the locker, end edges overhanging 1/4″ on each side.
Step 5
Step 6
Add the shelf trim, shown in green above, using 2″ nails and glue. The above diagram shows the measurements. Keep the top edges flush. Make sure you nail through the face of the green board into both the edges of the turquoise and red boards above.
Step 7
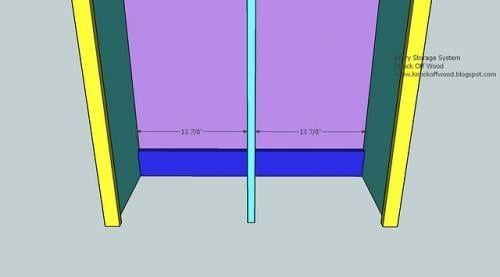
Fasten the blue boards above, the bottoms supports, in place, using glue and 2″ nails. Nail through the sides into the end edges. Also nail from the supports in to the center board, shown in turquoise, at an angle. Then use 1″ nails to fasten the plywood to the supports (shown in blue).

Comments
Alexis (not verified)
Fri, 01/08/2010 - 06:08
Oh my word!!!! Thank you
Oh my word!!!! Thank you Thank you Thank you!!!!!!!!! If it wasn't the dead of winter, I'd be building this right now.
Jaime (not verified)
Mon, 03/01/2010 - 05:15
Hi Ana. I can't wait to
Hi Ana. I can't wait to build this. Any idea how much this project costs?
Becky (not verified)
Tue, 04/13/2010 - 10:59
Thank you so much for the
Thank you so much for the wonderful plans. Do you attach the locker to the drawer?
teamstan (not verified)
Fri, 09/10/2010 - 17:32
Yes, I was curious how one
Yes, I was curious how one attaches the locker to the drawer? Do you need to nail it to the top of the drawer before you put on the back? Thanks!
Katie (not verified)
Mon, 01/24/2011 - 17:53
How do you attach the locker
How do you attach the locker to the drawer? Also, do you recommend securing the locker to the wall? Thanks!
Renee H (not verified)
Fri, 03/25/2011 - 13:51
Attaching the Locker
I am also one who would like to know how you attach (or if you even do) the locker to the base....
JES
Fri, 03/25/2011 - 14:10
Found the post - Attaching the locker
Ana's 'Entryway Mail Sort and Charging Hutch" project plan has some instructions on how to do this with a metal bracket (simpson strong tie) or anti-tip kit (Ana's response from 1/10/11 - the very last response at the bottom). She gives detailed instructions in that post on how to attach the top to the base.
Cheers!
Jeff (not verified)
Sat, 09/22/2012 - 18:39
Bigger Sketchup Screen Shots?
Ana, this is just what I am looking for. However, the screen shots from your Sketch up is way to small to see the dimensions. Anyway we can get a better view?
christinecondon
Sat, 10/12/2013 - 08:36
bench plans....
Love this and we want to make it, but all I see here are plans for the hutch.... where can I find pland for the bench as well?