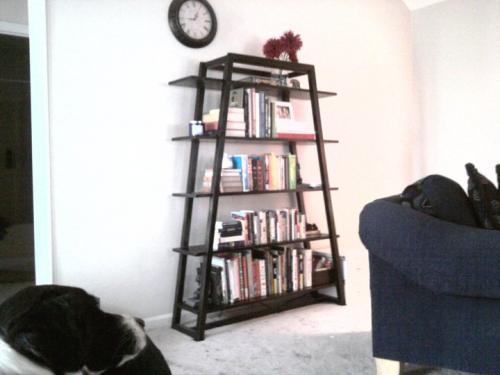


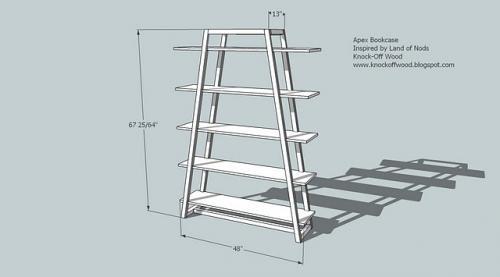
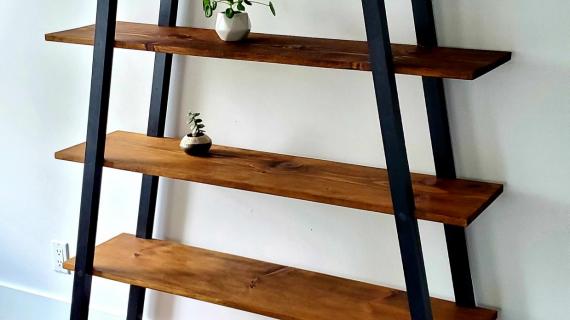
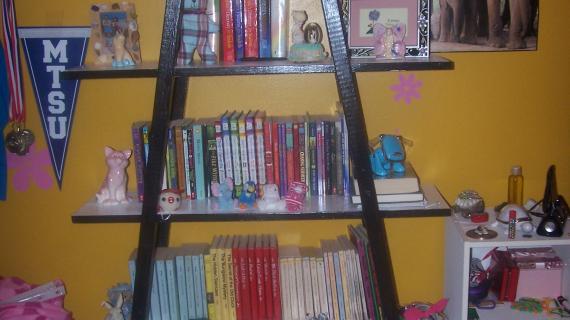
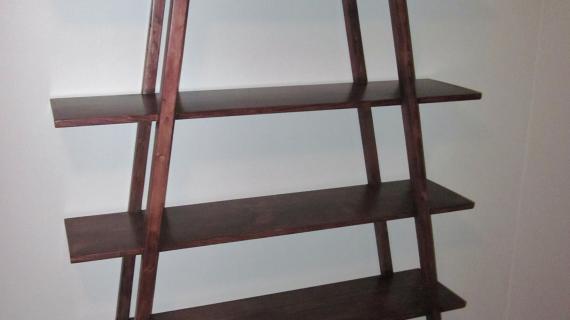
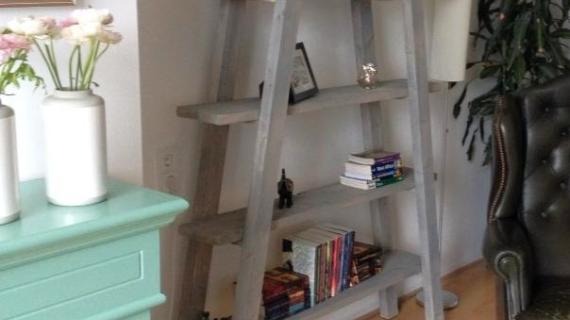
A functional modern work of art. Featuring five shelves, each 48" long, and angled sides, this bookshelf has plenty of room to store books, baskets and bins, office supplies, or any other decorative storage. This bookshelf is a more advanced project, so please, do not attempt as first project. Matching Z Tower Plans also available online. Special thanks to Sheri for sharing her photo.
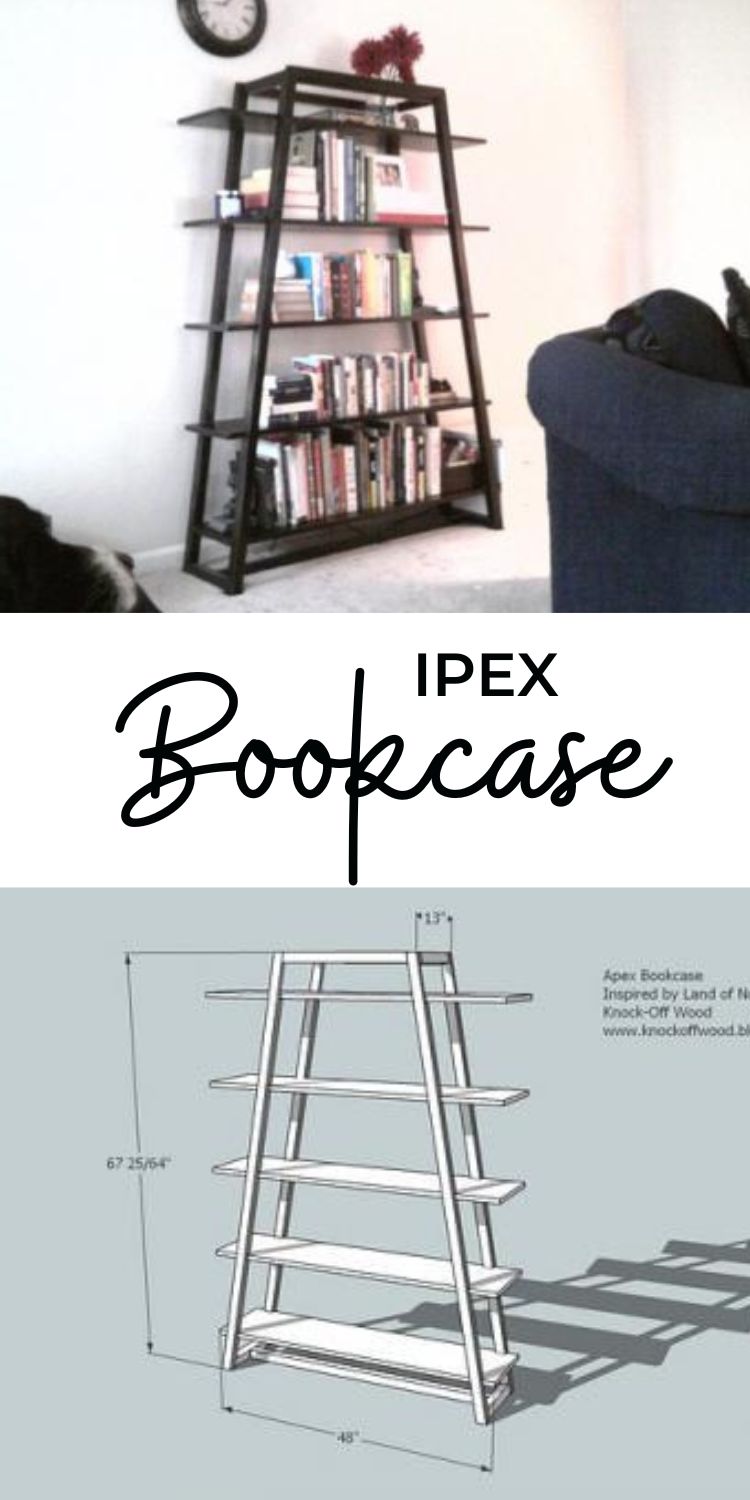
Pin For Later!
Preparation
3 - 1x12 @ 8 feet long 1 - 1x12 @ 4 feet long 9 - 1x2 @ 8 feet long 1 - 2x2 @ 8 feet long
4 - 1x2 @ 68 1/2" (Sides) 4 – 1×2 @ 6″ (Bottom Trim-both ends at 10 degrees parallel to each other) 16 – 1×2 @ 13 1/8″ (Trim Between Shelves-both ends at 10 degrees parallel to each other) 4 – 1×2 @ 4 1/2″ (Top Trim - both ends at 10 degrees parallel) 5 - 1×12 @ 48″ 2 - 1x2 @ 22 1/2" short point to short point, ends at 10 degrees NOT parallel to each other 2 - 1x2 @ 19 1/2" short point to short point, ends at 10 degrees NOT parallel to each other 4 – 2×2 @ 10″ 1 - 2x2 @ 43 1/4″ short point to short point
Because of the angles on this bookcase, I recommend cutting boards as you go. This set of instructions differs from my traditional method because of the uniqueness of this plan. You will find a cutting instructions under diagrams.


Instructions
Step 1

LEGS: First cut you outler leg trim at 68 1/2 from a 1×2 board. Not that you will cut the legs at a 10 degree angle on both ends. You will need four of the outer leg trim pieces (shown in red above).
Then cut the inner leg trim pieces, at 10 degree angles, overall dimensions listed above. You will need:
4 – 1×2 @ 6″ (Bottom Trim)
16 – 1×2 @ 13 1/8″ (Trim Between Shelves)
4 – 1×2 @ 4 1/2″ (Top Trim)
Cut both ends at 10 degrees as shown above.
Step 2

SPACERS: Nail the inner leg trim pieces to the outer leg trim piece, as shown above. Leave a 3/4″ gap between all boards, resulting in slightly over 1 1/2″ gap at the top. Use glue and 1 1/4″ nails.
Step 3
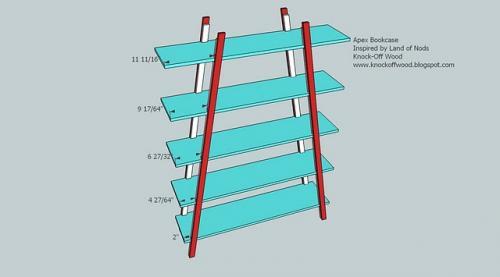
SHELVES: Cut 5 - 1×12 @ 48″ (you can cut the shelves slightly smaller to get two shelves out of 1 eight foot long board). Fit the shelves in the gaps left between the inside leg trim pieces. Use the measurements above to help guid you centering the shelves on the legs.
Nail the shelves in place using 2″ nails and glue, through the outer legs into the shelves.
Step 4

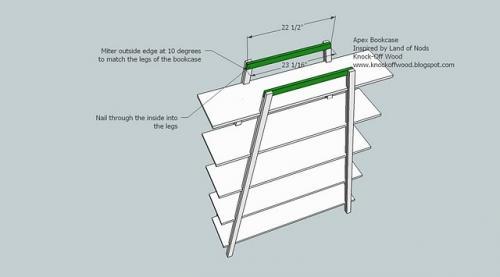
INSIDE TOPS: Measure the distance between the top two legs and cut from a 1×2, both ends mitered at 10 degrees, 2 boards approximately 23″ long, 22 1/2″ on the short point to short point measurement. Nail in place using the 1 1/4″ nails and glue.
Step 5
Step 6

TOPS: Cut 2 – 2×2 @ 10″ and predrill from the outside of the legs into the ends of the 2×2. Keep the outside edges flush.
Step 7

Leg Bases: Cut 2 more 2x2s @ 10″, and predrill and screw in place, as shown above. Keep the inside edge flush, lining up the bottom inside corner of the 2×2 with the bottom inside edge of the legs.
Step 8
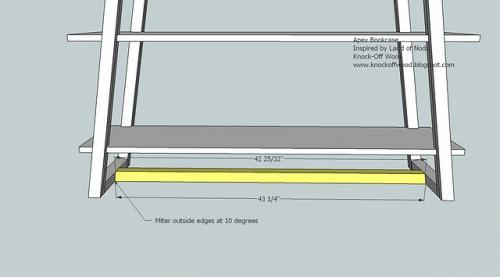
Measure from the midpoint of the 2 boards from step 7 and cut a stretcher, approximately 43 1/4″ short point to short point, from a 2×2. The ends are mitered at 10 degrees. Predrill and use screws to fasten.

Comments
Anonymous (not verified)
Thu, 02/11/2010 - 10:05
So this book case is cool but
So this book case is cool but what about the other one that is on the wall left of this one? I have been looking for plans to something like it but haven't found any.
Clara Duarte (not verified)
Wed, 02/17/2010 - 15:50
I love the Apex, but I wanted
I love the Apex, but I wanted to make a leaning bookcase too. I found this at Crate and Barrel http://www.crateandbarrel.com/family.aspx?c=1141&f=14503. The whole system is awesome.
Sheri (not verified)
Mon, 10/04/2010 - 06:24
I confess that my fiance
I confess that my fiance actually made this, not me. But I finished and styled it... and we love it!
Ana White (not verified)
Mon, 10/04/2010 - 06:27
Sheri, thanks so much for
Sheri, thanks so much for adding! I love this! Remarkable, and so perfect for you colors scheme too!
DIY Truss Book… (not verified)
Tue, 10/05/2010 - 18:56
[...] After Sheri shared this
[...] After Sheri shared this amazing photo of her Ipex Bookshelf [...]
Sylvia (not verified)
Thu, 08/11/2011 - 19:53
Love It
We saw this and loved it for my almost 11 year old's room. Since it was a bedroom and space is at a premium my husband modified it to be 36 wide rather than 48. I came up with the painting scheme as she is into black and white/zebra.