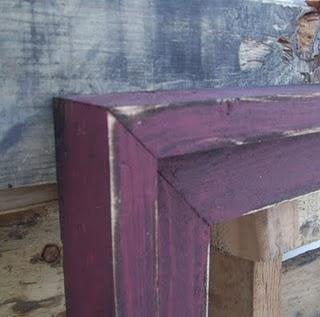


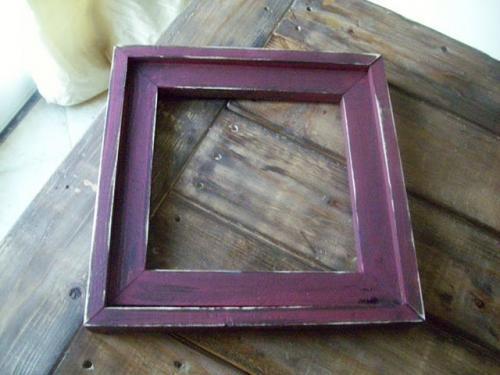
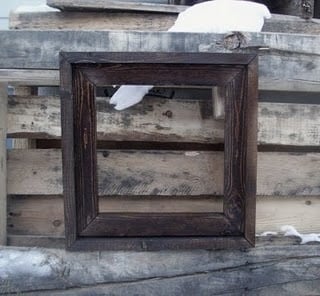
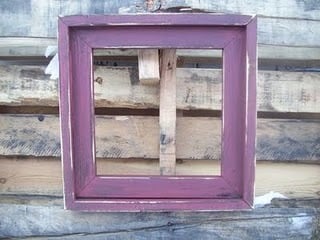
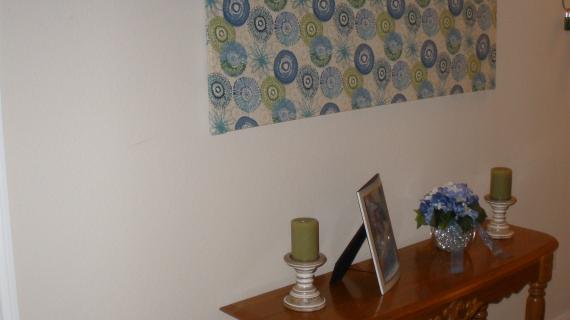
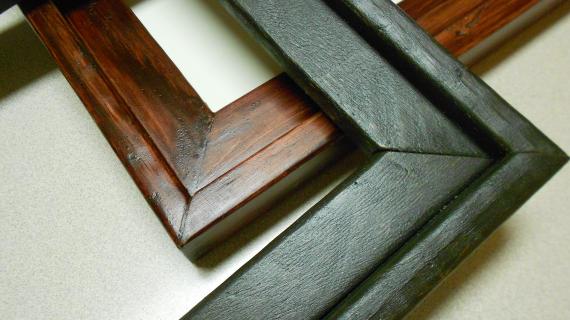
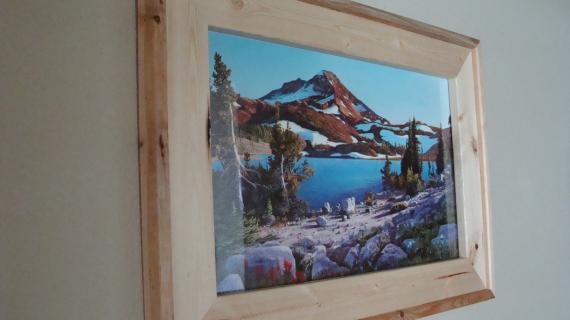
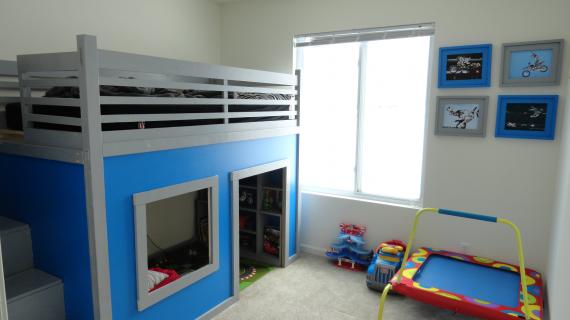
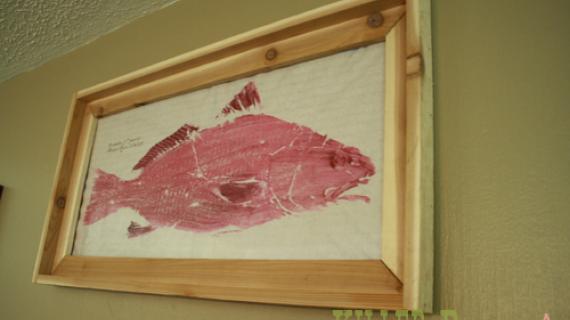
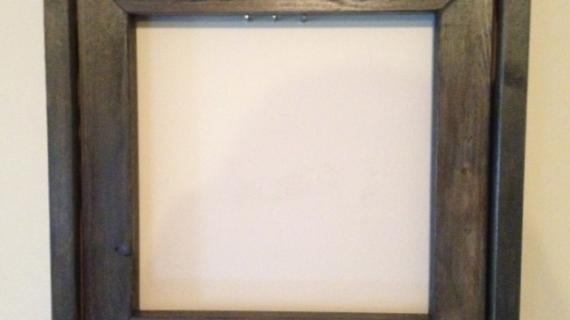
For those of you not needing toys and kids stuff, don’t give up on me! Here is a cheap and easy, but sure to be cherished gift idea for adults. Shopping for some fabric, I noticed an empty frame retailing for $99 for a 24”x36”. Labeled as the “Barnwood” Frame, I was shocked at the markup. It seems the more simple something is, the more we are willing to pay for it. Now I know what a couple of rustic 1x2s cost – $1.50 to be exact. I’m not certain what 16 nails cost, or the tiny bit of weathered wood stain, but it doesn’t total up to $99. So the next morning, in my bathrobe with my daughter still sleeping, in 10 minutes, I used exactly one 1×2 (75 cents) to build this frame – a 12”x12” size:

Pin For Later!

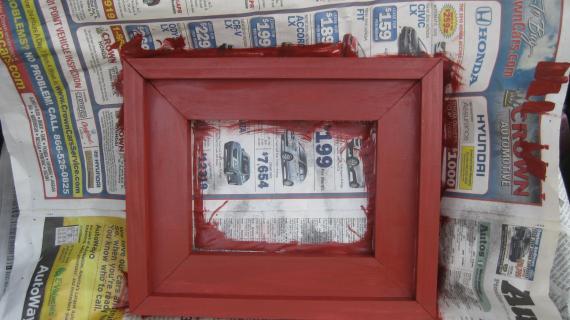
Preparation
1x2s
4 – 1x2s @ 12, 1 1/2″ flat side mitered so the shortest length is 9″ 4 – 1x2s @ 13 1/2″, edge side mitered so the shortest length is 12″


Instructions
Step 1
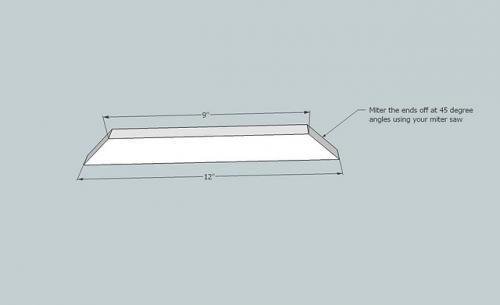
Start by mitering the 12″ pieces, as shown above, at a 45 degree angle.
Step 2
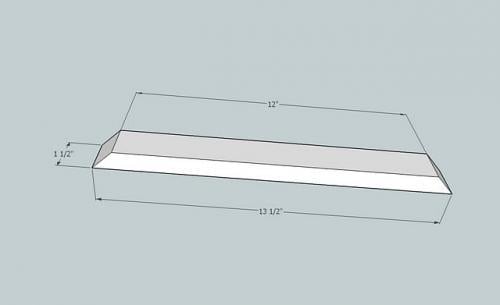
Then do your 13 1/2″ pieces.
Step 3
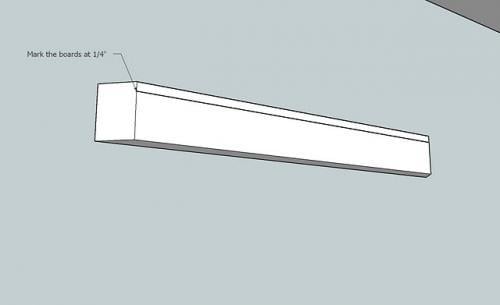
Mark your 13 1/2″ pieces as shown above.
Step 4

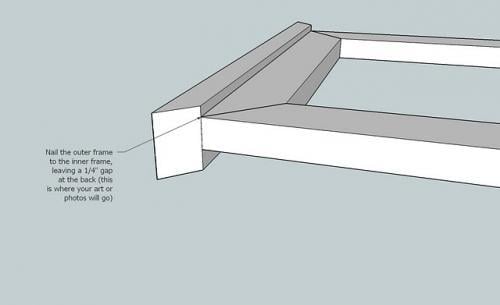
Back to the 12″ pieces. Nail through the corners into the perpendicular board, as shown above. Do this on all corners to make the inside frame.
Step 5
Step 6
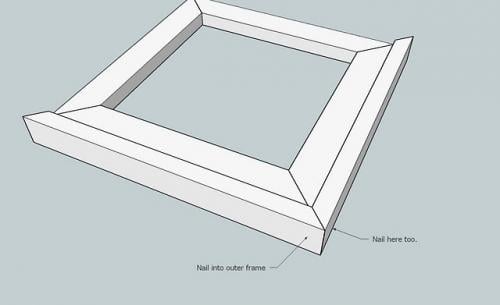
Nail the corners like we did in step 4. Also, make sure you nail the outer frame to the inner frame.
Step 7
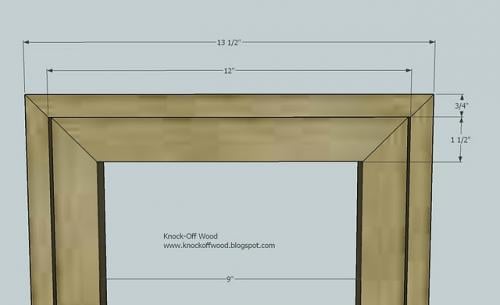
Here are some measurements to guide you.


Comments
Maria Stahl (not verified)
Thu, 12/03/2009 - 03:53
Ana, this is so pretty. Is
Ana, this is so pretty. Is there any reason why one shouldn't glue the pieces together as well as nailing? Seems like it would be much more stable over time. Hanging a frame puts quite a bit of strain on the parts. (I'm always having to glue old frames back together.)
Ana White (not verified)
Thu, 12/03/2009 - 09:28
Yes, I should write a "unless
Yes, I should write a "unless otherwise stated, glue, glue, glue . . ." because I glue everything! Thanks for making note of this - much appreciated!
beth (not verified)
Thu, 01/21/2010 - 15:36
Hi Ana. We built a frame for
Hi Ana. We built a frame for our son's large poster today using these plans, and it turned out great! Thanks so much once again. Can't wait to try the next project!
lanisanford (not verified)
Wed, 04/07/2010 - 14:18
Any tips on getting glass
Any tips on getting glass into these? Say I am wanting to build a frame to fit 8x10 glass, the only way I can see to make the glass stay in without a table saw or router is to make the outside of the inner frame measure 8x10 but then your viewing area is 6 1/2" x 4 1/2" am I missing something?
bononers (not verified)
Mon, 09/06/2010 - 10:27
just found your site today
just found your site today and spent SO much time bookmarking projects for the future! i found a collage of old worn frames this past weekend but my wallet wasn't even negotiating that purchase. i've been brainstorming how to make my own and finding this page was extremely timely and perftect!
i'm echoing the earlier question: how do we put glass in it?
Sharon Lambirth (not verified)
Wed, 12/08/2010 - 15:40
use glazing points. make the
use glazing points. make the frame opening the size you want, then install the glass in the back using glazing points or something similar. then cover with a piece of cardboard or craft paper.
Sharon Lambirth (not verified)
Wed, 12/08/2010 - 15:45
You make the inside
You make the inside measurements just a hair smaller than the 8x10, the glass would be placed on the back and should hold in fine with glazing points or similar.
Anthony Clarke (not verified)
Wed, 12/29/2010 - 11:17
Looking to build a mirror for
Looking to build a mirror for the bath room with this frame layout. Worried about the solid strength of the joints to hold a mirror roughly 3 x 3 feet. What are your thoughts? Of course I will glue every seem and brad nail all connections but do you think this will suffice to throw a mirror into it? Or do you have plans to build a frame for a mirror? Thankyou for your professional website and easy to follow plans.
Bathroom Remod… (not verified)
Fri, 01/07/2011 - 08:09
[...] frame hung from above
[...] frame hung from above the mirror to hold our hand towel. I made it using palette boards and Ana White’s [...]
Pam Allen (not verified)
Mon, 01/24/2011 - 07:24
Ana, Your blog is my everyday
Ana, Your blog is my everyday gift to myself. I have looked over your plans so many times, I almost know them by heart. So far I have made your tower shelves, easy rustic bench and picture frame(barn wood) shown on this page. Please don't make this blog a stresser for yourself, we would miss you so much if you quit. Relax, enjoy, we do. Love ya, Pam
arminda (not verified)
Wed, 03/30/2011 - 06:52
memo board
I just made this frame and am using it for a cute memo board in our laundry room. This project was super easy and now that I've made this one, my mind is spinning with so many other ways to use this style frame in my home. Thank you so much for this site!!! I LOVE it!!
http://allthatriffraff.blogspot.com/2011/03/my-barnwood-frame-memo-boar…
Lindsay (not verified)
Mon, 05/09/2011 - 06:39
Sizes
I am trying to make frames in the common sizes, 8x10, 5x7 and 11x13. What length woods will I need? I am afraid to do this....this is my first project. :)
Guest (not verified)
Thu, 08/04/2011 - 22:23
reply to sizes
Someone correct me if I'm wrong in this, but I think the rule of thumb is to take the length you want to the side to be and add twice the width of the wood. So if your wood pieces are 1 inch wide, and you want the opening to be 8x10 (for example), start with two 10" pieces and two 12" pieces, all mitered down at 45 degree angles on the ends to 8" and 10" respectively, to make the inner square. Work backwards to find the lengths of the outer part (measure your square you've built and apply the same logic to find the lengths needed). Assemble following the plan directions here.
Guest (not verified)
Mon, 11/21/2011 - 19:24
Hi Ana, I love your site and
Hi Ana, I love your site and feel so grateful to your sharing of many wonderful plans. Just have a question about this one. Maybe I am missing something here, but I am having a hard time nailing the edges together. I just can seem to find an effective way to hold onto the two pieces of wood and then nail them together. Any suggestions for an amateur???
Thanks, Shanda
In reply to Hi Ana, I love your site and by Guest (not verified)
Tara Kirkland
Sun, 12/25/2011 - 19:29
Nailing Corners
Were you able to find a good solution for this? I am planning on trying these tomorrow, and I'm not sure how to hold the two pieces together while nailing.
Guest (not verified)
Mon, 12/26/2011 - 01:25
I ended up gluing and
I ended up gluing and clamping the corners, and that was ok. Also thinking that maybe drilling small pilot holes first might help. Or really if u just had someone who could hold the pieces together while you put in the nails would be good too. Good luck!
lkuchinskas
Tue, 12/13/2011 - 15:34
Reclaimed window frame
I'm thinking of using this plan to make a reclaimed-looking "window frame" with trim in the middle to make the "panes", but I'm not sure how to attach the trim. I think it might be too small to use a Kreg jig on, and without glass or a mirror to glue the trim to, I'm not sure how to attach it. Any thoughts? I figured you might like the primitive look it gives when hanging on a wall if you'd like to make plans...pretty please?????
AML (not verified)
Thu, 01/19/2012 - 05:27
Lovely Frames
I love these barn wood frames of yours. Using reclaimed materials is great, instead of wasting it, right?
Bradske (not verified)
Thu, 02/16/2012 - 10:07
Advice
I tried to put this together without a nail gun...virtually impossible. The forces required to hammer a nail into these small pieces destroys the miters and still fails to get the nails all the way in. Tried 1" angle irons and the screws split the wood. Guess I'll try a new method that I can Kreg or get a nail gun.
In reply to Advice by Bradske (not verified)
windjamer812
Thu, 03/22/2012 - 23:39
Pilot holes
I have found that by drilling pilot holes using a 1/16" inch bit makes driving finish nails much easier. The bits are very inexpensive and even come with an attachment that fits directly into a cordless screwdriver. I hope that helps.
Skydreamer (not verified)
Thu, 06/07/2012 - 12:57
tools
I am new to this. I am just getting into making items and am going to start with the laundry dresser but this caught my eye as I need a frame and i am having difficulty finding one that will fit what I am trying to do and especially not break the bank. I don't have a miter saw though I recently acquired a table saw and a router. I have a circular saw as well. Am I able to use any of that in place of the miter saw?
jenn at asimplehaven
Wed, 01/30/2013 - 05:06
Barnwood Frame
Love this frame! I made it for a 20 x 32" map of the world. Through some trial and error, I figured out some formulas to make it for whatever size you need.
http://www.asimplehaven.com/jillian-michaels-meets-ana-white-bargain-cu…