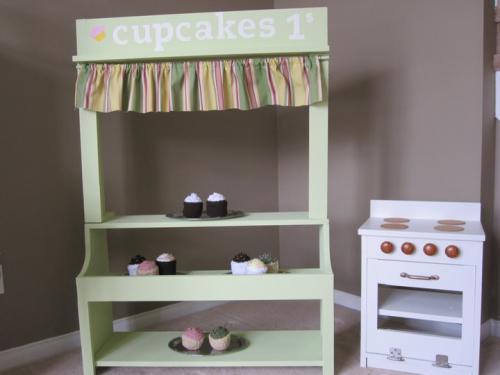


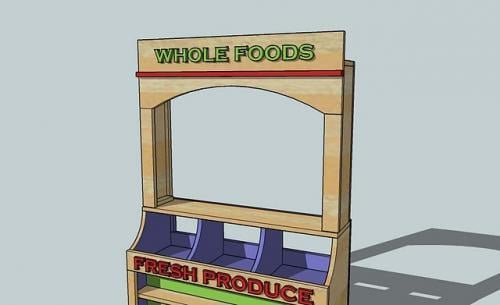
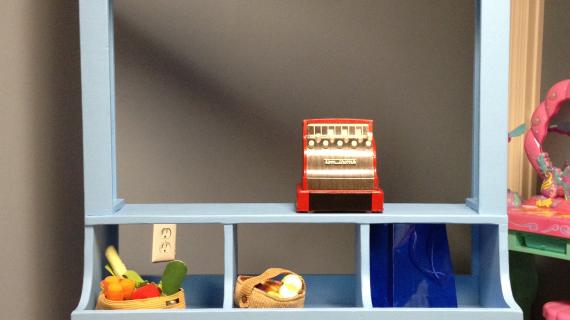
From Lindsay, this hutch is so many time cuter than the one I built! Originally designed for a Grocery Store, as Lindsay demonstrates, this hutch can be used for tons of other pretend play ideas as well!
While the original plan call for an arched top, I love how Lindsay simplified the design by adding a simple curtain.
Preparation
2 - 1x6 @ 8 feet long
2 - 1x2 @ 8 feet long
1 - 1x3 @ 8 feet long
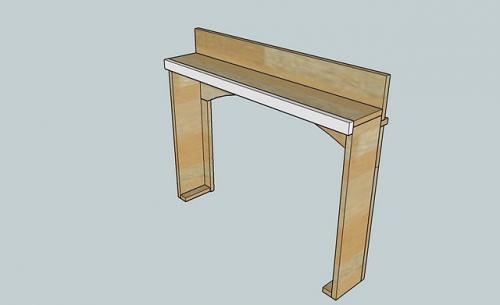
A) 2 – 1×6 @ 24 3/4″ (Sides)
B) 1 – 1×6 @ 36″ (Top)
C) 2 – 1×2 @ 5 1/2″ (Supports to attach to the base unit)
D) 1 – 1×6 @ 36″ (Sign Header)
E) 1 – 1×2 @ 36″ (Header Trim Piece)
F) 1 – 1×6 @ 36″, Arch Cutout (Header)
G) 2 – 1×3 @ 17 3/4″ (Front Sides Trim)
H) 1 – 1×2 @ 36″ (Back Top Trim)
I) 2 – 1×2 @ 24″ (Back Sides Trim)
Cut out all your boards first.


Instructions
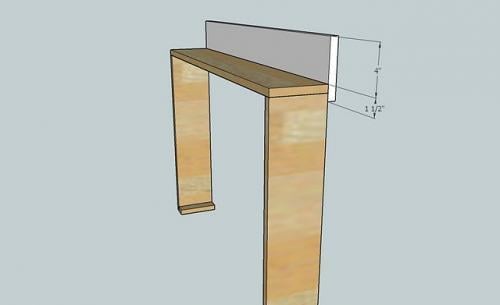
Step 1
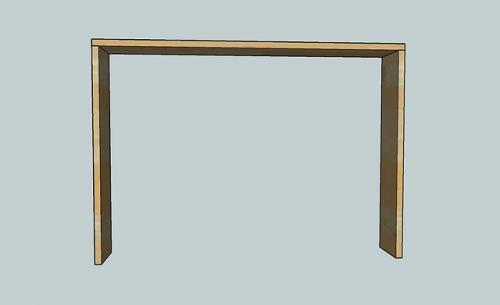
Start by “building the box” by nailing with 2″ nails and glue through the top of B into the end edges of A, to get the above diagram.
Step 2
Start by “building the box” by nailing with 2″ nails and glue through the top of B into the end edges of A, to get the above diagram.
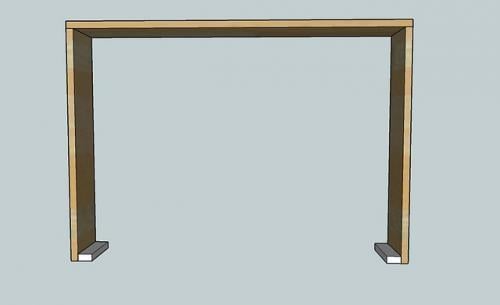
Step 3
Add the Sign Header, D, as shown above. Use 2″ nails and glue, and make sure you nail into both the top and the sides of the hutch.
Step 4
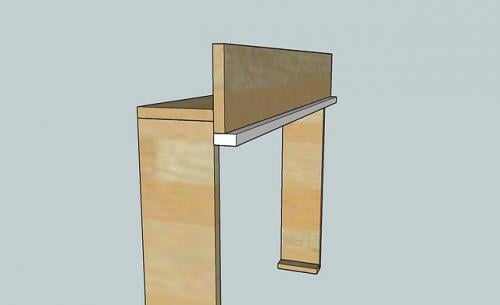
Nail through the bottom of the trim piece, E, shown above in white, into the header. Also nail through the front of E into the sides of the hutch. Use glue and 2″ nails.
Step 5
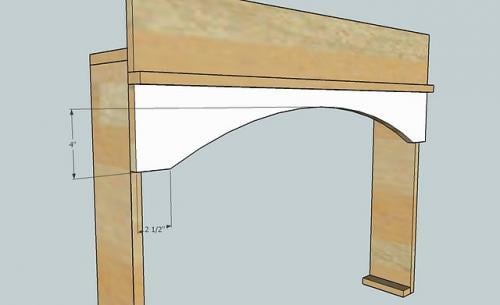
Step 6
Hardest part is done! Now add the front sides trim pieces, G, as shown above, Make sure you nail and glue into both the sides and the bottom supports, C.
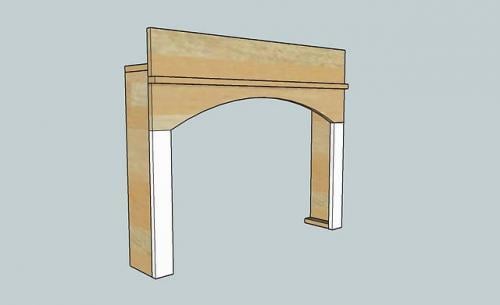
Step 7
Turn the cabinet over and nail and glue the back top trim piece, H, in place. Keep outside edges flush.
Step 8
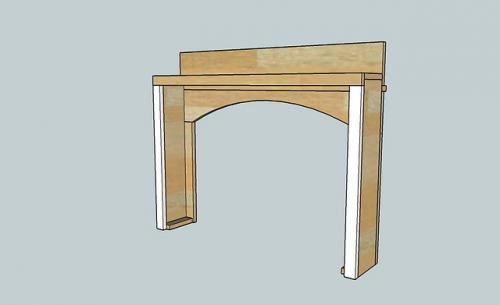
Then the side pieces, I, and you are done with the framing.
As always, fill nail holes with putty and sand and finish as desired. Make sure when you attach the hutch to the base that you use screws and screw through the supports into the top of the base unit.

Comments
Anonymous (not verified)
Tue, 12/01/2009 - 09:59
OMIGOSH! Ana, THANK YOU!! I
OMIGOSH! Ana, THANK YOU!! I appreciate you posting the grocery store plans - hopefully I can complete it for Christmas or soon after for my daughter. Thanks sooooo much for the prompt post! LOVE THE DESIGN!!
Anonymous (not verified)
Tue, 12/01/2009 - 10:32
Do you know where you can buy
Do you know where you can buy organic stain?
Do you cut out your own lettering for the town pieces, or buy ready-made? Do you have any cutting short-cuts for the small pieces like letters?
K in CA
Ana White (not verified)
Wed, 12/02/2009 - 08:42
K - I buy my letters ready
K - I buy my letters ready made. You can buy templates and use your router to cut out letter - but for me, I just don't have the time. For example, I could router out my letters and save $5, or I could build a bench or bookcase and save $300 in the same amount of time.
Ana White (not verified)
Wed, 12/02/2009 - 08:47
This site is very reasonable
This site is very reasonable for cutting letters, and other things, and can do tons of different fonts:
http://www.craftcuts.com/wooden-letters.asp
Another idea that would cost nothing is to engrave the names on the stools using a wood engraver (a very inexpensive tool). Just trace the name with stencils, and then hand engrave.
Ana White (not verified)
Wed, 12/02/2009 - 08:49
LOVE IT - Organic Soy Stain
LOVE IT - Organic Soy Stain and Sealer - http://www.healthyhome.com/products/1991/Timber-Soy-Interior-Exterior-N…
I say this as I drink my Soy Latte!
Anonymous (not verified)
Wed, 12/02/2009 - 11:55
Yippee! Thanks, Ana, for the
Yippee! Thanks, Ana, for the prompt posts about the letters and the stain! I told my mom what she and I would be working on for my daughter....now she's excited! Thanks SO much for the inspiration! Next thing we know, you'll have a BOOK deal in the works!!!
K in CA
JenP75 (not verified)
Wed, 12/02/2009 - 13:25
Or a HGTV SHOW!!!!! You
Or a HGTV SHOW!!!!! You should try out for Design Star! HGTV needs you!
Kimberly (not verified)
Tue, 08/10/2010 - 03:07
Thank you so much for these
Thank you so much for these plans, Ana! I never even thought of working with wood to build stuff, and this weekend I built the coffee/tea stand base and added this hutch... cut the wood, built it, sanded and painted in two days! BY MYSELF! Look out -- I feel a building frenzy coming on.
One note on the hutch: It might be because I don't know what I'm doing, but I attempted the jigsaw cutout below the sign... you have the cut starting at 2.5 inches in from each side. But then when I put it together, there are 1x3s for trim along the sides. So, the 2.5 inch-wide base on the arch didn't match up with the 3" support. Does that make sense?
Just wanted to let you know so you can modify the plans if needed. Thanks again for your awesome site, spending time designing this stuff and posting free plans for all of us to use! You make it all very approachable and simple. Next up: entryway storage lockers! I've been drooling over those Pottery Barn lockers for a few years now!
Jill Pauli (not verified)
Tue, 12/18/2012 - 09:18
DIY play store
Hi Ana,
I just thought I'd share the pretend store that I made for my daughter. It's a little different than yours because I needed it to sit on a tabletop.
http://www.snugglebuguniversity.blogspot.com/2012/12/repurposed-flower-…
Thank you so much for sharing plans! You are inspiring!
Jill Pauli (not verified)
Tue, 12/18/2012 - 09:21
Another play store
I made this play store for my daughter: http://snugglebuguniversity.blogspot.com/2012/12/pretend-store-preview…
It's a little different from yours because I needed mine to sit on my daughter's play kitchen...I didn't have room for a larger one!
Thank you so much for sharing your designs...You are inspiring!
Maxpayne
Sun, 10/25/2015 - 00:03
I too love the curtain idea.
I too love the curtain idea. It’s beautiful. Great work, Ana. This is something I can show my 16-year-old and hopefully have her try it out for fun. She’d love building it for my younger son, who is a first grader. http://www.qspray.com