


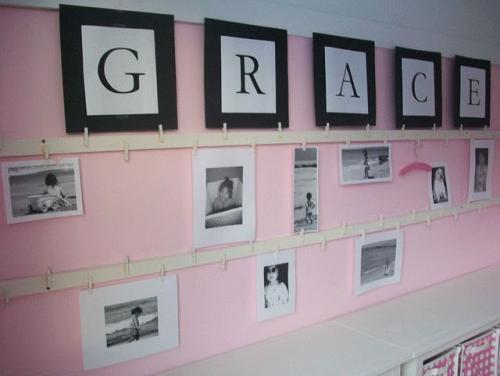
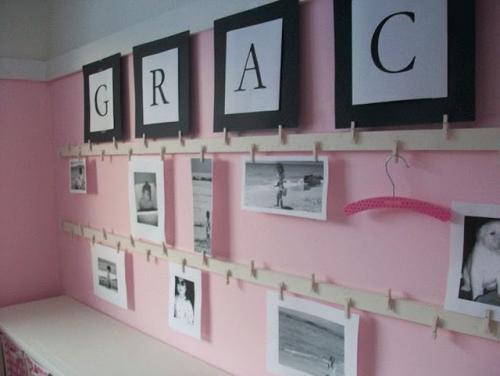
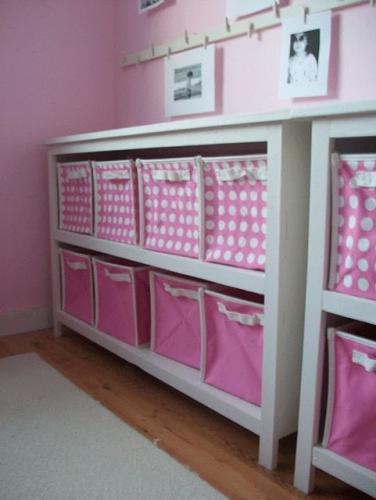
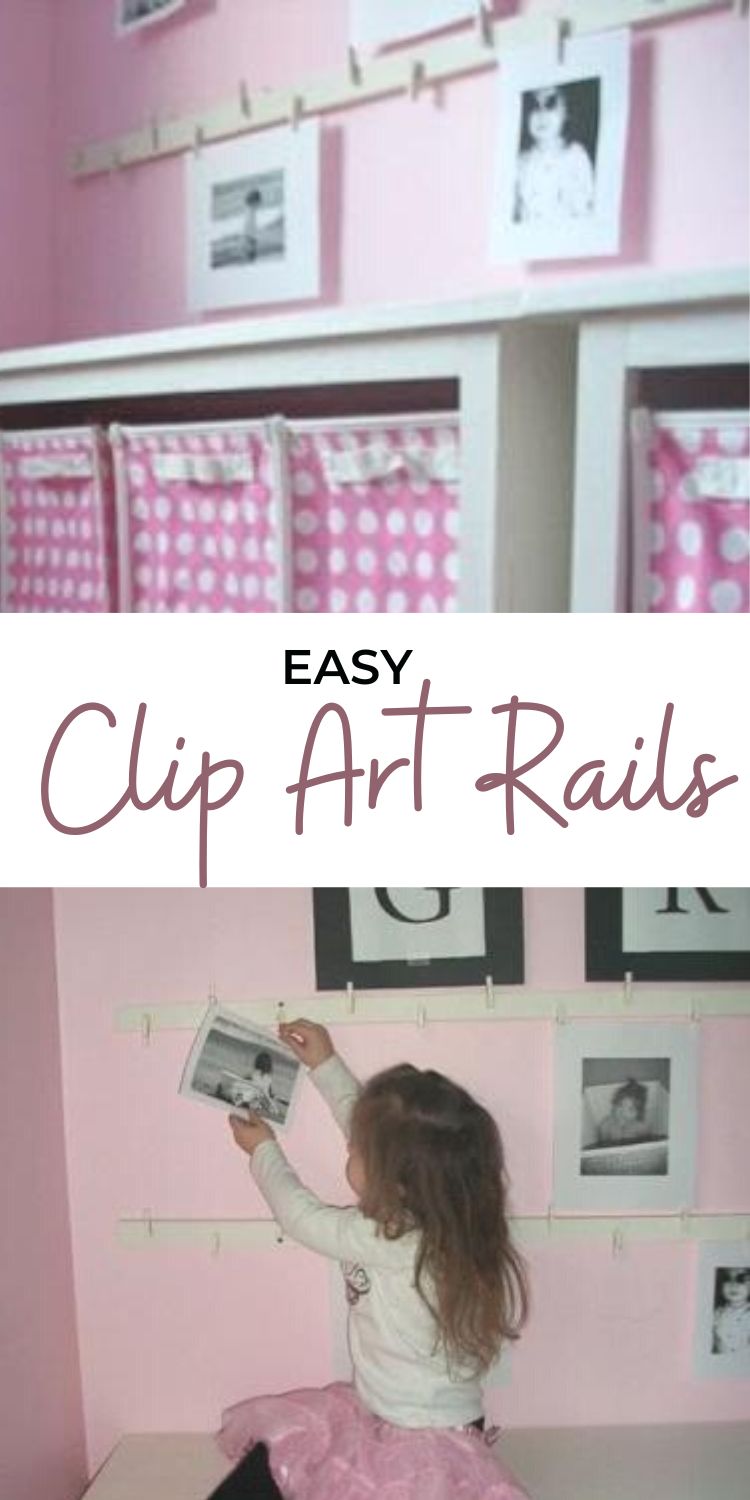
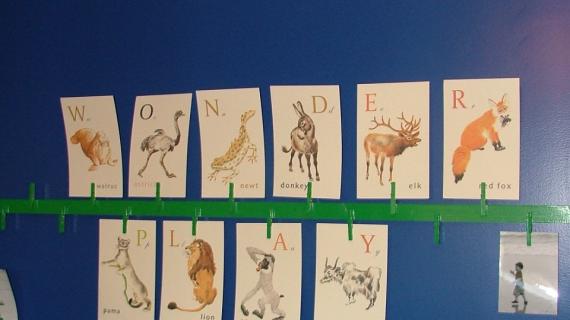
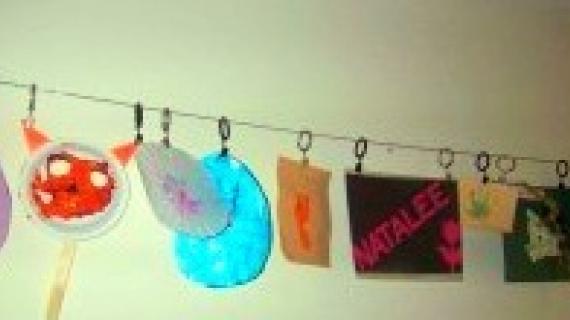
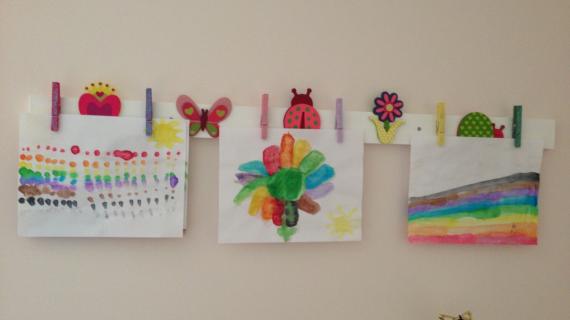
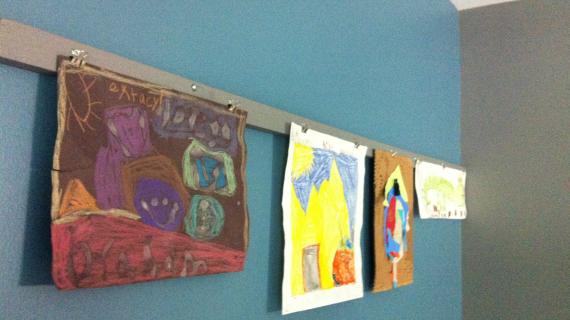
If you are looking for an inexpensive project to dress up a blank wall or a means to hang your child's artwork, look no further. These easy clip art rails are inexpensive and easy to build.
Pin For Later!
Preparation
2 – 1×2 pine or MDF strips, 8 feet long (I used firring strips from Lowes for 75 cents each) 2 – bags of small clothespins, 24 count each (bought mine at Joanns for $2.49 each) Glue (I used Elmers) Paint (I used Valspar Antique White Satin leftover from the bookcases. The fastest method would be to spraypaint) 4 screws or 4 Picture Hanging Brackets
You can cut your boards down to size, but it's not necessary.

Instructions
Step 1
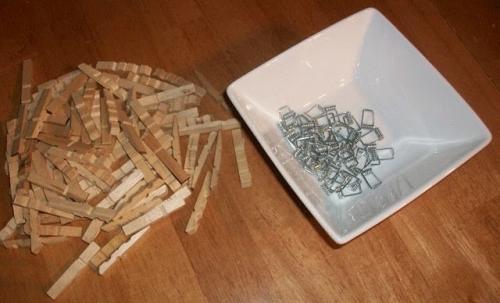
Remove the springs from the clothespins.
Step 2
Paint the wood part of the clothespins and the boards.
Step 3

Step 4

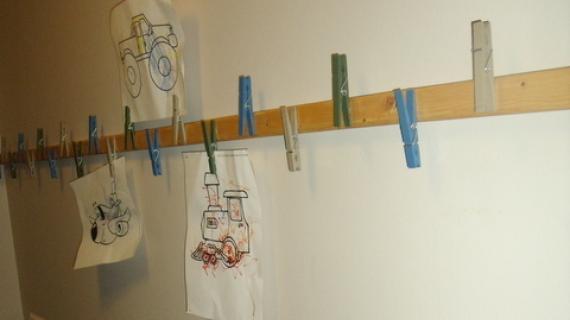
Reassemble the clothespins. Then glue the clothespins to the boards. I glued the clothespins ever 4″ starting 2″ from the ends. You can do this by marking the board at 2″, 6″, 10″, 14″, 18″, 22″ . . . and so on, every 4″ until the last mark at 94″. Alternate pins facing upwards and downwards.
Comments
odomamo (not verified)
Sat, 01/23/2010 - 07:25
I have done this and got trim
I have done this and got trim or chair rail and attached the sivler not clips to it. Get the white trim etc. and no need to paint and have it cut at the store.
odomamo (not verified)
Sat, 01/23/2010 - 07:26
Sorry that was supposed to
Sorry that was supposed to say silver clips.
Anne @ the doc… (not verified)
Sat, 01/23/2010 - 07:38
This is awesome :) I'm
This is awesome :) I'm totally making this for my craft room!! Thanks!!
Jen (not verified)
Sat, 01/23/2010 - 08:06
Great ideas! I love your
Great ideas! I love your blog. Have fun in Hawaii. We live on Maui and get our daily does of vitamin d every day!!! Thanks for visiting!
Melissa: Mothe… (not verified)
Sat, 01/23/2010 - 08:31
I love your blog! Great idea!
I love your blog! Great idea! I want one bad!
Maryann @ Dome… (not verified)
Sat, 01/23/2010 - 09:30
Aloha! Have a fab time!
Aloha! Have a fab time! Can't wait to make these for our bonus room.
Becky (not verified)
Sat, 01/23/2010 - 14:20
Oh, I saw this when you were
Oh, I saw this when you were a guest on UCreate. I LOVE IT!
Gail :) (not verified)
Sat, 01/23/2010 - 14:46
I just found your blog and I
I just found your blog and I am in LOVE!!!! I have been telling everyone I know about it! I am off to add a link to your blog from mine. You are so generous. I cannot wait to get building :)
Jeanette (not verified)
Sat, 01/23/2010 - 16:04
This is such a great idea. I
This is such a great idea. I am thinking about using this to keep my 'ideas' and 'projects' handy. Great idea.
Kerry (not verified)
Sat, 01/23/2010 - 16:57
Ha ha, 'vitamin DIY' - I love
Ha ha, 'vitamin DIY' - I love it! :)
I need my daily dose!!!
Hope you enjoy your trip!
The Faveros (not verified)
Sat, 01/23/2010 - 20:08
This is the first project
This is the first project idea you gave me that I made!! There is one in my daughters and my son's room!!
Elizabeth (not verified)
Sun, 01/24/2010 - 02:20
I am making this! I hope
I am making this! I hope today. My daughter has all sorts of papers that she brings home from school.
B (not verified)
Sun, 01/24/2010 - 12:51
I think I'm going to
I think I'm going to redecorate my whole house in Knock-Off Wood! I have an empty corner in my living room and lots of kid art to hang up; this would be perfect!
stef j. (not verified)
Sun, 01/24/2010 - 20:07
a. i love these clip-art
a. i love these clip-art rails!! SO doing it in my 3 1/2 yr. old's room.
b. which island are you coming to? we live on oahu and i do photography it you want more pics! {lame plug, i know)
c. have you ever considered doing modern style furniture?? i know you're more into "rustic", but i'd love some tips/pointers on the modern lines :)
cara (not verified)
Sun, 01/24/2010 - 21:01
THANK YOU FOR YOUR SITE!!!!
THANK YOU FOR YOUR SITE!!!! I have been drooling over it ever since I saw it on ohdeedoh a few weeks ago. Yaaaay, I am so excited to get some projects going...and it looks like you're from Alaska?? I'm in Anchorage, lived here a while, and HATE that everything costs more up here, OR that we have limited options. My husband and I are s-l-o-w-l-y updating/remodeling our 70's house (takes a while because we have 4 young kids, and we do all the work ourselves...) Anyway, have fun in Hawaii, love it there! We got to go in November :) Thanks again, Ana!!
JamesandKelsey (not verified)
Mon, 01/25/2010 - 09:18
that`s such a great idea!
that`s such a great idea!
Cottage Dreamers (not verified)
Tue, 01/26/2010 - 07:33
A friend introduced me to
A friend introduced me to your blog and I'm already addicted! I can't wait to get started on some of these projects. I'm so glad you're sharing with us!
Marissa (not verified)
Tue, 01/26/2010 - 08:49
Thank you so much!!! I am in
Thank you so much!!! I am in the process of organizing my scrap room, and these Clip Art Rails are fabulous!!! I am going to use them (with modification) for rubber stamps, across the top, and hanging embellishments.
Fabulous!!! now I know how to do it!
Melinda (not verified)
Thu, 02/04/2010 - 16:32
I love the clip art rails! I
I love the clip art rails! I might try hanging a set vertically.
Kate (not verified)
Tue, 04/20/2010 - 07:56
I found your blog via
I found your blog via facebook... a friend of mine is making the modern style farmhouse table and posted a link to your blog. I LOVE IT!! I made the clip-art rails today for both my girls' bedrooms. I think it is so important to showcase kids' work and this is an excellent way to do so!! Thank you!!!
Marygail (not verified)
Sat, 08/07/2010 - 20:10
So happy to have found your
So happy to have found your blog! This is going to be my very first project! It'll be for my kids rooms, and after I redo my craft space I'll do this project again. Can't wait :)
Robyn (not verified)
Fri, 09/03/2010 - 00:39
I wanted to make these for
I wanted to make these for our playroom, but I have two little ones (and hubby wants one more) so these will need to last a long time. Is the glue strong enough to last years of abuse or would it be better to nail/screw the clothespins on?
Ana White (not verified)
Fri, 09/03/2010 - 09:02
Robyn, mine are doing great!
Robyn, mine are doing great! However, I would suggest using a glue for finished surfaces if you plan to paint your clothespins first.
How to Build a… (not verified)
Mon, 09/06/2010 - 18:57
[...] A new bed that would
[...] A new bed that would essentially remodel here entire room? Yep, it would takeover this very wall. (plans for clip art rails) [...]
MarketGirl76 (not verified)
Mon, 11/08/2010 - 04:03
Made this in a few hours. I
Made this in a few hours. I installed three rails in my stairwell heading to the basement to display photos and art work from the kiddos. I used a hot glue gun to adhere the clothes pins and it seems to be working well. Good luck to everyone!
Just clip it «… (not verified)
Mon, 11/22/2010 - 14:05
[...] Tutorial for Easy Clip
[...] Tutorial for Easy Clip Art Rails — Ana White [...]
Amy Avaritt (not verified)
Fri, 12/03/2010 - 22:04
I'm so happy I found this
I'm so happy I found this website! You have provided an easy way for curious would-be builders to get over the fear of ignorance and jump into the project they have always dreamed of. This little clip art project rescued me! We draw names for Christmas and we are supposed to make something, but I'm the least crafty of the family and thought I would settle for giving a gift card. I know I can accomplish this project and build my confidence to move onto another! Thanks for empowering me!
Ana White (not verified)
Sun, 12/05/2010 - 20:42
Amy, welcome! Thanks for
Amy, welcome! Thanks for commenting, can't wait to see what you build! Ana
Christa (not verified)
Thu, 12/16/2010 - 18:47
Am I the only moron that is
Am I the only moron that is having a heck of a time putting the clothespins back together? It's a nightmare!
nikki_0823
Tue, 03/22/2011 - 11:33
Just Did This!!
I just finished hanging this up on my little one's wall! Super easy to do, looks great and is a nice piece in a growing boy's room. All I have to do is switch out the papers to change the look. A lot better than trying to redo it every couple of years!!
Guest (not verified)
Fri, 08/05/2011 - 08:01
This is a dumb and delayed
This is a dumb and delayed question...If you take the the springs off of the clothespin, how do you hang pictures? I know, I'm really slow...
Sherrie (not verified)
Fri, 08/19/2011 - 07:09
GREAT IDEA
I made one for my son and it turned out so cute! It's such a great idea!
diana (not verified)
Wed, 09/21/2011 - 16:40
Fabulosity
Great for an idea board in my art-crafting space.
Plus messages to myself to get busy and off the computer! LOL
Tiffanie (not verified)
Sat, 11/05/2011 - 15:04
Art wall!
Hi there, Ana!
Just found your website a few days ago. So wonderful! As an architect I find looking at how other people detail things fascinating.
I did a similar art wall for my daugther, with trim boards held off the wall with 3/8" plastic spacers. It is a godsend, as the amount of artwork around here is prolific!
http://bloggingcornerblog.blogspot.com/2011/09/only-on-black-wall.html
Great work!
Tiffanie