
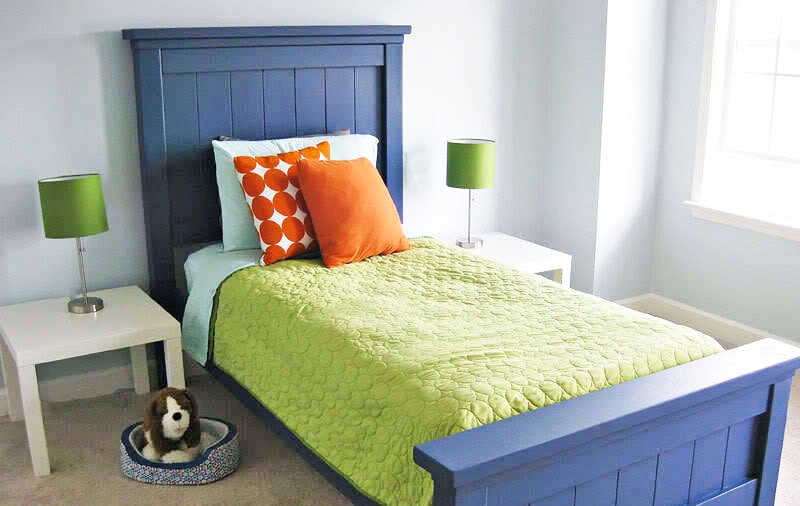

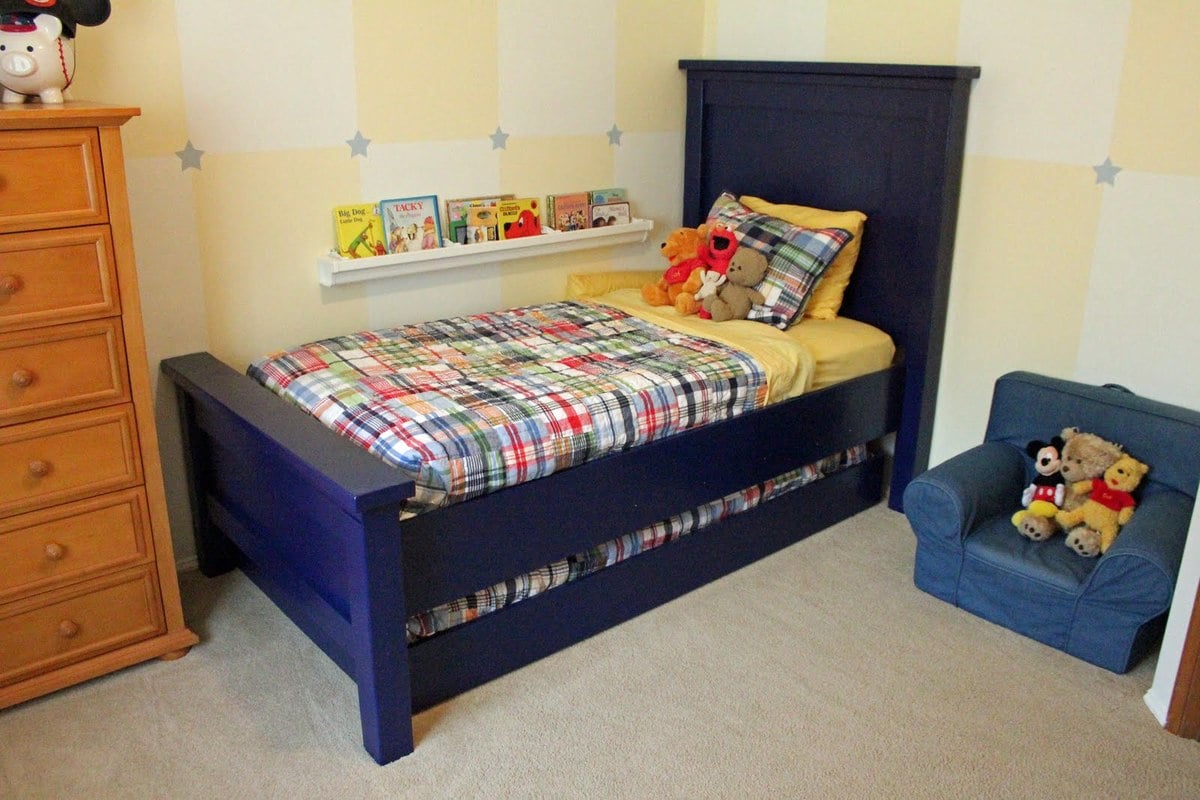
If you are looking for a classic farmhouse style bed for your child's room, this is the project for you. Featuring simple styling, large headboard and footboard tops, substantial legs, sturdy siderails, and the option to go with or without a boxspring, this beautiful bed is definitely worth your sweat!
Step by step plans with diagrams and lots of readers submitted photos. Check out all our Farmhouse Bed plans here.
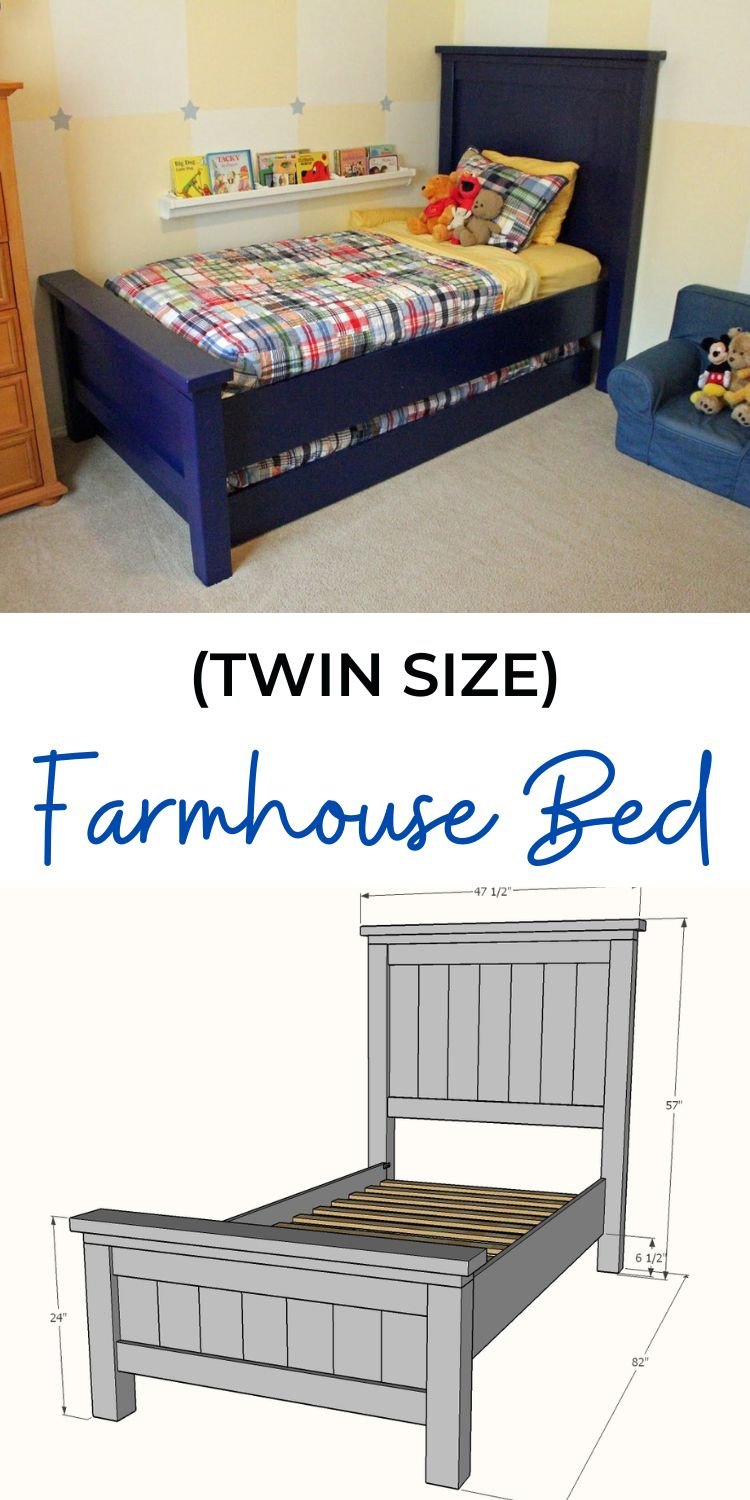
Pin For Later!
Preparation
3 - 1x6 @ 8 feet long
1 - 1x6 @ 4 feet long
2 - 1x4 @ 8 feet long
2 - 4x4 @ 8 feet long
1 - 2x2 @ 8 feet long
4 - 2x4 @ 8 feet long
2 - 2x6 @ 8 feet long
2 - 1x10 @ 8 feet long
6 - 1x3 @ 8 feet long
2 - 1-1/2" x 1-1/2" L brackets
2 - 3" long straight mending plate brackets
HEADBOARD
- 7 - 1x6 @ 30"
- 2 - 1x4 @ ~38-1/2" - measure and cut to fit
- 2 - 4x4 @ 54"
- 2 - 2x2 @ 30"
- 2 - 2x4 @ ~45-1/2" - measure and cut to fit
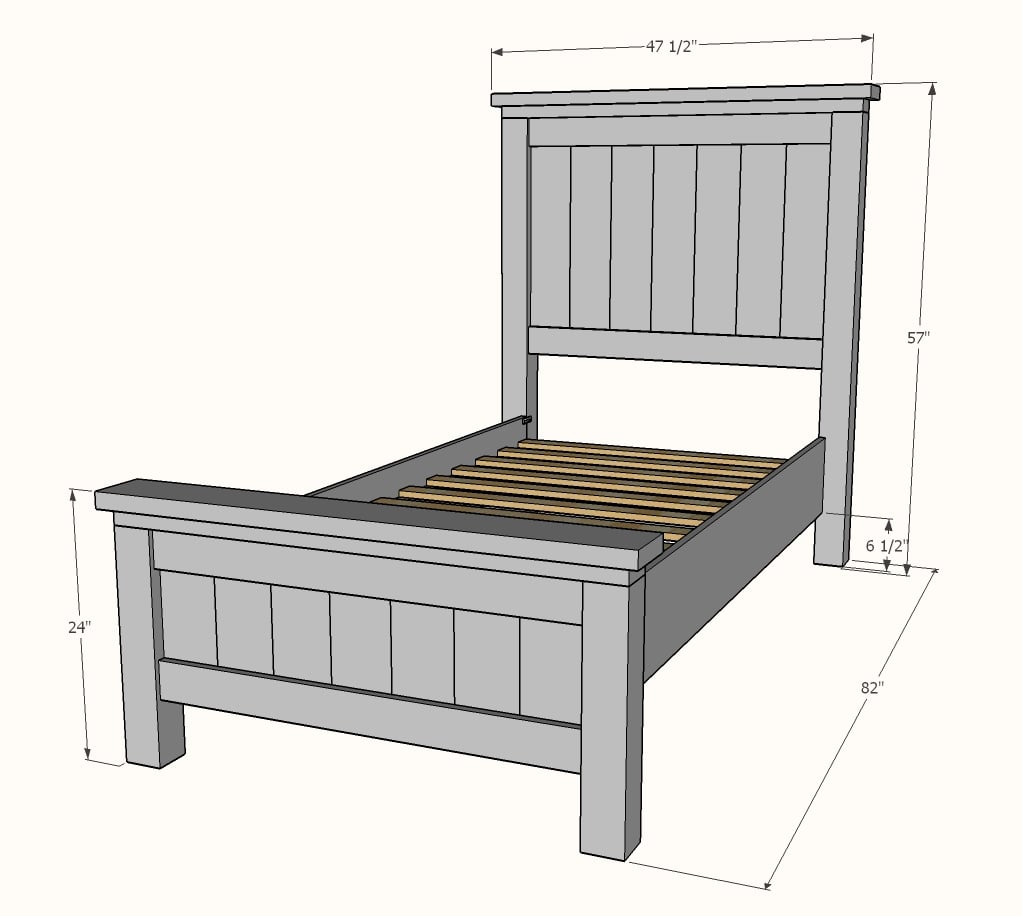
- 2 - 2x6 @ 47-1/2"
FOOTBOARD
- 7 - 1x6 @ 15"
- 2 - 1x4 @ ~38-1/2" - measure and cut to fit
- 2 - 4x4 @ 21"
- 4 - 2x2 @ 5-1/2"
- 2 - 2x4 @ ~45-1/2" - measure and cut to fit
- 2 - 2x6 @ 47-1/2"
BED FRAME & SIDERAILS
- 2 - 2x4 @ 80"
- 2 - 2x4 @ 8-1/2"
- 2 - 1x10 @ 75"
- 12 - 1x3 @ 38-1/2" - measure and cut to fit


Instructions
Step 1
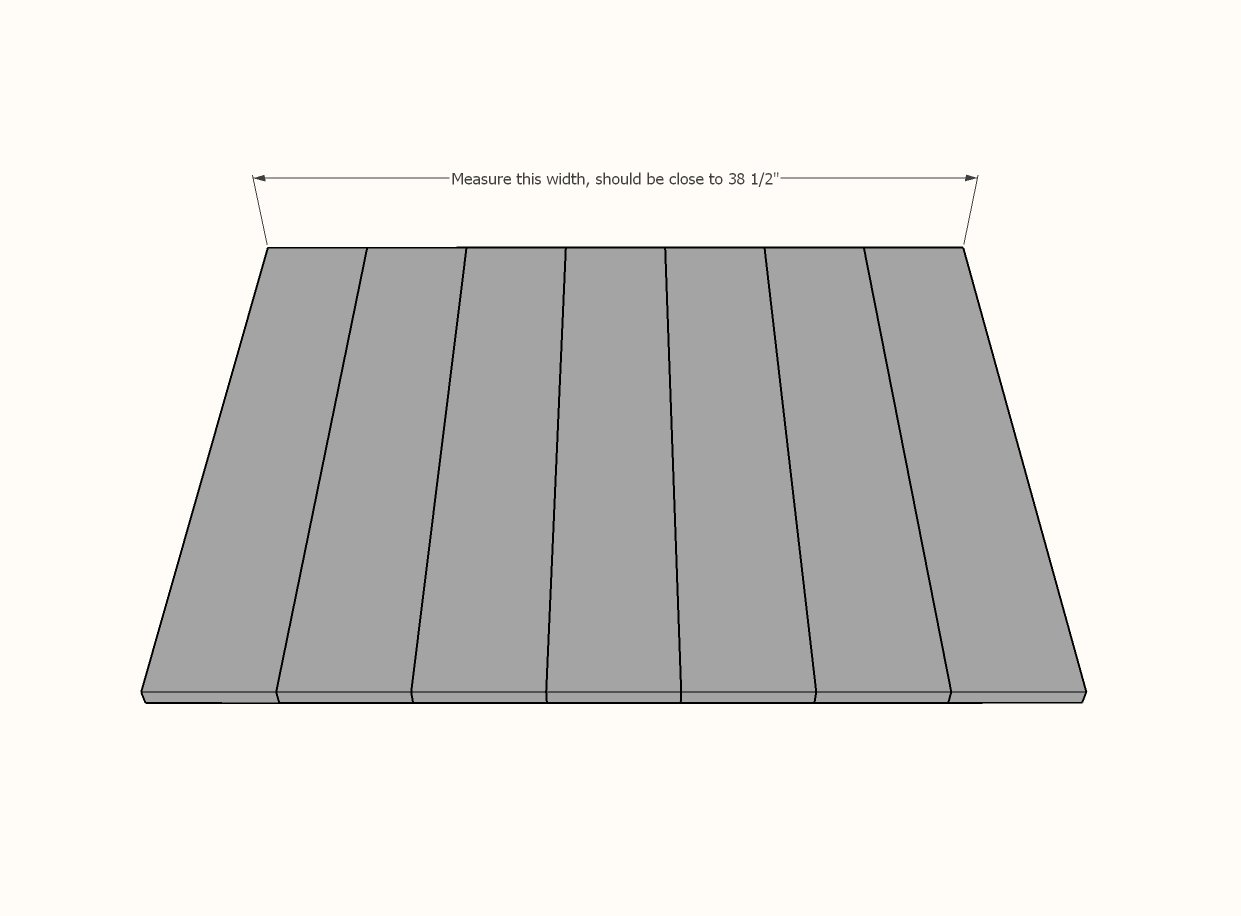
Cut the 1x6 headboard boards with a miter saw (preferred) or circular saw with straight edge.
Lay out as shown in diagram.
Measure the overall width.
POCKET HOLE USERS: You can join the 1x6 boards together edge to edge with 3/4" pocket holes and 1-1/4" pocket hole screws.
Step 2
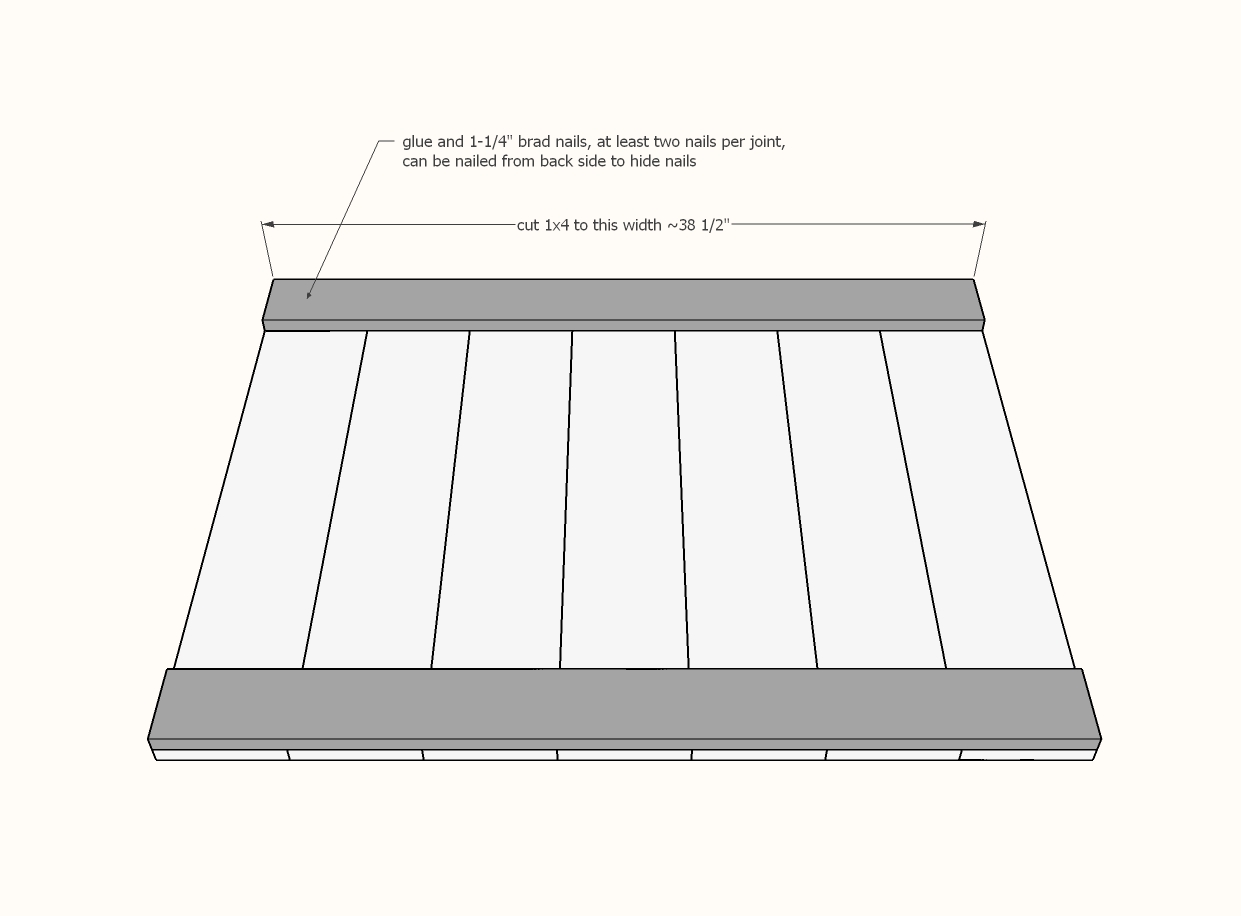
Attach 1x4 on top and bottom, with all outside edges flush, with 1-1/4" brad nails and glue.
Make sure the panel is square (not a parallelogram) by taking outside corner diagonal measurements and adjusting until the two opposite diagonals measurements match.
POCKET HOLE USERS: Drill two 3/4" pocket holes on each end of the 1x4 boards. Attach to the 4x4 legs with 1-1/4" pocket hole screws. Then nail the 1x6 boards to the 1x4s.
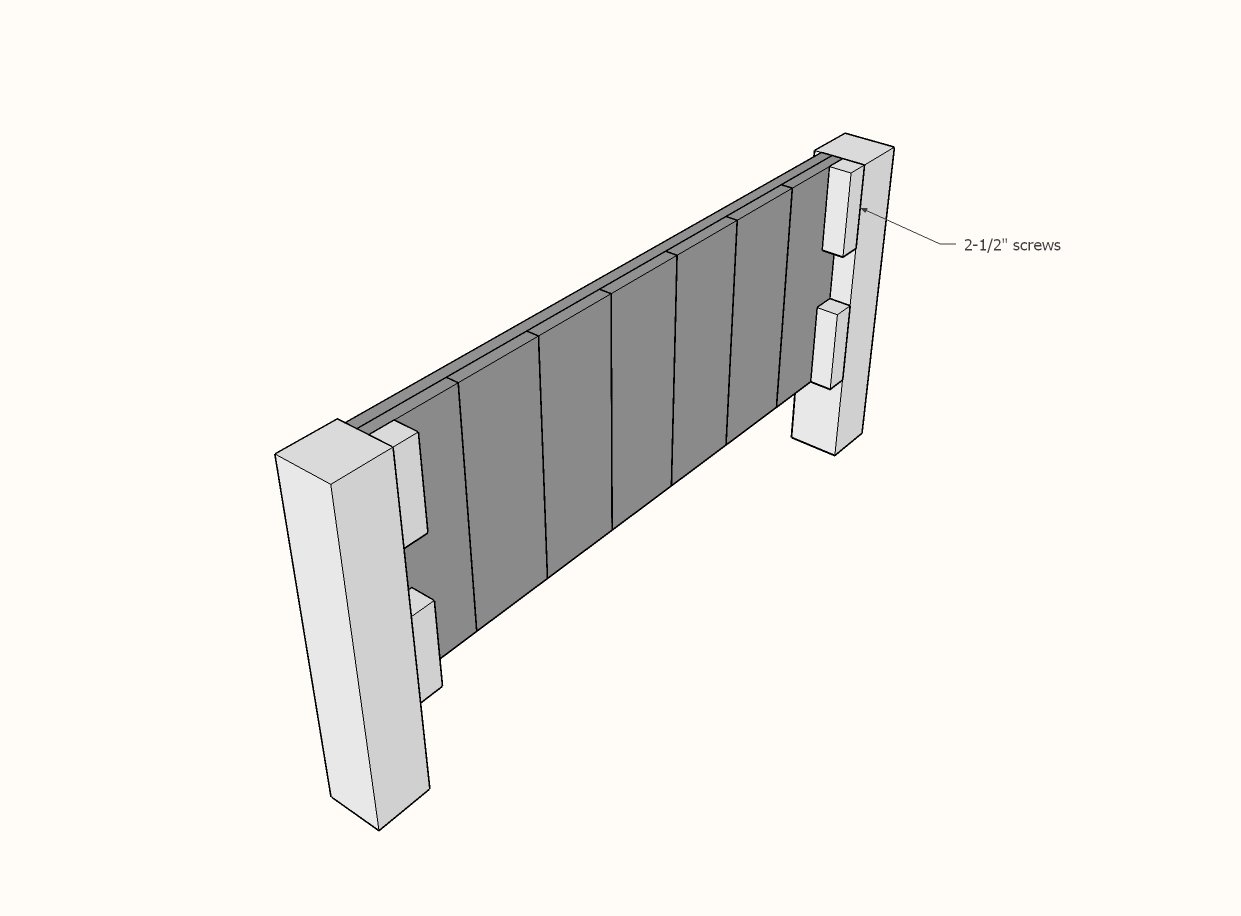
Step 3
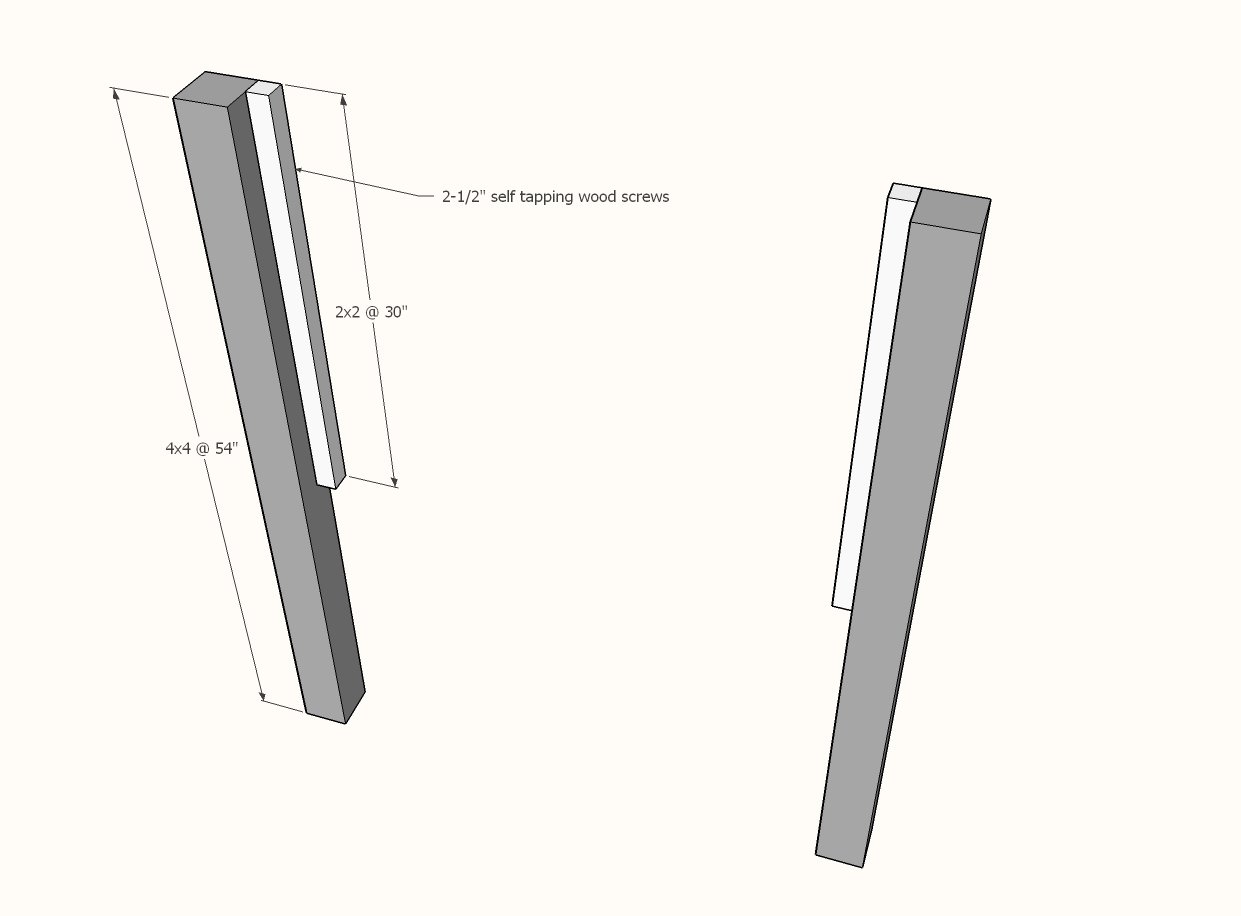
Use 2-1/2" screws to attach the 2x2 cleats to the inside back edge of the 4x4 legs.
POCKET HOLE USERS: Skip this step.
Step 4
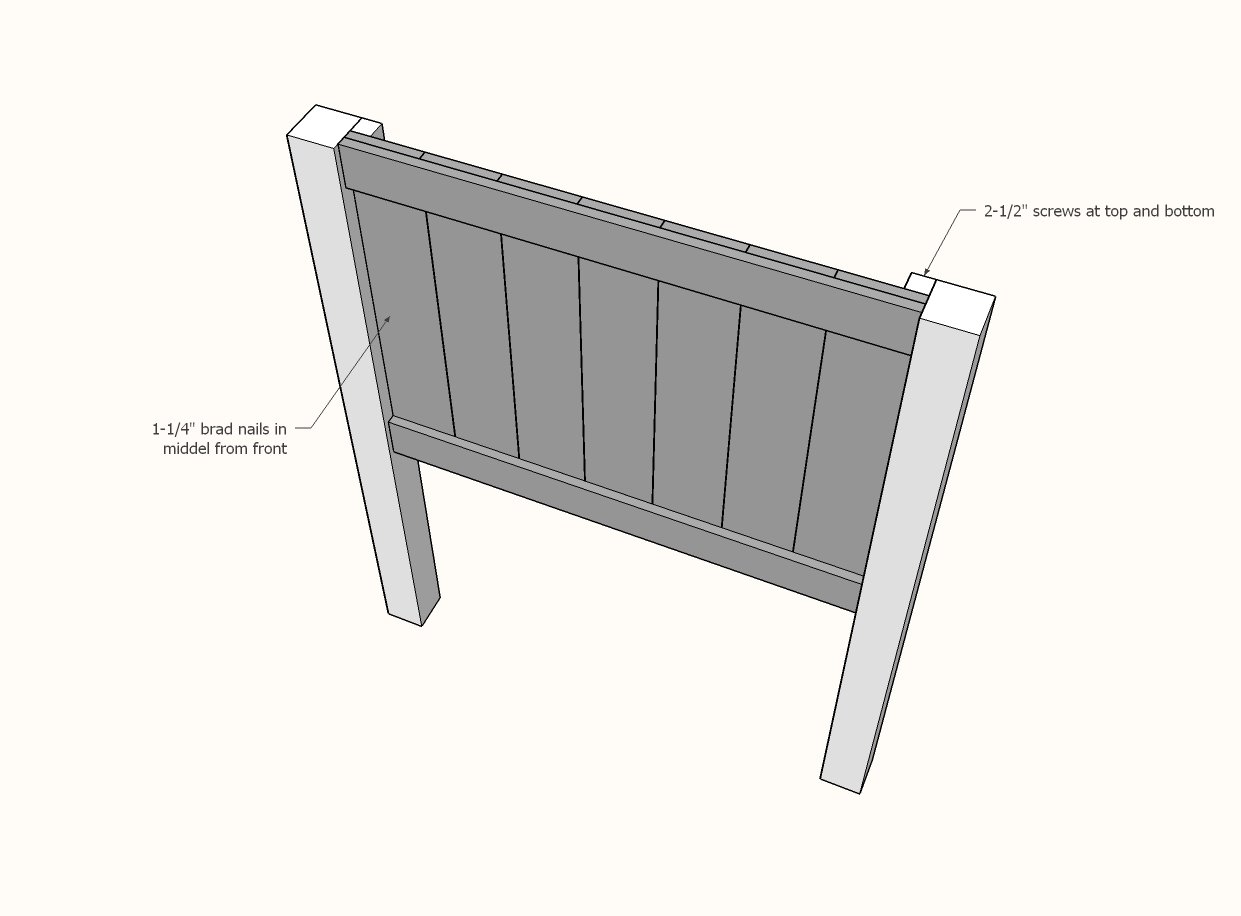
Attach panels to the 2x2 cleats with 2-1/2" screws and 1-1/4" brad nails and glue.
POCKET HOLE USERS: Skip this step.
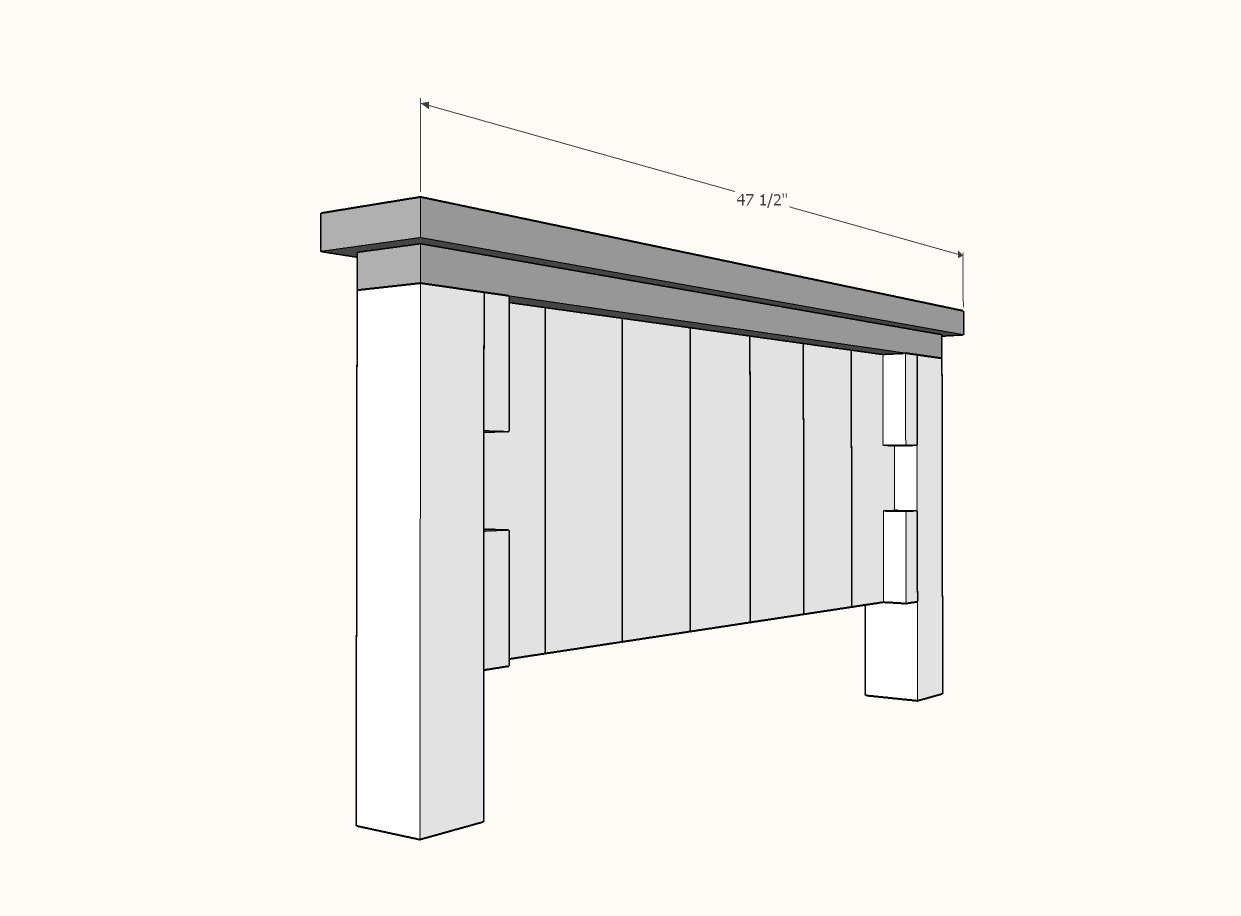
Step 5
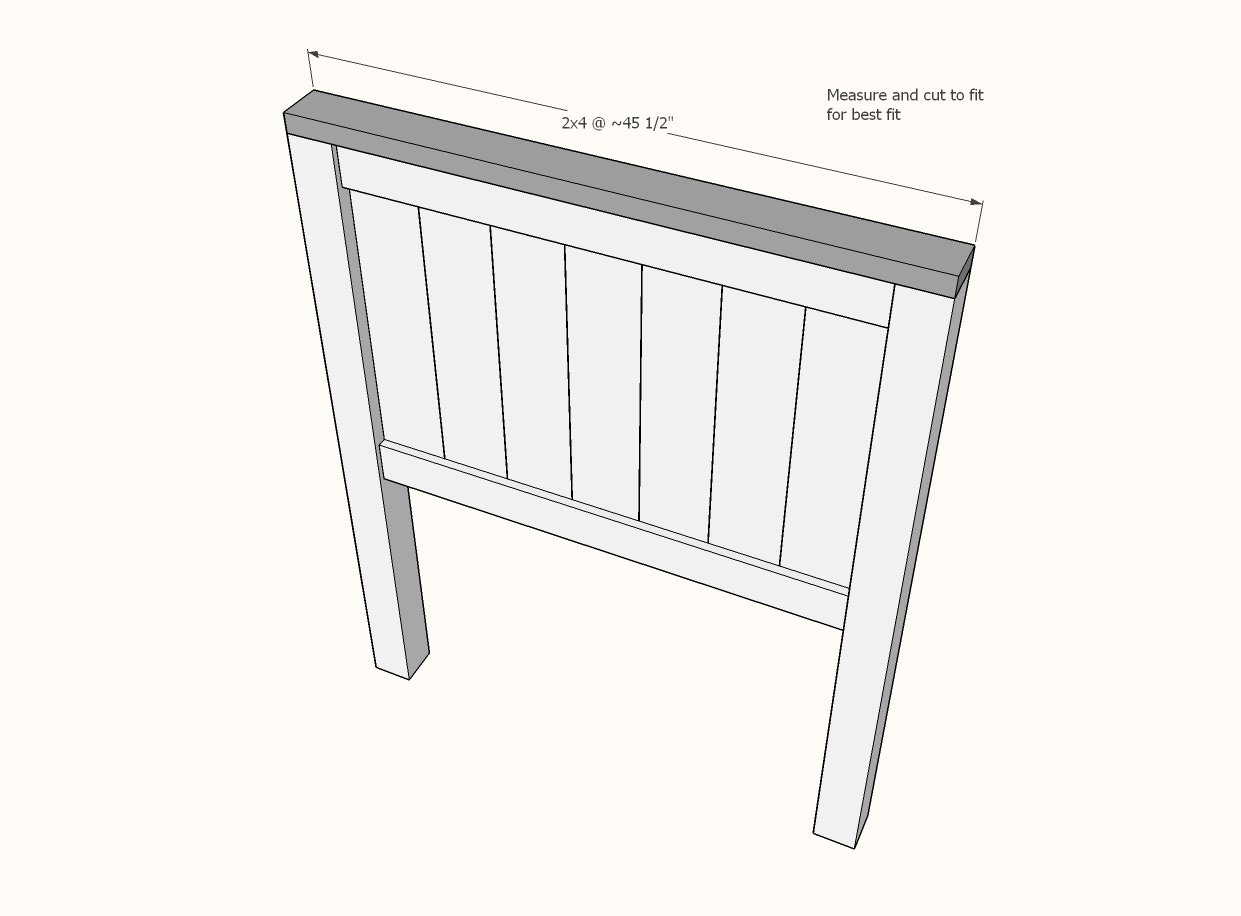
Measure and cut the top 2x4. Attach with 2-1/2" screws and glue.
Step 6
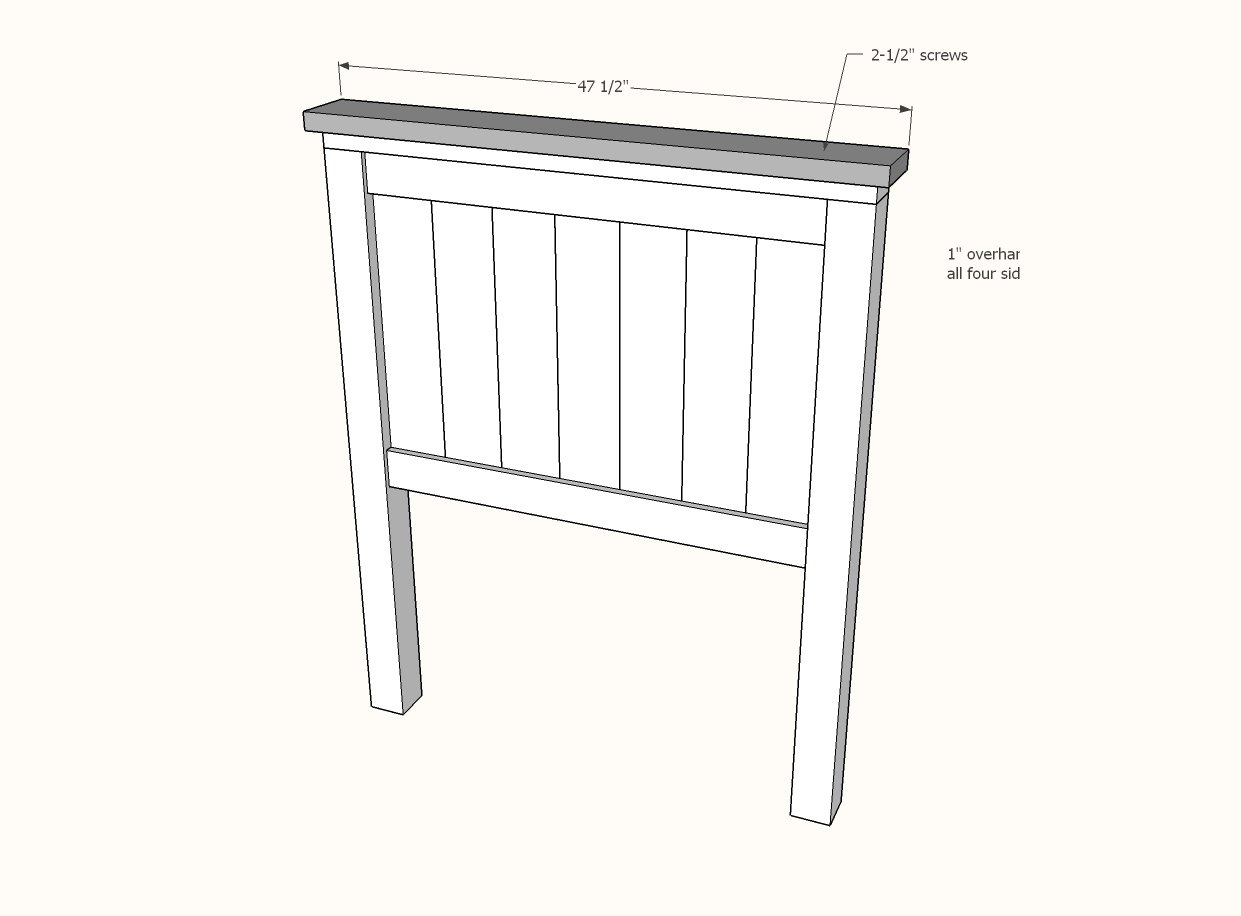
Place 2x6 on top of 2x4. Make sure all outside edge overhangs are even.
Screw on with 2-1/2" screws and glue.
Step 7
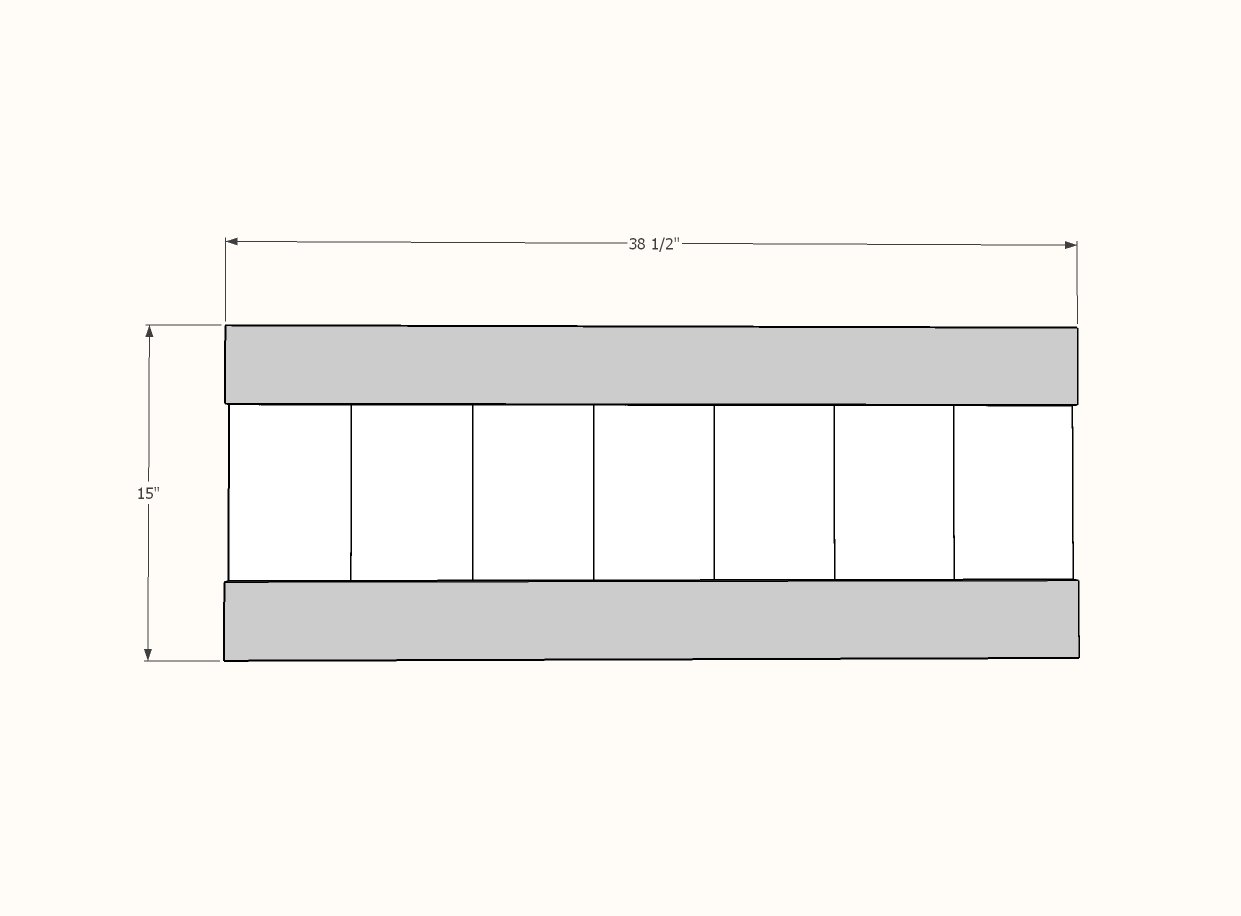
Repeat the same steps for building the footboard panel.
Step 8
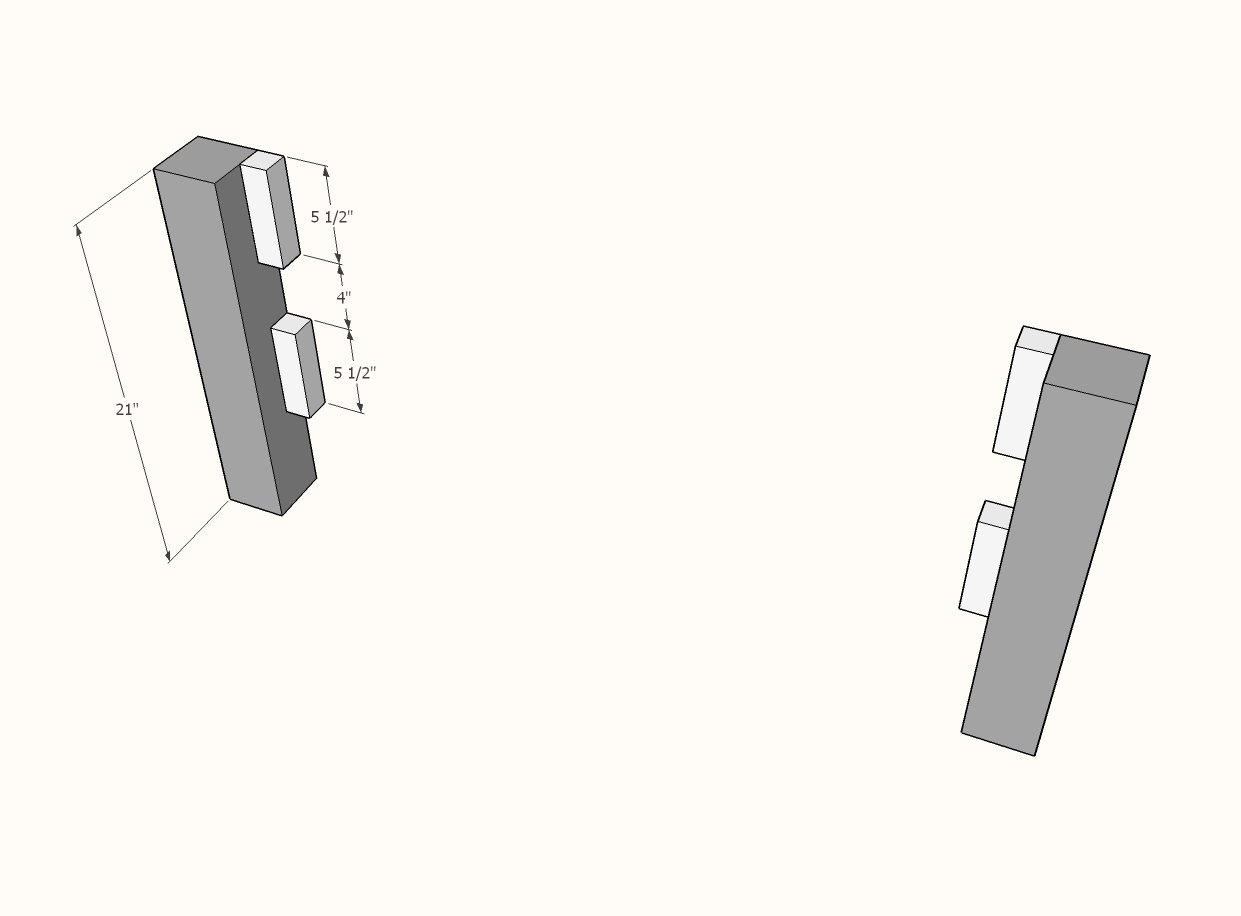
If using the cleats for attaching, leave a space in the cleats as shown for accepting the bed frame in later steps.
Step 9
Attach footboard panel as you did the headboard panel to the legs.
Step 10
Repeat steps to finish top of footboard.
Step 11
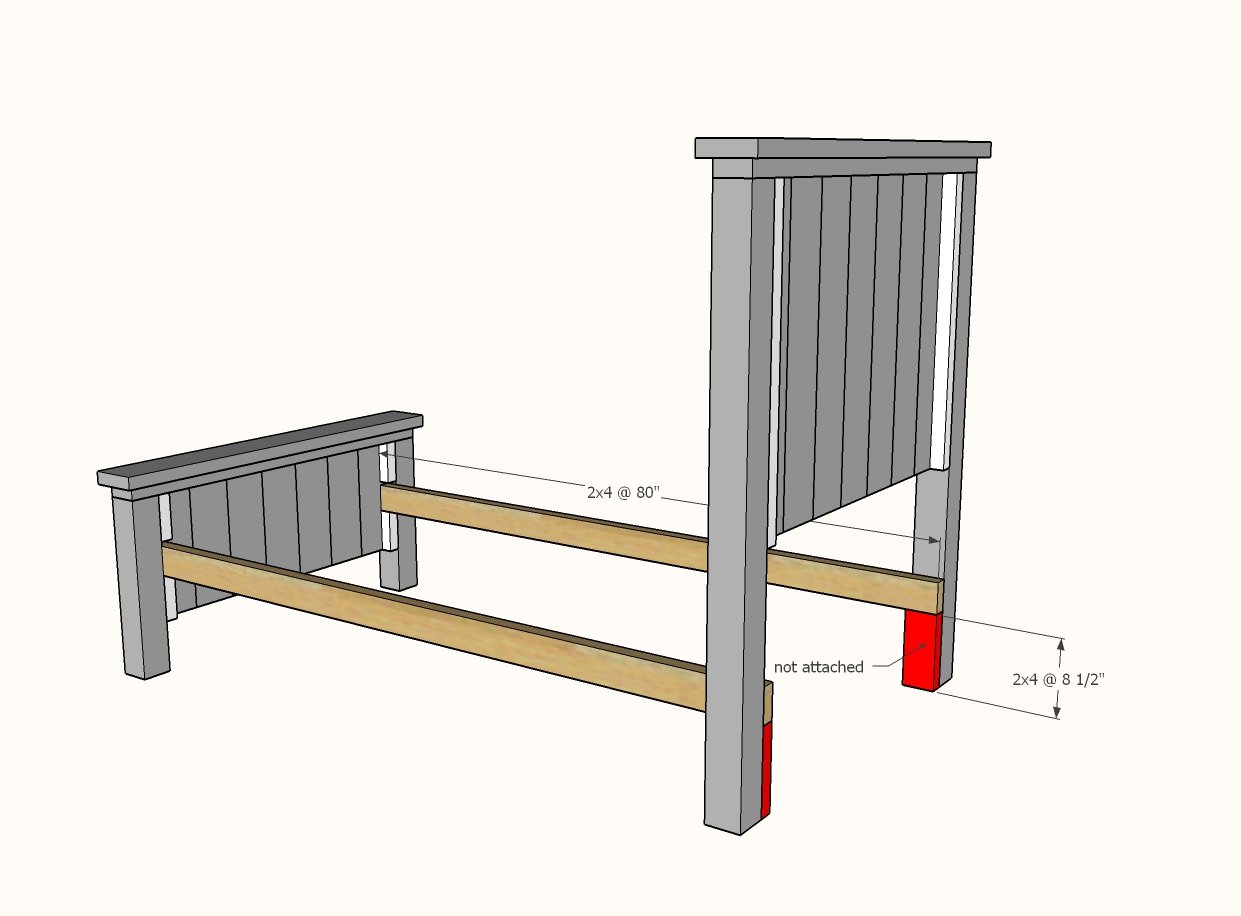
Attach 2x4 cleats to the 4x4 legs with 2-1/2" screws.
The spacer blocks are not attached and are just used as guides for setting up the bed.
Step 12
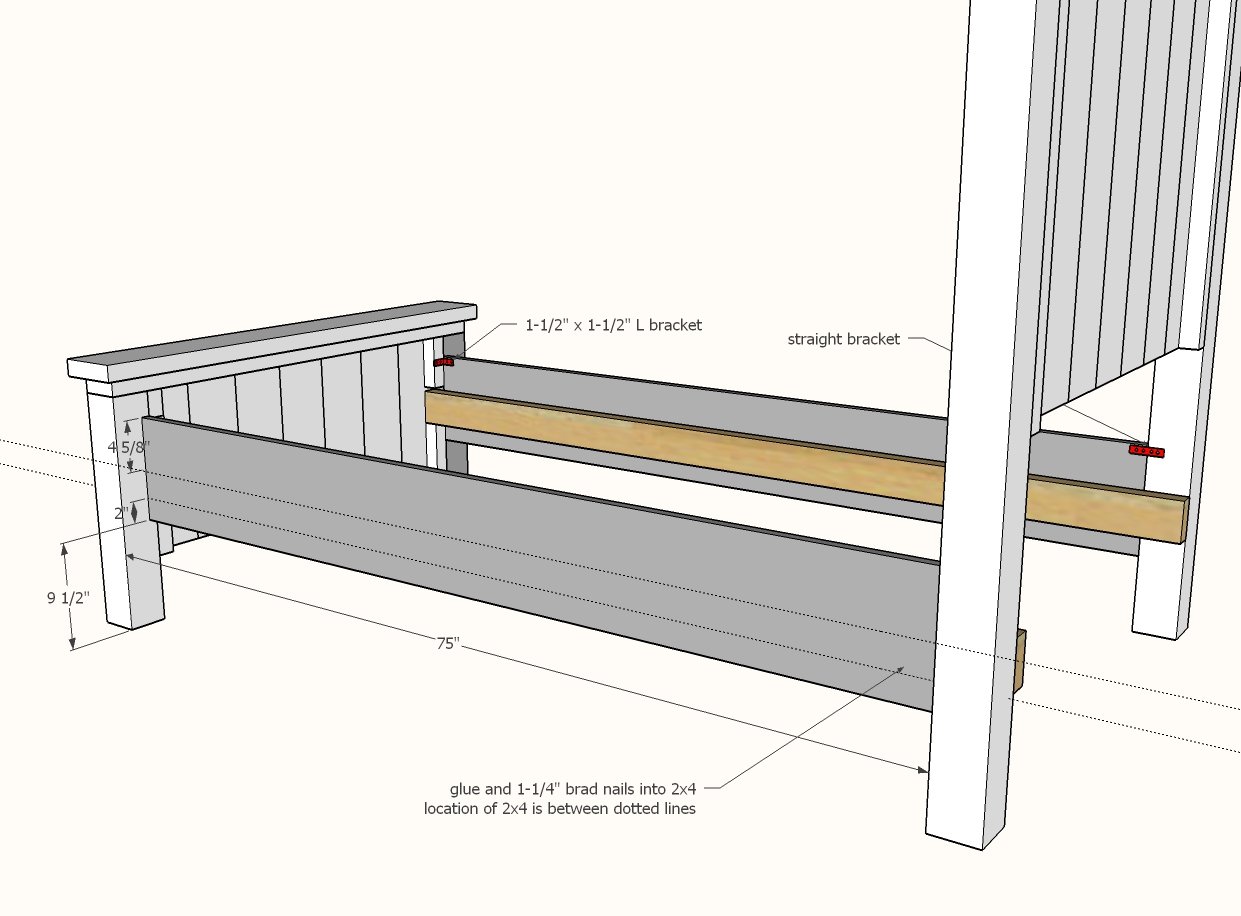
Place sidreails on cleats and attach with glue and 1-1/4" brad nails.
Also recommended is attaching with an L bracket and a straight bracket at tops. Pocket hole users can use a 3/4" pocket hole and 1-1/4" pocket hole screws.
Step 13
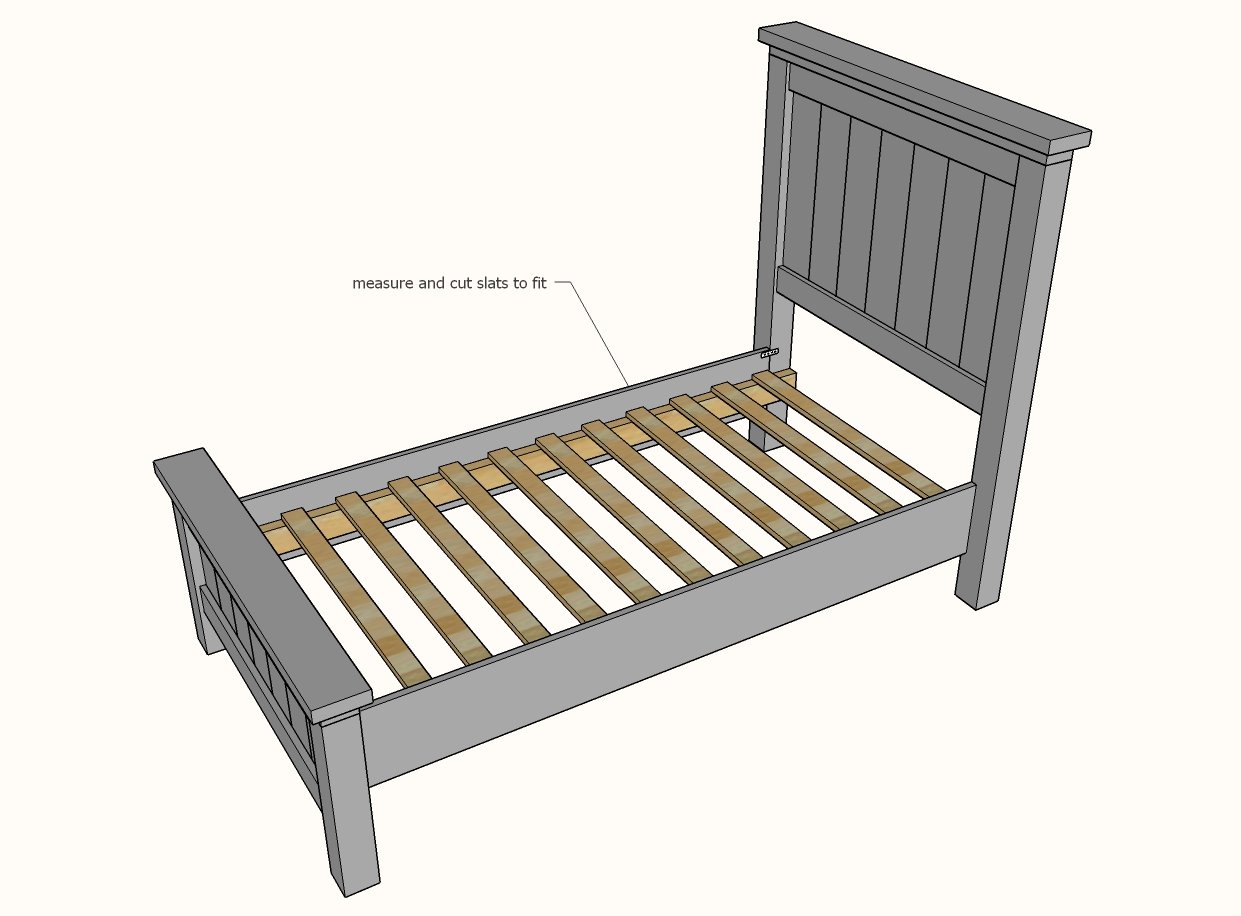
Lay slats in bed frame, space evenly. Screw down with 2" screws or 1-1/4" brad nails.


Comments
d-may
Tue, 02/19/2013 - 00:30
Questions About Side Rail Size
Hey Ana & fellow Ana-White Fans!
I have a question I hope someone can help me out with.
This plan calls for the side-rails to be 76.5" long while on other twin bed plans such as the "Simple Bed" & "Kentwood" the side rails are supposed to be 75" long.
Am I missing why this beds side-rails longer than the other beds?
Thank you!! :)
Michele123
Sat, 01/25/2014 - 11:49
If I want to make the headboard from plywood...
If I want to make my headboard fro plywood instead of beaded, what size plywood do I need to cut? I'm new at this and want to reduce complexities...
ace88
Sat, 11/01/2014 - 18:07
twin farm house bed
i have a few questions i,m starting to make the farm house bed twin size
1st question is why are the rails that connect the head board n foot board 76.5 inches long every mattress is diffrent length i found one that is 75 inches long so does that mean i should cut the rails 75 inches long not 76.5?
2nd is how can a 39 inch wide box spring fit inside your opening if there is only 35.5 inches inside to inside please help me out on this thanks
KarpeDiem
Thu, 12/04/2014 - 10:40
Answer to length and width since it comes up often.
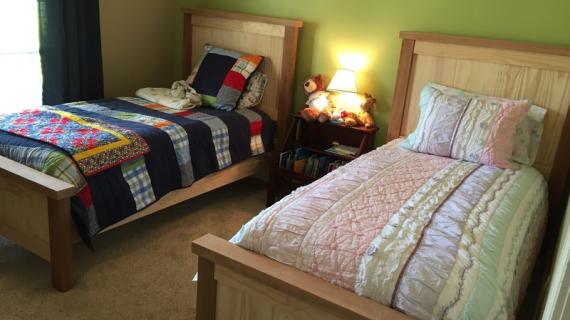
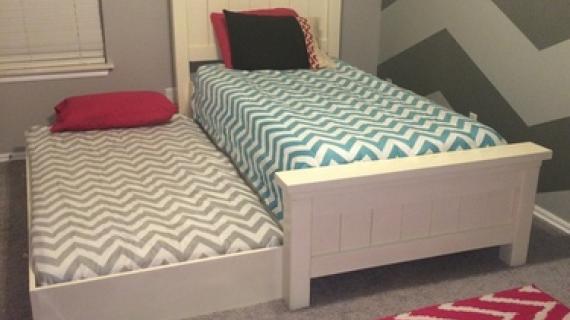
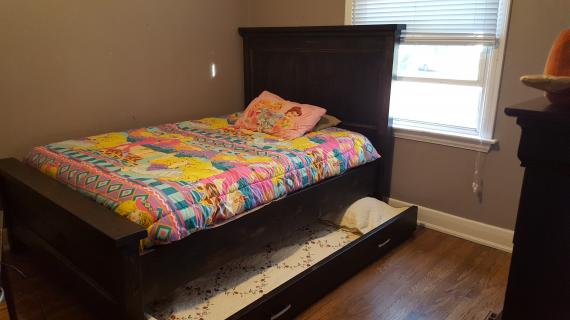
1. The length of the side supports is 76.5" and not 75" because the mattress will/could sit at the same height as the top of the footboard. This top piece is a 2x6 so it overhangs a bit when place on the 4x4's. The extra 1.5" allows for the mattress to still fit. Check out completed pictures to see where the mattresses end up.
2. The 35.5" width is the width of the 2x4 rail supports for the headboard and foot board. Notice on the drawings how the supports are placed inside the 2x4 side rail cleats. Resulting in a width of 38.5" which should fit most twin boxsprings.
mwwuwf
Wed, 06/24/2015 - 15:40
awesome
awesome
Adammills
Fri, 11/06/2015 - 13:49
Attaching headboard to posts...
How are you all attaching the headboard and footboard to the posts?
Runsomewhere
Fri, 03/25/2016 - 10:38
Go to Rockler.com and search
Go to Rockler.com and search for "bed rail brackets." They have a few surface mounted styles.
Runsomewhere
Fri, 03/25/2016 - 10:37
Side rails 1x10 vs 2x10
Are the 1x10 boards sturdy enough? That's a common place for my kids to step on when climbing into bed. I'm wondering if I should use 2x10s, or if that would be overkill.
mier
Wed, 05/11/2016 - 12:52
Farmhouse Bed
Ok, I made this bed and it looks nice. I don't have the metal frame and box springs. So I have to attach the 2" X 4" rail support boards. The measurements for a twin size bed is 75" X 39" but the width for this bed is 38 1/2", hope it fits? The rail board llength is 76 1/2" which is fine, but rail board support boards are 80 1/2" which stick out passed the back of the head board post. I'm not sure why so long? Don't the rail support boards only need to be as long as the rail boards (76 1/2") for the front of the mattress to rest on?
Rweir
Tue, 01/02/2018 - 11:58
Conversion help
We built this twin farmhouse bed for our son 3 years ago. We are wanting to convert it to a full size now. Can you give tips on how to convert the head and foot boards to fit a full size bed? Thanks!
Spcschaffer
Sun, 09/09/2018 - 04:16
Box spring??
The method you used on this bed for the use of a box spring, can it be used with the other sizes of farmhouse beds?
khardy1986
Sat, 01/26/2019 - 20:50
Trundle
I already have a trundle I'd like to use. It's 13 inches high. Can anyone tell me how much space is available under the bed if it's made as exactly stated in plans. I've never built anything like this before and I wasn't sure where this measurement was on the plan. Thank you anyone who can help please.
In reply to Trundle by khardy1986
Brian Famous
Mon, 01/28/2019 - 18:53
Trundle height...
Judging by the diagrams, it looks like the legs for the footboard are 21" long. The side rails are 1x10s (9.5" high") and mounted to align with the top of the legs on the footboard. So 21 minus 9.5 would be 11.5" high if I am interpreting correctly.
Hope this helps.
r0jas_jr
Wed, 06/05/2019 - 17:52
Need some help to finish.
I'm a little lost here. Currently building this project but I have come to a speed bump. How do we attach the headboard to the legs? On the queen size farm house bed it takes 2x2s, here it doesnt ask for them. A little help please?
allykat25
Fri, 04/03/2020 - 19:26
I made this! Great plan, easy instructions!!!
I made this! Great plan, easy instructions!!!
Jayna
Tue, 05/25/2021 - 18:48
Maybe a mistake?
Building this bed for the second time. I've noticed that if I cut the spacer blocks at 8.5 as suggested, the 2x4 stretcher does not line up with the footboard slot made for it. This slot sits at 11.5 inches up, which makes it three inches off. Either the spacer blocks need to be taller, or reconfigure the footboard. Is there something I missed that I'm not seeing? I looked over the plans a good bit believe I followed them correctly, but I'm very prone to human error!
jendon
Sat, 08/20/2022 - 19:35
Perfect bed for a son in high school!
Dear Ana,
Thank you once again. I made this bed for my son who is now in high school. We made the plans fit the extra long mattress and raised it up for storage. He wanted to try tongue and grove, so we used that in the headboard and footboard. We used Rockler breakdown bed kit. I attached pictures to a “brag post.” My son and I are so happy. Our daughter now wants a new bed! Thank you for challenging me and giving me the plans I know can be successful in.
Blessings,
Jennifer