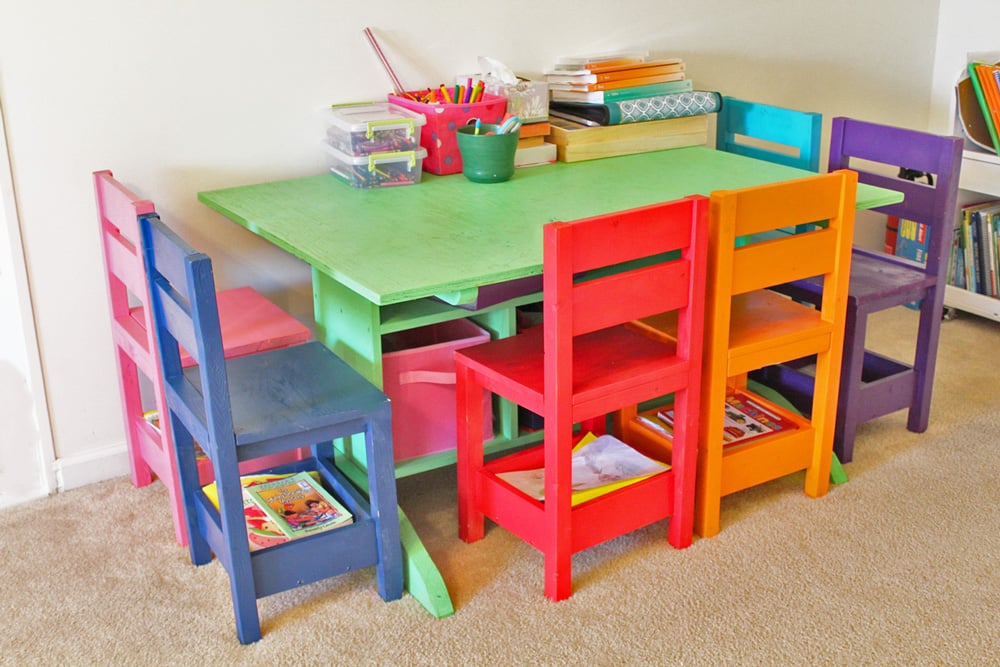


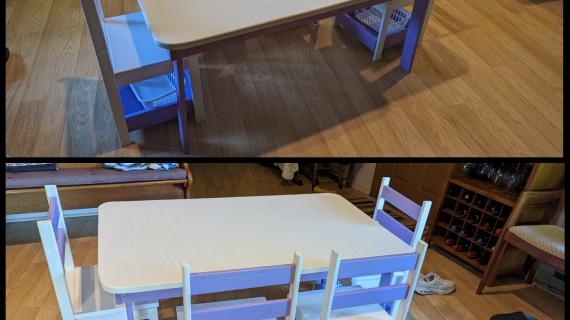
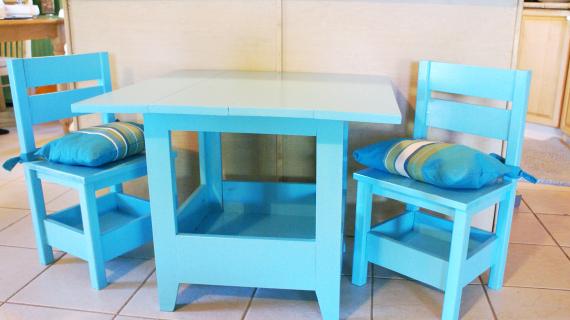
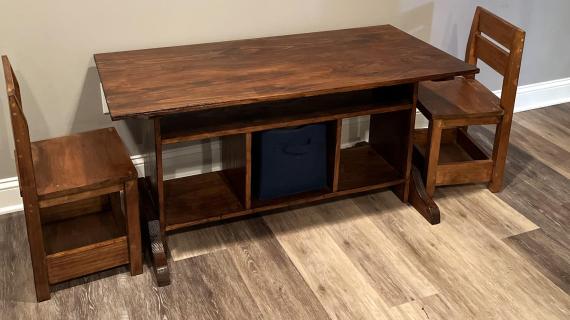
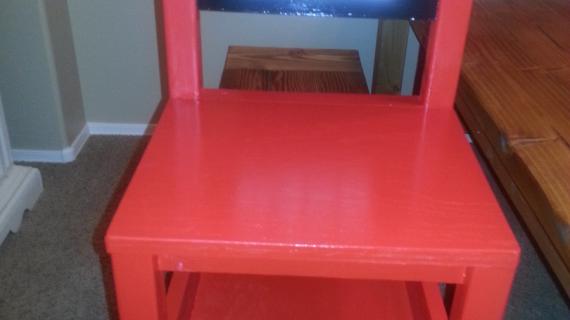
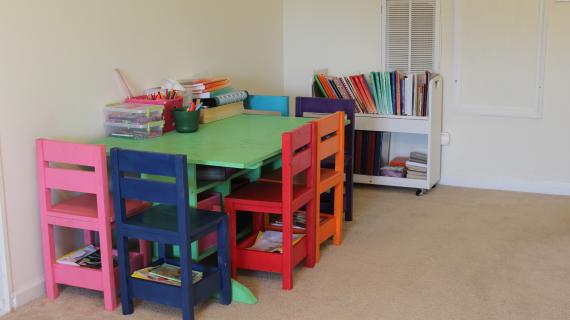
Build your own kids chairs with storage. It's perfect for homeschool or playrooms where each child can have their own chair, with their own supplies stored right in their chair! Solid wood design is easy to paint or stain. Simple woodworking project requires no special tools or techniques.

Preparation
- 13 feet of 1x3 boards (Recommend buying two 8'- 1x3 furring strips and cut the good parts out for the chair and discard the bad sections)
- 1 - 1x2 @ 8 feet long
- 1 - 1x12 @ 14"
- 1/4" plywood minimum 12" x 12"
- 3/4" and 1-1/4" brad nails
- 1-1/2" self tapping screws like these
- Wood glue
- wood filler, paint or stain
- 4 - 1x3 @ 11" - seat frames
- 4 - 1x3 @ 12-1/2" - seat frames
- 1 - 1/4" plywood @ 12-1/2" x 12-1/2" (can be 12" x 12" if you are trying to make the pieces work on a dimensional piece of plywood) - storage bottom
- 2 - 1x2 @ 28" - back legs
- 2 - 1x2 @ 13-1/4" - front legs
- 1- 1x2 @ 12-1/2" - seat back
- 2 - 1x3 @ 12-1/2" - back slats
- 1 - 1x12 @ 14" - seat
The best way to cut the pieces for this chair is with a compound miter saw. You can also use a circular saw.
It may be easier to sand the boards before cutting, especially if there are rough patches.


Instructions
Step 1

Build two frames with 1x3s. Attach at corners with 1-1/2" self tapping screws, two screws per joint.
Attach 1/4" plywood to bottom of the frame with 3/4" brad nails and glue.
Step 2

Cut back legs in taper if desired, starting the taper at 14" from the bottom of the leg.
Attach the frames to the legs, with the tops of the frames at 13-1/4".
Use glue and screw at a slight angle from the inside of the frames into the back side of the legs. Screws at an angle will be stronger, and also since your screws are 1-1/2" long, there is a risk of the screw popping through. The angle will help with that.
Step 3
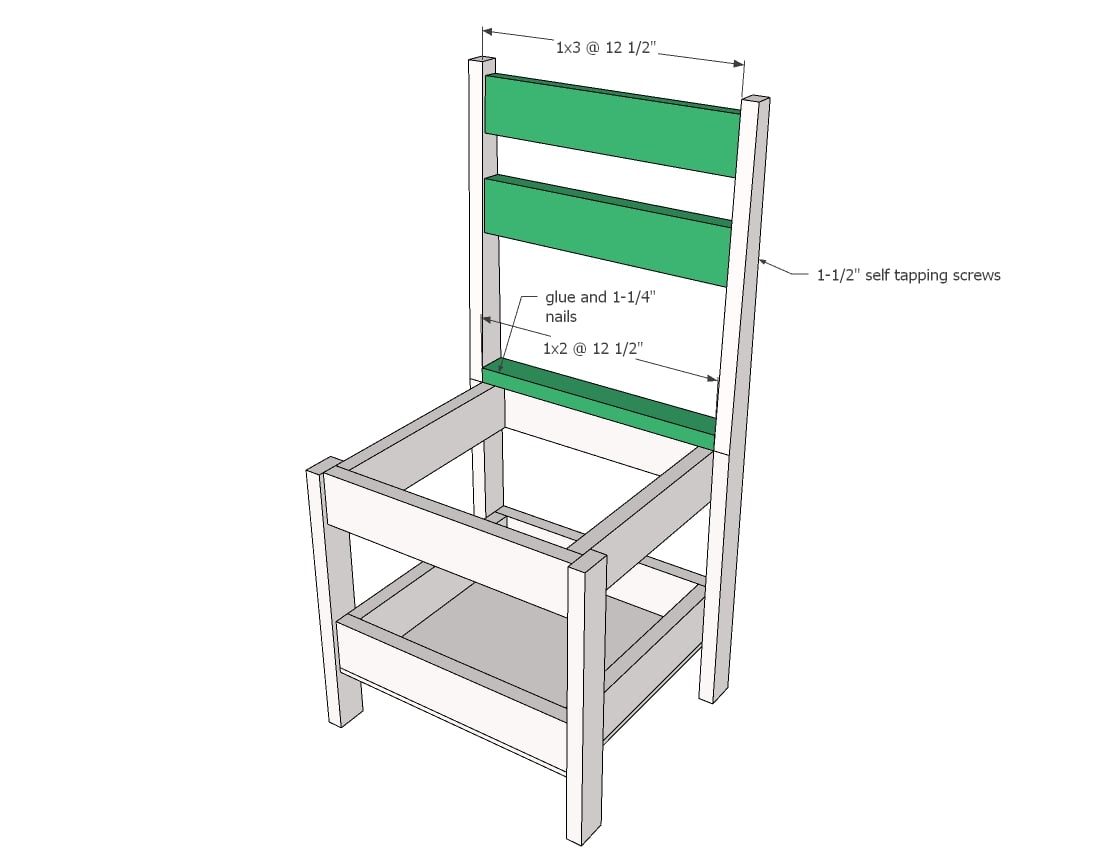
Attach back rests with the 1-1/2" self tapping screws.
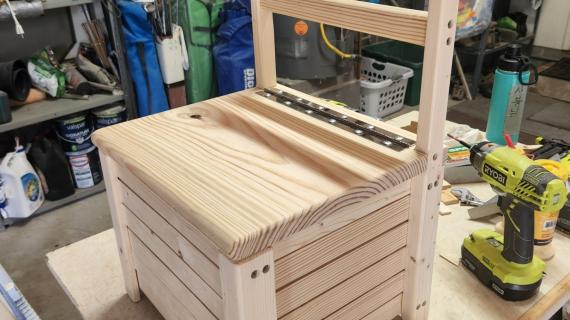
Then add the seat back with 1-1/4" brad nails and glue.
Step 4
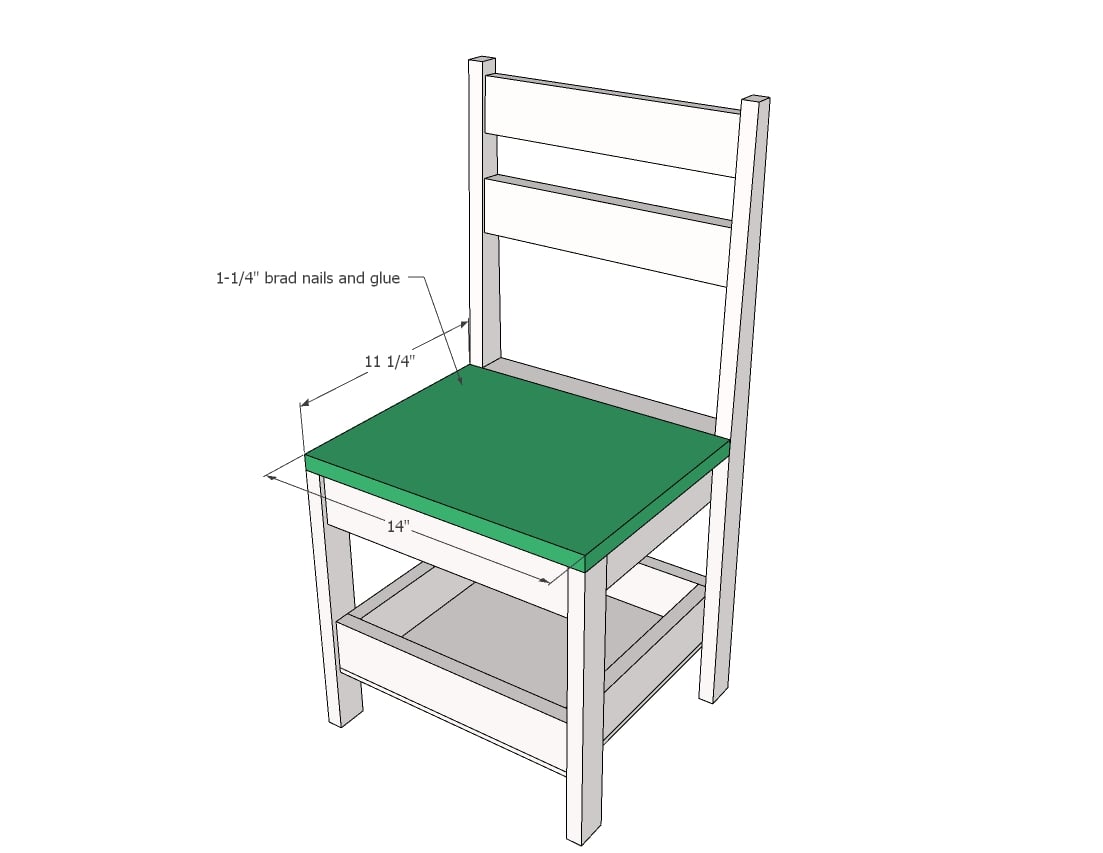
Attach seat with 1-1/4" brad nails and glue.
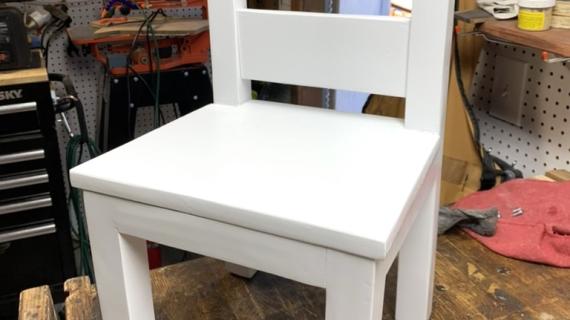
For a painted finish, apply wood filler to all holes, overfilling holes. Let the wood filler completely dry. Sand with 120 grit sandpaper. Vacuum all sanding residue off. Apply primer and paint (or a paint and primer in one). Apply as many coats as necessary to achieve even coverage. We recommend a semigloss for this project.

Comments
Norma Lee @ No… (not verified)
Wed, 01/06/2010 - 03:15
Ana, I posted my post about
Ana, I posted my post about you! You are amazing and talented and I want the whole world to know!! :)
http://www.normaleegood.com/2010/01/diyknock-off-wood.html
beth (not verified)
Wed, 01/06/2010 - 04:00
Your chair looks EXACTLY like
Your chair looks EXACTLY like the one from the store! Perfect!
MamaB (not verified)
Wed, 01/06/2010 - 10:10
This is such a cute chair and
This is such a cute chair and I can't wait to make it, but I'm wondering.. is this too advanced for a first time project?
Sabra (not verified)
Wed, 01/06/2010 - 18:45
holy holy holy! just found
holy holy holy! just found you and you are a genius! my jaw has been hanging open through 5 pages of your posts. Now to just get my husband on board with helping me make some of this stuff. I can't believe you just offer these plans up for free! !!!! thought I should add a few more because I'm just that excited :)
also, your post on the jeans in your dryer? loved it.
jharmonfamilyblogs (not verified)
Fri, 01/08/2010 - 09:26
I love this chair! Would you
I love this chair! Would you be able to give me some tips on how I might modify it to have the storage part enclosed and have the seat hinged? I am not a carpentar by any means, but I think that I might be able to attempt this.
In reply to I love this chair! Would you by jharmonfamilyblogs (not verified)
bozarthm1
Sat, 07/02/2022 - 06:02
oh wow, that is a good idea…
oh wow, that is a good idea. I just started making 2 chairs and will incorporate the hinge. Cheers
Ana White (not verified)
Fri, 01/08/2010 - 11:10
You are such a mind reader!
You are such a mind reader! That is exactly what I was thinking as I was building this chair . . . the seat should be hinged and the storage compartment enclosed Just use a larger board width for the apron pieces, probably a 1x6 or 1x8(you don't want the chair to become too heavy) instead of the 1x2. Forget about the existing storage compartment. Then use a 1x10 for the bottom of the compartment. Then put hinges on the 1x12 where it meets the 1x2 back top piece, so the 1x12 folds up.
I could work up some plans, but it will be a while . . . very backlogged with requests.
Ana White (not verified)
Sun, 01/10/2010 - 09:33
Mandy, of course you can
Mandy, of course you can make barstools, but the higher you go, the more you have to worry about structure. I would like to try to build a barstool myself before posting plans. Chairs look easy, but the only thing easy about build them is cutting the boards.
That said, I'm looking at our cheap barstools that I bought years before I became a carpenter, and they are esentially the same design, without backs, and they are still working fine.
Marija (not verified)
Tue, 01/19/2010 - 02:19
I'm so happy and pleased to
I'm so happy and pleased to see these chairs and most of all, the instructions for measures and process of making it :)
I hope one day I'll make these chairs come true, they're incredible.
Imaginative, practical and don't look complicated :)
Thank you!
Marija (Zagreb,Croatia)
Jay (not verified)
Thu, 02/11/2010 - 12:45
I love your blog. I know
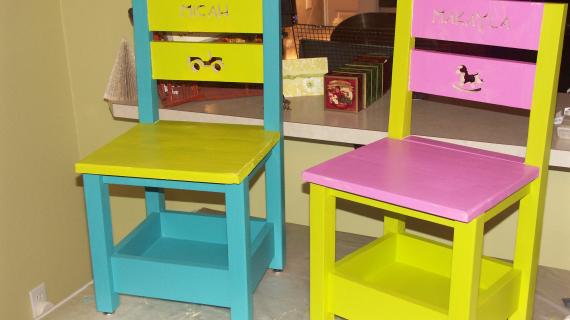
I love your blog. I know this is a relatively old post but i was wondering... what is the name of the paint you used on the pink chair? Its perfect! Did you put a finish on top of the paint or just paint it and let it dry?
thank you!
jay
Sara Jayne (not verified)
Mon, 03/15/2010 - 09:00
We built this chair yesterday
We built this chair yesterday and gave it a little added flair. We chamfered the top of the back legs, and the tops and bottoms of the back rails and the edges of the seat (cut it at a 45 degree). We thought that it made it more kid friendly, saved lots of sanding time and gives it a very cute, different look. We still have to fill holes, sand and paint, but will be sure to send pics.
Anonymous (not verified)
Wed, 03/24/2010 - 16:49
I love your site. I was in
I love your site. I was in the middle of making my own plans for a PB Cameron cubby when I found your site. This will save me lots of time!! Do you have plans for the rectangle kids table I see in one of the pictures?
Anonymous (not verified)
Wed, 03/24/2010 - 16:50
I love your site. I was in
I love your site. I was in the middle of making my own plans for a PB Cameron cubby when I found your site. This will save me lots of time!! Do you have plans for the rectangle kids table I see in one of the pictures?
Kristen McCourtie (not verified)
Mon, 04/05/2010 - 15:42
I love love love this site -
I love love love this site - Ive been looking through it for hours - choosing the projects for my new (first) house.
I really really need bar stools - and because this is my first project - I would to be able to work off a plan - I know you havnt done these yet - so Ill hold off until you do! Im searching the rest of the net for something similar - with no luck. I just want it to be plain wooden square stools with no backs so when pushed together -they could make a bench.
Any ideas??
Your newest fan!!
Kristen
the letter "J" (not verified)
Tue, 06/15/2010 - 10:12
so I may be blind, but I
so I may be blind, but I could only see a "cut list" and not a "buy list" did I some how miss it?? I'm starting a preschool and am building these and one of the table on here....I'm soooo excited!!
The Sanchez Family (not verified)
Sun, 08/22/2010 - 05:18
I too am wondering if you
I too am wondering if you have the plans for a kids table to go with the chairs. Also some advice on painting. Do you put a top coat on it or just staight paint....glossy paint? This is an AWESOME blog!
Melanie (not verified)
Tue, 08/31/2010 - 17:22
I love your website! And I
I love your website! And I love this chair! I wonder how hard it would be to make it into a one piece school desk?!
Ana White (not verified)
Tue, 08/31/2010 - 19:19
Now that would be cute
Now that would be cute Melanie! It's definitely doable!
Creating the P… (not verified)
Tue, 09/07/2010 - 12:50
[...] So easy to build, yet
[...] So easy to build, yet so cute! Plans here. [...]
Elena (not verified)
Sat, 12/18/2010 - 04:39
Wow! Ana! I know many people
Wow! Ana! I know many people told you how great you are. I just stumbled on your website and I am absolutely inspired! Thank you so much for sharing. I will try to make a chair for my 1 year old daughter. I am stay at home mom also! Oh, Ana! You are really genius!
Project Time! … (not verified)
Sun, 01/02/2011 - 18:30
[...] I used Ana White’s
[...] I used Ana White’s plans for the Four-dollar Stacking Kids’ Chair. Since I built the chairs in my living room and needed to transport them to my parents’ house, I thought the stacking chairs were the way to go. I also love the storage chairs! [...]
lorasolis
Wed, 04/13/2011 - 12:50
The chairs went together very easy!
I did a pair of these chairs and am so happy they went together so easily. N ow if I can figure out how to attach pics I'll be 100% finished! One of them I did a chalkboard paint on the seat. The kids will write all over the chair anyway.
Guest (not verified)
Sat, 04/23/2011 - 16:03
trying to build the chair
I am trying to build this chair and notice that in the cut list 1x2 is mentioned. It is not included in the shopping list. Am I missing something? Please help. TIA
billyunderhill3
Tue, 06/10/2014 - 18:19
Nice looking chair...
Looks like a nice sturdy chair. But I have a couple questions. I don't see a 1x2 on the Shopping List, and I'm a little confused on how the side aprons are attached to the front legs. You said to use 2 screws per leg and 1 screw per apron. Do I simply screw from the outside of the leg into the apron towards the top for one screw, and towards the bottom for the other?
Mkellogg1
Fri, 08/21/2015 - 09:00
Wood Req'd
FYI.... Your "Shopping List" failed to mention the 1x2 board. But the pieces are accounted for in the "Cut List".
Mkellogg1
Tue, 08/25/2015 - 08:03
Assembly steps
Ana.... Love the chair plans, but the assembly Step 9 & Step 10 use the same picture, and Step 9 is supposed to show the attachment of the storage tray. I don't see a location dimension for the storage tray anywhere. Any help ?
jb97aggie
Thu, 12/17/2015 - 08:57
1X2 is NOT but SHOULD BE on the Shopping List
Grrrr...back to the store.
moonprysm
Sat, 06/18/2016 - 17:38
How old of a "kid"?
I'm in the process of building our homeschool "one room schoolhouse". I'm trying to figure out what kind of chairs to make. I have a 10 year old who's almost 5ft tall, a 7 year old, and a 5 year old. Are these like, toddler size chairs, or would they work for my boys?
bwaters86
Fri, 07/08/2016 - 13:06
Wood for the seat
Where can you find the 1x12x14? I tried looking online at my local lowes and home depot and it doesn't seem like they carry this board?? PLEASE HELP ASAP as I am planning to build this chair tomorrow. THANKS IN ADVANCE
In reply to Wood for the seat by bwaters86
Doug B
Fri, 07/08/2016 - 19:41
Seat wood
I think you will find the seat wood is 1x12 at 14inches long, should be in most lumber stores. Hope this helps.
In reply to Wood for the seat by bwaters86
Ana White
Mon, 07/18/2016 - 15:30
It's 14" not 14', it's for
It's 14" not 14', it's for the seat. Hope this helps. Depending on how many
chairs you want to build, you could probably find a 6' up to 10' 1 x 12.