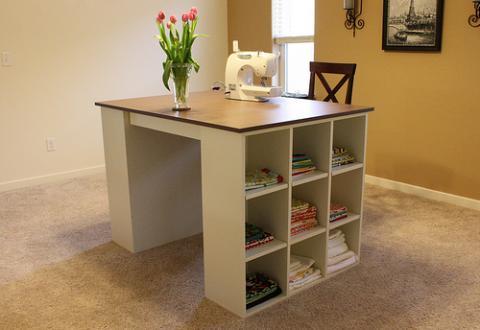


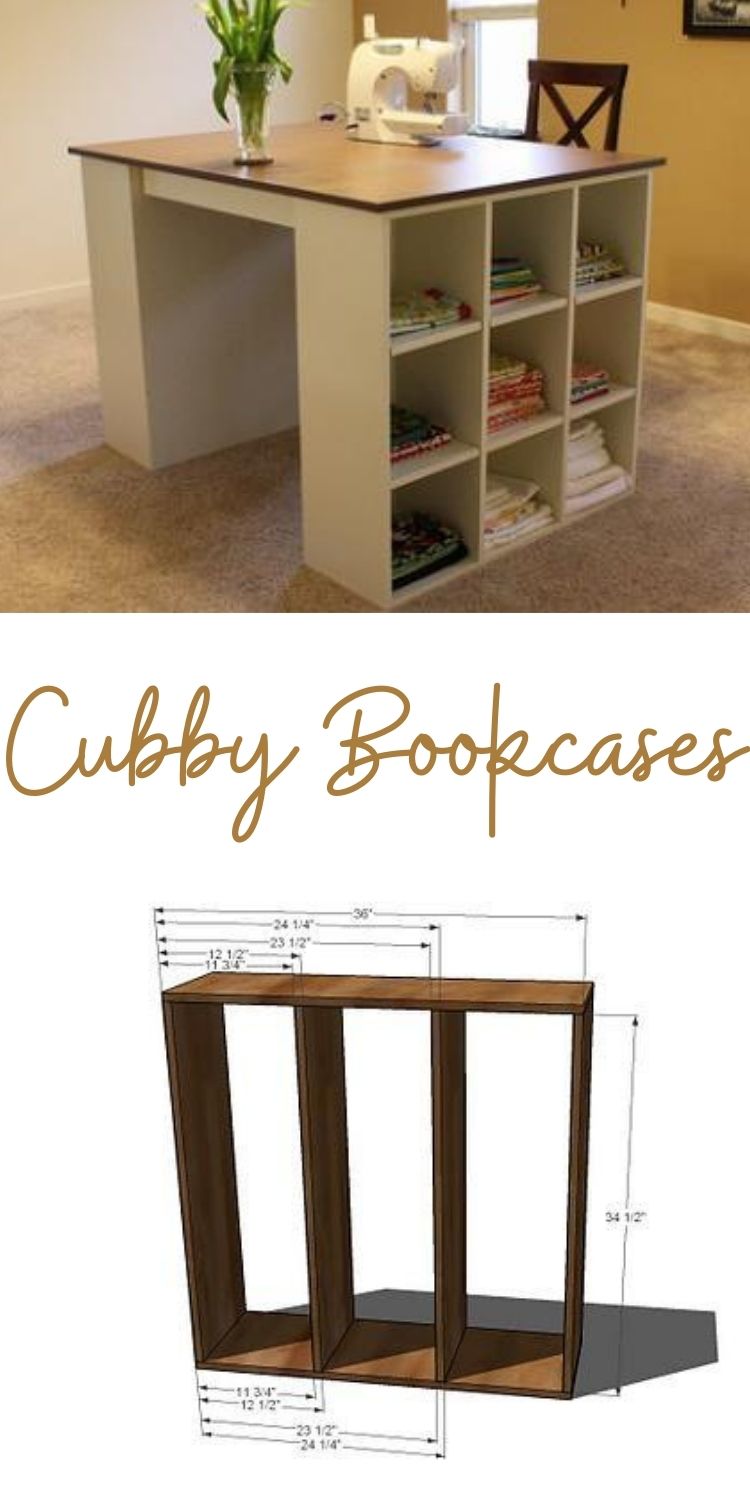
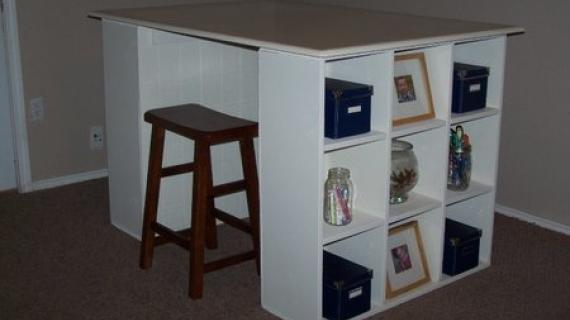
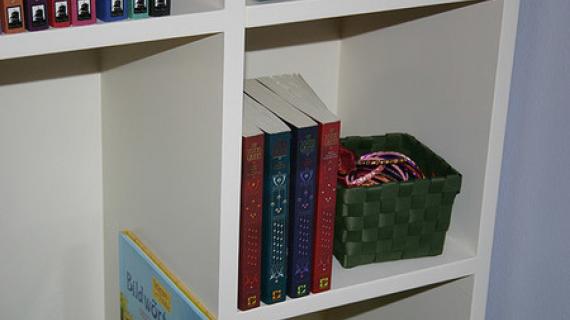
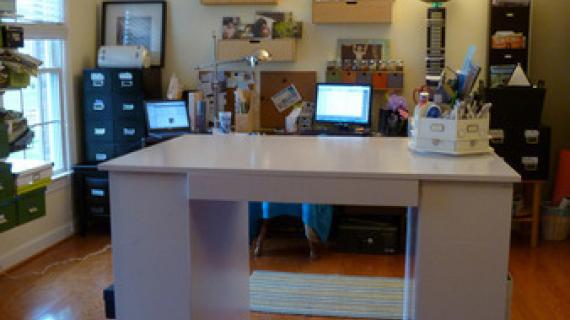
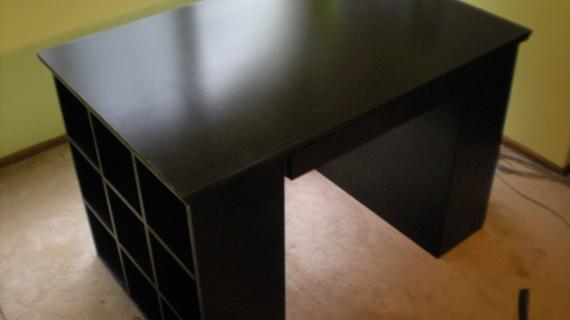
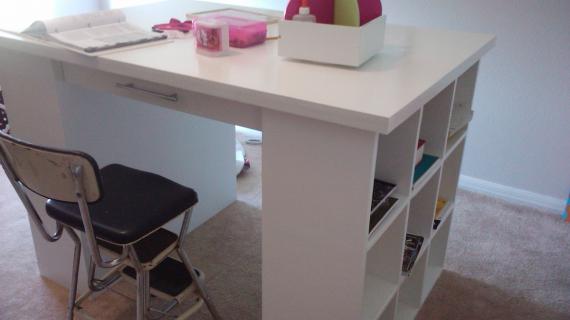
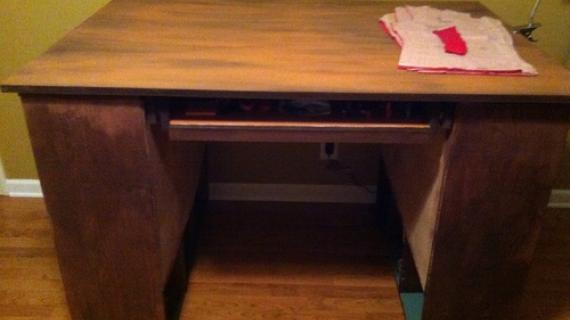
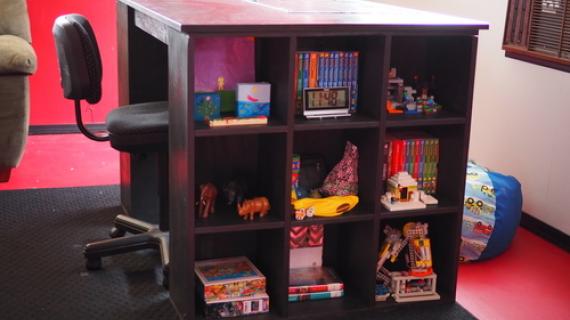
Cubby bookshelves are so popular because they enable you to further sort and organize your belongings. No longer do you need bookends and even baskets and bins become optional. This cubby bookshelf works with the craft table top to create a project table. It's the best of both worlds - ample workspace and easy storage. Build the cubby bookshelves alone or add the project tabletop for even more functionality.
Pin For Later!
Preparation
(This shopping list is for only one bookshelf)
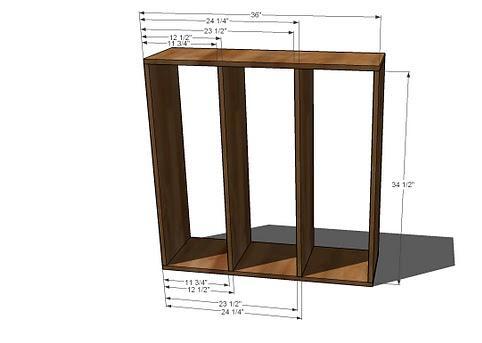
- 2 – 1×12 @ 36″ (Top and Bottom)
- 4 – 1×12 @ 34 1/2″ (Vertical Dividers)
- 6 – 1×12 @ 11″ (Shelves)
- 1 – 36″ x 36″ 1/4″ Plywood (Back)
- 6 – 1×2 @ 11″ (Inside Supports)


Work on a clean level surface. Mark your joints and cuts before assembling. Dry fit your pieces before fastening. Check for square after each step. Always use glue and work safely.
Instructions
Step 1

Build the Box. Fasten the vertical dividers to the tops and bottoms as directed above. Screws will hold better, nails are easier. If you use screws, predrill and countersink your screw heads. Use 2″ fasteners and glue. Check for square.
Step 2
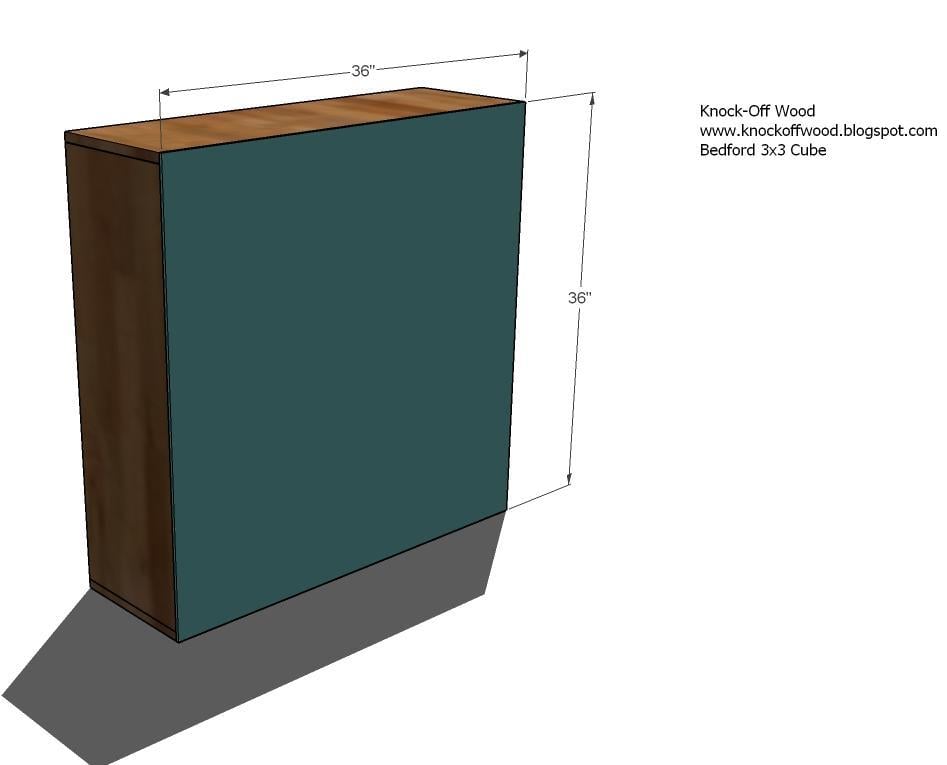
Back. Attach the back, making sure to fasten to the vertical dividers. Use the 1 1/4″ nails and glue. Check for square.
Step 3
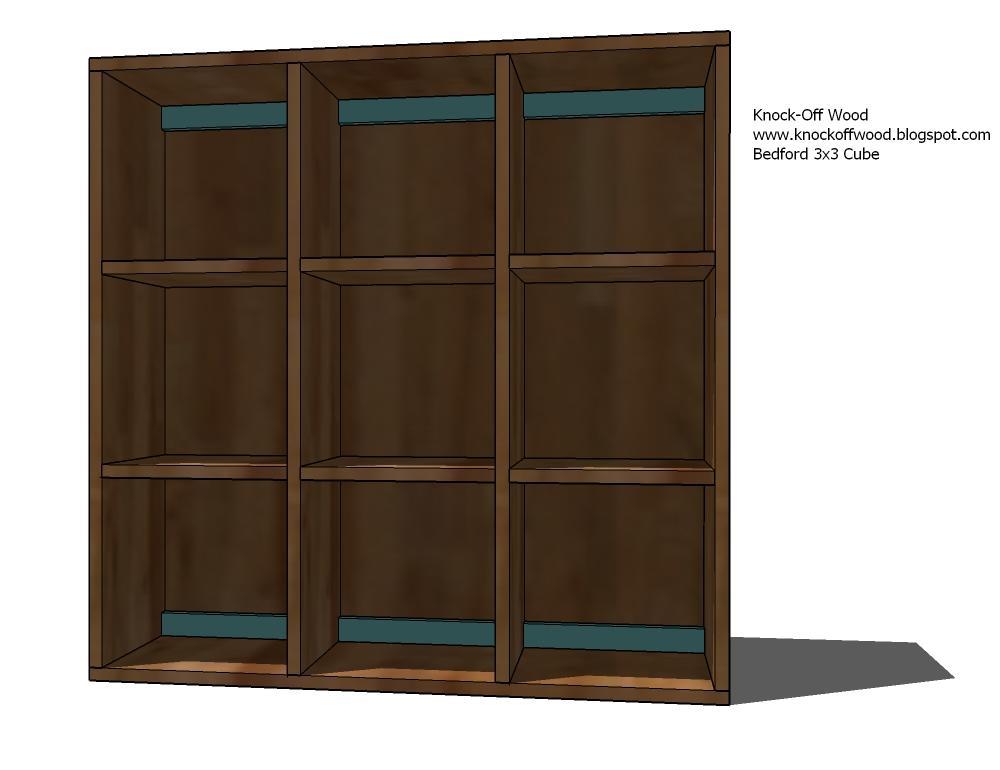
Inside Supports. Fasten the inside supports through the tops and bottoms using glue and 2″ fasteners. Also fasten through the sides into the ends. These supports will keep everything square and give you something to fasten the project table top to.
Step 4

Shelves. Measure and add shelf pins where the shelves are marked above. Notice the first Pottery Barn photo – the shelves in this system are removable. Fit the shelves on the shelf pins.
Comments
gretchen (not verified)
Tue, 02/16/2010 - 06:58
You are wonderful!! This
You are wonderful!! This made my day, I have wanted this collection for a long time...can't wait till all our tools catch up with us in the move. Oh, and Alaska girls rock! I grew up in Southeast and went to school at UAF. Love your site.
The Comfort Girl (not verified)
Tue, 02/16/2010 - 07:00
Yay! I'm about to start
Yay! I'm about to start creating a crafting/sewing studio...maybe I should make my own craft desk!
Onica (not verified)
Tue, 02/16/2010 - 07:02
gosh dang it! I already have
gosh dang it! I already have my craft room furniture! Maybe I need another craft room...
lanisanford (not verified)
Tue, 02/16/2010 - 07:17
Oh I loooooove this
Oh I loooooove this collection. Been drooling over it in the catalog. I don't think I have anywhere to put it at the moment but someday...
NerdyArtist (not verified)
Tue, 02/16/2010 - 07:33
Never before have I been so
Never before have I been so excited that my craft room isn't complete...
*starts making springtime building plans*
liz wiley (not verified)
Tue, 02/16/2010 - 07:57
I'm new to your site and I
I'm new to your site and I LOVE IT! I'm hoping for the courage to try this someday.
Liz
Jenny Lynn (not verified)
Tue, 02/16/2010 - 07:59
YAY!! I'm SO excited that
YAY!!
I'm SO excited that you're doing this :) This is the collection that I want for my craft room/office. I'm THRILLED!
Kari @ Ucreate (not verified)
Tue, 02/16/2010 - 08:07
Miss Ana!!My hubby is going
Miss Ana!!
My hubby is going to make these in our toy room and was going to make one up as he goes, now thanks to you he has the plans!!
THANK YOU, THANK YOU!
Mom (not verified)
Tue, 02/16/2010 - 08:28
I was just going to suggest
I was just going to suggest this bookcase! I have been wanting to make this desk for a few years now. You rock!
Leslie (not verified)
Tue, 02/16/2010 - 08:33
Hmm, I'm thinking these might
Hmm, I'm thinking these might be great anchors for a kitchen island. How would you go about supporting a piece of granite or butcher block? Thanks for this great design!
Brooke (not verified)
Tue, 02/16/2010 - 08:45
Hey I had a good idea that
Hey I had a good idea that would free up some of your emails. You can start a flickr account with Knock off Wood. That way people who make your plans can put pictures in there. If you want to do a bragging board every so often you can pull images from there.
It would save your email account :)
Thanks for all you do!
C & N c{o}. (not verified)
Tue, 02/16/2010 - 08:55
OMG! Can you please please
OMG! Can you please please please please make plans for the work station too?!
Love it as always :)
Christy (not verified)
Tue, 02/16/2010 - 10:02
OMG - Ana - THANK YOU!!!
OMG - Ana - THANK YOU!!! You're going to make me pee my pants from all the excitement. Okay, not really, but close! Be still my heart!!
Nielson Family (not verified)
Tue, 02/16/2010 - 12:48
This is my FAVORITE
This is my FAVORITE collection! I have been drooling over it for a long time and I can't wait to get started...I'm off to home depot right now! THANK YOU!!!
Jenn (not verified)
Tue, 02/16/2010 - 15:40
You ROCK!! We just found
You ROCK!! We just found your blog a few weeks ago and I pestered my husband to help me build the entryway shelf and bench, which we're almost done with. I told him I wanted the Bedford table/storage system for my craft room and that I wished you had plans for it...and here they are!!
Michelle and Landon (not verified)
Tue, 02/16/2010 - 16:25
Im so excited about this, I
Im so excited about this, I have been dying to have this craft desk forever! Thanks for doing this one!
Jerilyn (not verified)
Wed, 02/17/2010 - 13:43
I fell in "LOVE" with this
I fell in "LOVE" with this the second I saw it...so headed to Lowes and bought all the supplies and will be starting on it tomorrow..cannot wait for me and my 8yr old to share the great space doing craft and such..One modified item we will be doing..on one side we will add a dowel rod to attach a big roll of paper..this should make her drawing and coloring alot easier and know right where the paper is.."Cant Wait!" Will post as soon as I am done..
Amynev (not verified)
Tue, 03/09/2010 - 04:34
I love this but would like
I love this but would like the cubbies to be about 13x13 when finished. I scrapbbok and would love to store my 12x12 paper in the cubbies. LOVE IT!
Ursula (not verified)
Sun, 04/11/2010 - 16:45
I am working on building this
I am working on building this right now, I actually am building 2 for the desk. In total 2 bookcases have cost $90 in lumber, so they're roughly $45 apiece. I used good quality wood so I'm sure you could get some a bit cheaper than I. :)
dandeelionsoup (not verified)
Sat, 08/07/2010 - 05:53
I'm building two of these
I'm building two of these bookcases now to go with the craft table. The problem that I'm having with the plans is that you are supposed to drill the holes for the shelf pins after you assemble the rest of the bookcase, but in doing it that way, it is extremely difficult to drill the holes. I can't get my cordless drill into the shelfspace to property drill the holes perpendicular to the board face. I've been drilling at an awkward angle to get the shelf pins in. Next time, I would drill the holes in those boards first before putting the top and the bottom on the bookcase.
jimssolidwoodp… (not verified)
Fri, 09/03/2010 - 03:25
This is very nice maybe a
This is very nice maybe a future project
jim
Build Your Own… (not verified)
Mon, 09/13/2010 - 08:48
[...] the color! Overall
[...] the color! Overall Dimensions. Overall dimensions are shown above. This includes the use of the bookcase plans here. Shopping List 1 Sheet of MDF or A1 Plywood 2 – 1×4 Boards, 8′ Long 2- [...]
DeAndrea (not verified)
Sun, 11/07/2010 - 11:53
Ana, most of the examples and
Ana, most of the examples and pictures are missing from this post! :( I'd love to build this!
DeAndrea (not verified)
Sun, 11/07/2010 - 11:55
Oops, apparently they just
Oops, apparently they just didn't load the first time!!
Cheyenne Renard (not verified)
Fri, 11/26/2010 - 08:33
This is my first time to your
This is my first time to your site , boy you sure Rock to say the least. I have wanted some of the things you have made only to think i just dont have the money for them , so i wait and still nothing, NOw i can make it my self or have help making it. I just love the desk for a scrapbook room and office also the kidds Kitchen i just love you work . Hope you had a great Thanksgiving i am greatful for people like you now i can have the things i want and not have to wait any more. AgainThank you so much Love and Blessings Cheyenne from Henderson Nevada Please sign me up to this site May god richly bless you and yours
Elise (not verified)
Tue, 01/18/2011 - 21:08
Would it be possible to scale
Would it be possible to scale this down (I was thinking 4 cubbies as opposed to 9) to create a child's art table? How would one go about doing so? I was thinking the cubbies would be 30"x30" over all. And tabletop might be 32"x44"ish? How hard might it be to have 4-6 circular holes on the table top for paint cups? And some sort of paper roller?
Forgive my art skills, but my idea thus far: http://www.flickr.com/photos/brightleafphoto/5368916903/
Table used for cup holder and paper holder ideas:
http://www.amazon.com/Alex-Toys-710W-Creativity-Center/dp/B000HV2U6O/re…
jenaRN
Thu, 04/14/2011 - 18:17
LOVE this
I am so going to have my husband make this for my craft room in our new house-can't wait!!!!!!!!
Hawaiianatheart (not verified)
Wed, 06/08/2011 - 07:35
How super is this
I was just talking to hubby about making something like this - on a larger scale to hold multiple machines/girls.
SMathis
Wed, 08/31/2011 - 10:35
Stain/Paint used on the top
So Love your table, I was wondering what color is the paint/stain that you used on the top?
Guest (not verified)
Fri, 10/14/2011 - 14:46
Creating the Table
Hi, I am one of those people that need every step laid out so, how do you attach the top of the table to the cubbies?
Tsu Dho Nimh
Fri, 10/14/2011 - 18:41
Screws slightly shorter than
Screws slightly shorter than the thickness of the cubby top and the table top ... drill and screw up into the top. Predrill the cubby to make it easier.
Guest (not verified)
Sat, 10/15/2011 - 11:49
Thanks
So no extra supports are needed to install the top? I always try to over think stuff!! Thanks!!
Phil (not verified)
Thu, 10/20/2011 - 18:02
Check for square
I see the "check for square" on alot of plans, but how do you accurately check for square? Also, if you aren't square, what do you do then? Undo it and try again?
dfillion
Sun, 02/26/2012 - 12:36
This is like a Dream!!!
Hi Ana, I'm new to your blog today and so excited about your plans that I can barely type. This cubby/desk unit is about $400 ON SALE to purchase. Have wanted it for so long, but just can't do it in this economy and couldn't figure out how to make it (I'm a newbie at woodworking and am loving it).
Thank you thank you thank you for all you are doing!
I too am interested in making the cubbies able to hold 12x12 products.
Christi Jay (not verified)
Tue, 03/06/2012 - 08:21
I am confused. I am not
I am confused. I am not seeing where to use the Kregg Jig. When do we use it? and where ? and how to we fasten the 2 inch screw? I am sorry,I am a newbie to these projects.
papabear
Mon, 09/22/2014 - 01:02
kreg jig
this is for making pocket holes for a pocket hole screw. It makes a stronger joint in your projects and it is very easy to use.I hope this helps:)
Andge1989
Thu, 01/30/2014 - 18:10
Im missing something... where
Im missing something... where is the instructions for attaching the top and the drawers? Im only seeing the bookshelf...
papabear
Mon, 09/22/2014 - 00:54
attaching top and shelf
there is an other plan for the top and drawer and how to attach the it to the bookshelf together.
samthebuilder
Sat, 09/13/2014 - 15:11
Has anyone actually built this?
How do you make a 1/2 of a piece of plywood into 36x36?
DIYER_MD
Sat, 09/13/2014 - 17:16
Plywood
A standard sheet of plywood is 48" x 96" meaning that 1/2 sheet of plywood is 48" x 48". You just need to cut it down to 36" x 36" using your circular saw or table saw. Home Depot will cut it for you if you buy it there.