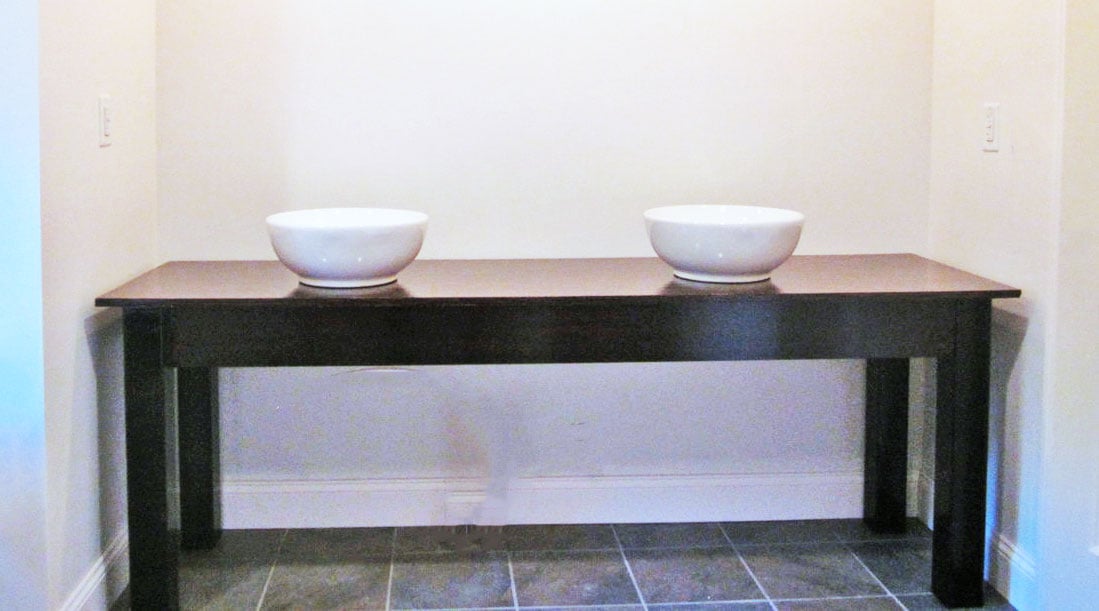


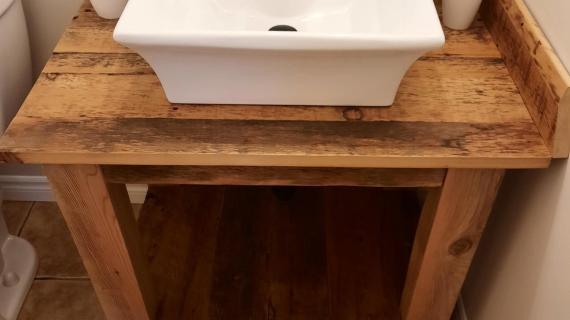
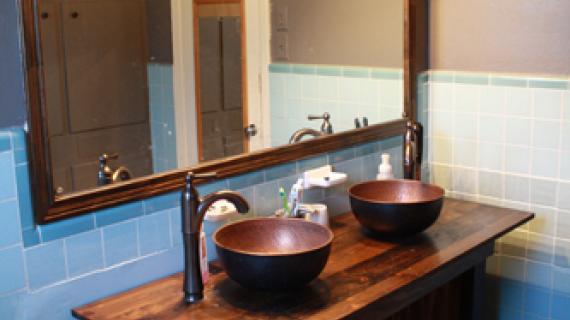
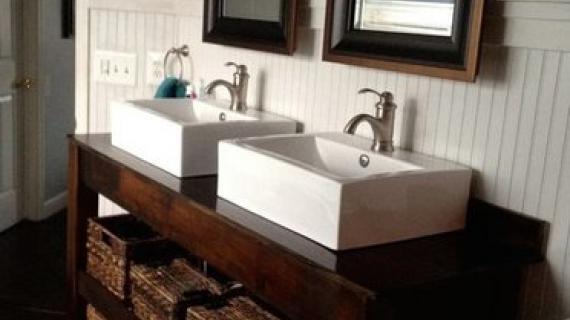
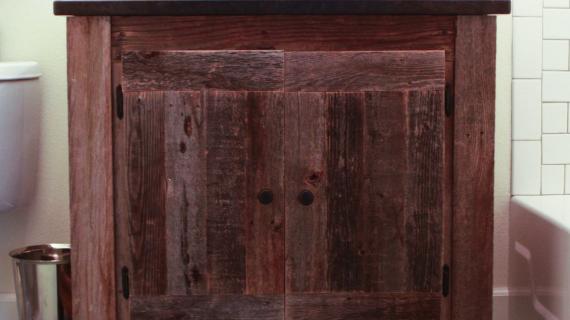
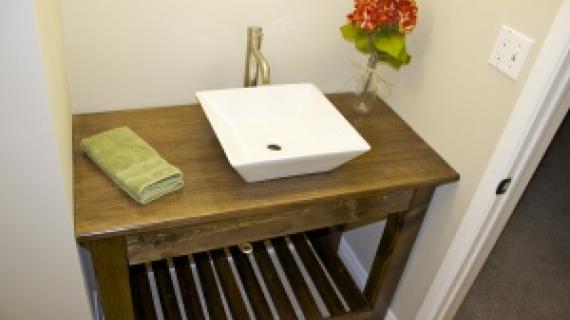
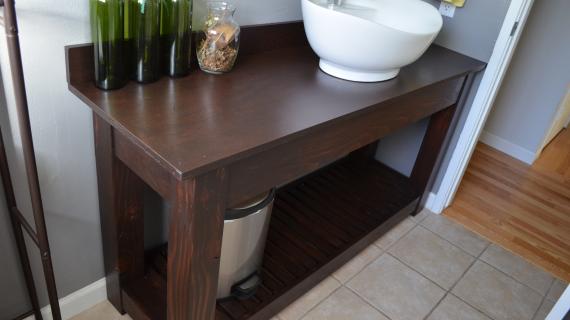
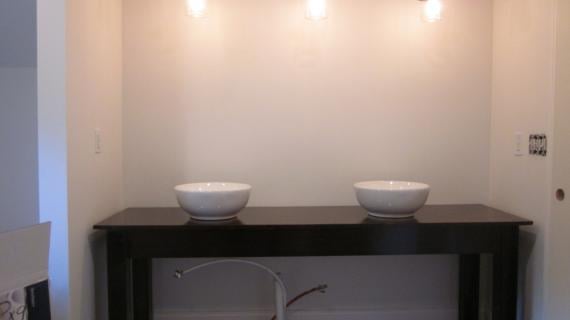
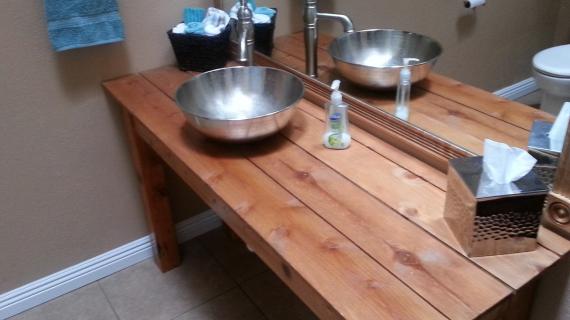
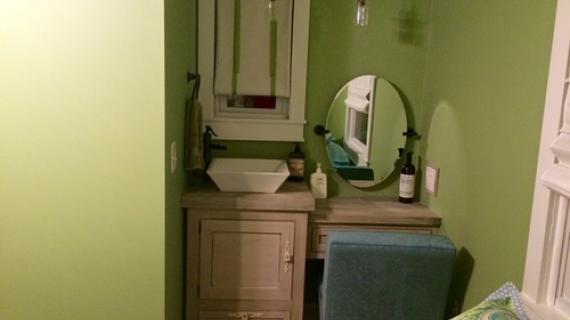
With raised sinks so popular these days, why not save some money and create a open vanity? You can add a shelf under the sink or even rolling laundry bins. This simple plan can be easily scaled to any space. Special thanks to our readers for sharing their photos.
Preparation
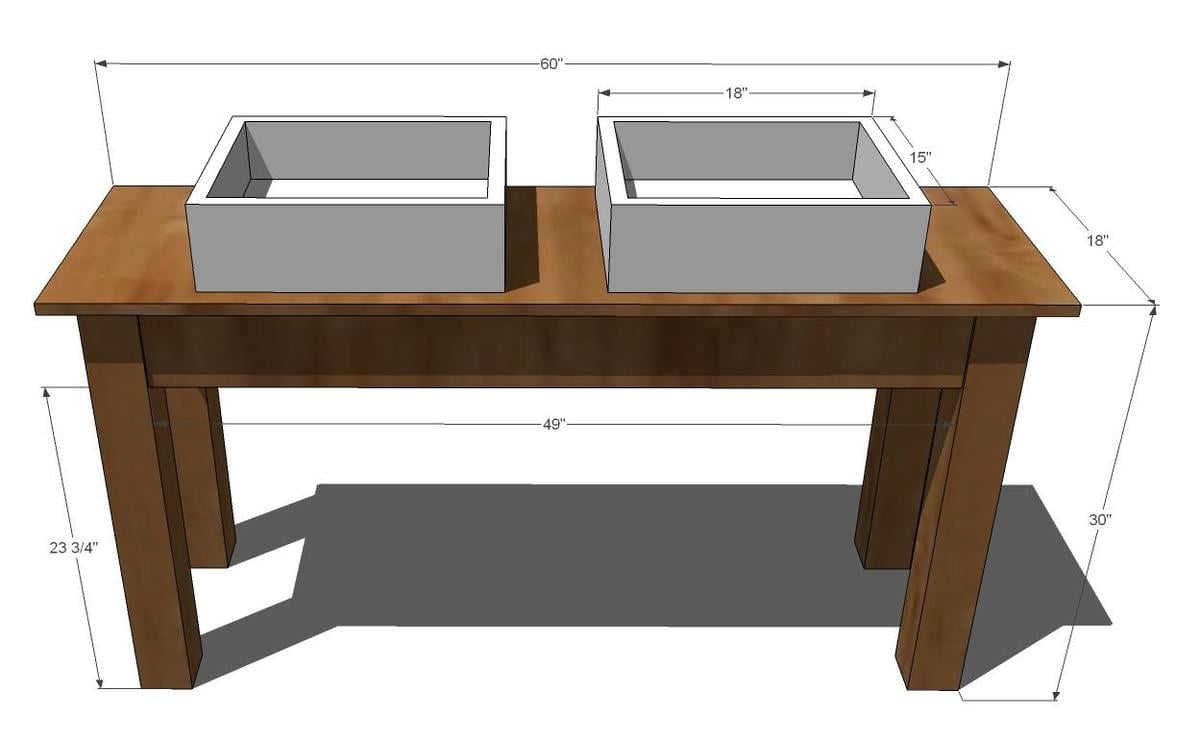
2 – above mount sinks, approximately 18″ wide x 15″ deep
1 – 4x4 - 10 feet long
1 – 1×6 - 12 feet long
1 – 1×3 Boards, you will only need less than 12″
Plywood or project panel 60″ x 18″ or make a tabletop out of two 1x10 boards, 60" long
2 1/2″ screws
Wood Glue
Wood Filler
Paint and Sealant
A) 4 – 4×4 @ 29 1/4″ (Legs)
B) 4 – 1×3 @ 5 1/2″ (Spacers)
C) 2 – 1×6 @ 10″ (Side Aprons)
D) 2 – 1×6 @ 15 1/4″ (Top Side Supports)
E) 2 – 1×6 @ 49″ (Front and Back Aprons)


Work on a clean level surface with good straight boards. Predrill and countersink your screws. Measure and mark out your joints before fastening. Use glue and 2 1/2″ screws unless otherwise directed. Check for square after each step.
Instructions
Step 1

Spacer. Fasten the spacer to the legs, as shown above. Use the 2 1/2″ screws and glue.
Step 2
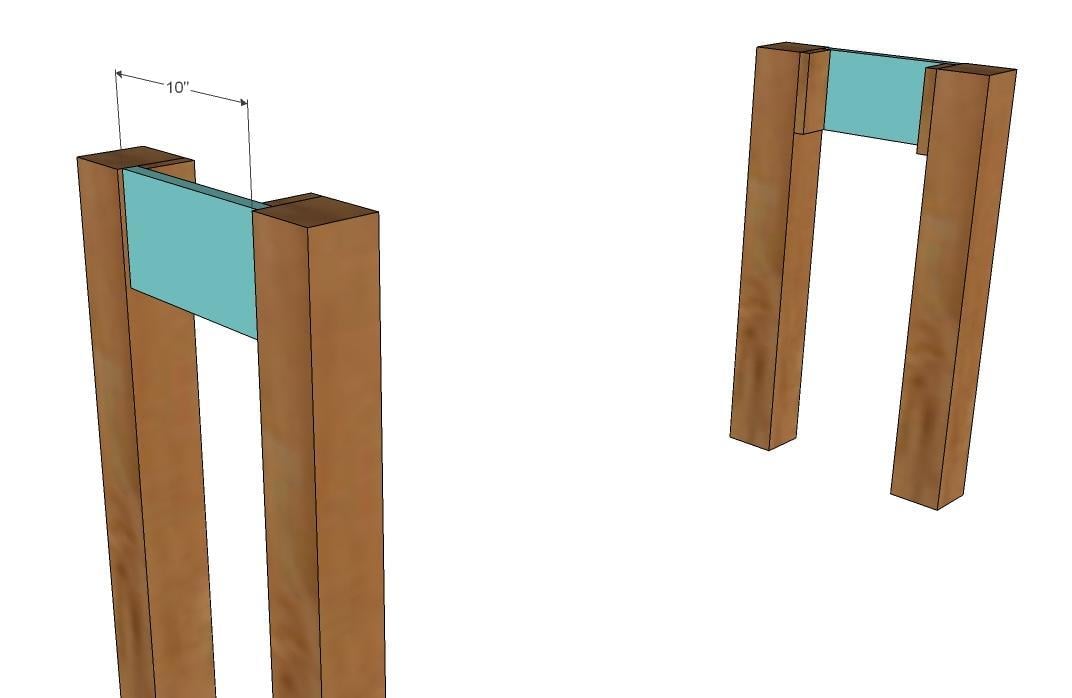
Side Apron. Fasten the side apron to the spacers, as shown above.
Step 3
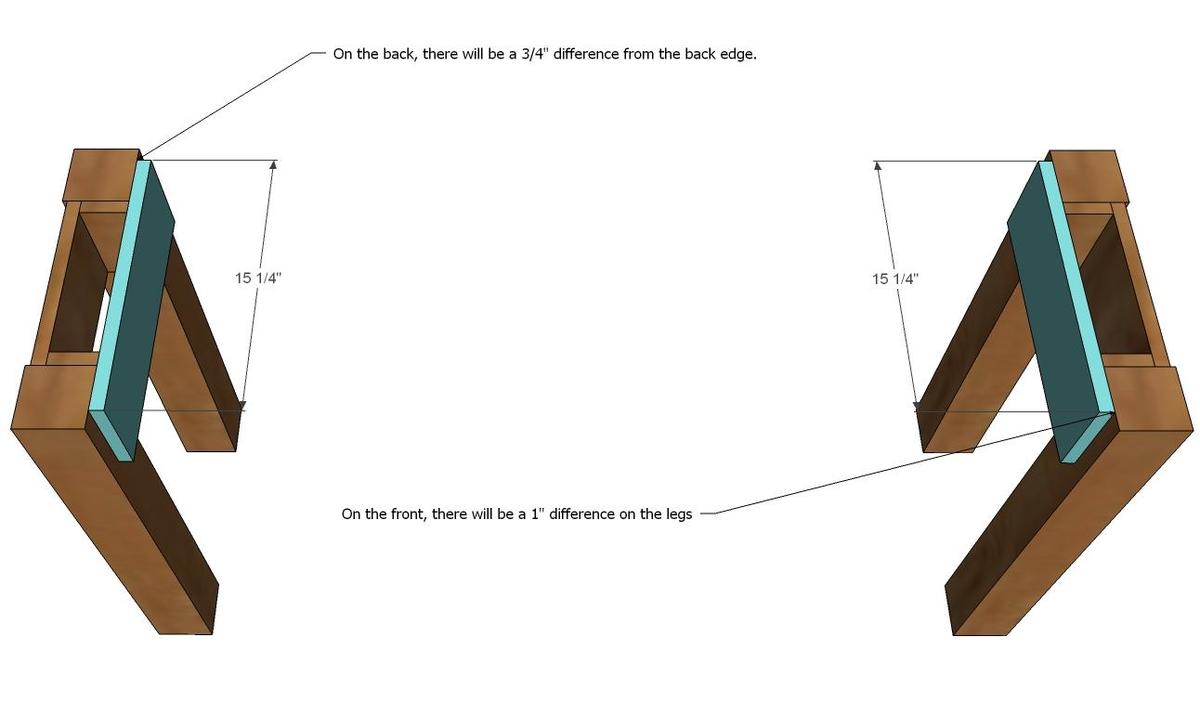
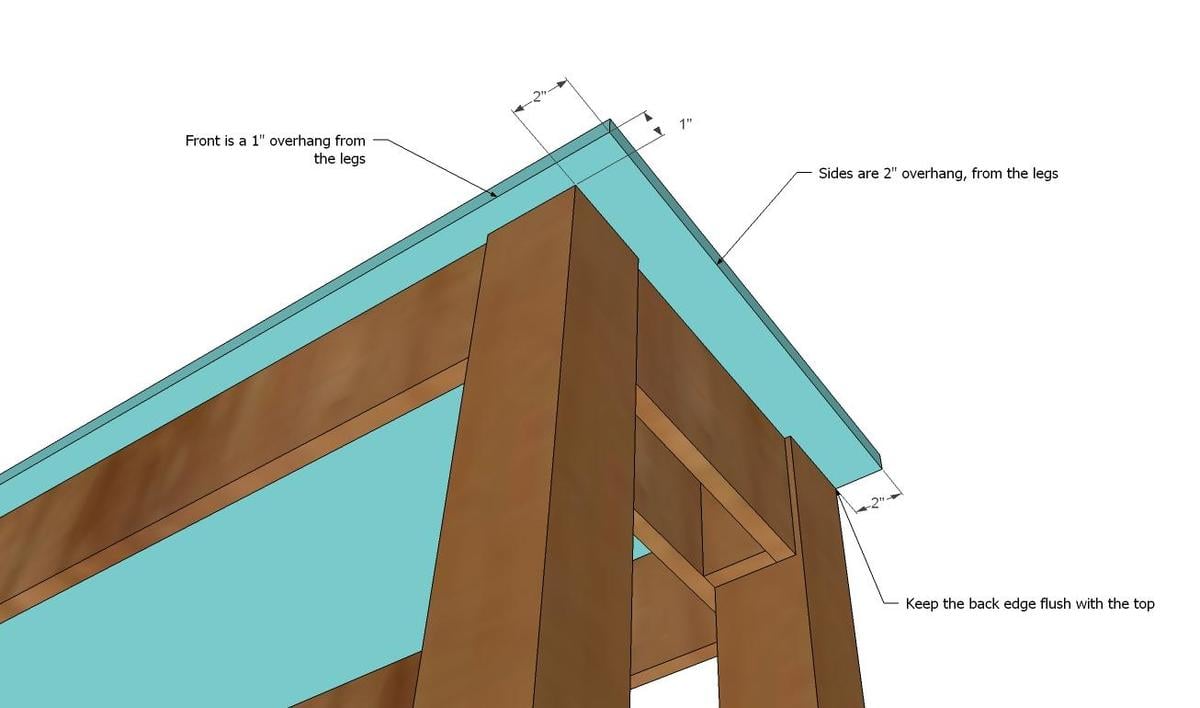
Top Support. Fasten the top support, as shown above. Notice the front and back of the support will have a different position on the legs. This is important, because you want your back apron to sit flush with the backs of the legs, and then the back of the wall behind the vanity. You can also choose to secure the vanity to the wall through this back apron.
Step 4

Front and Back Aprons. Fasten the front and back aprons in place.
Step 5

Comments
Catherine Hans… (not verified)
Sun, 02/14/2010 - 02:22
Isn't this fabulous??? I
Isn't this fabulous??? I love it!!! I love all your colour selections too. If only I were building/renovating.... BTW, what drawing software do you use? I always wondered how to do that.
In reply to Isn't this fabulous??? I by Catherine Hans… (not verified)
loniwolfe
Sun, 11/06/2011 - 07:30
It's called Google Sketchup.
It's called Google Sketchup. It's a free download. If you get it I suggest watching the little tutorials it offers, otherwise its kind of confusing, lol.
Tiffany (not verified)
Sun, 02/14/2010 - 03:29
FABULOUS!!! My dad and
FABULOUS!!! My dad and husband want me to stop following your blog because each day I tell them of a new project we I mean they need to start!!!
Kathy V, Pittsburgh (not verified)
Sun, 02/14/2010 - 03:33
This makes me want to start
This makes me want to start on the second bathroom, pronto! :P Unfortunately, that's a few years down the line, but would it be wrong to build the vanity now? To be prepared?
Jennie (not verified)
Sun, 02/14/2010 - 03:47
love this! hubby and i were
love this! hubby and i were just talking about getting a new vanity for our full bath - although i don't know if we have enough room for a double like this. i guess we could just narrow it up a bit and go with 1 sink??
Elizabeth @ Th… (not verified)
Sun, 02/14/2010 - 04:03
This has become one of my fav
This has become one of my fav Blog's I can't wait to see what you come up with. I love this vanity!! so mant possibilities!!!
Frugal Home Design (not verified)
Sun, 02/14/2010 - 05:01
That is so cute. I love it.
That is so cute. I love it. Thanks you so much for making building stuff seem possible. You are amazing.
Nielson Family (not verified)
Sun, 02/14/2010 - 05:24
I recently found your blog
I recently found your blog through another blog I love and I can't wait to start building! Your plans are absolutely amazing!!! I love the vanity and it just might be my first project...Look out for some pictures to come :)
Ana White (not verified)
Sun, 02/14/2010 - 08:13
I use Google Sketchup, its
I use Google Sketchup, its free, its fun, its easy! There is even a Google Sketchup for Dummies book.
To add a shelf, look at the plans for the Kitchen Island here http://knockoffwood.blogspot.com/2010/02/plans-revised-kitchen-island-i…
Oh, and there is no reason you could not make this vanity size (1 sink) you choose. Just make sure the sink will fit on the vanity top. Poplular vanity sizes are 24", 20", 36", 48" and 60".
mel (not verified)
Sun, 02/14/2010 - 08:39
Every time I look at your
Every time I look at your blog, I am amazed at your work! I have held a special place in my heart for Alaska since a mission trip there 10 years ago because that's when I learned that it's okay for girls to use tools. And today, discovering that you're in Delta Junction, well, I like you even more! My trip to AK was spent at Tanana Valley Baptist Association's Camp Baldwin in Delta Junction.
Andrea (not verified)
Sun, 02/14/2010 - 08:57
Are you really in Delta
Are you really in Delta Junction? Or is that just a cover? :-) Sooooo cloooooose.
snowphish27 (not verified)
Sun, 02/14/2010 - 09:29
Hmmm...Thinking I might build
Hmmm...Thinking I might build this as a desk for a special niche in my son's room. Not nearly as exciting as a vanity, but fun nonetheless!
lacysummer (not verified)
Sun, 02/14/2010 - 15:12
LOVE IT, we are starting on
LOVE IT, we are starting on the kitchen and bath this spring
I am hoping you may someday venture out and work on kitchen cabinets.
Have any ideas on building your own?
brown paper packages (not verified)
Sun, 02/14/2010 - 15:29
I love your blog, and so does
I love your blog, and so does my husband! He is an awesome woodworker, and we love building knock-off furniture--mostly from Pottery Barn. We were so excited to find your site, because he usually builds with no plans, and it's wonderful to have all this info. I adore your farmhouse bed, and we will be making them in king-size for us, and twin-size for our girls.
Our question is:
What's the process you use to finish your projects? i.e. paint, spray paint, poly, etc. We are always looking for better ways to get a more professional and finished-looking project. Also, where do you paint in the wintertime? I noticed you live in Alaska, and I know how hold it gets there. We also live in a cold climate, so I'm interested in what you do.
Anyway, great blog! I would love to feature you in the future!
Carolyn (not verified)
Sun, 02/14/2010 - 17:37
I think it would look great
I think it would look great and be slightly more functional if you mounted a shower rod or part of a shower rod as a towel bar below the front apron- instead of mounting a smaller bar on the apron- if that makes sense? Then you could have more towel storage, probably cover the exposed pipes slightly more, etc.
Karen P (not verified)
Sun, 02/14/2010 - 18:34
Very cute and sometimes I
Very cute and sometimes I wish I could start over with raising my kids, just to be able to make your furniture for their rooms (instead of buying it for ridiculous prices in AK) Are you really in Delta Junction? Very cool!
Heather (not verified)
Mon, 02/15/2010 - 03:39
Oh my goodness! Where are my
Oh my goodness! Where are my power tools??? I just asked my hubby that after seeing this. I showed him your blog and we are both super excited about me starting to build our own furniture. But I just may have to start with this! Thank you soooo much!
Philip (not verified)
Mon, 02/15/2010 - 17:38
Thanks for putting this out
Thanks for putting this out there!!! :) I was wondering how to modify for a single sink??Any ideas would be appreciated.... Thanks again :)
Kirsten (not verified)
Mon, 02/15/2010 - 18:01
I think my husband is going
I think my husband is going to kill me. :) I tell pepole if it was not for my husband we wouldn't have any furinture. Thanks for the wonderful post as I was looking at these so that my husband could make them.
Mike & Emily (not verified)
Tue, 02/23/2010 - 17:50
This is exactly what we want
This is exactly what we want for our bathroom! This might just be perfect! Thanks!!
Mollie (not verified)
Thu, 03/18/2010 - 14:47
I am building this vanity
I am building this vanity right now and have a question about staining. I used pine, but two different colors of pine. When staining will that difference show? Also, since pine is a softwood should I use some kind of pre-treater before staining?
Ana White (not verified)
Thu, 03/18/2010 - 15:52
I think the best thing you
I think the best thing you can do is test out scrap pieces of wood with the desired finish. See how closely they match, and if the scraps are blotchy or not.
Chris (not verified)
Tue, 04/27/2010 - 06:15
What is your measurement
What is your measurement between the edge of the vessel sink and the edge of the top?
Ana White (not verified)
Tue, 04/27/2010 - 06:22
Hi Chris, this is really
Hi Chris, this is really going to depend on what type and size of sink, the desired faucet and placement, etc. I would rest the sink on top until you find the perfect position.
Christine (not verified)
Mon, 06/07/2010 - 14:04
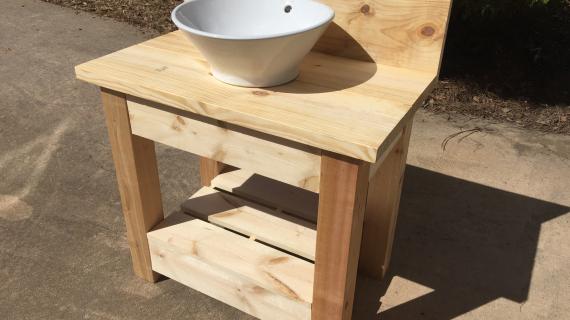
I just built this last night
I just built this last night with a couple modifications -- it's just a single sink, I used 2x2's instead of 4x4's for the legs (since it looked awkward with thick legs), and added a shelf 6" from the bottom. I'm so excited to finish and install it! This was a super easy plan and my 2nd KOW project.
A couple pics of it as it is right now:
http://www.facebook.com/photo.php?pid=34448965&l=85b9cf8631&id=57000033
http://www.facebook.com/photo.php?pid=34448964&l=c3f0aebe5c&id=57000033
karen (not verified)
Sun, 12/26/2010 - 06:48
This is my new project! We
This is my new project! We did the Tryde Console to start out and it was great! It was the first project that we did together (not just me doing it) and finished together. We have had so many people comment on it that now my husband is ready to do more projects with me like this! Thansk Ana
Polysoup
Wed, 10/12/2011 - 22:05
LOVE THIS but I have questions
My bathroom was damaged from water so I'm ripping out the construction grade stuff and making my own vanity and linen cabinets :) I was wondering if this design can support a 39x18.5 piece of granite? Will I need to add some more supports? Whats the minimum thinkness the frame (legs and skirt) should be? And a preferred wood that can handle that weight?
Thanks so much. I love this site!
Hillary (not verified)
Sat, 11/05/2011 - 17:25
granite top
I just blogged about my version of this vanity and I'll post it to the brag blog after I post this comment. I don't think this vanity would have a problem handling a big piece of granite. It is incredibly solid and strong. I used 4x4 posts for the legs and 2x4s for the skirt and mine is made out of reclaimed cedar. I think it really needs the 2x4 skirt but if you didn't like the look, you could face it with a 1x4 or 1x6 or even a 1x6 ripped to just cover the 2x4.
My only suggestion would be to maybe add two 2x4s on either side of the sink, just to give the granite more supports underneath, but that is really to accommodate the strength (or weakness) of the granite more than it is about the strength of the vanity. Your granite fabricator could tell you whether it would be necessary.
Polysoup
Sat, 11/05/2011 - 20:53
Granite Top
Thank you for your response. I ended up making two of these vanities one at 29 inches and one at around 39. I found pieces of granite on craigslist and found a local person to cut the granite as well. Because the width of the tables are so short I didn't feel like I needed more support (guess I was over paranoid) :) I'm finishing up tiling the floor of these bathrooms before brag posting the finishes vanities and also the finished linen cabinets that I made (both designs are off this awesome site!)
In reply to Granite Top by Polysoup
hillarylouise
Sat, 11/05/2011 - 20:57
Wow!!
I can't wait to see the finished work!
Tameka (not verified)
Tue, 06/19/2012 - 19:00
This vanity is beautiful.
This vanity is beautiful. What would need to be done to the plans to add shelves at the bottom for baskets?
mayoef
Sat, 05/11/2013 - 16:32
how to fasten the top of the vanity?
Hi Ana! I absolutely love your website! We've built shelves, beds, and now this vanity. How exactly did you fasten the top of the vanity to the legs without screws showing? I just wasn't sure how to complete it and on the instructions it just says "fasten" THanks! I'll post pictures when I finish it!
ibthemom
Wed, 02/26/2014 - 08:51
Single Vanity Plans??
I love this vanity-- however, when I clicked on the pic of the single bowl vanity, it showed these plans for a double bowl. Where are the plans for the single? I am a starter and need everything listed out for me- lol. I can't modify. Thanks!
marianneknoles
Sat, 05/16/2015 - 17:42
vanity
how are you attaching the apron boards to the spacers? With screws from the front or with a Kreg jig?