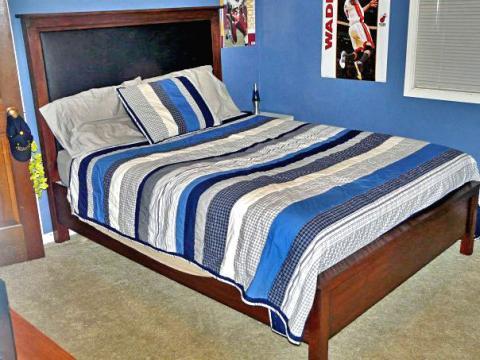


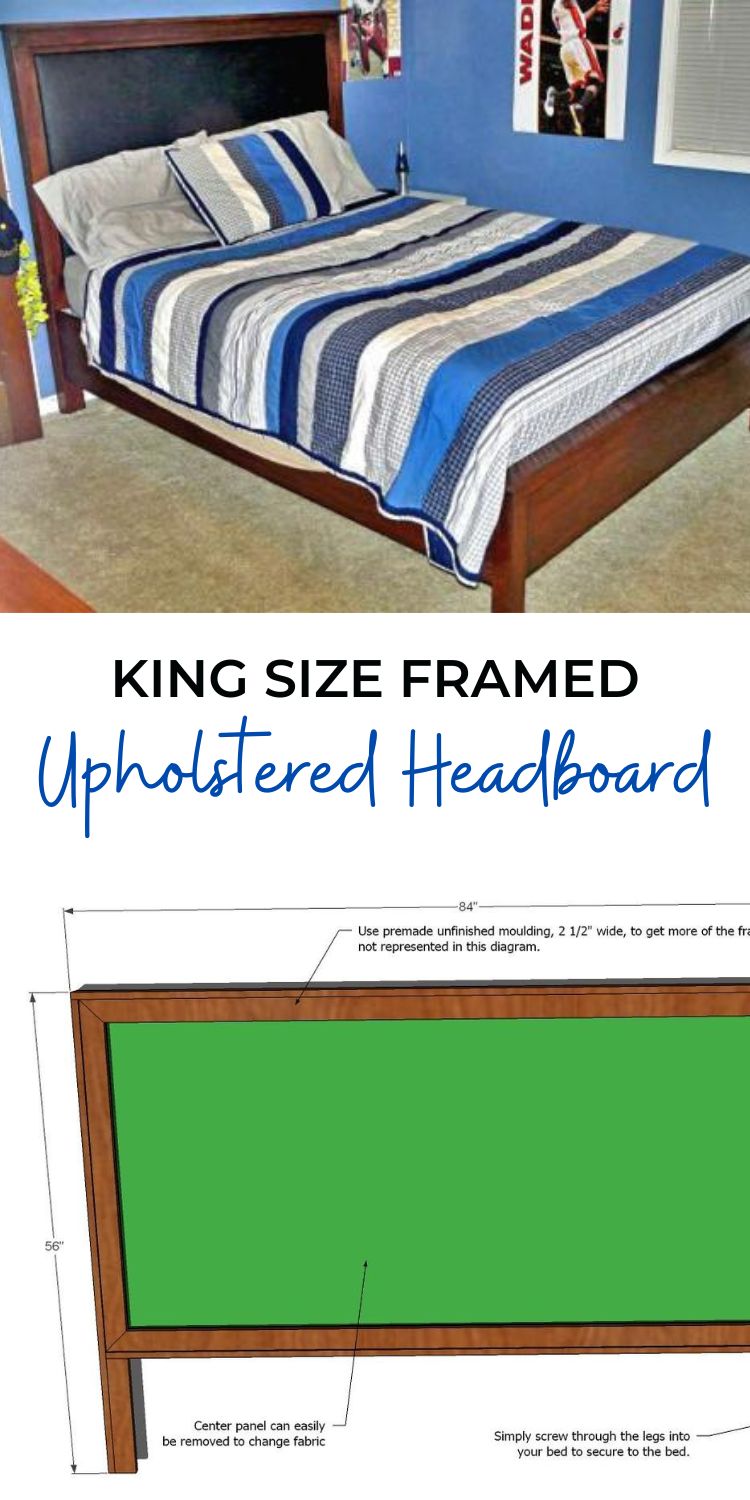
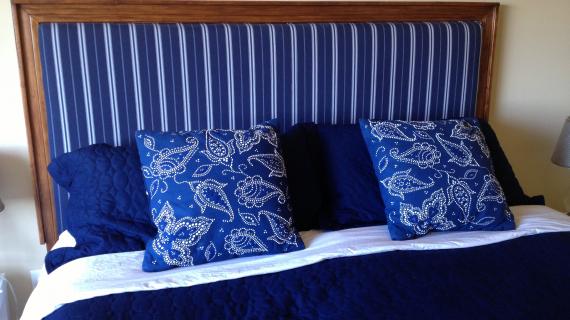
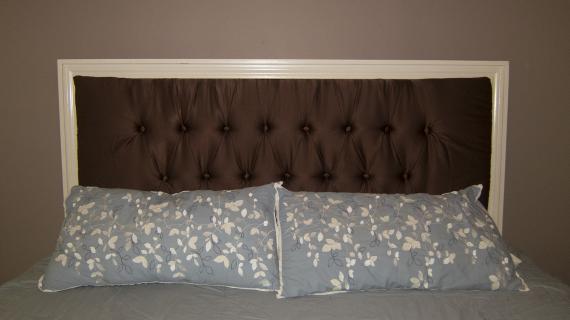
Create a luxurious headboard for your bed with these simple plans. Special thanks to Amy for sharing her photo. Amy also built the bed (it's a queen size) from her own plan.
Pin For Later!
Preparation
1 – 3/4 MDF or plywood (can be low grade, but make sure the plywood is straight and not damaged)
A) 1 – 3/4″ Plywood or MDF @ 76 1/2″ x 40” (Back, you can use builder’s grade plywood)
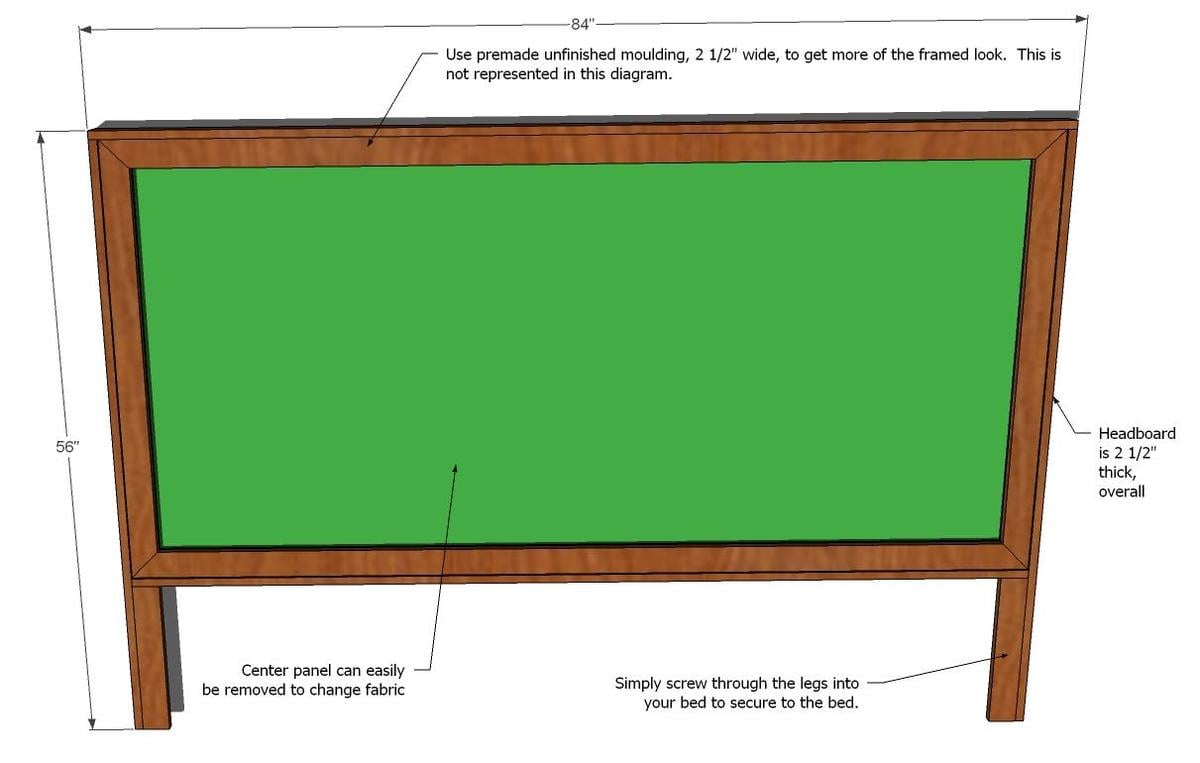
Please note that the actual width will be 78″ and not 84″, as shown in dimension diagram(to fit a standard king, 78″ wide). The cut list will reflect this change. To make a queen sized, simply subtract 18″ from all horizontal cuts, leaving all vertical cuts the same. (queen sized mattress measures 60″ x 80″)


Instructions
Step 1
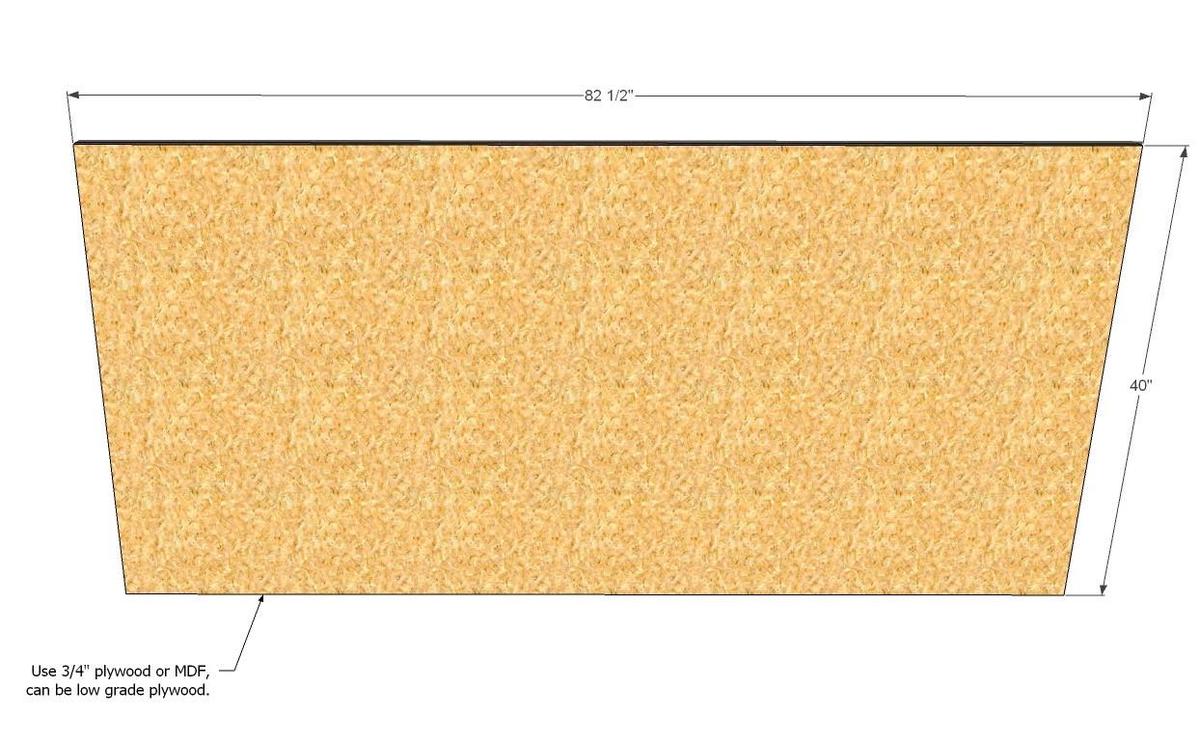
Please note that the above piece should be cut at 76 1/2″ x 40″
1. Back. Cut or have cut the back of the headboard. Overall dimensions are 76 1/2″ x 40″
Step 2
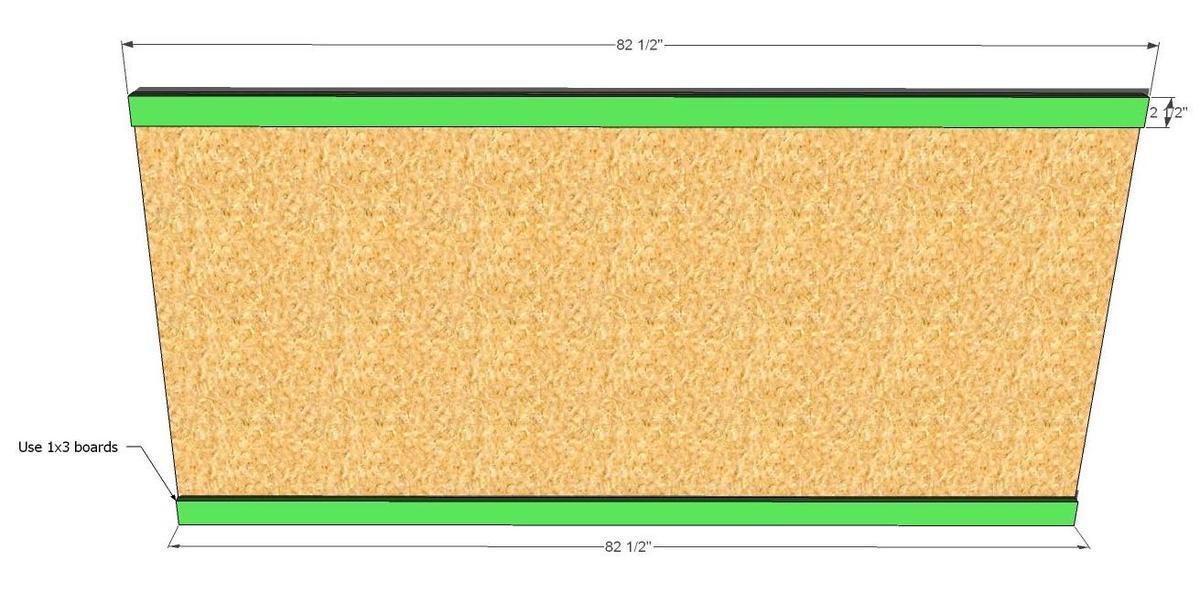
Please note that the top and bottom trim, boards B, will be 1×3 cut at 76 1/2″ overall length.
2. Top and Bottom Trim, Bottom Layer. Use 1 1/4″ nails and glue to fasten the trim pieces to the back, as shown above.
Step 3
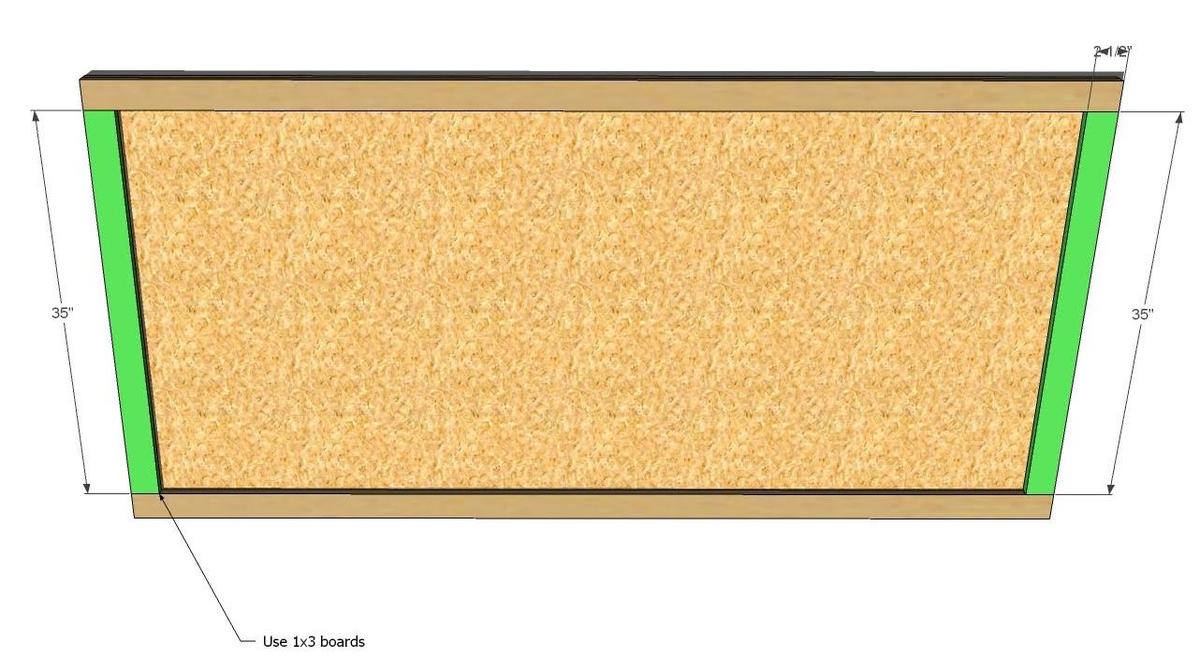
3. Side Trim, Bottom Layer. Fasten the side trim to the back, as shown above. Use 1 1/4″ nails and glue. Keep outside edges flush.
Step 4
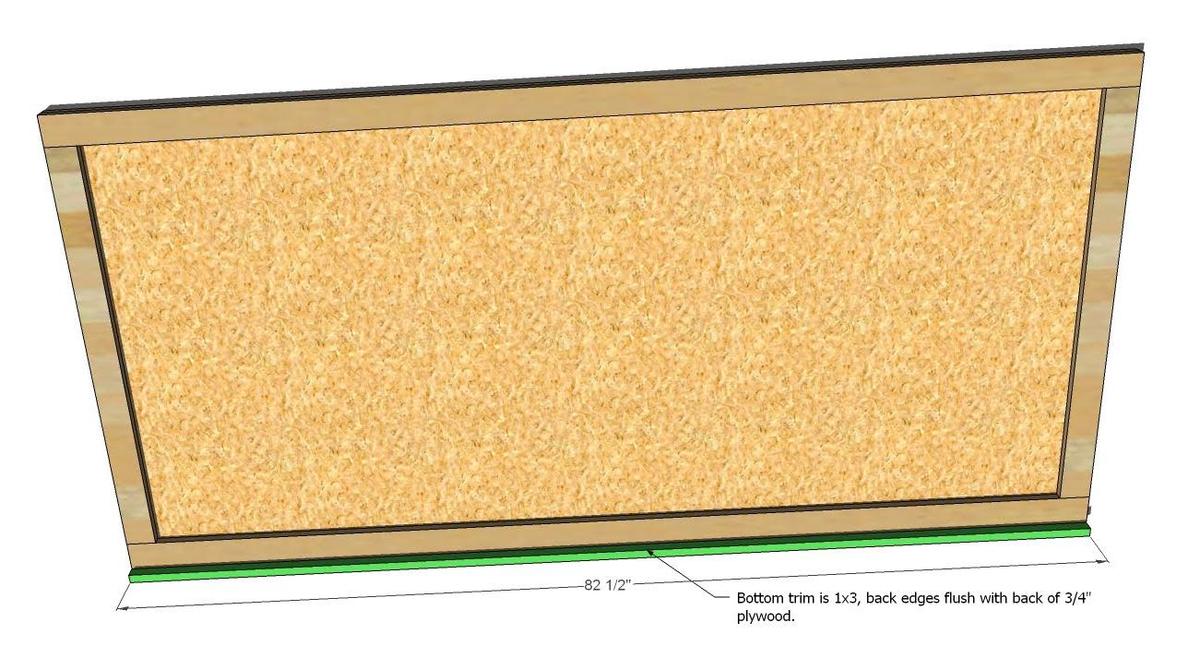
Please note that the bottom piece will be 76 1/2″, and not 82 1/2″ as shown above.
4. Bottom. Fasten the bottom in place, using 2″ nails and glue. Be certain to fasten to both the back and the bottom layers of trim. Keep back and sides flush. The front will overhang 1″.
Step 5

Step 6
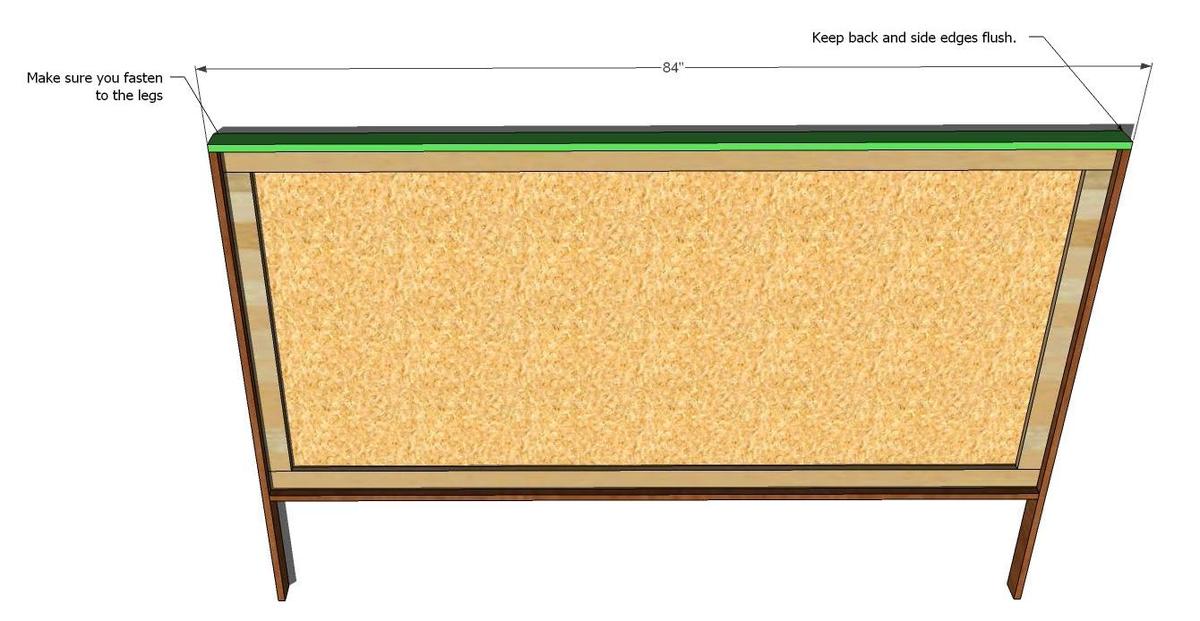
Please note that the top will be 78″ long and not 84″ as shown above.
6. Top. Fasten the top in place, as shown above. The top will be a 1×3 cut at 78″, not 84″ as shown above. You will need to fasten with the 2″ nails and glue, fastening to the legs, top trim and back.
Step 7
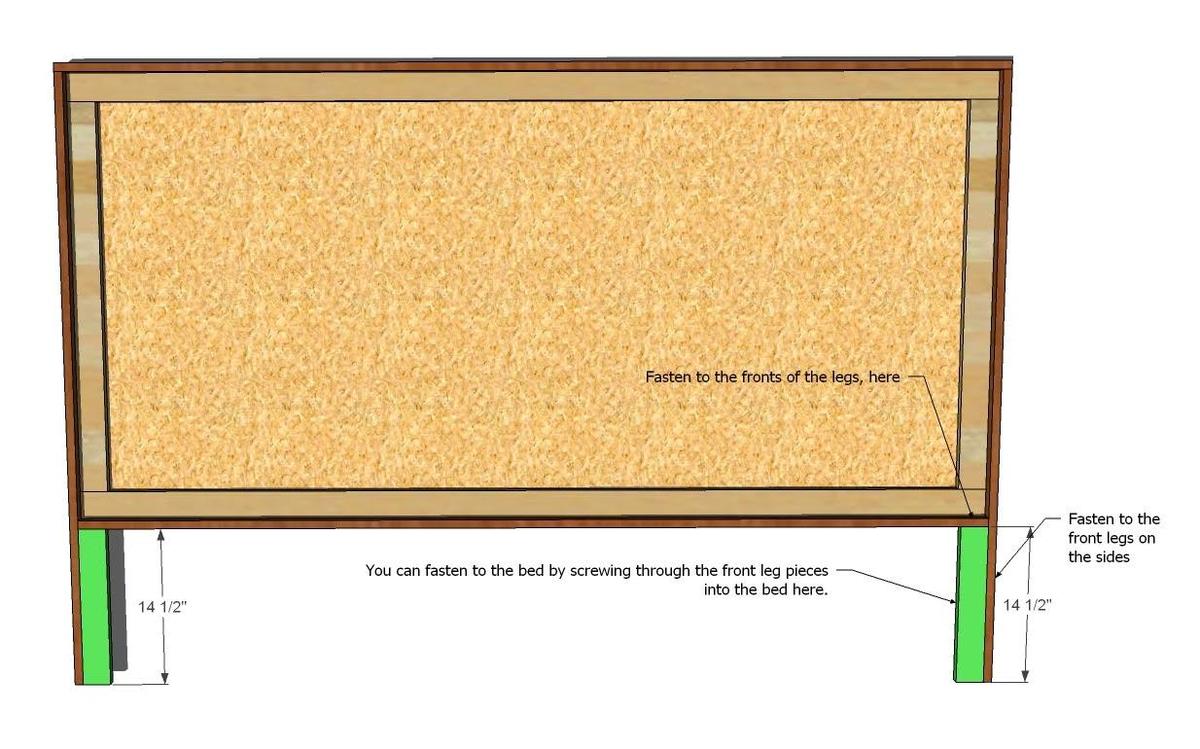
7. Front Legs. Fasten with 2″ nails through thes sides of the legs into the side edge of the fronts of the legs. Also fasten the top of the leg fronts to the headboard as shown above.
Step 8
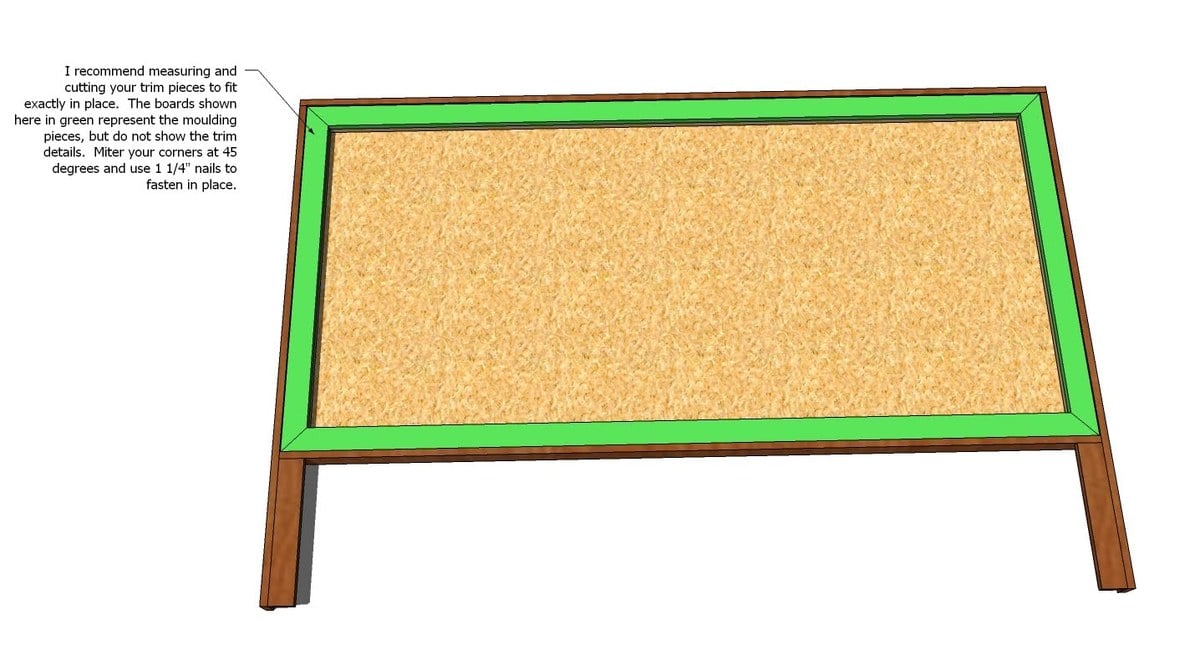
Frame. Measure and cut your frame from the store bought moulding. Miter the corners at 45 degrees. Uses 1 1/4″ nails and glue.
Step 9
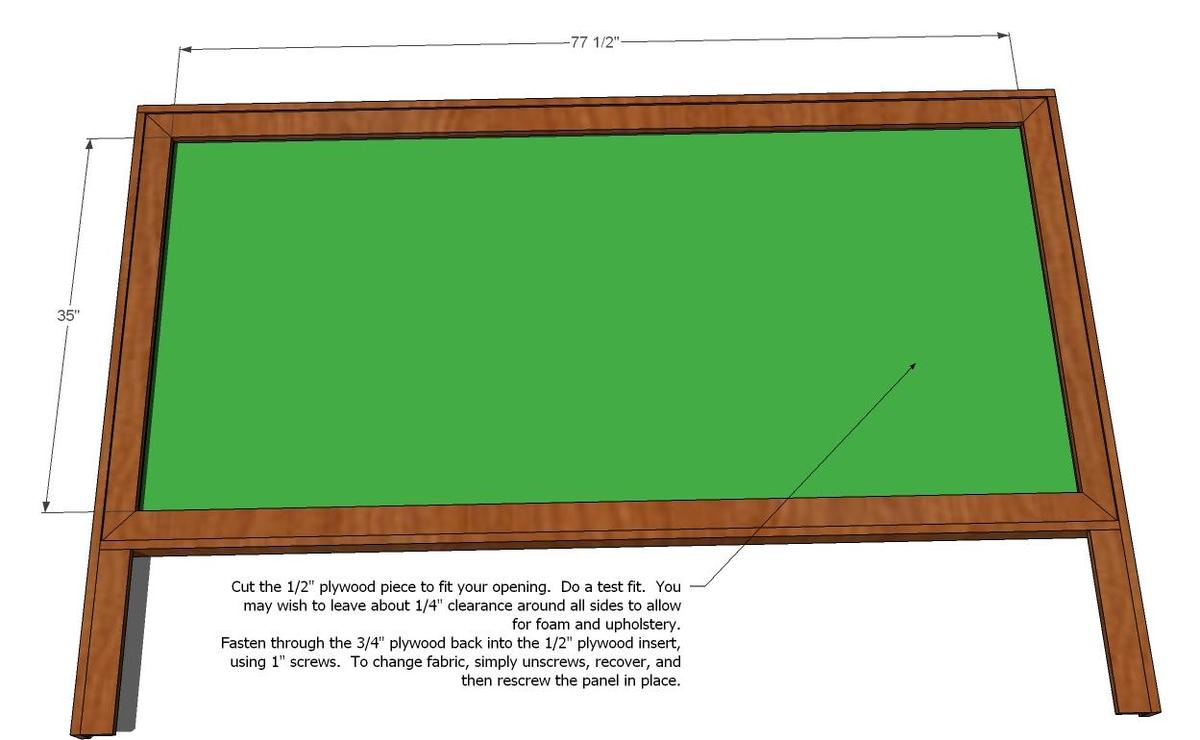
Fabric Insert. Measure and cut the panel insert, shown in green above. Your panel should measure approximately 35″ high x 71 1/2″ long. This is correct, and the dimensions given above for the length are 6″ too long.
Dry fit your panel. You may wish to leave some room around the panel to give allowance for foam backing and fabric. When you are satisfied with the fit of the panel, cover with foam, batting and fabric, stapling on the back. Using the 1″ screws, screw from the back of the headboard into the center panel, holding the panel in place. You will want screws in each of the corners, and in the center.
Comments
Tiffany (not verified)
Tue, 02/02/2010 - 01:37
LOVE this! I am a new
LOVE this! I am a new follower....came by way of Shanty2Chic! Love your blog....thank you for the "secrets"!
Gen (not verified)
Tue, 02/02/2010 - 08:12
yay! i may have to try
yay! i may have to try this...sounds like it'd be perfect for my room!
hey, gave you an award for your blog...check it out
girlsandsunflowers.blogspot.com
Denise (not verified)
Tue, 02/02/2010 - 08:26
wE MISSED YOU!!!
wE MISSED YOU!!!
Jamielyn (not verified)
Tue, 02/02/2010 - 21:20
AH I LOVE this! do you have
AH I LOVE this! do you have this in a queen? thank you for all your plans, you are awesome! i have lots on my to-do list! Let's just hope I am half as good as you!
The Owens Family (not verified)
Sun, 02/07/2010 - 14:17
Can you tell me where I can
Can you tell me where I can find the quilt off of this bed?
Ana White (not verified)
Tue, 02/09/2010 - 07:54
quilt is pottery barn
quilt is pottery barn
Christine (not verified)
Sat, 02/20/2010 - 11:08
is it possible to build this
is it possible to build this with the plywood cut smaller to fit in a car?
Pinz (not verified)
Sun, 02/21/2010 - 13:43
Ana - you amaze me!!! My
Ana - you amaze me!!! My hubby and I just made our own built ins around our fireplace and I was thinking of what I should do next when I came across your site. I cannot wait to have these painted so I can do the headboard for our bed. Thank you so much for your plans and website!! One question... what's the best way to print plans?
Thanks!
Lindsay
Annesphamily (not verified)
Tue, 02/23/2010 - 17:33
This is incredible! I am so
This is incredible! I am so glad my friend Barb at Dogmom Diva sent me over! You are awesome!
loni (not verified)
Sat, 03/06/2010 - 10:56
I love the headboard looks
I love the headboard looks easy to make too. Do you have the plans for the base as well. Together they look amazing.
Ren H. (not verified)
Mon, 11/29/2010 - 10:26
Ana, you forgot one very
Ana,
you forgot one very important step with this headboard plan.
12. To complete, place one dog onto bed.
I know our (not home made yet) bed isn't complete without a dog or two on it!
CelesteC
Thu, 04/14/2011 - 14:12
Ren H. You are soooo right!
Ren H. You are soooo right! I'm looking for ways to make our bed big and comfy enough for myself, hubby (we're both overweight) our boy Yorkie and our deaf Great Dane girl and that's how I found this brilliant site. Can't wait for hubby to wake him up and show him
Teri (not verified)
Wed, 12/22/2010 - 15:45
Ana, you are my hero! Alaska
Ana, you are my hero! Alaska and Hawaii have something in common----furniture and shipping is so expensive! When I found your website I became so excited! I haven't had a headboard for 17 years and I am going to build this one as my first ana-white.com project! Thank you!
Jaime Perreca (not verified)
Wed, 02/02/2011 - 11:52
Ana, I made this last week. I
Ana, I made this last week. I think it looks really good. I bought prepainted moulding (espresso color) to make the fabric, then painted the outside legs and wood a complimentary off white. I think it works with the room. The nightstands are cedar and also your pattern.
http://3.bp.blogspot.com/_6t3DH00JAm4/TUgYqBdID6I/AAAAAAAABO8/boFSgzlil…David (not verified)
Wed, 03/30/2011 - 10:53
Upholstered Headboard
Trying to figure out the cut down to make a twin headboard. Does anyone have those dimensions? Any suggestions on how tall I should make it so it isn't mis-proportioned? Thanks.
Tharryhic (not verified)
Wed, 04/18/2012 - 12:43
Louis Vuitton Suitcases-Louis Vuitton Buzz
???o0焄洊k0D0O0d0K0n0f[uL0逺茤U0?f0D0?S0h0h00陙Rn0T榥0MRg0搳F0Lk?j0D0W00~0_0軴0
0e4177fbfb52fc9e64fe555[url=http://www.louisvuittonja.com/] http://www.louisvuittonja.com/ [/url]
diameora (not verified)
Sat, 06/02/2012 - 22:22
most importantly the same high quality
Wholesale purses and handbags are the way for you to own your on business that you have been wanting for years. Watch the money roll in when selling handbags and purses wholesale. This is a trick that retail stores have know about for ages. The income you will be making will astound you. Since you will be buying such high quality purses in bulk you will be amazed at what low prices you will receive them at. You will be getting the same styles, fabrics