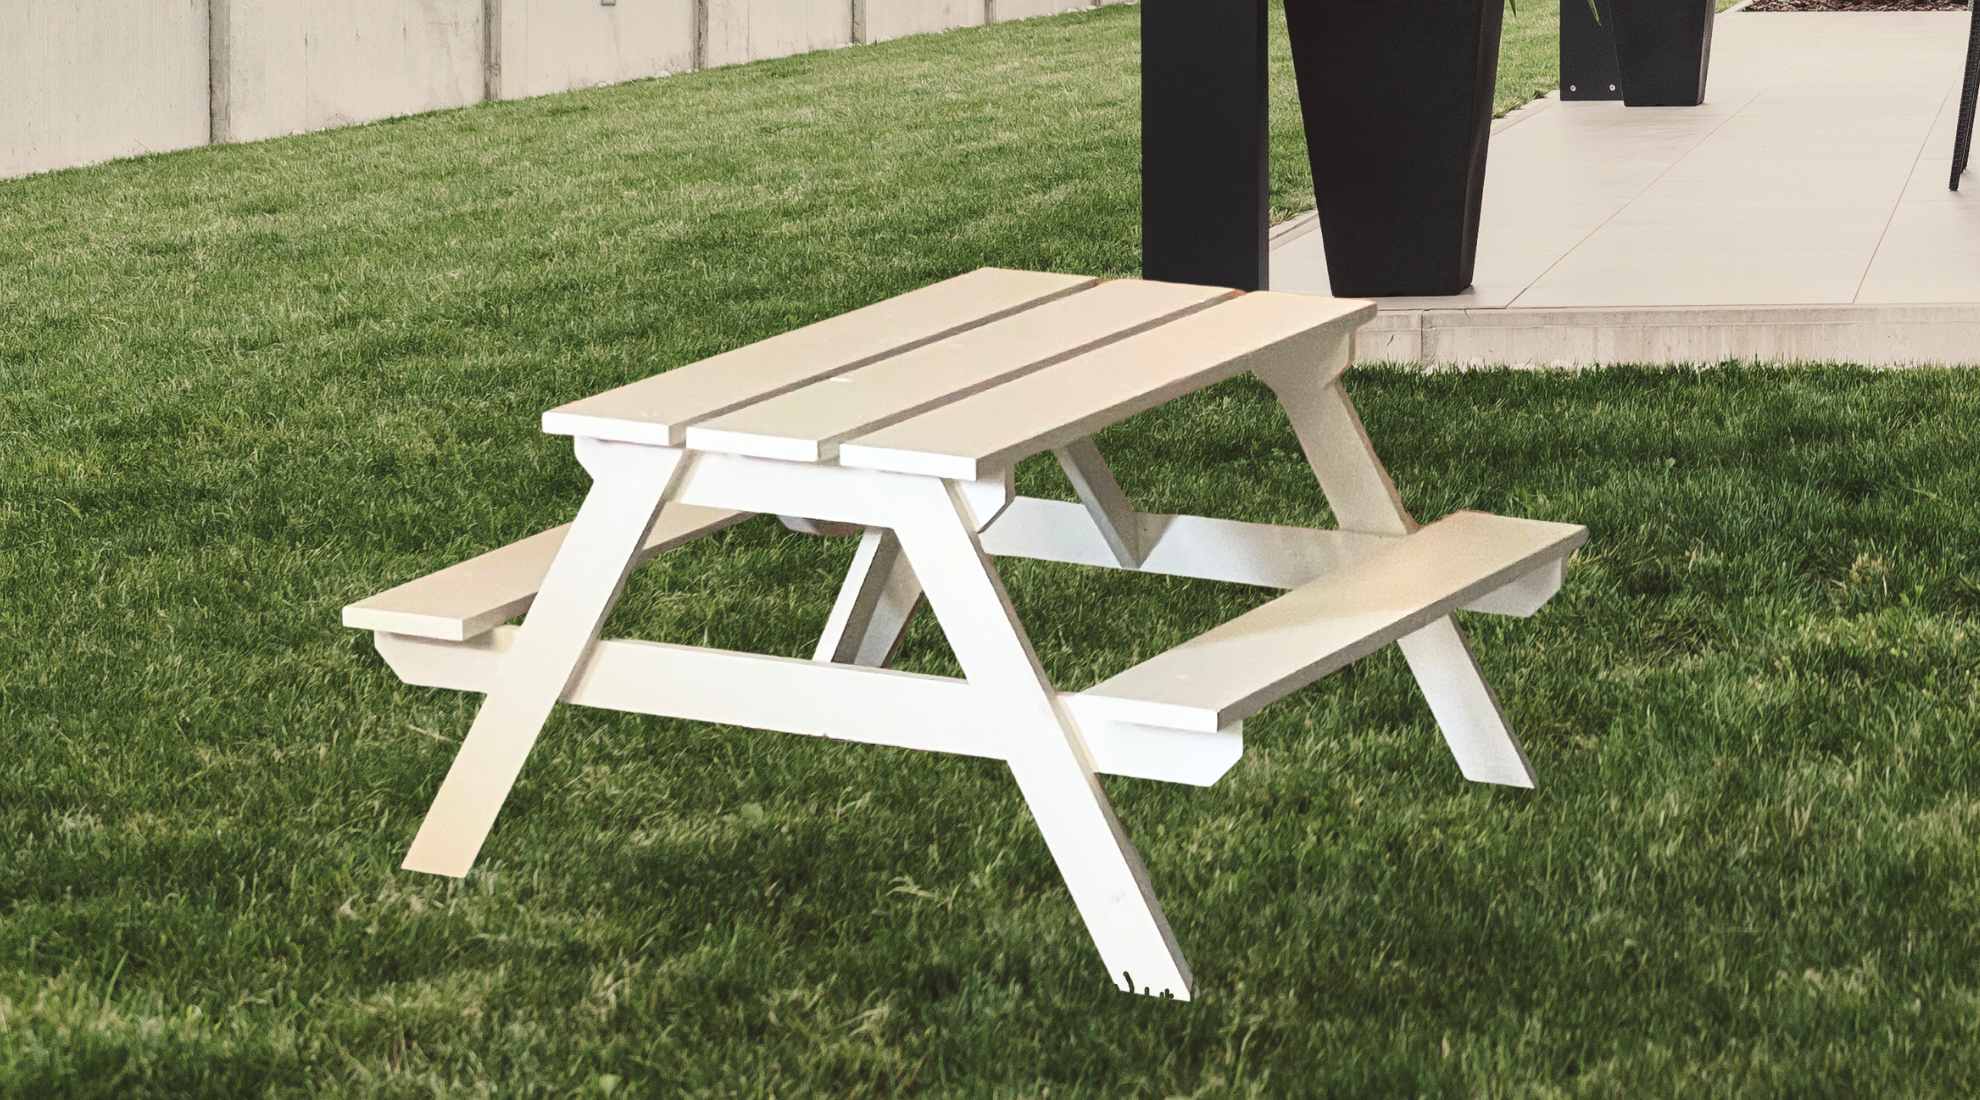


Build your own mini sized picnic table with our free plans. This toddler or preschool sized picnic table is one of the most popular plans. Due to the simple design, easy building instructions, and perfect sizing for littles, thousands of these tables have been built! We love this table as a gift too!
RELATED: We also have a big kids picnic table plan, and an adult sized one too!
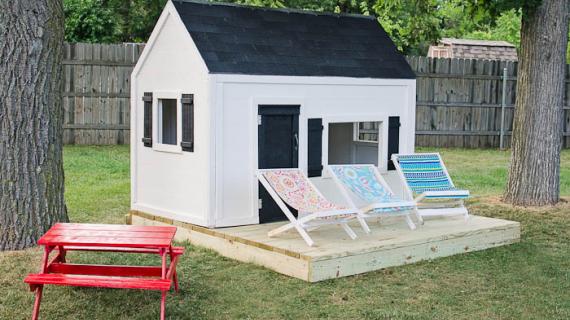
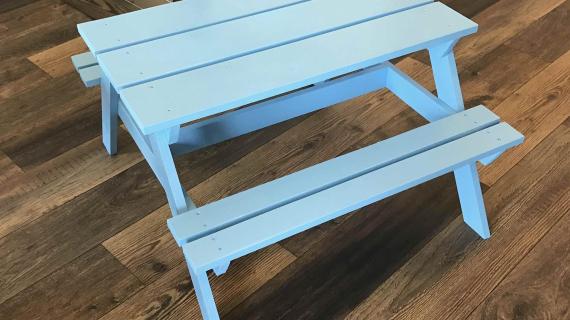
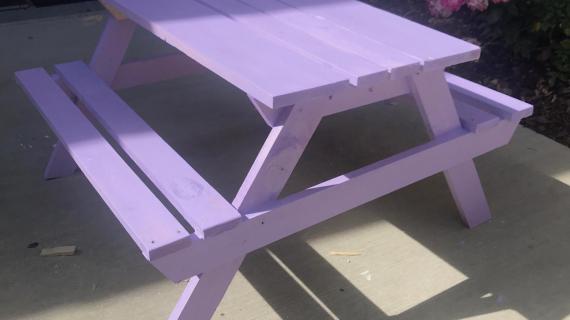
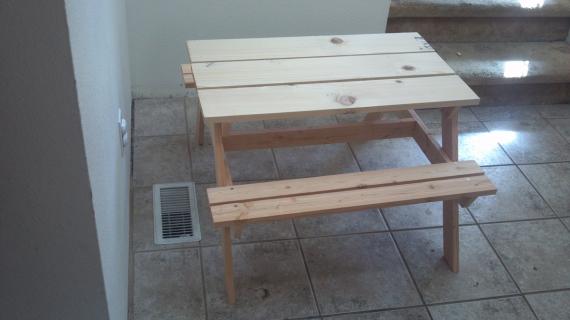
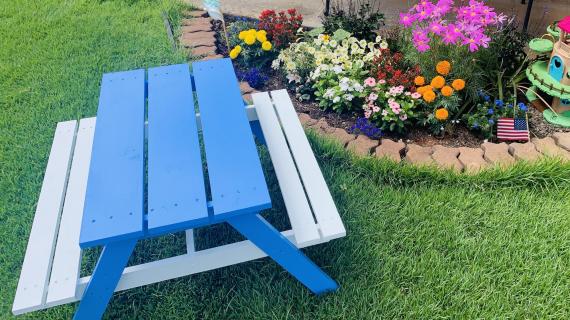
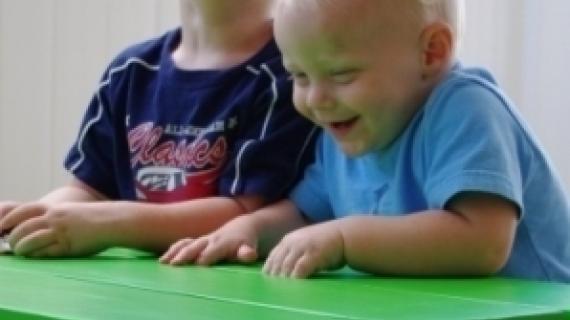
This adorable picnic table is sized perfectly for two-six year olds. It is lightweights and easy to carry indoors and outdoors. You can paint or stain it fun colors. For indoor use, you can add a solid top (it makes a great indoor play table too!)

We love this picnic table and have made it many times - it's the perfect birthday gift!
For older kids, we recommend the bigger kids picnic table plans, as this plan is more rugged and built using 2x lumber.
How to Build It - Ana White Picnic Table Video Tutorial
Watch this super quick video tutorial to help you visualize how to build this picnic table.
Preparation
- 1 - 1x6 @ 8 feet long
- 1 - 1x6 @ 6 feet long
- 3 - 1x3 @ 8 feet long
- 1 - 1x2 @ 3 feet long
- 1 1/4″ self tapping star bit screws (about 50)
- interior/exterior wood filler
- 120 grit sandpaper
- exterior appropriate wood stain
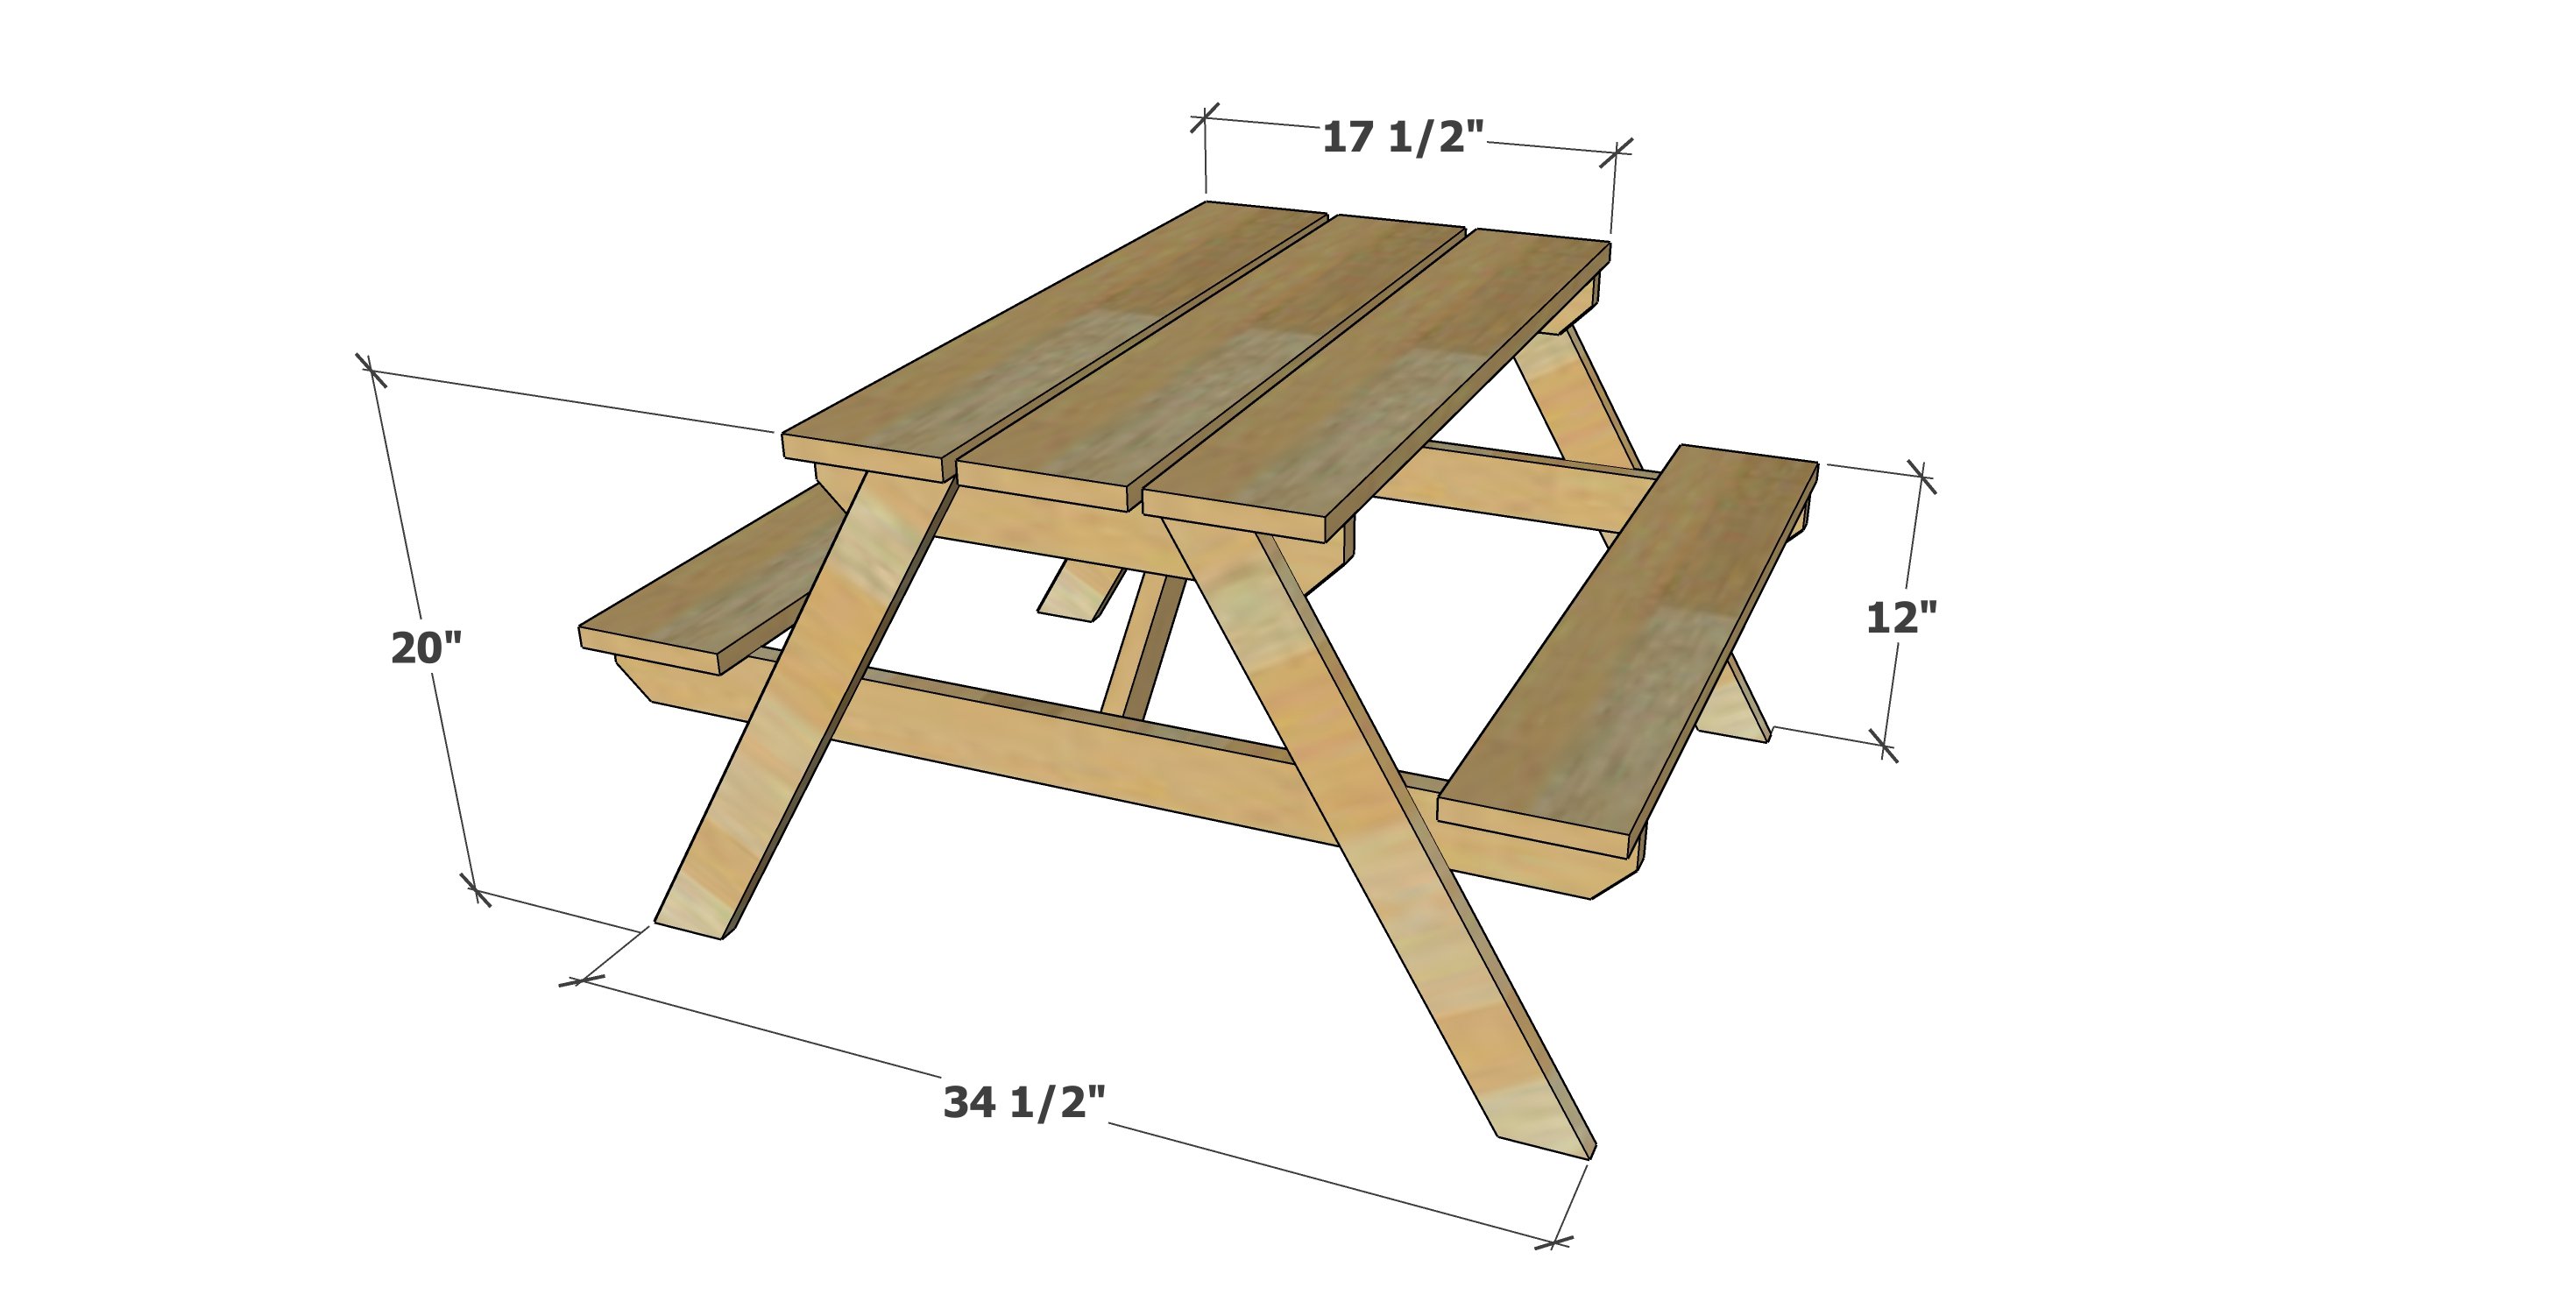
- 5 – 1×6 @ 31″ (Tabletop and Seat Pieces)
- 2 – 1×3 @ 17 1/2″ (Under Table Supports) *
- 1 – 1×3 @ 26 1/2″ (Center Support)
- 4 – 1×3 @ 22″, both ends cut at 30 degrees off square, long point to short point measurement, ends ARE parallel (Legs)
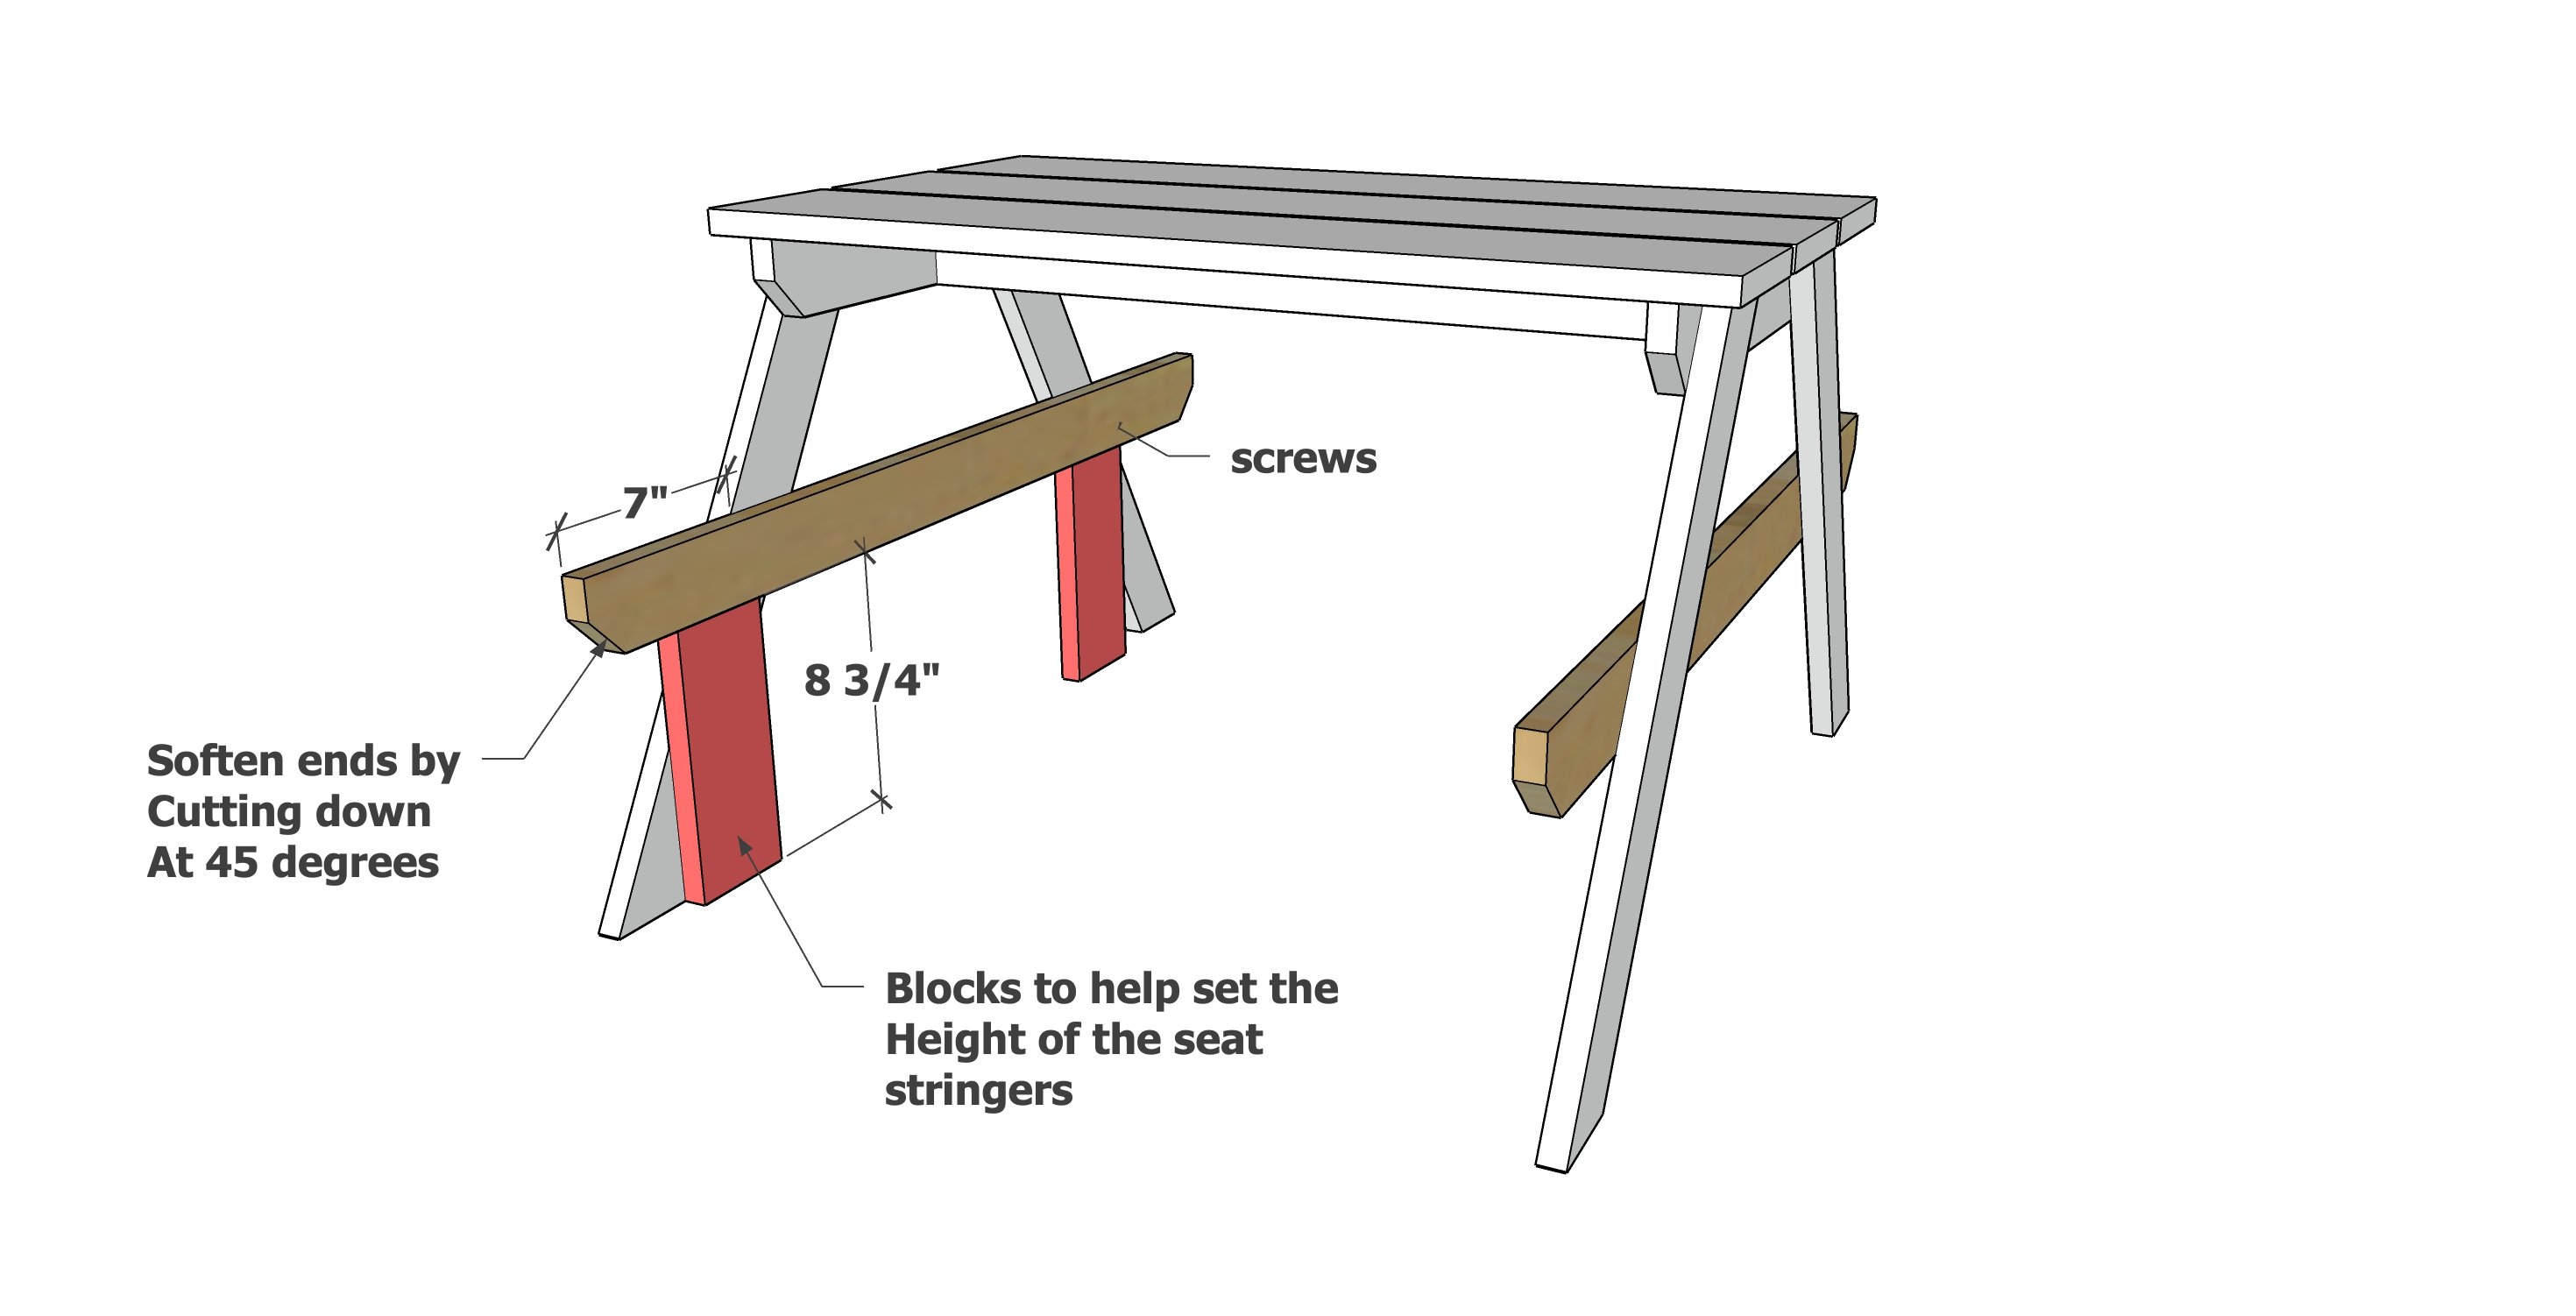
- 2 – 1×3 @ 35-1/2″ (Seat Stringer) *
- 2 - 1x2 @ 14-12", both ends cut at 45 degrees off square, long point to long point measurements, ends are NOT parallel (Cross Supports)
*Ends are clipped at 45 degrees to soften edges, see in diagrams


General Instructions. Work on a clean level surface and use proper safety precautions. Check for square after each step. Predrill and countersink all screws.
Instructions
Step 1
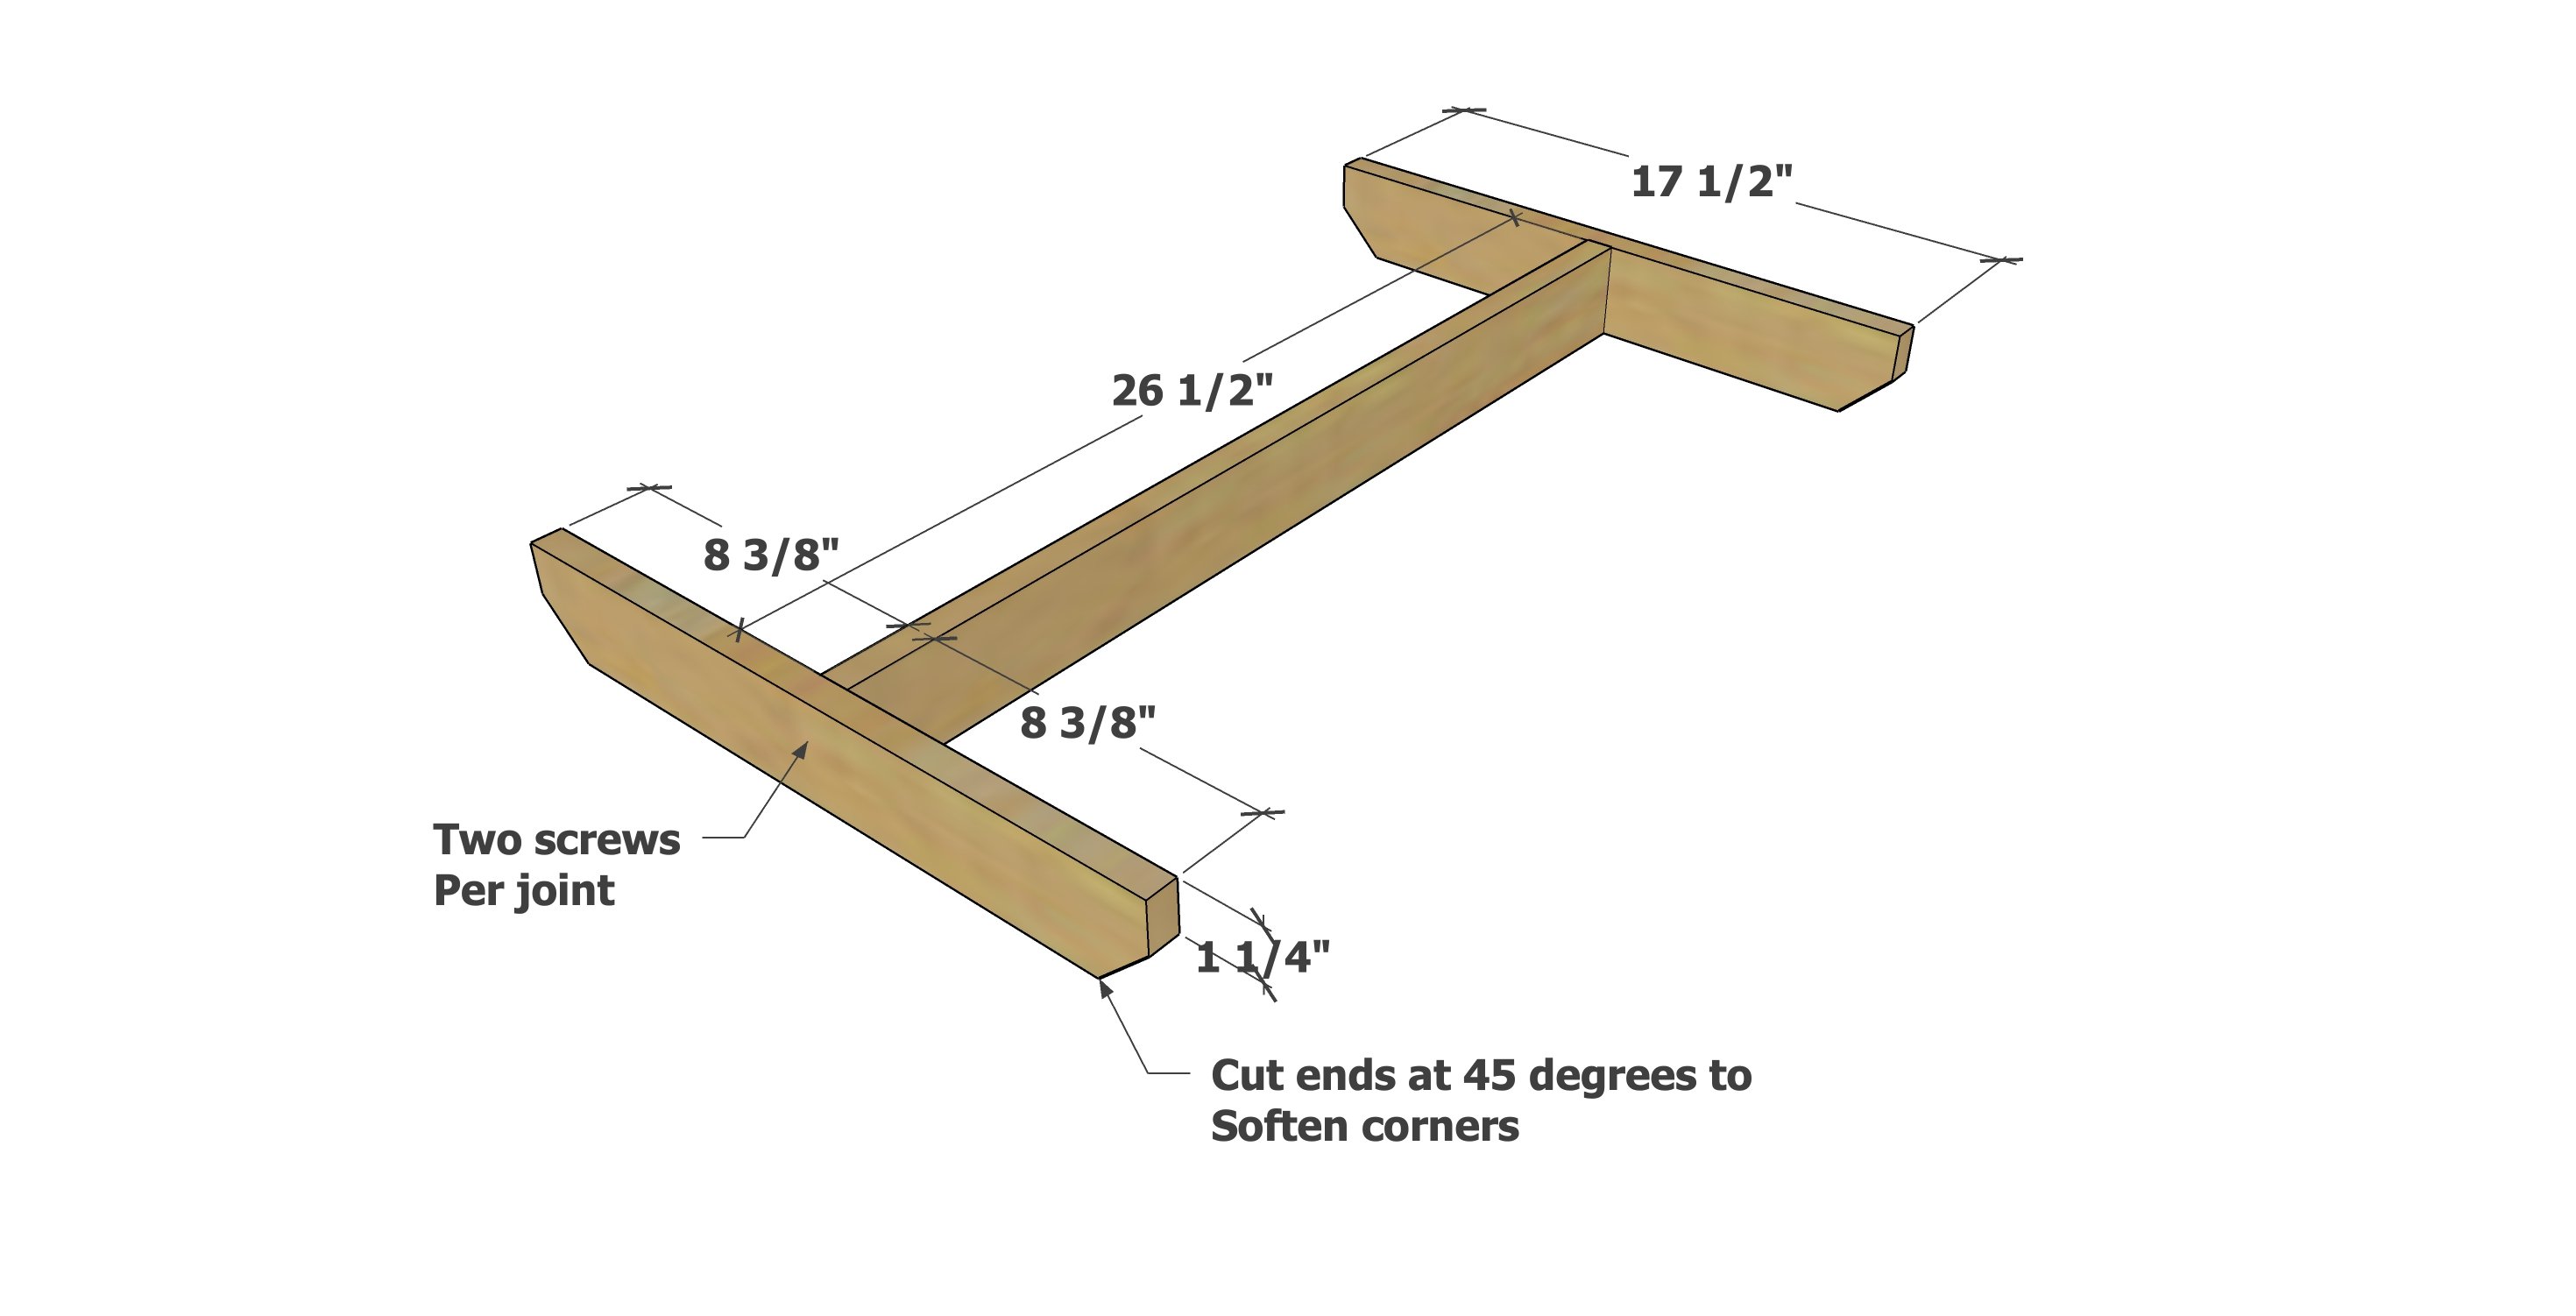
Cut the ends of the tabletop supports back at 45 degrees as shown to soften edges.
Attach the center tabletop support to the two ends to make an I shaped support system.
Adjust for square, meaning the outside corner diagonal measurements match - this is to ensure your project is a rectangle and NOT a parallelogram.
Step 2
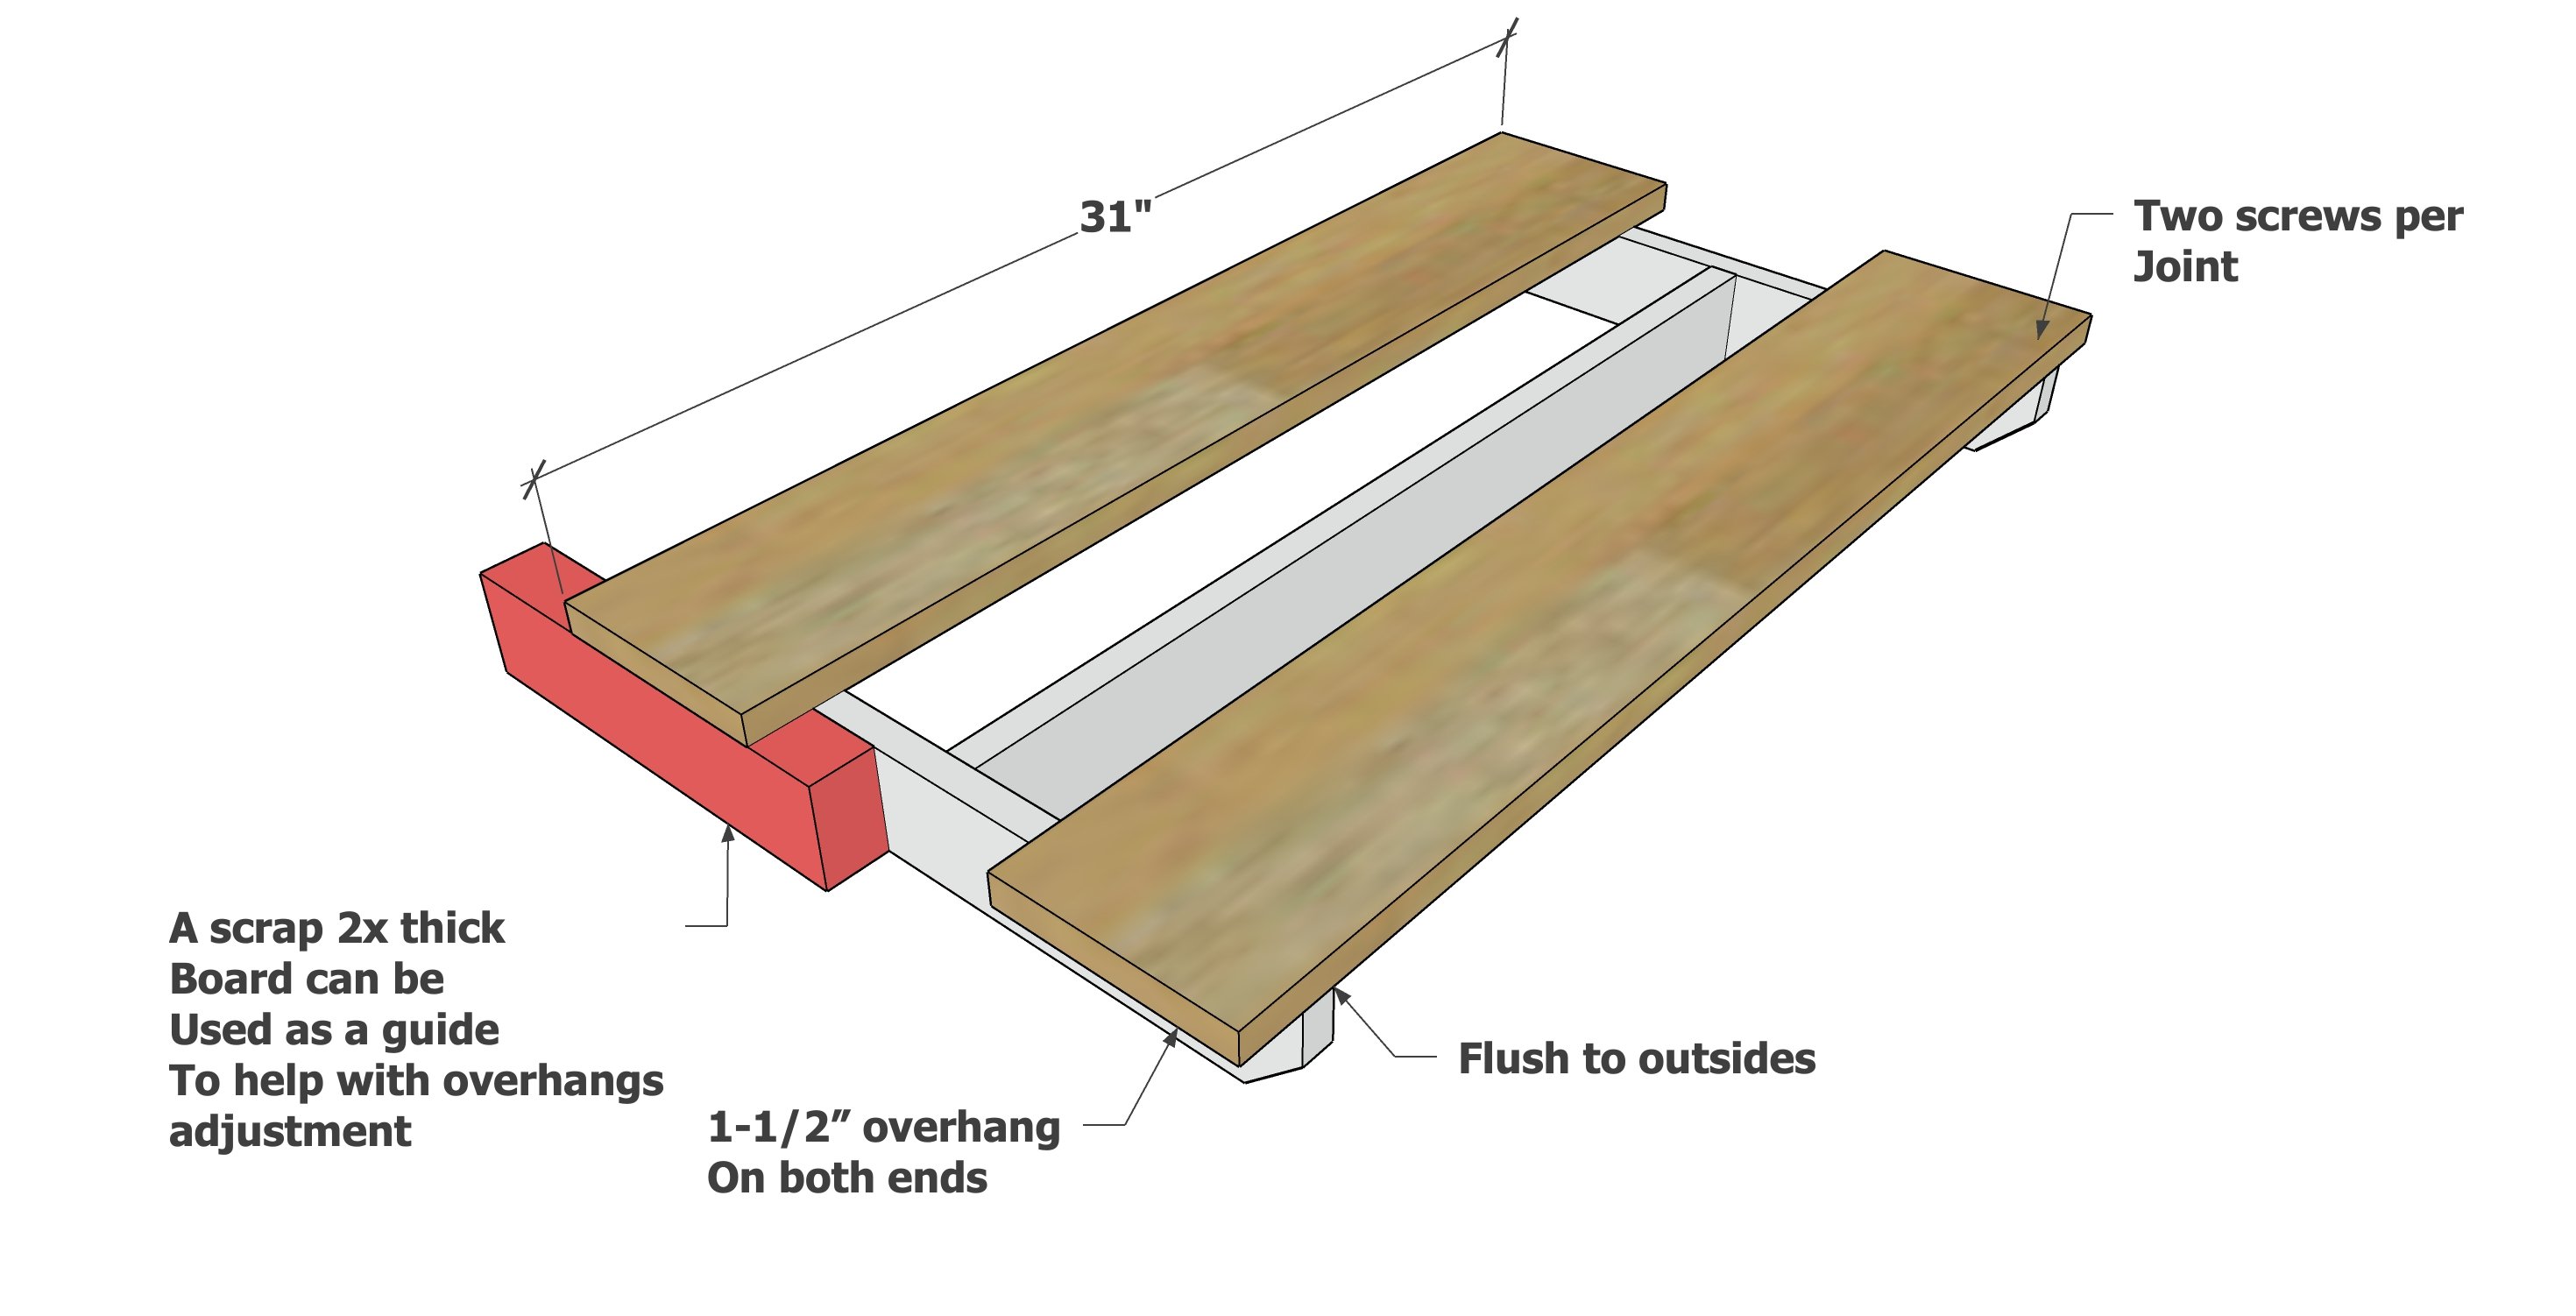
Lay two of the 1x6 boards on top, with even 1-1/2" overhangs on ends and flush to outsides.
Screw down with two screws per joint.
Center the third tabletop board and screw down, also add a couple screws to the center support.
Step 3
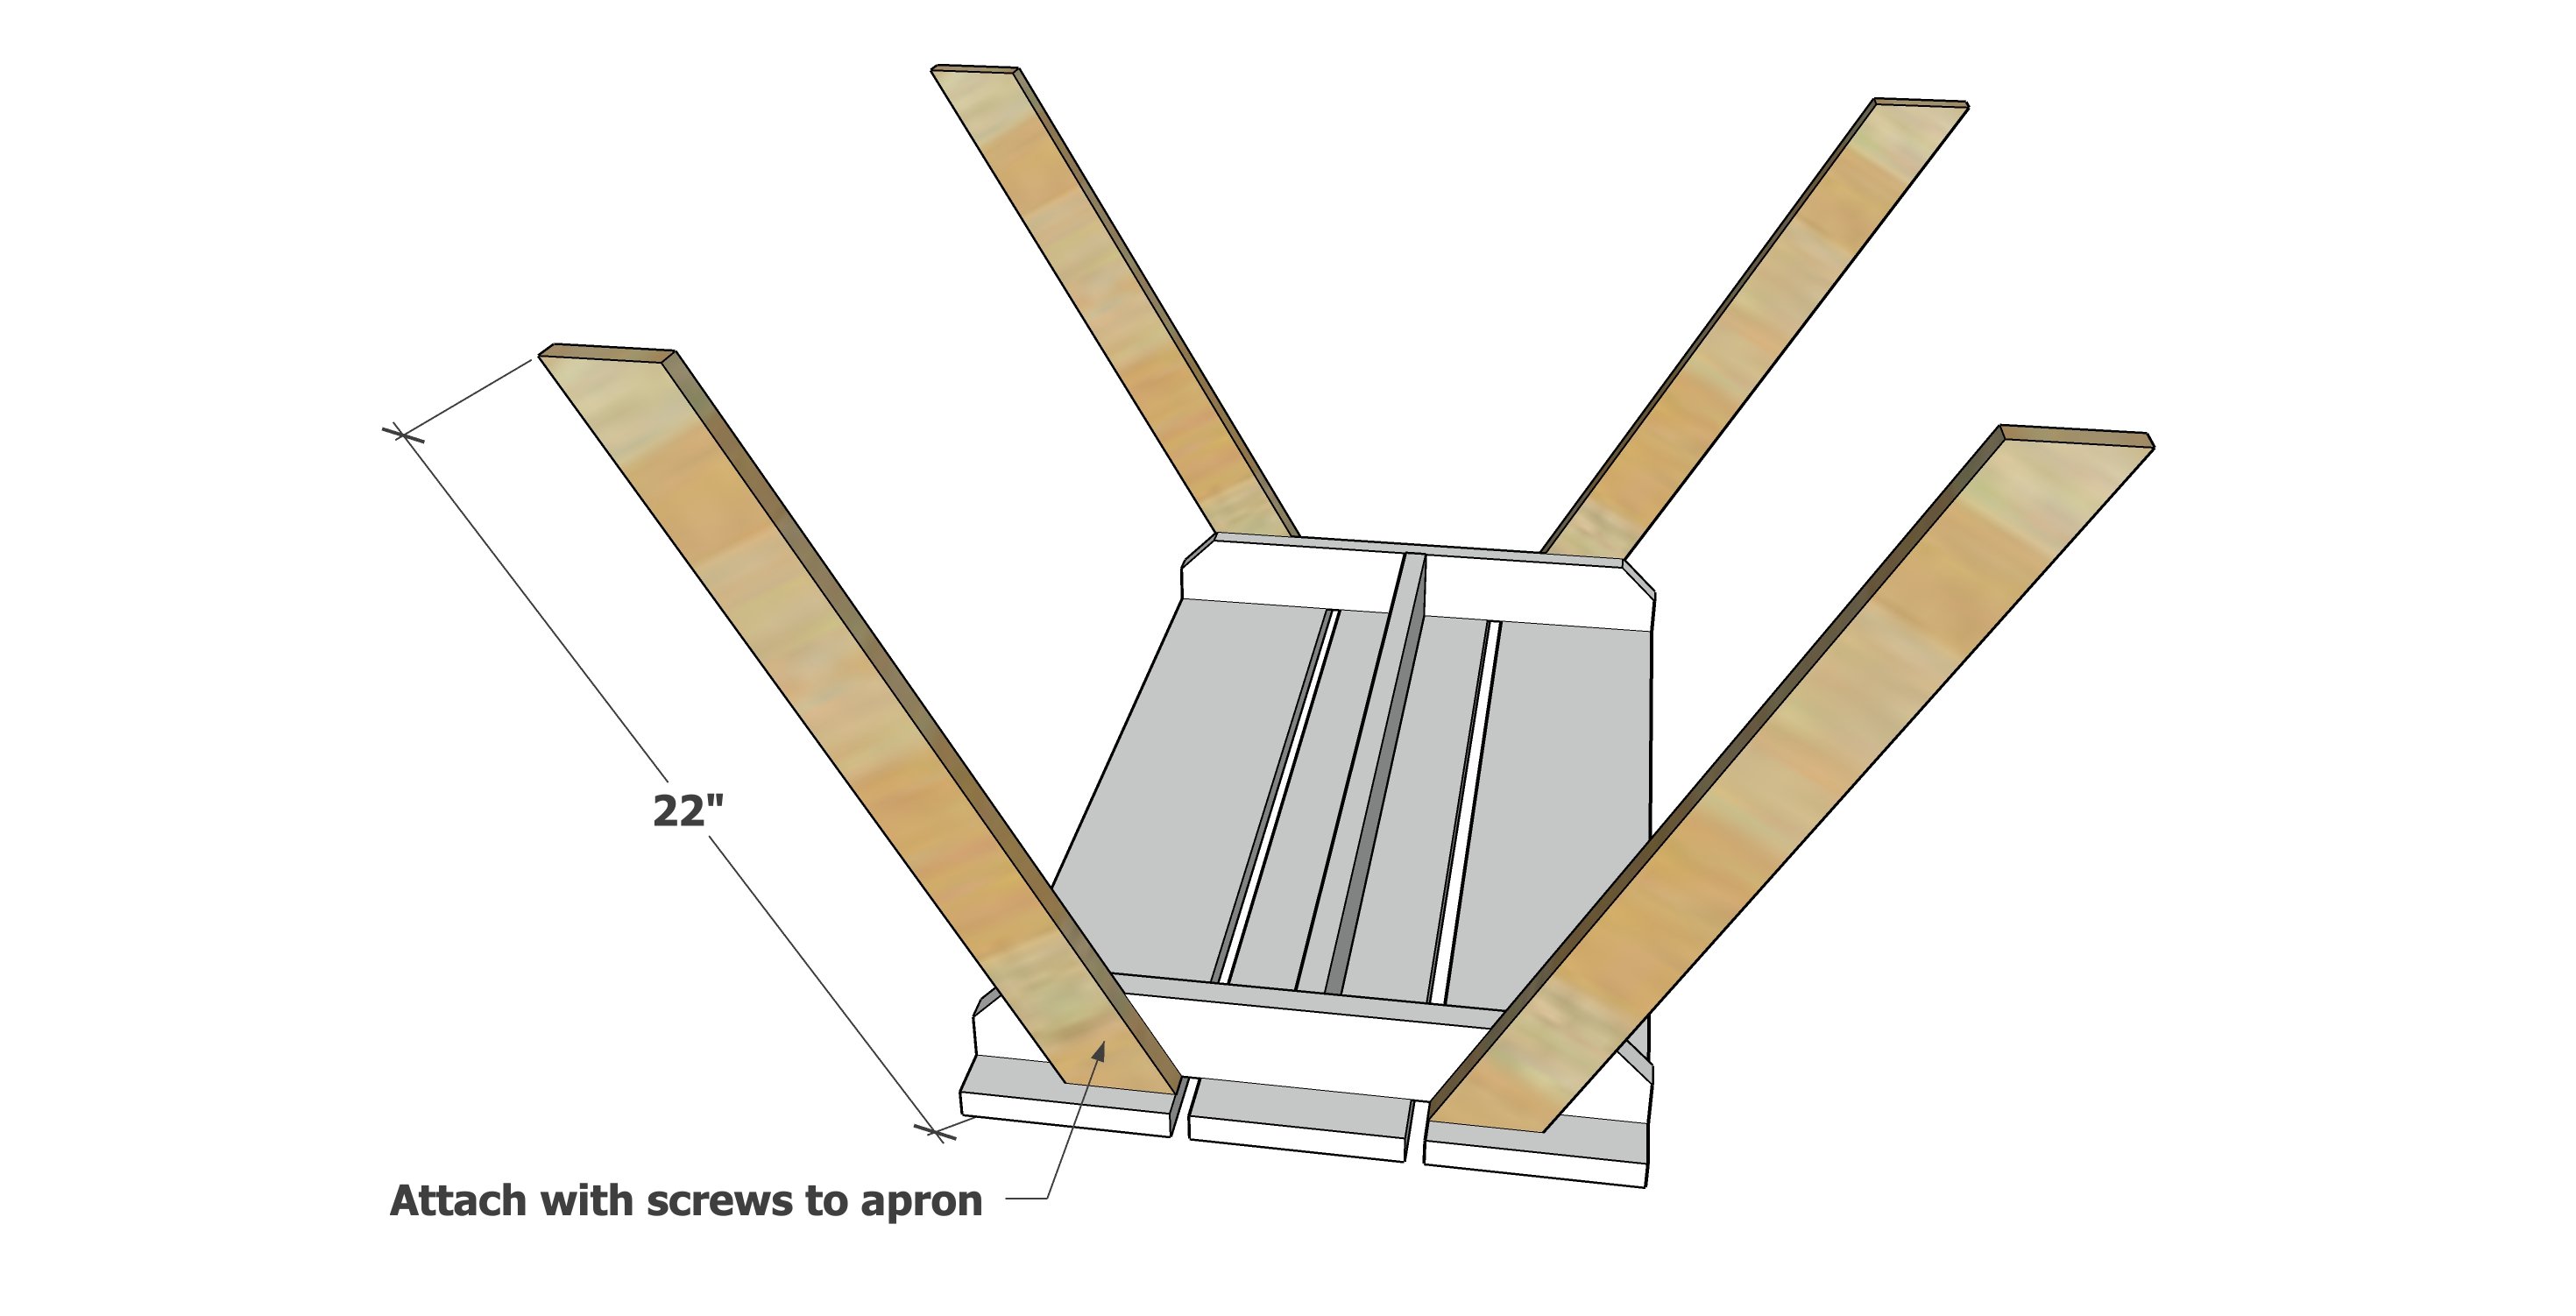
Flip over and attach the legs to the outsides of the aprons with two screws per joint.
Step 4
Flip over. If your table is wobbly, make sure the surface it is setting on is level. If still wobbly, unscrew one of the legs and rotate slightly, until the wobble is out.
Use blocks to set the seat stringer and attach to the insides of the legs.
Step 5
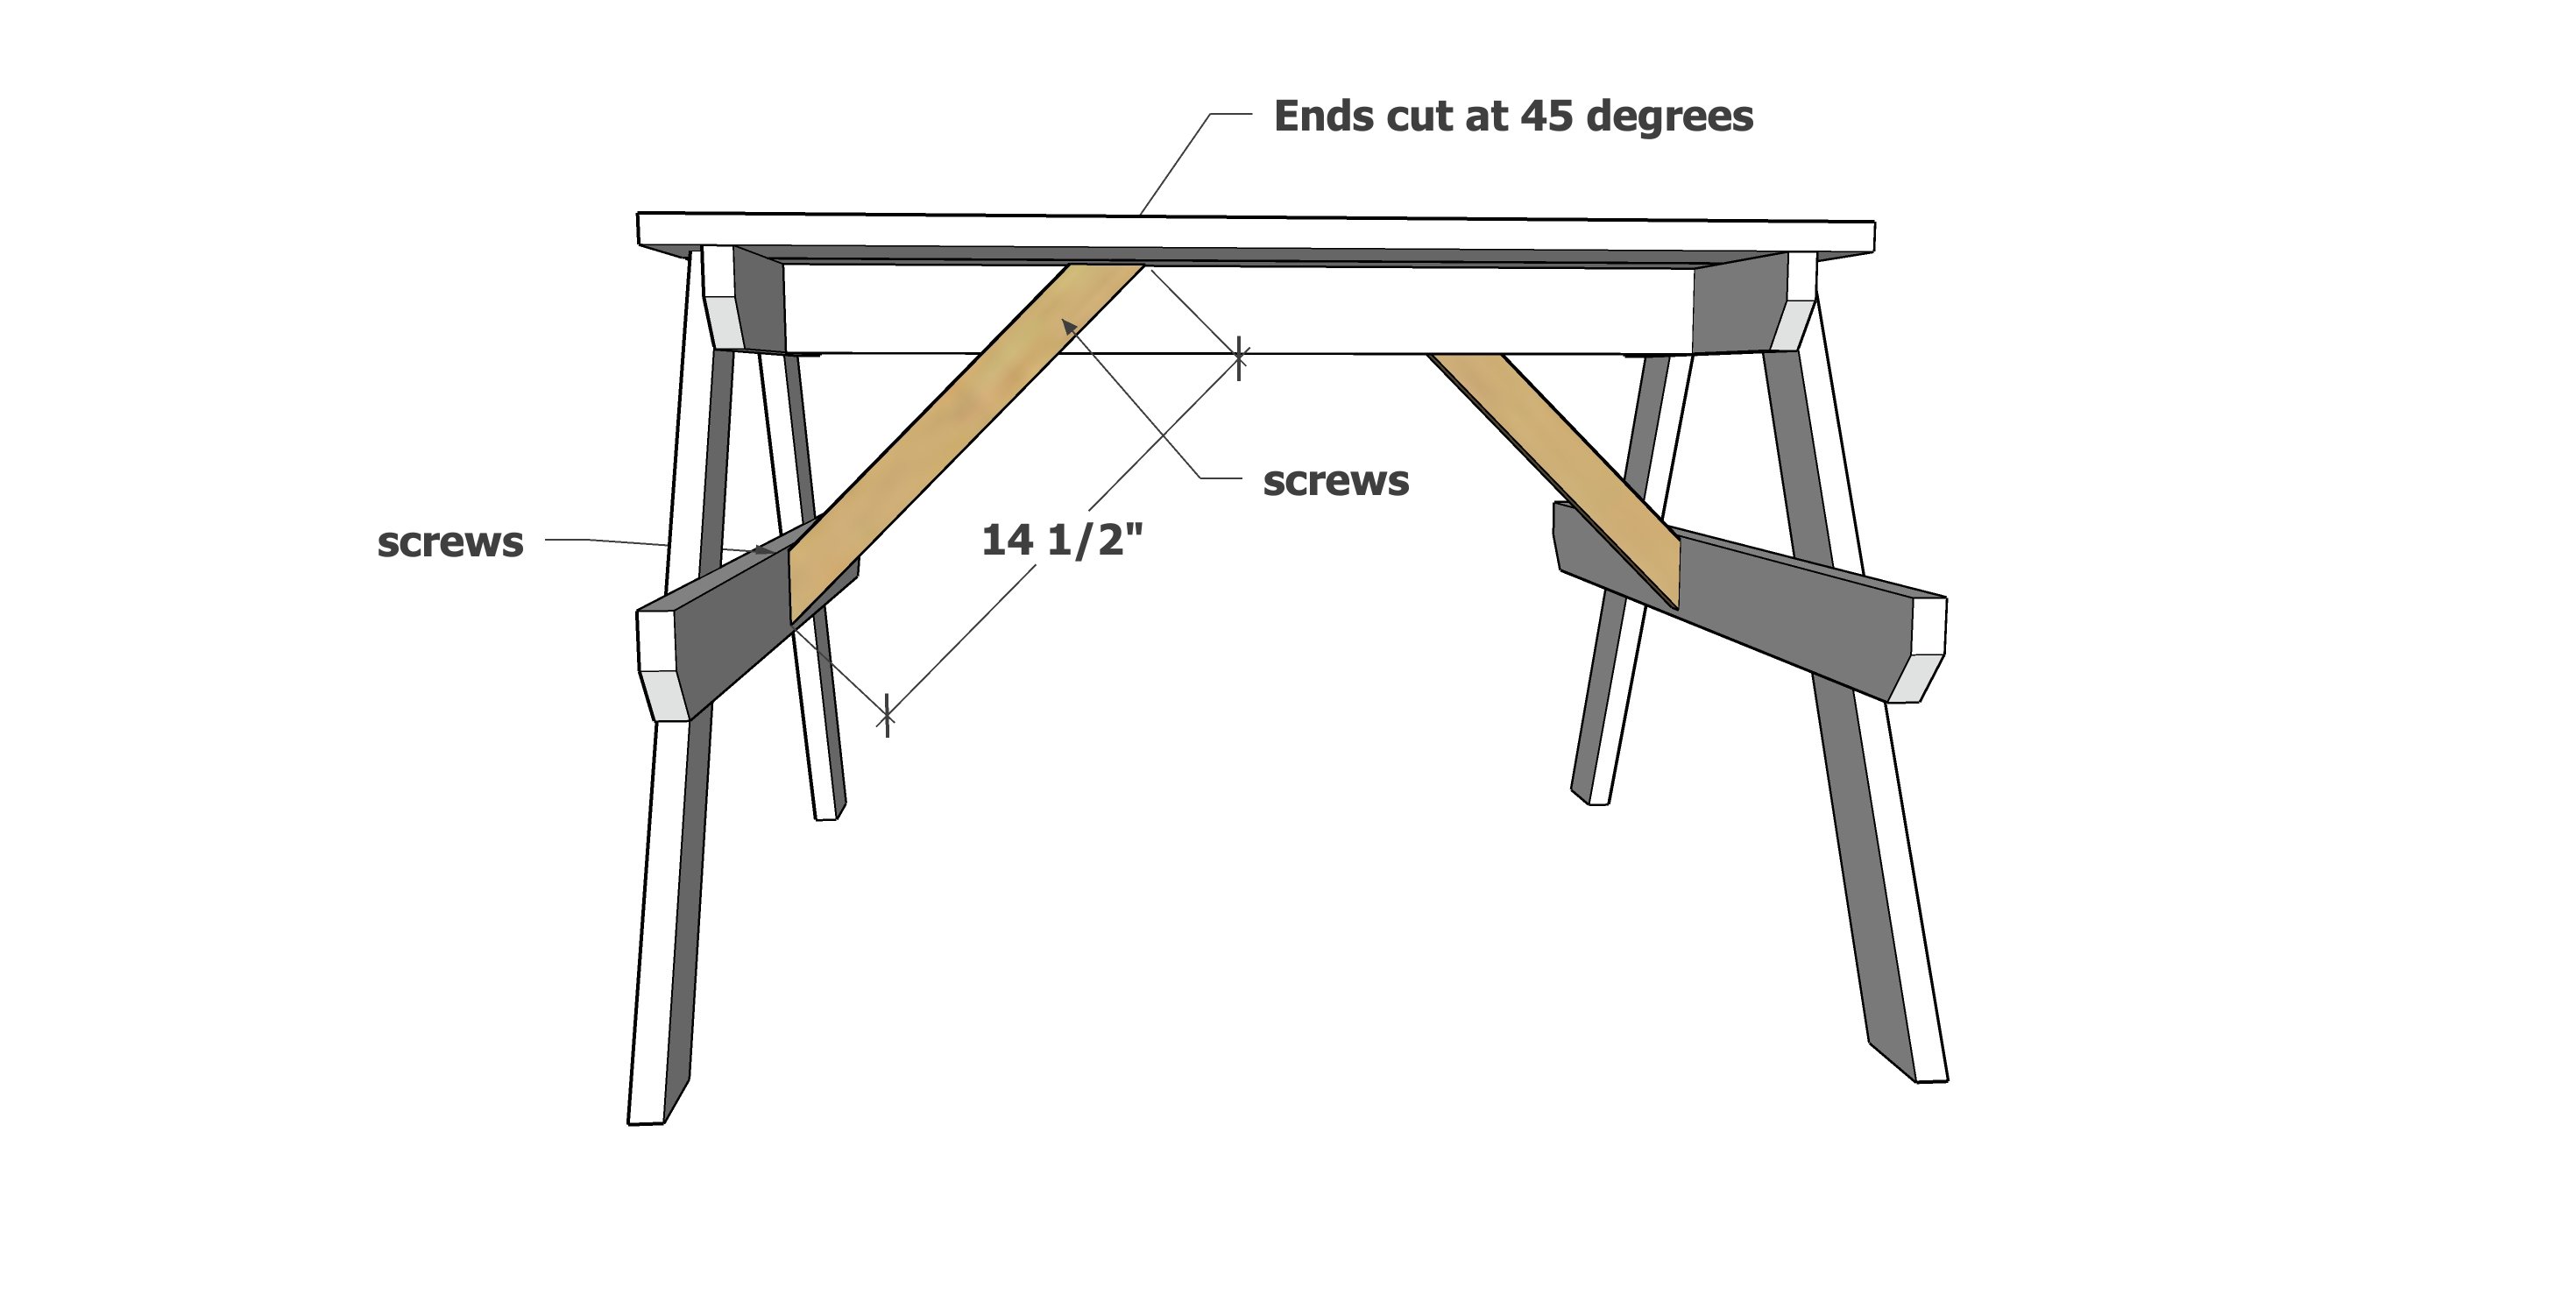
With the table setting flat and no wobble, attach the cross supports inside as shown.
Alternative - add a second 1x3 @ 26-1/2" centered on the seat stringers (as shown in some photos)
Step 6
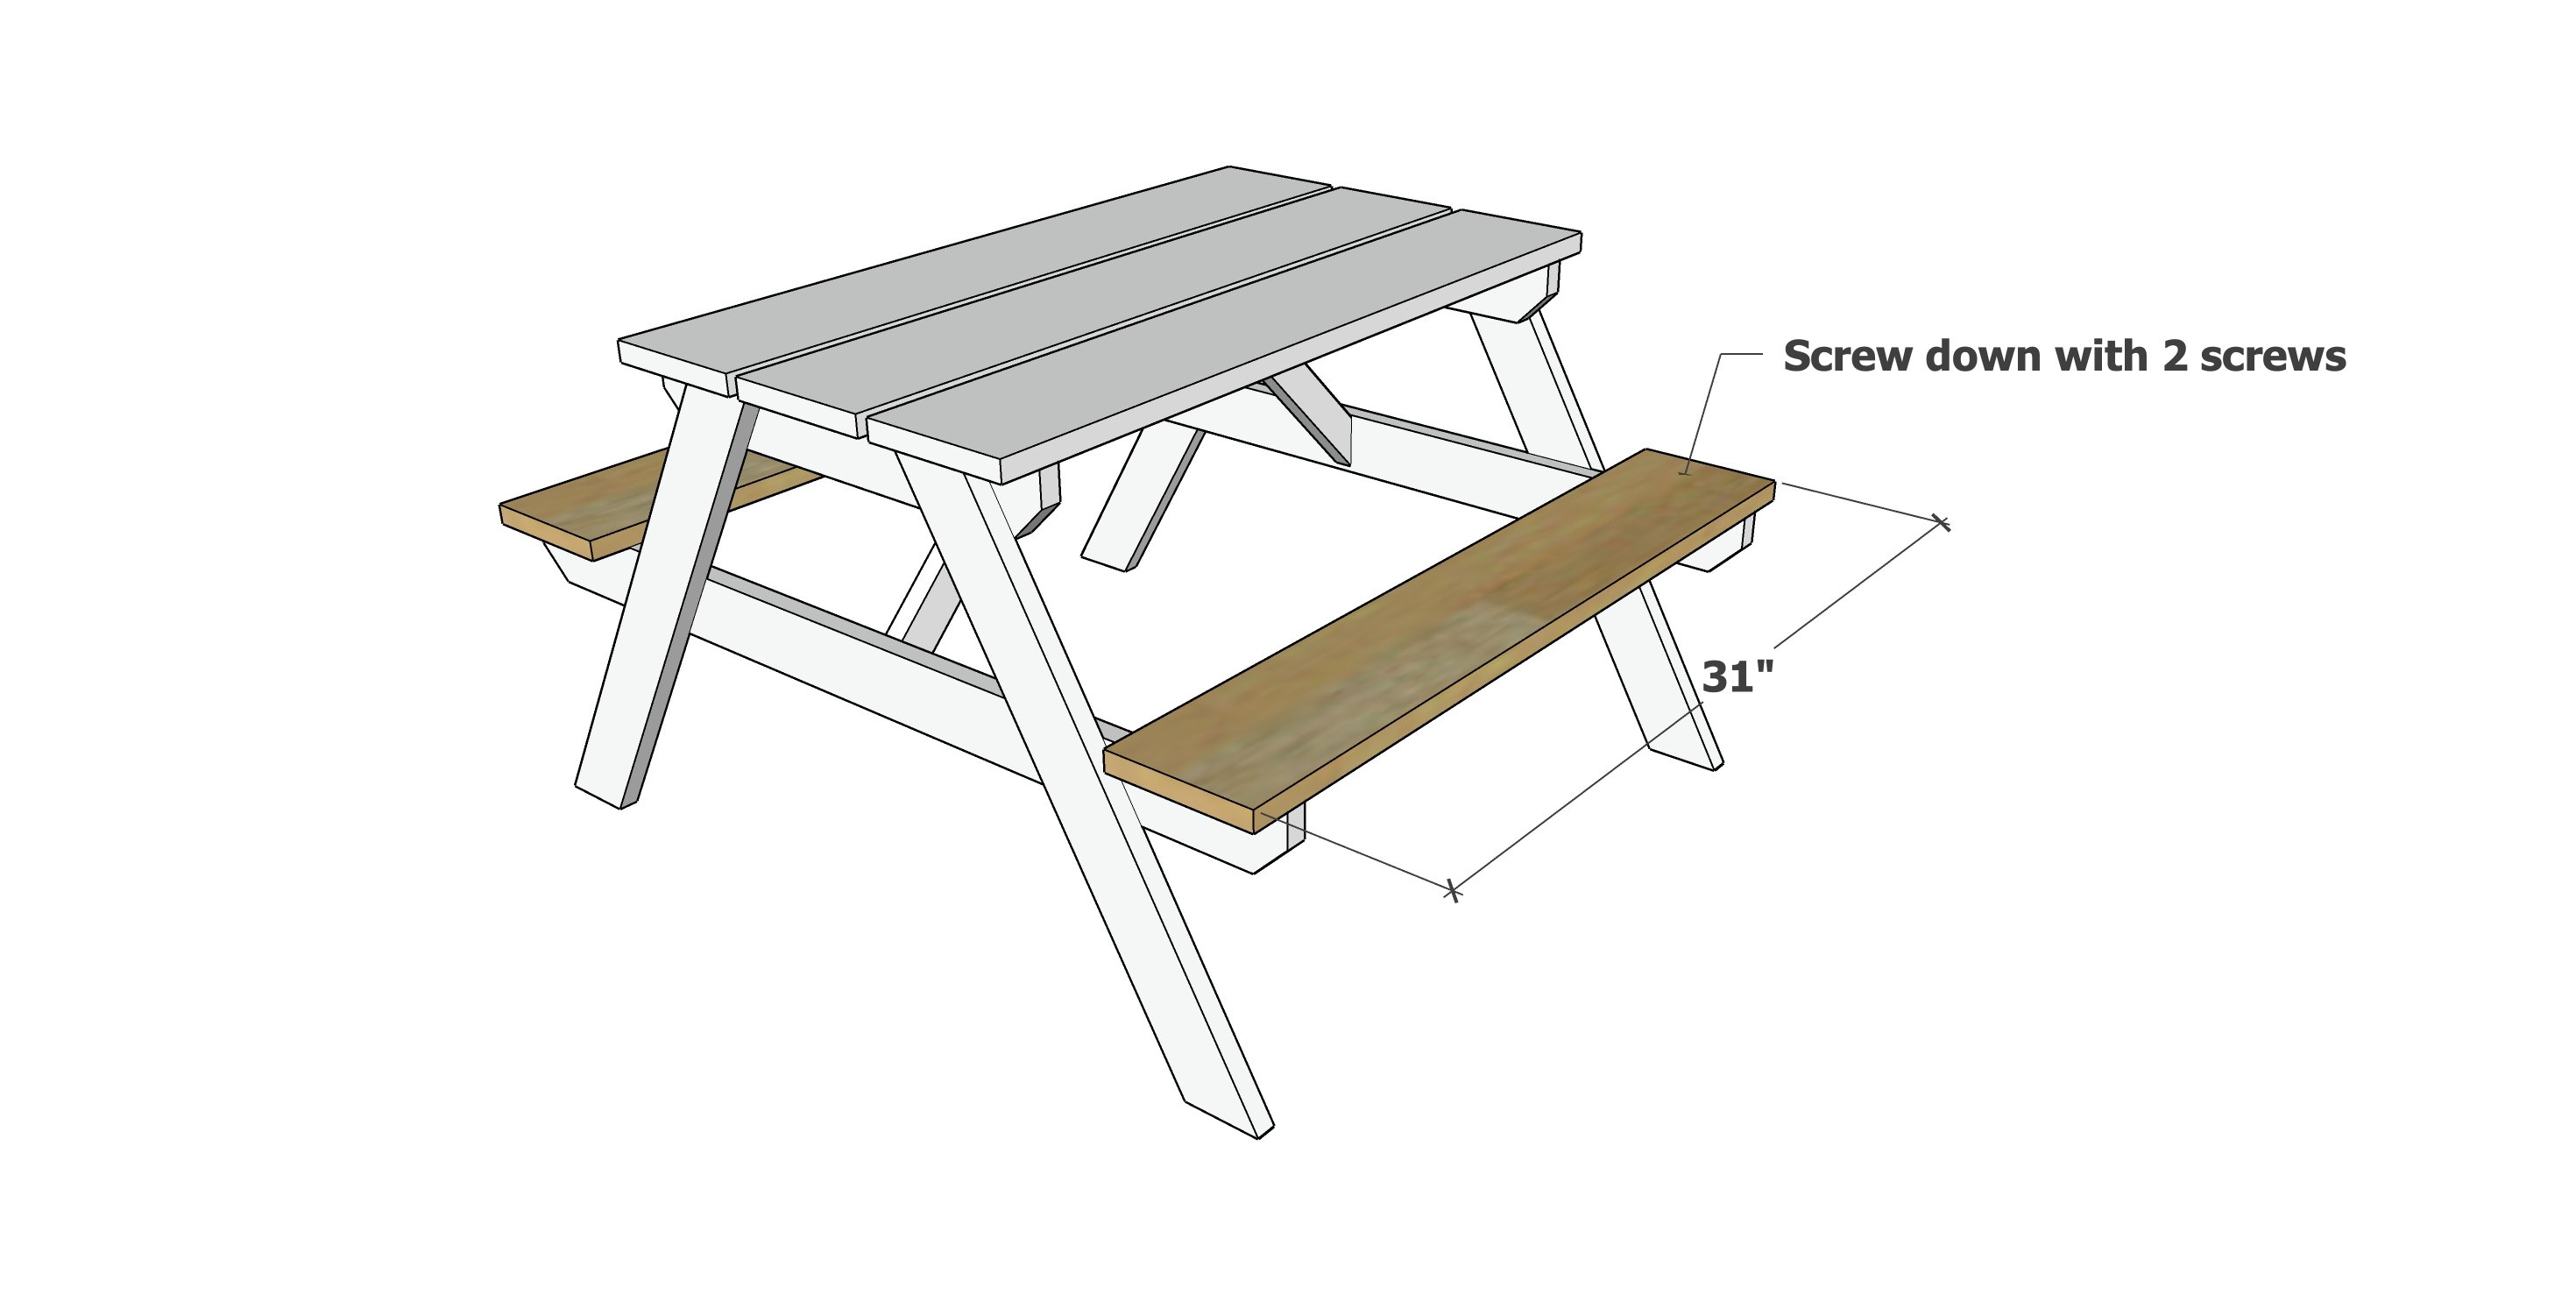
Attach the seat boards to the tops of the seat stringers with two screws per joint.
Step 7
Finishing. Fill screw holes with wood filler, sand and finish as desired.


Comments
lulublu (not verified)
Tue, 03/23/2010 - 01:30
Oh I am so excited to see
Oh I am so excited to see this! My littles are probably nearing the top end of the age range for this, but I can't wait to build it anyways!!!
RHgaijin2
Sat, 08/24/2019 - 23:38
Toddler Picnic table video
I built this and made a video to go along with it
https://youtu.be/vG341R62HGk
Amber (not verified)
Tue, 03/23/2010 - 01:41
What a cute and nice table!
What a cute and nice table!
Devon! (not verified)
Tue, 03/23/2010 - 02:13
thank you so much for posting
thank you so much for posting this! i can't wait to make this!
The Bailey's (not verified)
Tue, 03/23/2010 - 02:44
Yay! I am so excited! We are
Yay! I am so excited! We are in an apartment right now, but will soon move to a place with more room and a.....garage! This will defintely be one of my first projects, although I am a little intimidated by the diagonal cuts! Think I can talk the guys at HD to help me cut, or do they only do straight cuts???
Curried Cupcakes (not verified)
Tue, 03/23/2010 - 02:49
This is adorable! I have so
This is adorable! I have so many things from your site i want to build I don't know where to start! Thanks for posting this. I can't wait to see it in a full size version.Thanks again!
Melody (not verified)
Tue, 03/23/2010 - 03:05
YES! This came at the
YES! This came at the perfect time! I was just looking for table plans yesterday! This will do quite nicely. Thanks again, Ana!
Mary (not verified)
Tue, 03/23/2010 - 03:08
Adorabel! I definitely want
Adorabel! I definitely want to try this :) Thanks!
Brittany@Superwoman (not verified)
Tue, 03/23/2010 - 03:28
I'm so excited that you
I'm so excited that you branched out into outdoor furniture! Though I have to admit, I already have plans for a kids picnic table in a woodworking book.
LK (not verified)
Tue, 03/23/2010 - 03:44
Yay for Ezekiel Bread!!!
Yay for Ezekiel Bread!!! Great warmed up with natural hazelnut butter. Mmmm. I'm making this picnic table for my little girls for sure!! Bring on summer!
By the way, I'm new here. I'm really inspired by the site and am in the process of working (around the hours I have my daughters and the other hours I work) on my first project. Exciting!
Jen @ Sunshine… (not verified)
Tue, 03/23/2010 - 04:39
Haven't been able to decide
Haven't been able to decide what project to start on first and then I saw today's post. Just came from the lumber yard and can't wait to spend the day on this!
Cammi (not verified)
Tue, 03/23/2010 - 04:44
Ana - you are AMAZING! I
Ana - you are AMAZING! I can't wait to start some of these projects today! I'm headed to Home Depot... Pics coming soon!
Bobette (not verified)
Tue, 03/23/2010 - 04:51
Bring on the outdoor fun!
Bring on the outdoor fun! Can't wait to make this. Thank you.
Suze (not verified)
Tue, 03/23/2010 - 05:12
Another to add to the "To Do"
Another to add to the "To Do" list!
aimeewrites (not verified)
Tue, 03/23/2010 - 06:34
This is GREAT!! You
This is GREAT!! You constantly amaze me.
Request: A larger size, appropriate for elementary school-aged kids, but smaller than the adult-sized ones. My boys, especially my 10yo, would knock their knees on this.
Twiddle Thumbs (not verified)
Tue, 03/23/2010 - 06:44
Very cute! I just sent this
Very cute!
I just sent this link to my husband to see if he's up for a little companionship type weekend project with me.
P&J(or one or … (not verified)
Tue, 03/23/2010 - 06:49
Yup, adding this one to the
Yup, adding this one to the list! Thanks!
Holly (not verified)
Tue, 03/23/2010 - 07:18
Fabulous! I hope this is
Fabulous! I hope this is just the start of many other outdoor projects. . .spring is in the air, and I could really use some outdoor/patio furniture! Ooh, and maybe some planter boxes for the front porch too? :)
Celia Marie (W.) B. (not verified)
Tue, 03/23/2010 - 07:46
Yay!! I have so many projects
Yay!! I have so many projects I want to do and this is going on top of the list! Thanks so much.
Lesli (not verified)
Tue, 03/23/2010 - 07:50
I can't wait to try this! I
I can't wait to try this! I was waiting for a project that seemed easy and fast, and that I could paint a funky color. I think I might make this be our date night this week. Thanks!
Mary (not verified)
Tue, 03/23/2010 - 08:03
I love it!!! I am going to
I love it!!! I am going to use my leftover paint from Audrey's bed for my picnic table! It will be great for our campground!
Meagan (not verified)
Tue, 03/23/2010 - 08:37
I'm your 4000th follower!!
I'm your 4000th follower!! Yeah!! I love love love your blog! Can't wait to get started on some projects!
Jamie (not verified)
Tue, 03/23/2010 - 08:40
YAY!! This looks like the
YAY!! This looks like the perfect weekend project. The weather is getting warmer and the kids would love to be able to eat on the porch.
Roxanna (not verified)
Tue, 03/23/2010 - 08:48
I was just telling DH we
I was just telling DH we needed a kids picnic table this is too cute :)
Michelle (not verified)
Tue, 03/23/2010 - 08:56
Wahoooo I think I have enough
Wahoooo I think I have enough wood from an old futon frame....laying around I could build this...
wicker picnic … (not verified)
Tue, 03/23/2010 - 09:01
That is a lovely picnic
That is a lovely picnic table. It's spring time, the perfect time for picnics. Thanks for sharing this and I'm sure a lot will benefit from this post.
Tracy (not verified)
Tue, 03/23/2010 - 10:14
This looks like something I
This looks like something I can handle! My sister and I are going to tackle it together, but I want to "amp it up" a bit since my kids are on the tall side. I'm going to use 1x8s instead of 1x6s, and I'd like to make it a touch taller...aside from longer supports holding the top together, can I just add length to the legs and call it good? LOVE your site!
Melanie (not verified)
Tue, 03/23/2010 - 12:45
This is one thing I might be
This is one thing I might be able to make during nap times! I have been looking for plans... thanks.
Ben and Katie … (not verified)
Wed, 03/24/2010 - 04:16
I am going to make this my
I am going to make this my first project! I have been wanting something like this for my kids. Thanks so much for the plans. I love your blog and all of your plans!!
Mrs. Smartie (not verified)
Wed, 03/24/2010 - 06:32
Would it be possible to add a
Would it be possible to add a back to the bench? Would you suggest doing this? Might be good for the younger kids. Your blog is so awesome-thank you!!!
Heather (not verified)
Wed, 03/24/2010 - 09:51
I love this! I was just
I love this! I was just looking at the Little Tykes table at Walmart last week - $70!!! This plan is much cuter!!!
Amy (not verified)
Wed, 03/24/2010 - 11:00
Would it be difficult to make
Would it be difficult to make this in an adult size? What changes would need to be made? Thanks for your help!
waline family (not verified)
Wed, 03/24/2010 - 13:25
I am so excited about this
I am so excited about this project that I showed it to my 5yr old daughter and told her, "mommy is going to build you your own picnic table", and she told me "you don't know how to do that"! So thanks to your easy plans to follow I am pretty confident I can do it and eager to prove myself to my daughter! :) wish me luck!
Cierra Pera (not verified)
Wed, 03/24/2010 - 14:58
Love it! Finished it! Here:
Love it! Finished it! Here: http://cierraperaphotography.com/blog/?p=487
mamasweetk (not verified)
Thu, 03/25/2010 - 23:37
I am so excited to build this
I am so excited to build this picnic table for my children. If it goes smoothly, I might build one for my niece's birthday next month!! My list of projects that I want to build is getting longer!
Devon! (not verified)
Tue, 03/30/2010 - 10:05
I am so excited about this!
I am so excited about this! I built it this week and have posted it on my blog. It is still unfinished, but I couldn't NOT post about it! Thank you so much for coming up with the plans!
http://domesticallydevon.blogspot.com/2010/03/first-wood-project-picnic…
mamaseemamado (not verified)
Thu, 04/01/2010 - 15:34
What a fantastic photograph!
What a fantastic photograph! I want to have lunch with her!
Sapphire Sweetheart (not verified)
Fri, 04/16/2010 - 06:21
Oh my goodness! I absolutely
Oh my goodness! I absolutely LOVE it! We are moving to an apartment on a lake and this will be perfect for my little guy and new friends!
Metalbonder (not verified)
Sat, 04/17/2010 - 08:25
Thanks for this plan, it
Thanks for this plan, it inspired me to build a table of my own for my boys. I'm a metal worker by trade so woodworking is slightly new to me. I think it came out good, even better being it only set me back seven bucks and an afternoon. The pictures are in my blog at http://chippedhammer.blogspot.com/2010/04/first-project-is-tabled.html
Jodi Pilling (not verified)
Sat, 04/24/2010 - 07:36
I made this picnic table this
I made this picnic table this week for my little girl. It was my first attempt at using power tools. This plan was very easy to follow and I LOVED building this table. It turned out so cute. Thanks for the plans and for the inspiration!
Wes Kerr (not verified)
Sat, 05/01/2010 - 06:47
Wish I could have done it for
Wish I could have done it for $15 but the plans worked out great. I'll have to wait a few days until the humidity drops here to get it finished but it's built and my little girl things it's wonderful.
Marty (not verified)
Sat, 05/01/2010 - 10:44
I just built mine this past
I just built mine this past week. My 4 year old daughter was helping me. I didn't tell her what we were making but after laying out the top she knew exactly what it was. I knew then that I could finish and she'd be happy! I am so very excited with the end result and LOVE IT!!! (my neighbor came home while we were painting and though that we had bought it as is... then he thought that it was a kit I bought. NO, NO, NO!!)
THANK YOU
Lisa (not verified)
Fri, 05/28/2010 - 14:00
My husband just made this
My husband just made this yesterday...and we all love it! Thank you so much!
Kate (not verified)
Mon, 06/21/2010 - 09:01
We could SO not find decent
We could SO not find decent wood that cheap at Home Depot. The only wood near that price had huge nasty chunks out of every piece. I was so sad! I'm calling the next closest place 'cause it's at least 30 min away.
Kathi (not verified)
Tue, 06/22/2010 - 15:02
Yippppeeee! A perfect plan
Yippppeeee! A perfect plan for my dollhouse picnic table! Thank you SO much!!!!!
Kate (not verified)
Sun, 07/04/2010 - 20:12
Just made this out of old
Just made this out of old pallet wood. Only had to change a little to make it work. I can't wait to paint it!! =) It's gonna be bright and happy! =)
SAP (not verified)
Tue, 07/13/2010 - 17:51
OMG. I just found your site
OMG. I just found your site and have fallen. in. love. My husband is getting his Master's in woodworking and I am so excited to build some of these thing with him. THANK YOU for all the great photos and plans - can't wait to put something together!!
JessiHarri (not verified)
Tue, 08/10/2010 - 13:13
Just built this today with a
Just built this today with a girlfriend for her 1 year old! It turned out perfect and the plans made it simple! Thank you so much for making these free! Love it!
Alicia (not verified)
Tue, 11/16/2010 - 10:57
this picnic table its next on
this picnic table its next on my list. my husband and i are super excited to build this for our son.
thanks Ana.
Desi (not verified)
Wed, 11/17/2010 - 08:23
My husband and I are going to
My husband and I are going to make this picnic table this weekend for our niece for her Christmas Present! I love it!