


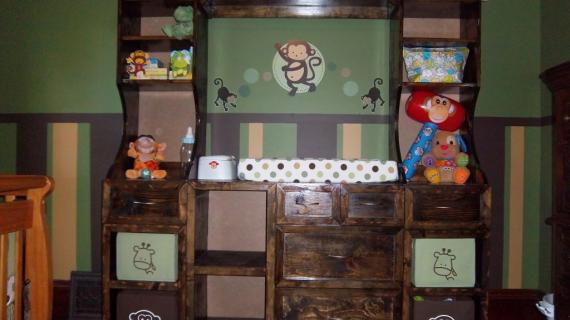
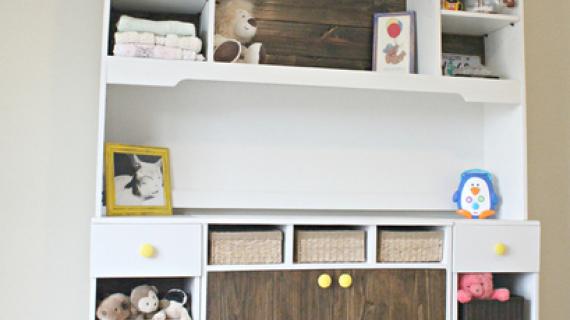
Beautiful scalloped sides on these hutches create charm on the Madeline Nursery Changing Wall. Featuring a large tabletop surface and two shelves, this hutch is perfect for all of baby's things. Shown with the rest of the Madeline Collection.

Preparation
Shopping List for 1 Hutch
1 – 1×12 (you will only need about 4 feet per hutch)
8′ of 1×16 (you should have leftovers from the base unit)
1 -1×4 (you only need about 3′)
1/4″ plywood, MDF, or luaun
2″ nails
1 1/4″ nails
wood glue
wood filler
Cut List for 1 Hutch
2 – 1×16 @ 40 3/4″ (Sides, you will need to scallop out sides with a jigsaw)
3 – 1×12 @ 14 1/2″ (Shelves)
2 – 1×4 @ 14 1/2″ (Top and Bottom Supports)
1 – 1/4″ Backing @ 40 3/4″ x 16″ (Back)


Composition is shown above. I am not going to recommend using A1 plywood to get a hardwood stain just because I don't know how difficult or easy it would be to iron on venner edge banding to the scalloped edges. I will have to go try this out in the garage and get back to you. You can use pine boards for the 1x4s and 1x12s for painting. Also, you can use MDF cut into 11 1/2" strips as 1x12s for the shelves. Another thought is to build the base pieces using 1x18" boards (3/4" MDF sheets cut into 17 1/2" widths). You will only be able to get two 8' strips of 1x18s out of a sheet of MDF. From the scrap, cut a strip 11 1/2" wide and this will be your 1x12.
General Instructions. Avoid fastening too close to the edges on the MDF to avoid splitting. I recommend nailing some scrap pieces of MDF to get a feel for how to work with MDF and nails. You can alternatively use drywall screws instead of nails, but make sure you countersink your screws and predrill the entire length of the screw shaft. Check for square and work on a clean level surface. Use proper safety equipment and precautions.
Instructions
Step 1
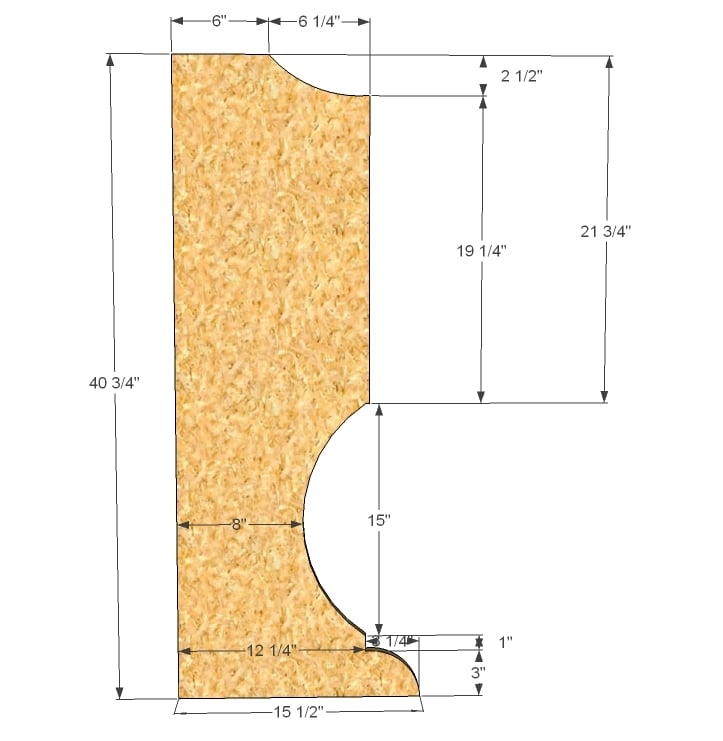
Sides. Cut out the sides as shown above. Cut one out and then use it as a pattern to cut the other out. Important: the top part needs to be 12 1/4″ wide. This is shown above. Use a jigsaw.
Step 2
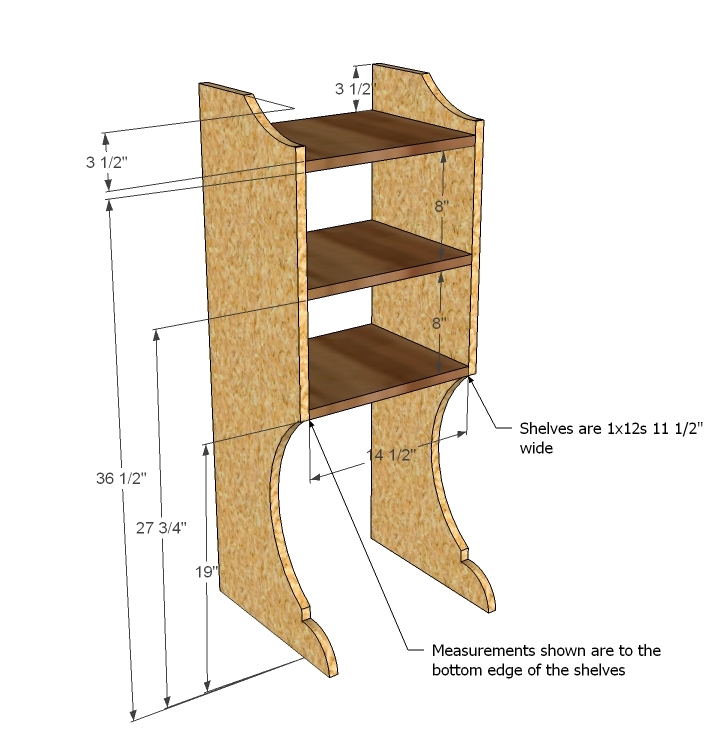
Shelves. Mark the sides as shown above and use 2″ nails and glue to fasten the shelves in place.
Step 3

Top and Bottom Supports. Using glue and 2″ nails or screws, fasten the top and bottom supports as shown above.
Step 4

Back. Fasten the back as shown above. Take a square and use glue and 1 1/4″ nails.
Step 5
Assembling. Recommended that you fasten the hutches to a stud in the wall behind the hutch to keep from falling forward. You can also use a simpson strong time to attach the hutch to the base unit easily.
Comments
Tuli (not verified)
Mon, 03/08/2010 - 09:30
Ana, just discovered your
Ana, just discovered your blog last week and have already started on my first project(the Recycling Center!) I'm curious how you finish the ends of MDF. I've read that they soak up a lot of paint if you don't finish them with something else first - wood filler, spackle, wood glue/water mixture? And do you use Latex or Oil-based paint? Thanks in advance! Your plans were the missing piece to get me to start building! Next up is the Media Console.
Stacie Kinlaw (not verified)
Mon, 03/08/2010 - 17:39
I NEED YOUR HELP!!! I am the
I NEED YOUR HELP!!! I am the Executive Director of a NON PROFIT children's Museum in NC. We were building an exhibit around the Gourmet Kitchen from PB and unfortunately now that I may have a sponsor - it is discontinued! Do you have plans for this (i tried searching but was not successful). THIS MAY BE MY LAST HOPE!!! you can email me at programs@explorationkids.com I look forward to hearing from you soon!!!
Nathan and Alicia (not verified)
Tue, 04/13/2010 - 06:19
Thank you so much for posting
Thank you so much for posting these directions for this beautilful changing wall. My hubby and I are axiously awaiting for the rest of the instructions for the actual changing table. We want to build this for our baby girl due in 8 weeks.