


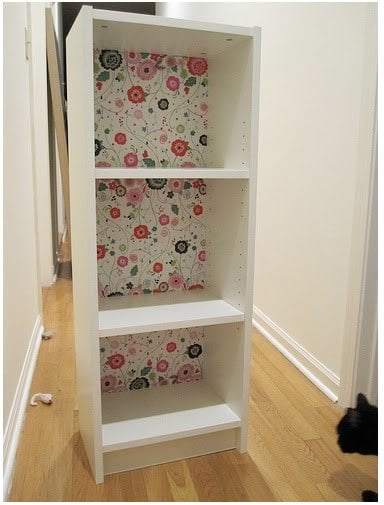
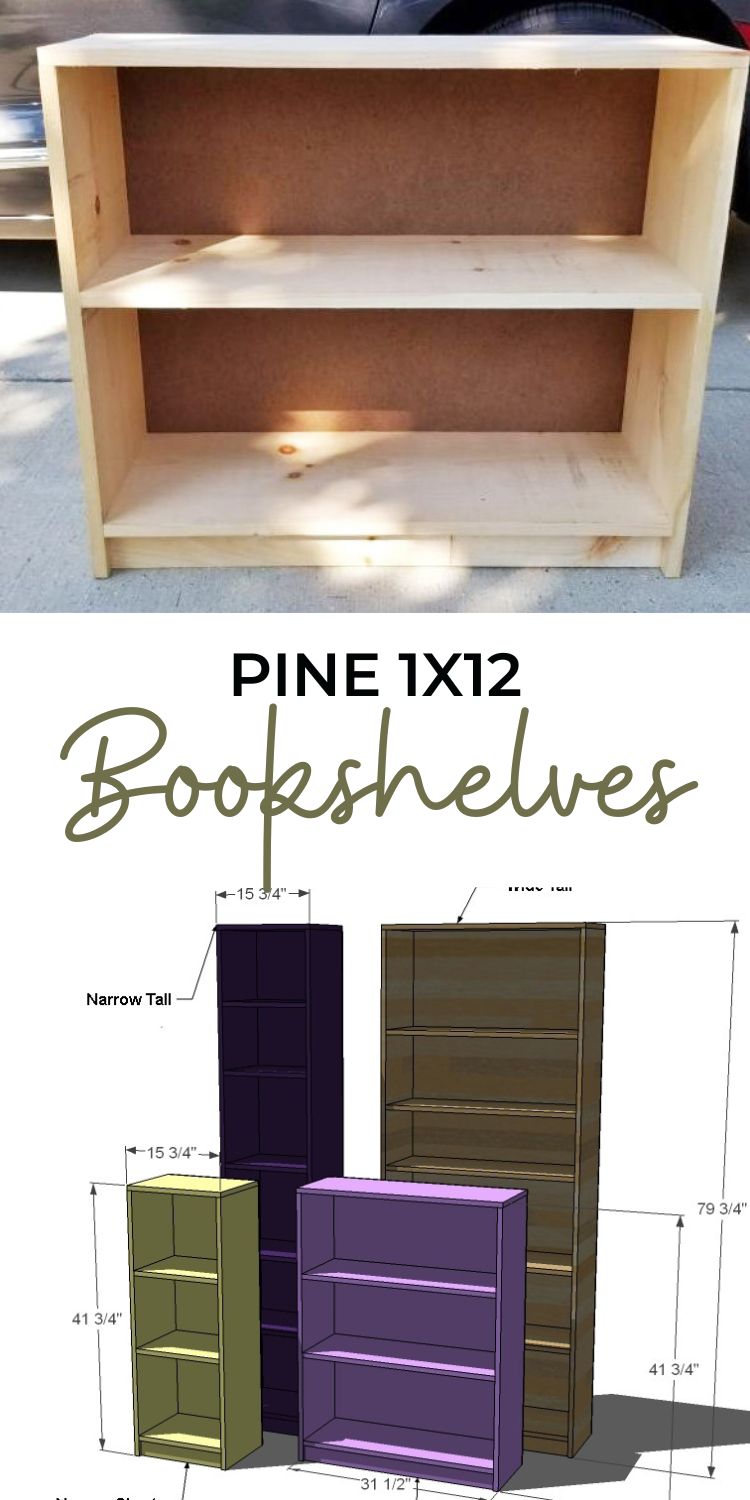
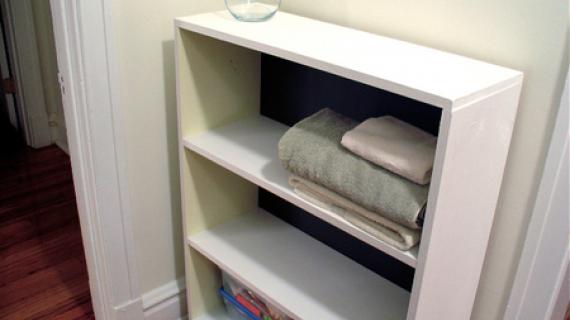
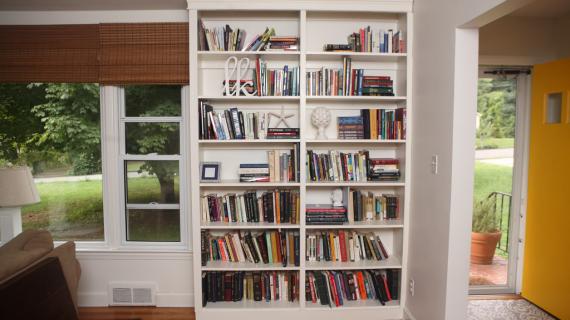
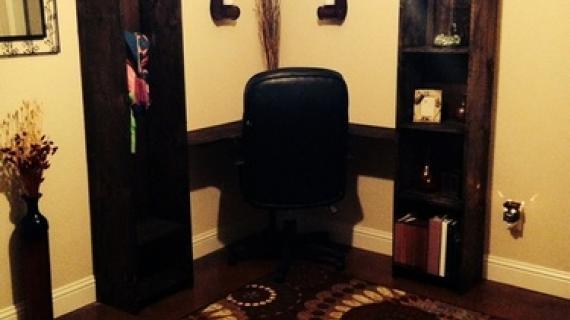
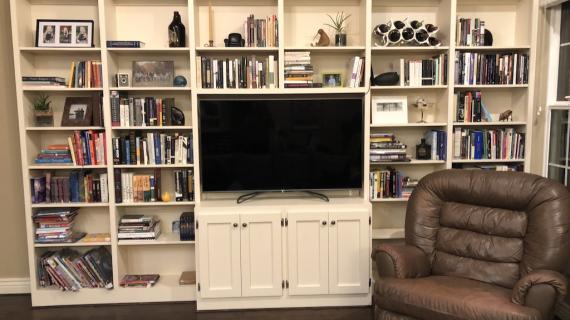
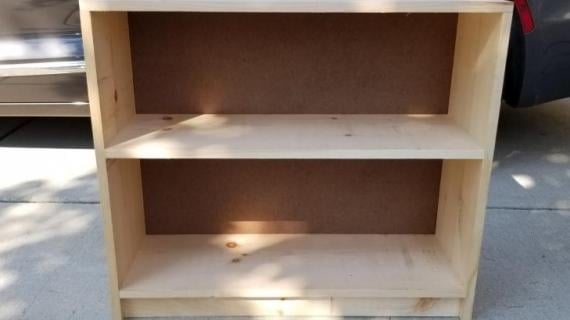
Pine 1x12 bookshelves are sturdy, paintable or stainable, and quick and easy to make. You can make them in custom sizes, and since it's raw wood, customize with added trim or detail. In this free plan, we show you how to build bookshelves out of pine 1x12 boards.
Pin For Later!

Preparation
Narrow Short
- 1 - 1x12 @ 12' long
- 1 - 1x3 @ 15"
- 1/4" Plywood @ 41" x 15 3/4"
Narrow Tall
- 3 - 1x12 @ 8 feet long
- 1 - 1x3 @ 15" 1/4"
- Plywood @ 79" x 15 3/4"
Wide Short
- 1 - 1x12 @ 8 feet long
- 1 - 1x12 @ 12 feet long
- 1 - 1x3 @ 32" 1/4" Plywood @ 31 1/2" x 41"
Wide Tall
- 3 - 1x12 @ 8 feet long
- 1 - 1x12 @ 12 feet long
- 1 - 1x3 @ 32" long
- 1/4" plywood @ 79" x 31 1/2"
For all sizes:
- 1-1/4" brad nails and glue OR 2" self tapping wood screws (#8 star bit recommended) OR 1-1/4" pocket hole screws if you have a Kreg Jig
- 3/4" brad nails
Narrow Short
- 2 - 1x12 @ 41" (Sides)
- 1 - 1x12 @ 15 3/4" (Top)
- 3 - 1x12 @ 14 1/4" (Shelves)
- 1 - 1x3 @ 14 1/4" (Footer)
- 1 - 1/4" Plywood @ 41" x 15 3/4"
Narrow Tall
- 2 - 1x12 @ 79" (Sides)
- 1 - 1x12 @ 15 3/4" (Top)
- 6 - 1x12 @ 14 1/4" (Shelves)
- 1 - 1x3 @ 14 1/4" (Footer)
- 1 - 1/4" Plywood @ 79" x 15 3/4"
Wide Short
- 2 - 1x12 @ 41" (Sides)
- 1 - 1x12 @ 31 1/2" (Top)
- 3 - 1x12 @ 30" (Shelves)
- 1 - 1x3 @ 30" (Footer)
- 1 - 1/4" Plywood @ 41" x 31 1/2"
Wide Tall
- 2 - 1x12 @ 79" (Sides)
- 1 - 1x12 @ 31 1/2" (Top)
- 6 - 1x12 @ 30" (Shelves)
- 1 - 1x3 @ 30" (Footer)
- 1 - 1/4" Plywood @ 79" x 31 1/2"


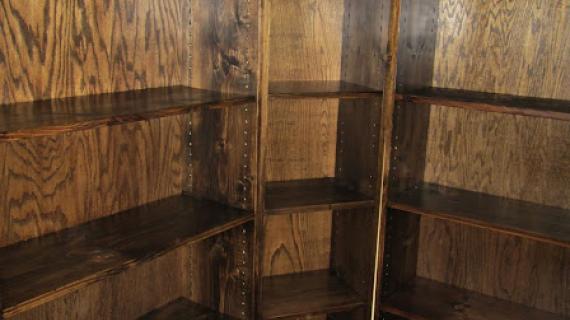
Work on a clean level surface. Cut and mark out all joints prior to assembly. Recommended box assembly is screws, but you can use nails if your piece is a low use piece. Take a square after each step Pre-drill and countersink your screw holes. Keep front edges flush. Adhere to safety precautions and use proper safety equipment.
Instructions
Step 1
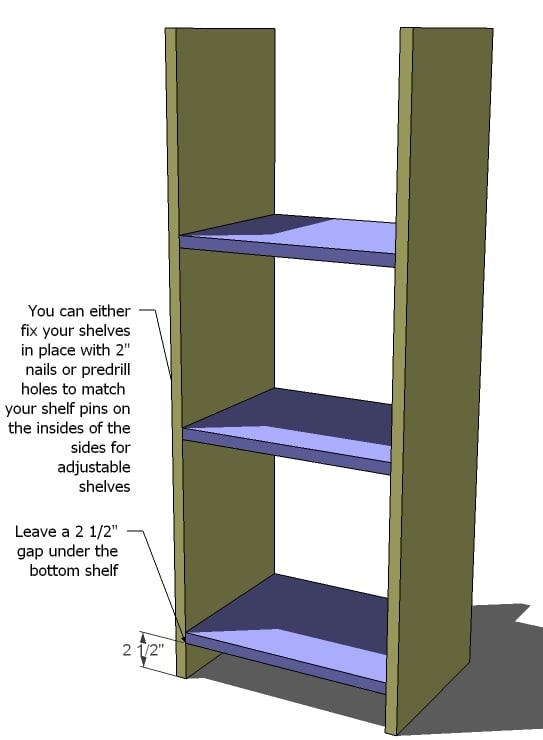
Sides and Shelves - Attach the shelves to the sides using glue and fastener of choice:
- 1-1/4" brad nails and glue - not as sturdy, but quick and easy and easy to hide nail holes
- 2" star bit self tapping screws are sturdy, quick, but you'll need to fill the screw hole with wood filler and sometimes splits the wood
- 1-1/4" pocket hole screws if you have a Kreg Jig is a great option, takes a little more time but certainly worth it
Space the shelves out as you see fit - I often will attach the bottom shelf first, and then use a block of wood, cut to the space I want, as a temporary spacer to help line my shelves up.
Step 2
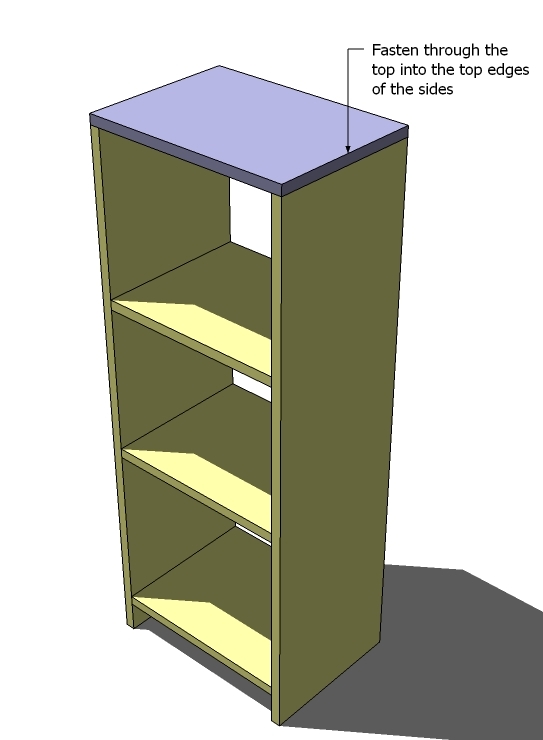
Top - Attach the top with 1-1/4" brad nails and wood glue.
Step 3
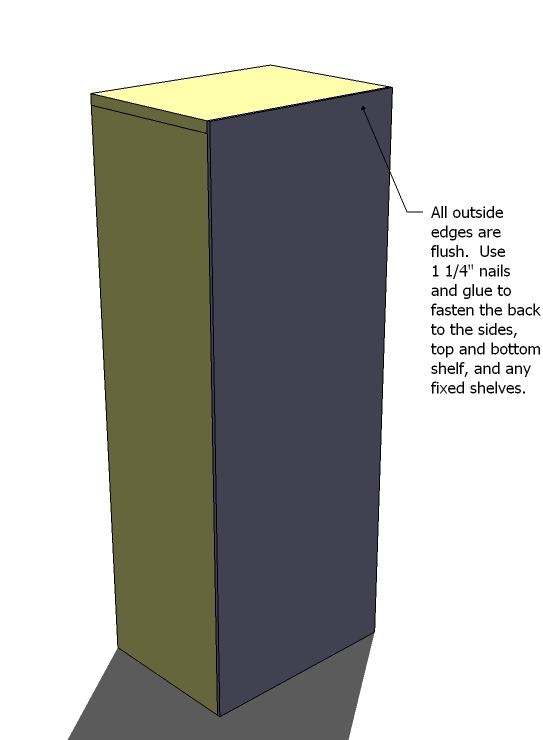
Back - Take a square of the bookcase by measuring opposite diagonals and adjusting the frame until the opposite diagonal measurements match.
Fasten the back to the bookcase with 1" brad nails and glue. If you do not have a nailer, you can also use small wood screws.
Step 4

Footer. Inset the footer 1/2″ and fasten through the sides and the bottom shelf with 1-1/4" brad nails and glue.
You an also add a 1x3 at the top, back, set upright, for additional stability and to give you an opportunity to screw the bookshelf to the wall to prevent forward tipping.

Comments
Silky (not verified)
Thu, 03/25/2010 - 23:05
First off all I want to thank
First off all I want to thank you for all your wonderful Plans!
I found your blog just recently and it's the only one I read every single day.
Living in Europe I never heard of Williams-Sonoma or pottery barn before. In fact the style is a little too American for my taste but your plans are amazing and easy to adapt.
We do own a lot of IKEA furniture. And while I love most of it they change their styles so quickly that it is almost impossible to add to your already existing furniture.
My parents own some Billy bookcases that are 30 years or older. Back then they were made of veneered plywood. When my husband and I moved in our first apartment the ones you could buy were veneered particle board. By now they are not even veneered anymore. They are particle board with a colored foil or some kind of foil that resembles wood.
So, thank you, thank you, thank you for posting these plans!
But while their cheaper furniture experienced a quality loss lately IKEA added some rather nice solid wood furniture to their product range. Check out MARKÖR or EDLAND for inspiration.
Your blog really added a lot of projects to my to do list. I just have to figure out how to manage withot a workshop.
I use my dad's workshop every once in a while but he lives to far away to do this on a regular basis.
Nalamienea (not verified)
Fri, 03/26/2010 - 00:23
this one may end up being my
this one may end up being my first piece of furniture! We've been wanting a new bookcase forever but they are all SO expensive! Thank you!
Mary (not verified)
Fri, 03/26/2010 - 01:17
I love the names!
I love the names!
Dawn (not verified)
Fri, 03/26/2010 - 01:32
Hahaha, thats so awesome. I
Hahaha, thats so awesome. I had such a hard time concentrating on the plans because I couldn't quit chuckling over the names. Love it. Making a list to buy the stuff for a 3 bedroom 2 bath next weekend, LMAO. Thanks so much, you of course are a daily inspiration to us all!
Jen (not verified)
Fri, 03/26/2010 - 02:50
The High Rise one would make
The High Rise one would make for a great display cabinet if we just added a simple door to it. Thanks for some more great designs!
JessA (not verified)
Fri, 03/26/2010 - 02:54
ANA! I had the Favorite
ANA! I had the Favorite Bookshelf plans all printed for my first project and I was ready to go buy the wood today! But THIS plan is more what I really want- just some basic bookshelves and these look like a good first project for me. WOW your timing couldn't have been better! thank you!
Rolenthegreat (not verified)
Fri, 03/26/2010 - 04:00
I really like the new table
I really like the new table you've made for your cut list, very easy to read and printable. Reminds me of the charts on the back of a sewing pattern.
Added bonus this sort of project might not save much $$, but since some of us live 4+ hours from an Ikea, it's a real time saver :)
Also there is a website I really love here http://ikeahacker.blogspot.com/ That shows all sort of people doing creative things with Ikea products. If you do a search for 'Billy' you end up with some amazing examples of how versatile these things can be :)
Isabel (not verified)
Fri, 03/26/2010 - 04:45
I think 50% savings sounds
I think 50% savings sounds fanstastic to me!! Plus Im building a product that will last for a 100 years and wont fall apart next time I move!! Thank you so much!!
Jeannine (not verified)
Fri, 03/26/2010 - 06:23
I love the new plan format!
I love the new plan format! I loved you old plans, but this new format is so professional looking!!! I love you blog too, can't wait to vote on the logo's you get submitted and see which one wins!
Thanks for all you do, I am so glad that such good things are coming your way. I always tell my kids "you get what you give", and you have given so much to so many people, it is right that you should get so much in return.
FYI... I am glad you are going to keep your plans on the webstie free, but I will also be one of the first in line to buy your book when it comes out - would love to have them all in one place that I can look at and refer to, and happy to help support what you are doing - empowering people! I have always like taking old pieces and giving them new life, but never thought I could make my own from scratch! Thanks!
Just one suggestion on the book, I would love to see some of the bragging board pictures of pieces that others have built and what they have done with them in there! That is what really has made me realize I can do this is see what other "regular" people have been able to do in their spare time, with basic tools, and limited woodworking/carpentry backgrounds.
Jennifer (not verified)
Fri, 03/26/2010 - 08:05
Oooh, I love what Jeannine
Oooh, I love what Jeannine just said. Featuring REAL fan photos in your book! That's a great idea. :)
bequi (not verified)
Fri, 03/26/2010 - 08:17
I also like Jeannine's idea.
I also like Jeannine's idea. I will also be buying a book ASAP! I'm excited to give copies as gifts!!
And I laughed out loud at the bookcase names!
Yolanda (not verified)
Fri, 03/26/2010 - 10:00
Oh Ana you just keep getting
Oh Ana you just keep getting better and better. I love the (B)illy book cases and the price point is hard to beat, but I have read that they can’t be wall-mounted and don’t survive a move very well. That’s a short-term gain, long-term loss. I’d rather repaint a bookcase when my taste or needs change, not have to repurchase.
Your Willies, on the other hand, are very versatile and I could see them popping everywhere from the nursery to the garage to the study to the bathroom.
gkey (not verified)
Fri, 03/26/2010 - 17:34
To the one who inspires me to
To the one who inspires me to build,
I can not believe you keep posting the VERY things I NEED!
Thank you again and again and again.
love,
Inspired in Nebraska
Kevin (not verified)
Fri, 04/02/2010 - 21:16
Love the bookcase plans and
Love the bookcase plans and really want to give them a go. Drilling shelving support holes thinking of making a simple jig to get holes to line up both sides. Guess you could use wooden dowels for supports. Great site keep up the good work.
Jackie (not verified)
Sun, 04/11/2010 - 10:15
If the width of the two wider
If the width of the two wider ones are 31 1/2" then why is the back piece only supposed to be 30"?
Jackie (not verified)
Sun, 04/11/2010 - 10:17
Just noticed the Error
Just noticed the Error message. I really hope I didn't just read over that and that it just got posted. Haha
Laura (not verified)
Sun, 04/11/2010 - 15:00
Yay! I built my first
Yay! I built my first bookcase or really any piece of furniture! Thank you for your inspiration!
Amy @ Thoughts… (not verified)
Wed, 04/28/2010 - 13:00
Thanks! You make it so
Thanks! You make it so simple (& do all of the measurements for me)!
We'll be doing this soon!
Do Not Lose Heart (not verified)
Wed, 06/02/2010 - 04:53
I finished making the
I finished making the smallest of these fout shelves. I had a good time figuring out how to do it. Its not professional, but if I did it again, I'd do better. It is very sturdy and useful. Thanks for the plans and list of materials!
brooklyns_mama
Wed, 03/09/2011 - 14:11
I want those bins!
Anyone know where those bins were purchased?
gamomma
Wed, 03/09/2011 - 16:03
They look like the Liberty of
They look like the Liberty of London stuff Target was carrying for a while.
Guest (not verified)
Sat, 08/27/2011 - 16:27
What kind of paint?
I love all the projects!! My question is, what is the best type of paint to use for painting furniture, and what do you use as the last step to protect it? Polyurethane? Something else? Should the protective finish be painted on with a brush or a spray can? Thanks for any responses. I painted an old beside table once and liked it, but it got scuffed up very quickly.
Hal (not verified)
Thu, 07/19/2012 - 00:39
Thanks for posting! Simple
Thanks for posting! Simple enough, but nice to know that simple will work...I'm a beginner when it comes to this type of stuff, and found myself overthinking the joints when trying to design something similar.
I think I noticed an error in the shopping list for 3bd/2ba. Unless I'm mistaken, you should be able to get by with just one 8' and one 10' 1x12, rather than an 8' and a 12'. The x8 cuts into 3 shelves with 6" of scrap, and the x10 cuts to the sides and top with 6 inches of scrap again.
michelle remmey (not verified)
Mon, 11/12/2012 - 06:43
bookcases
My husband and I (virgin builders!) are planning to build some varying size bookshelves for our daughter's bedroom. How do you recommend attaching these to the walls?
Smserrano
Sun, 06/28/2015 - 06:19
Shelf Size
I wanted to see what your thoughts were about shelf size. I am about to make some "build-in" shelves along my living room wall using these simple plans (thank you) and was debating having them come off the wall either 10'' or 12''. Does 12 '' stick out too much? Or have you found that there are some books that will not sit on the shelves because it is too small if only 10''? Usually bigger books end up being no more than 9'' wide. Thoughts? I don't want to make a mistake!!!