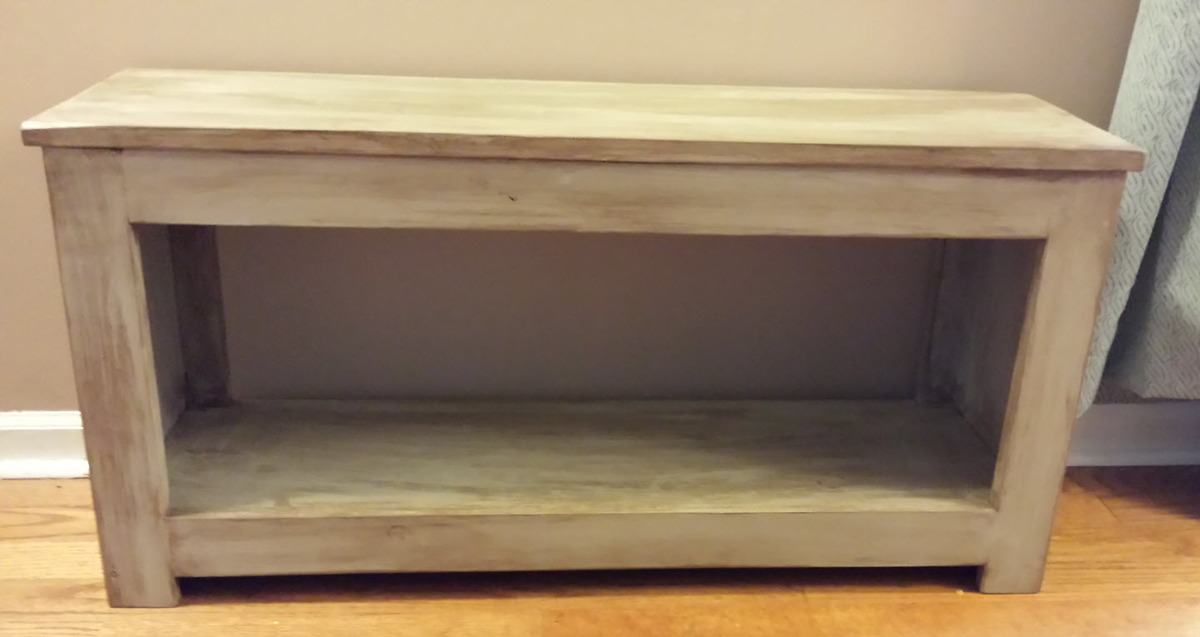


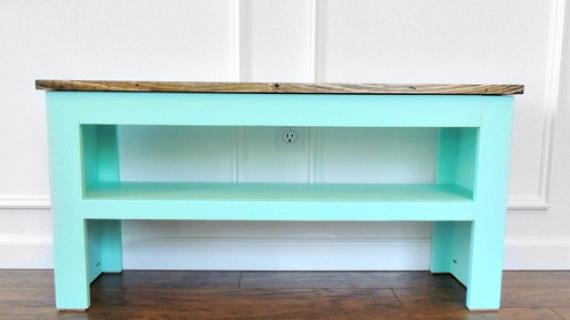
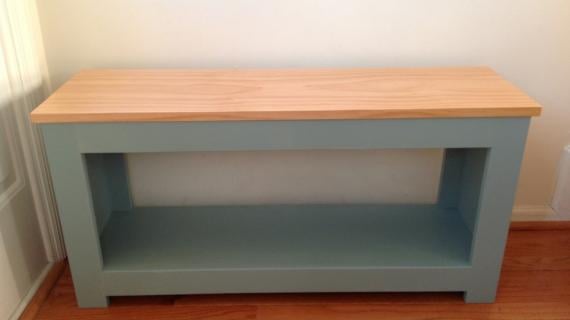
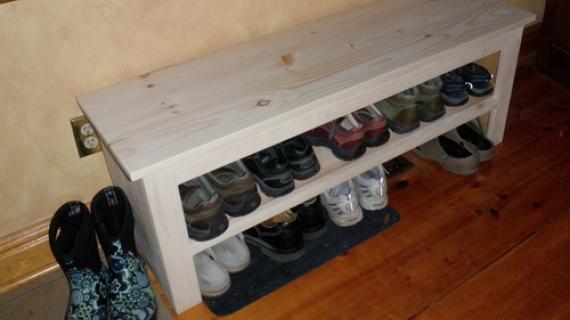
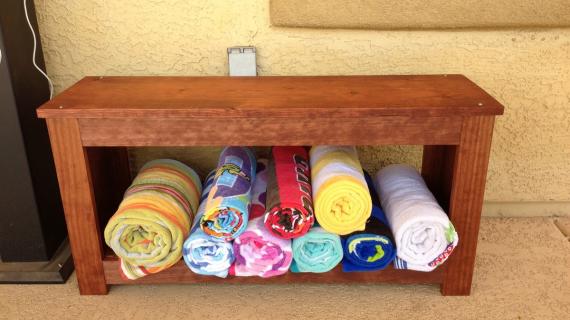
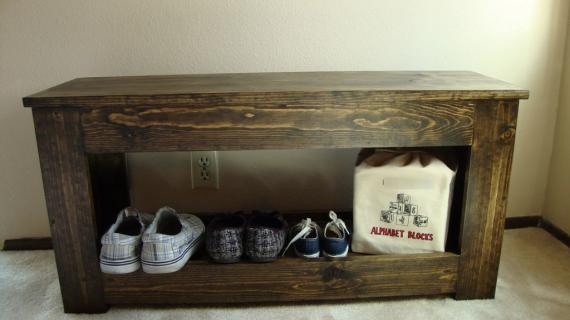
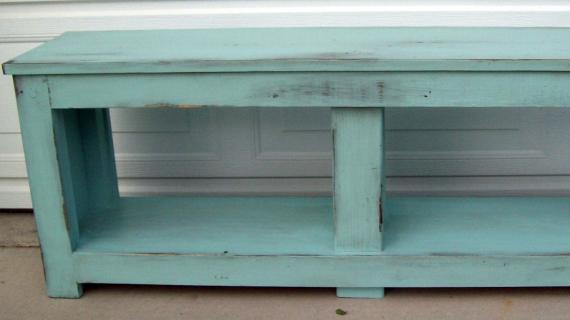
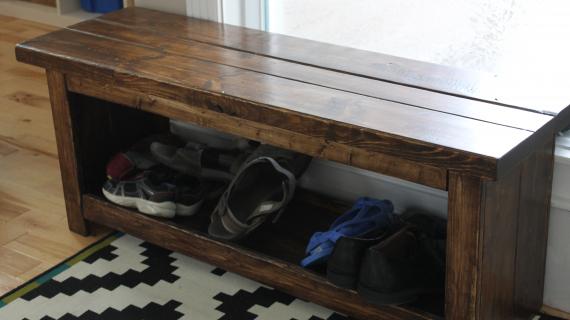
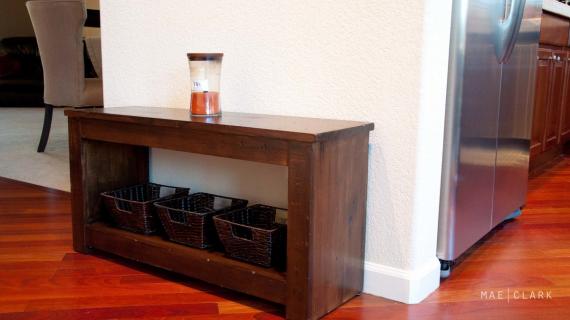
A good place for rolled towels, a good place to sit! This simple spa bench is compact enough to fit in most baths, but adds both storage and seating.
This is a free woodworking plan to build your own wood bench using pine boards. You can nail or screw this bench together. This is a beginner friendly project plan.
Preparation
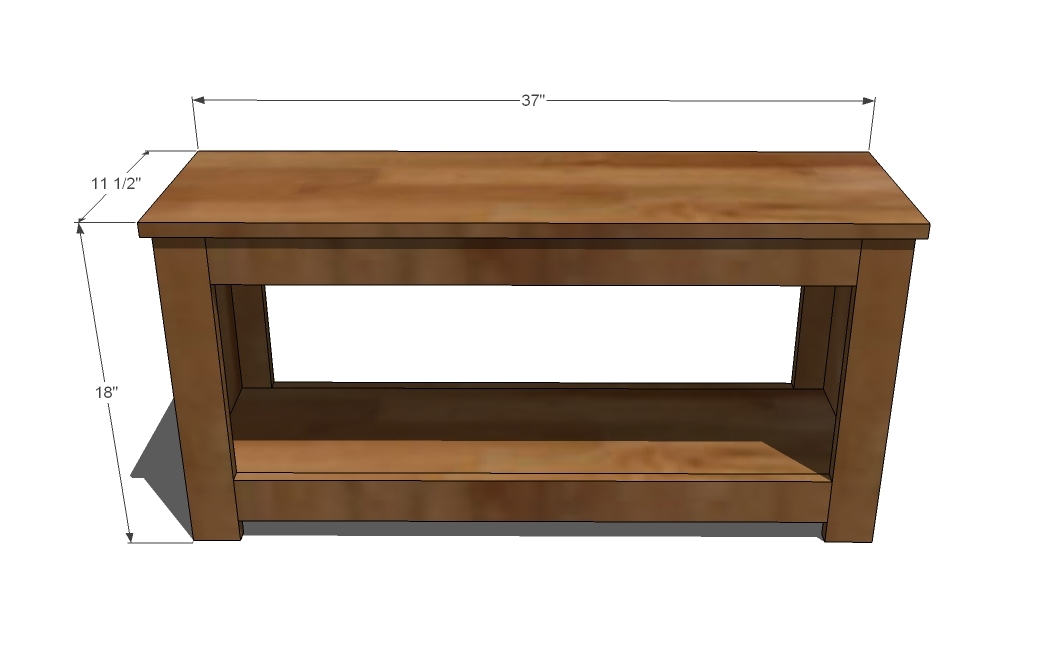
- 1 – 1×10, 10′ Long
- 1 – 1×12, 4′ Long
- 3 - 1×3, 8′ Long
- 2 – 1×10 @ 17 1/4″ (Sides)
- 2 – 1×10 @ 34 1/2″ (Shelves)
- 4 – 1×3 @ 17 1/4″ (Legs)
- 4 – 1×3 @ 31″
- 1 – 1×12 @ 37″ (Top)


Work on a clean level surface. Adhere to necessary safety precautions. Check for square after each step. Measure and cut your trim to fit your piece for the best fit.
Instructions
Step 1
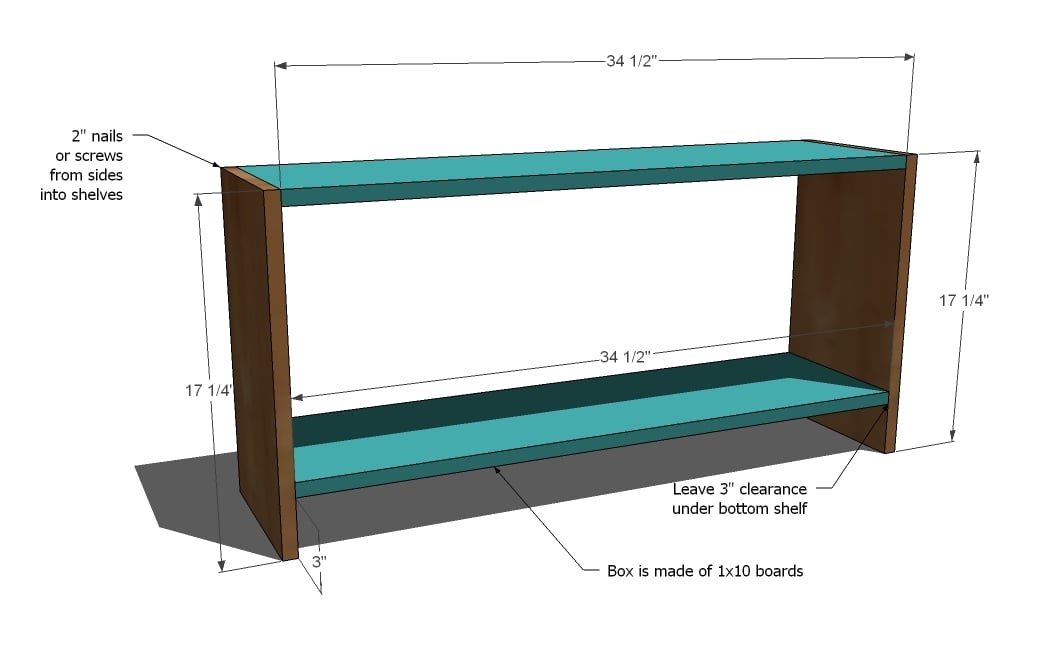
Build the Box. Start by marking the sides 3″ from the bottom. This will be the bottom of the shelves. Fasten the bottom shelf in place, using 2″ nails or screws and glue. Then fasten the top shelf in place.
Step 2
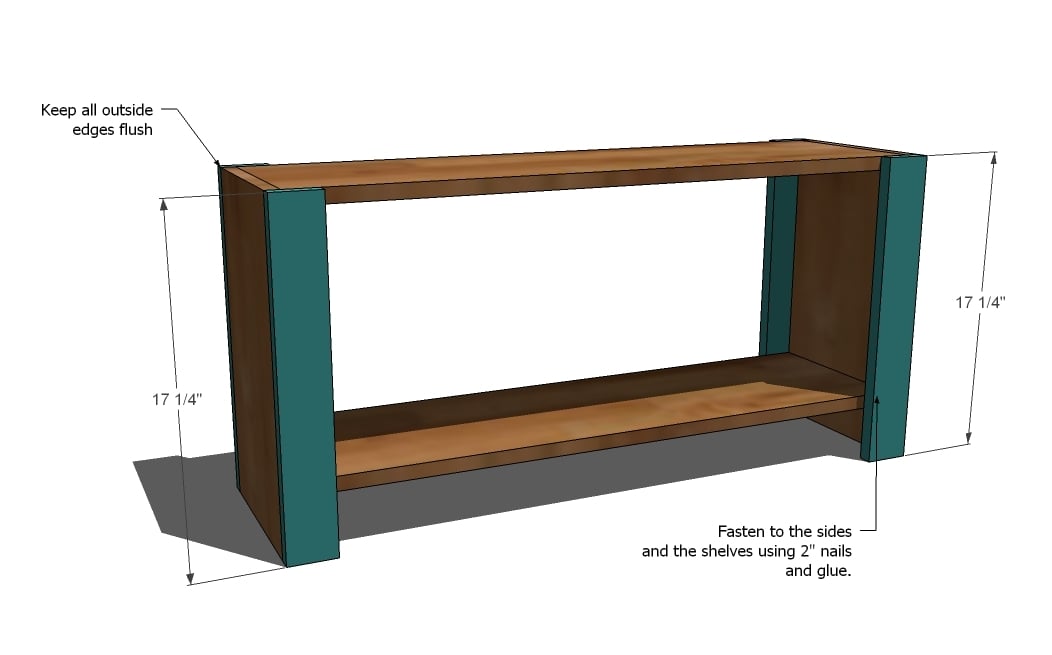
Legs. Fasten the legs to the sides of the bench as shown above, keeping outside edges flush. Make sure you also fasten to the sides and the shelves. The legs reinforce the sides
Step 3

Shelf Trim. Fasten the shelf trim to the shelves, as shown above. You may need to nail at an angle from the bottom corners of the shelf trim into the legs. Use 2″ nails and glue.
Step 4

Top. Mark the sides of the top in 1/4″ and 1/2″ from the ends. Position on top of the bench and fasten in place with 1 1/4″ nails and glue.

Comments
Tricia (not verified)
Mon, 03/15/2010 - 14:58
Hi Ana. I am really loving
Hi Ana.
I am really loving the new look of the blog. I especially like the about tab at the bottom of each article.
It turns out that this was a fantastic opportunity for you to make a name for yourself, huh?! ;)
Keep up the amazing work. Your talent is truly an inspiration for those of us with big ideas, but struggle in the blueprint areas.
Pine Tree Home (not verified)
Mon, 03/15/2010 - 16:14
So happy when you say
So happy when you say "outdoor". I am saving all these plans for when it gets a little warmer.
STRONGdesign (not verified)
Mon, 03/15/2010 - 16:24
you truely are gifted at
you truely are gifted at designing plans! so much so youre the first feature i've done on my blog!
http://strongerdesign.blogspot.com/2010/03/sunday-feature-day.html
hope you dont mind!
Robyn (not verified)
Mon, 03/15/2010 - 18:11
Now I just need a spa to put
Now I just need a spa to put it in...
Laurie (not verified)
Mon, 03/15/2010 - 20:22
I know EXACTLY what you mean
I know EXACTLY what you mean by the "wipe me mom" pleas. We're at that stage right now and it's a lot less work to do it than to take care of what happens next if I don't!
Talia (not verified)
Tue, 03/16/2010 - 02:28
We are so glad to see you
We are so glad to see you back!!! My fiance and I are addicted to your blog and check it daily (okay, really a few times a day between the two of us). When you didn't post, we fretted, sorry you were ill, take another day or two and really get back on your feet!!!!
(We are going to build the Grace's Town Grocery and Library for our soon-to-be 3 year old's birthday gift!)
Thanks for all you do!!
Talia & Tim
Rebecca (not verified)
Tue, 03/16/2010 - 03:54
Ana,This is perfect for my
Ana,
This is perfect for my Florida room to use as storage. Do you have an estimate of how much it would cost to make, with basic wood? I'll probably make about 10 of these if they are cost effective enough.
THanks,
Rebecca
In reply to Ana,This is perfect for my by Rebecca (not verified)
taradactel
Mon, 04/15/2013 - 06:19
Cost
Hey Rebecca,
Assuming that you already have all the tools, nails, glue, etc...
I just bought my wood last night at Home depot and it cost about $25. You will have a bit left over here and there so the cost would go down per bench if you are making multiples.
Kate (not verified)
Tue, 03/16/2010 - 04:42
Gorgeous bench! How's the
Gorgeous bench! How's the finish done in the photos? I love it and will copy it if I can.
rebeccaV (not verified)
Tue, 03/16/2010 - 06:36
Hi Ana! I just found your
Hi Ana! I just found your blog and I LOVE IT!! I'm totally going to buy myself a saw and make some stuff! I want to put your button on my blog, but I can't get it to copy. I tried to type it all in, which worked for the image but it didn't link to your blog. Any ideas?
Brooke (not verified)
Tue, 03/16/2010 - 07:37
Hope you are feeling better.
Hope you are feeling better. Sorry to hear you are sick.
Roxanna (not verified)
Tue, 03/16/2010 - 08:14
I just found your blog and I
I just found your blog and I think you are my muse. Its been a long time since I have been this excited about a blog :)
Kim (not verified)
Tue, 03/16/2010 - 12:51
I've been looking for just
I've been looking for just the right bench for so long...and here it is! I love this and I need one of these in my house right now. Thanks for this plan!
INSANITY ENJOYED (not verified)
Tue, 03/16/2010 - 15:55
Oh no, another thing I want
Oh no, another thing I want to build lol. I am happy to say that I bought the wood for my first project! Im going to build the entryway storage bench. I'm very excited and will definitely send pics of the results your way :) Although I am wishing I had more than just a hammer for all the nails lol.
Emily (not verified)
Tue, 03/16/2010 - 17:59
Hello :) I am totally new to
Hello :)
I am totally new to this world of DIY blogging and crafy-ness...this site is amazing, and so inspiring. I will definitely be trying a few of these things this summer (I'm a college student) to have in my dorm room next year. I will definitely be a regular visitor from now on.
Jen AKA Jupiter (not verified)
Wed, 03/17/2010 - 05:51
I am so obsessed with benches
I am so obsessed with benches right now. I love this one!
Rami, Danielle… (not verified)
Thu, 03/18/2010 - 02:36
This is going to be my first
This is going to be my first project. I love it! I am finally getting a home gym together and this is the perfect resting bench! Thank you and I'll let you know how it turns out.
Cassie (not verified)
Sun, 03/21/2010 - 19:55
My husband and I fell in love
My husband and I fell in love with your blog about a month ago. We've just gotten around to our first project this weekend and this is it! We got the bench built today in about an hour and I'll be staining it tomorrow. Can't wait to share it!
mwoolfenden (not verified)
Tue, 04/13/2010 - 05:18
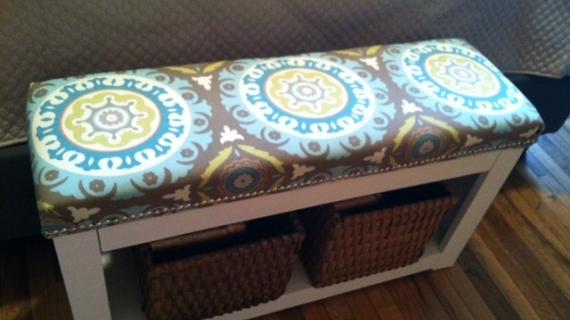
I need this! i think i will
I need this! i think i will tweek it so that it is longer and has a cushion on top so that my family cna sit and take off their shoes and store then under! my pretty wood floors(that i have to finish first) thank you!!
stephaniegiese (not verified)
Mon, 06/14/2010 - 02:29
Hi Ana! I stumbled across
Hi Ana!
I stumbled across your blog last week and I am ADDICTED!I'm so excited to take up this new hobby!!! I convinced hubby that it would be a great "date night" activity that we could do from home once the kids are asleep. We went to HD yesterday and bought our wood for less than $45 (maybe it would have been cheaper at a lumber yard, but we had two kids under 3 with us and Home Depot seemed like an easier trip.)We plan to start tomorrow, I'm excited to learn how to actually use all of "his" tools that have been in our garage for years. You are such an inspiration for Girl Power!
Cami Koralewski (not verified)
Wed, 08/11/2010 - 11:57
This was a great first
This was a great first project for someone who has never ever done anything like this before! Thank you! Right when we finished the bench, we started a table and just finished it. Now we are building a new kitchen table! THANKS, ANA!
SariBelle (not verified)
Sun, 12/05/2010 - 19:47
Hi Ana, Thank you so much
Hi Ana,
Thank you so much for sharing your creativity and showing us we all have the ability to build!
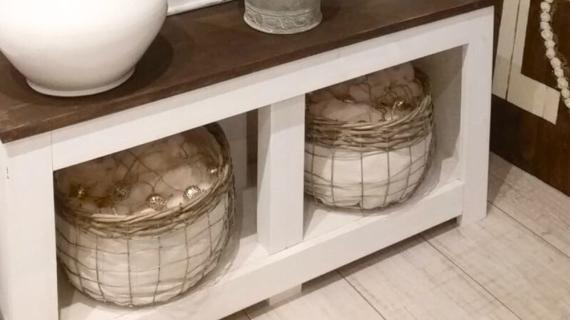
I've just recently moved to a new house and we didn't have enough storage in our bathroom so I got motivated to build this spa shelf with a few modifications. I wasn't sure how to upload a photo here but I've put a photo on my blog
Thanks Ana!
SariWebb (not verified)
Tue, 01/11/2011 - 12:32
Here's the image from the
Here's the image from the previous post. Figured out how to post it in the comment :)
http://3.bp.blogspot.com/_yAUQ_qk_nXg/TPx2sP1NbmI/AAAAAAAAACg/BYdqhvD0K…Today’s the day! | (not verified)
Mon, 01/17/2011 - 02:01
[...] am a little nervous
[...] am a little nervous though. I have never tackled a task like this before. So that you can keep reading I will tell you that this project is a bench. That’s right I [...]
The Crazy Amaz… (not verified)
Tue, 01/18/2011 - 01:02
[...] in the road my bench
[...] in the road my bench was done. It even looks like a bench. Better than that, it looks like the bench I intended on making. Today’s goal will be to fill the nail holes, sand, and stain. I [...]
Rochelle11
Tue, 10/04/2011 - 20:52
If I wanted to inclose it by
If I wanted to inclose it by adding a front and back panel with the front panel opening down, what do you suggest? Just thought it could be a storage type bench opening from the front. Any suggestions would help! Thanks for everything...this is the BEST website ever!
amycourts
Sat, 08/18/2012 - 18:56
newbie project - piano bench w/ storage?
Hey!
So this is hopefully gonna be my first project - anyone have suggestions for how to add a storage portion to the top, for a piano bench? And how to attach the hinges, etc? Slight modifications but I'd LOVE to use this easy plan!
owlduchess
Wed, 12/05/2012 - 12:09
spa bench
Are there more specific instructions for this somewhere? I don't understand which joints to use the Kreg jig on. Thank you!
gpjwhite
Fri, 06/05/2015 - 17:18
Strong enough to sit on?
Would this bench be strong enough to sit on? My friend asked me to make her one for her screened porch to sit plants on but also use as a bench seat when needed.
In reply to Strong enough to sit on? by gpjwhite
Ana White
Sun, 06/07/2015 - 19:30
Yes it is!
Yes it is!
Sl8er
Fri, 07/31/2015 - 10:40
ifications
Hi,
I am looking to make this bench out of pallet wood. Also, I have to make this a lot smaller so it can fit in my entryway as a bench. My dimensions are 24lx18w. Any suggestions?