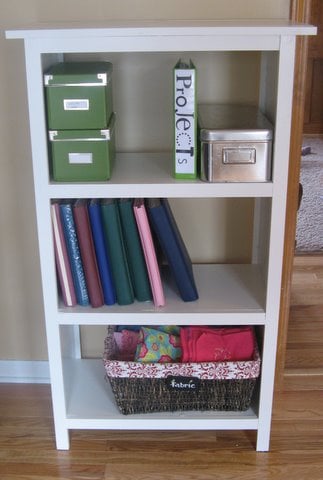


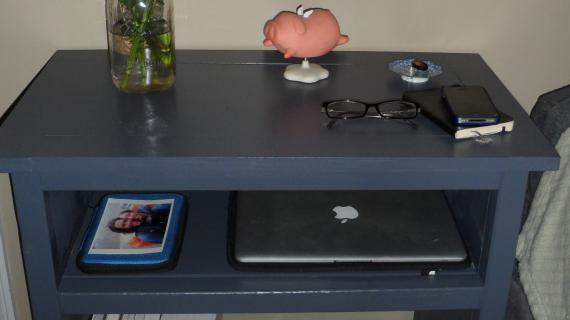
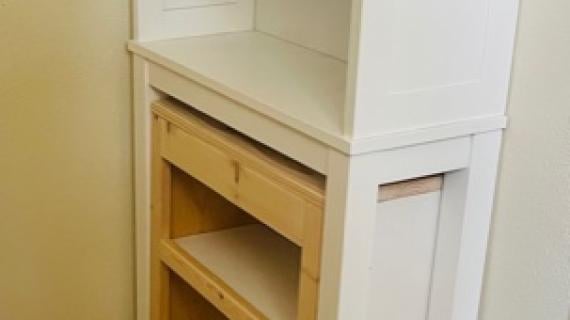
These simple easy to build bookshelves are inexpensive and can work in any room of your home. Fully framed, add a drawer to create a nightstand.

Preparation
- 1 – 12′ 1×12 Board
- 3 – 1×2 Boards
- 1/4 - Sheet of 1/4″ Plywood (at least 24″ x 30″)
- 2″ Screws (Drywall screws for MDF or Wood Screws for Wood)
- 1 1/4″ Nails
- 2″ Nails
- Glue
- Wood Filler
- Finishing Supplies
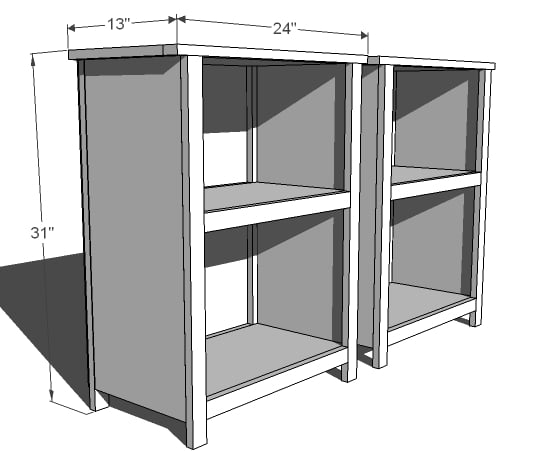
2 – 1×12 @ 28 1/4″ (Sides)


If you are using MDF, either purchase shelf boards, or MDF in strips 11 1/2″ wide (could be a different width, but this will change the depth of your bookcase) but 3/4″ thick, or have 3/4″ MDF cut into 11 1/2″ wide strips at the lumber store. If you are using MDF, use 2″ drywall screws to fasten the box together, predrilling and countersinking your screws correctly. You can use finish nails to fasten the frame to the face of the bookshelf. For a better fit, you may wish to measure and cut your trim to fit the shelf as you are building. Work on a clean level surface. Check for square after each step. Keep outside edges flush. Use proper safety equipment and precautions. Respect the saws, watch out for stray nails!
Instructions
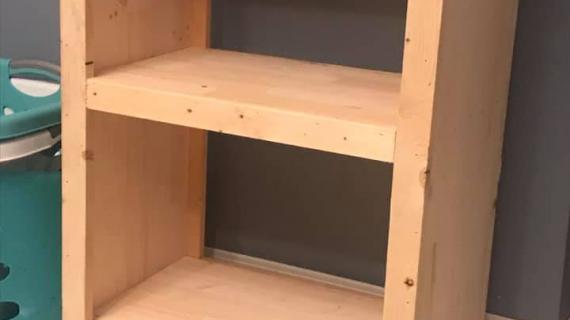
Step 1
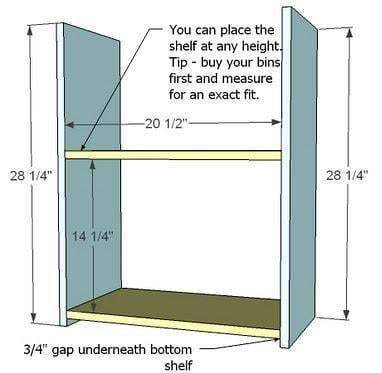
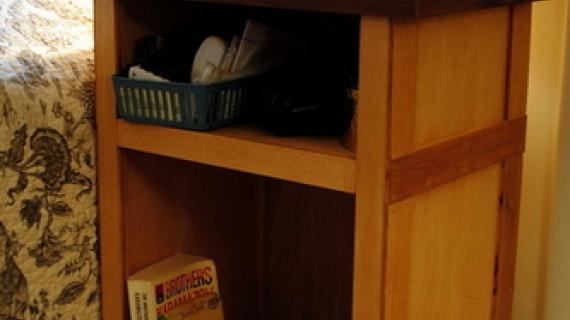
Build the Box. First mark on both the insides and the outsides of the sides the joints, as shown above. Remember that your boards are 3/4″ thick. Then fasten the shelves to the sides, as shown above. You can place the middle shelf at any height. Use glue and 2″ screws.
Step 2
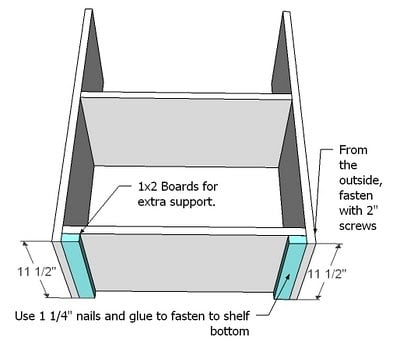
Supports. As shown above, fasten the supports to both the sides and the bottoms of the bottom shelf.
Step 3
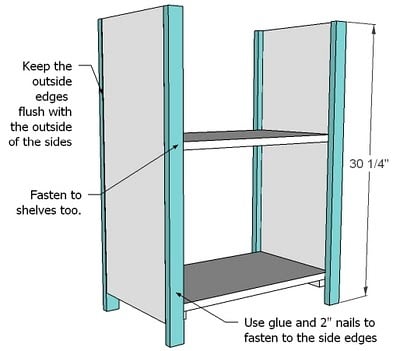
Legs. Using 2″ nails and glue, fasten the legs to the sides and shelves as shown above. The legs will sit flush with both the top edge of the sides, and the outside edge of the sides.
Step 4
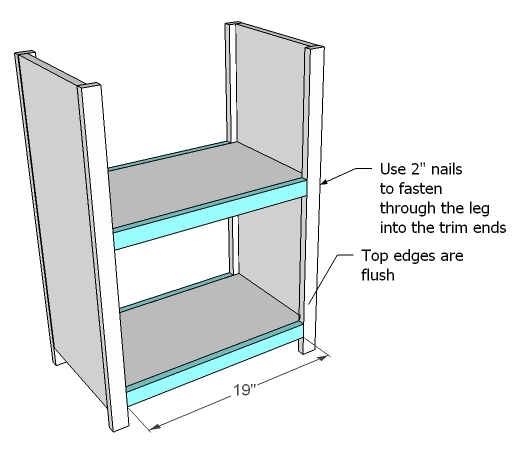
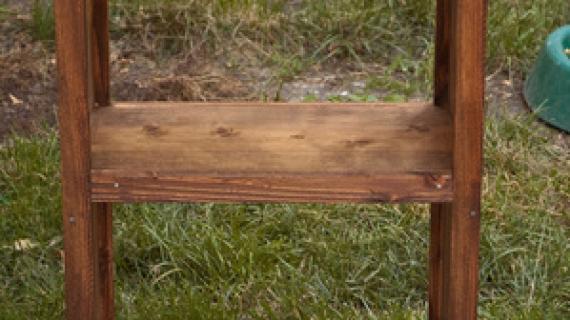
Shelf Trim. As shown above, fasten the shelf trim with 1 1/4″ nails and glue to the faces of the shelf edges. Then use 2″ nails and glue to fasten through the sides of the legs into the ends of the shelf trim. Keep top edges flush.
Step 5

Step 6
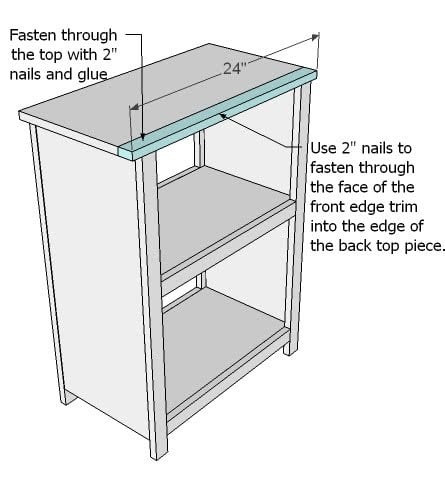
Top, Front Piece. Attach the front top piece as shown above. Minimize the gap between the front and back pieces.
Step 7
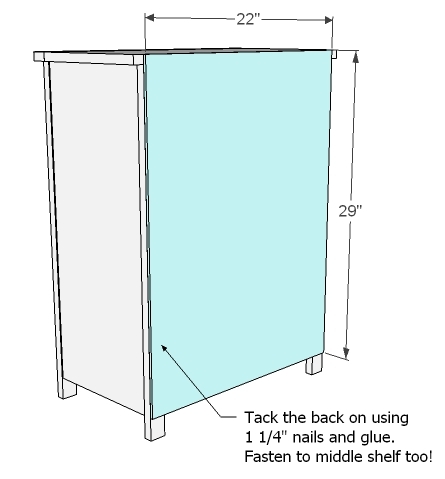
Back. As shown above, glue and nail the back on.
Comments
* Nancy * (not verified)
Mon, 04/26/2010 - 20:17
Oh yeah - can't wait to build
Oh yeah - can't wait to build this one as my first project!
Muchas gracias Ana!!
Jaka (not verified)
Mon, 04/26/2010 - 21:30
I am happy to visit your
I am happy to visit your blog.
Jaka (not verified)
Mon, 04/26/2010 - 21:31
I am happy to visit your
I am happy to visit your blog.
Mom (not verified)
Tue, 04/27/2010 - 04:18
How is it that you can read
How is it that you can read my mind? Yesterday I was thinking that I needed the plans for this exact size and this morning here they are. Thanks Ana! You are amazing.
Vanilla Comfort (not verified)
Tue, 04/27/2010 - 04:30
This is exactly what I'm
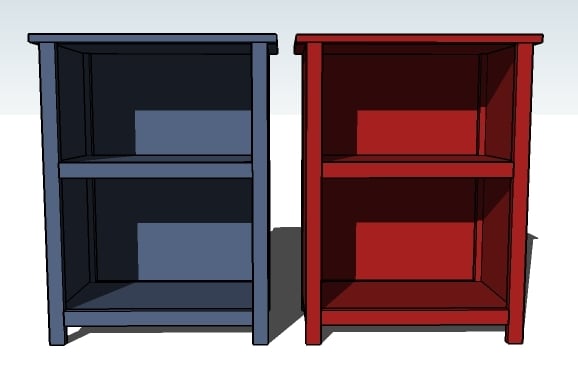
This is exactly what I'm going to build as a nightstand to my storage daybed for my new office/craft/guest room. Perfect! And that picture has me really tempted to decorate my son's room in red and blue. He already has the "pottery barn blue" walls. I was going to just do a lot of fun vibrant colors in there, but I'm really loving the classic red white and blue look too. Man, I hate decisions!
Ólöf (not verified)
Tue, 04/27/2010 - 05:01
Thank you! Going to make some
Thank you! Going to make some as soon as I finish rearranging my living room.
Jamee (not verified)
Tue, 04/27/2010 - 05:26
We are getting ready to move
We are getting ready to move into our first home and there are so many things that we are going to need so I have LOVED discovering your blog! These are now added to my "to-build" list :)
Leslie (not verified)
Tue, 04/27/2010 - 06:11
Love this plan! Did you see
Love this plan! Did you see the $99 price tag at "that other place?" Jeesh! It would be really cool to see a picture of all the shelf units made with $99. Talk about a visual! Thanks again, Ana, for the great hack!
Jannah (not verified)
Tue, 04/27/2010 - 06:53
Love, love, love, this for my
Love, love, love, this for my bedside table. How would I go about adding a drawer to the top? Thanks so much for all you do, I have found a new hobby I love!
Forever Owen (not verified)
Tue, 04/27/2010 - 08:12
I'm lovin' the new look for
I'm lovin' the new look for your blog!
Christy (not verified)
Tue, 04/27/2010 - 08:22
this is going to be my first
this is going to be my first project!!! (before I tackle a table) I really need new night stands and this will be perfect!
Meredith (not verified)
Tue, 04/27/2010 - 10:37
Ana,Thanks for posting my
Ana,
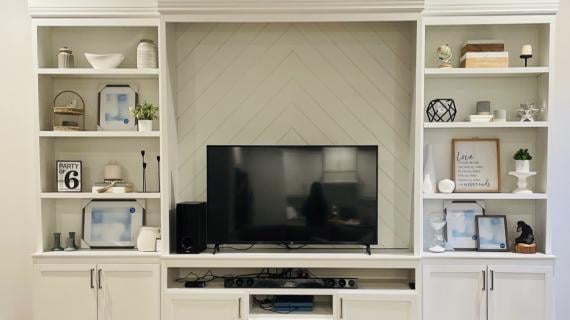
Thanks for posting my picture.. makes me feel pretty special. I enjoyed making it so much. I built these two pieces right before we gutted three rooms of our house. During construction we discovered that we had space for two built in bookshelves. With the knowledge and confidence that I gained building the bookcases, we built the new shelves. Had I never found your site we would have likely just drywalled the space and give up. Thanks a million times over for all of you inspiration.
Meredith
Jennifer (not verified)
Tue, 06/01/2010 - 04:37
Is their a drawer a option
Is their a drawer a option for this bookcase/nightstand? I'd love to be able to install drawers or even doors and build this to use as a nightstand!
Gen (not verified)
Fri, 06/04/2010 - 11:29
I agree. A drawer option
I agree. A drawer option would be great!
NTotten02 (not verified)
Mon, 09/20/2010 - 07:04
I built these little
I built these little bookcases this weekend. I shortened the length by 5 inches & I am so pleased with how they turned out. This was my 1st ever project! It was a lot easier than I thought it was going to be!
Mandy (not verified)
Wed, 10/27/2010 - 09:06
Ana, what is the top picture
Ana, what is the top picture of? I would love to use that as a nightstand... two shelves and a drawer would be great. But I can't seem to find the plan.
Preview: Mater… (not verified)
Wed, 12/22/2010 - 05:41
[...] for this project on
[...] for this project on Saturday so I could use Sunday afternoon to get the bookshelves started. The plan I was following by Ana White stated that these were smaller than a previous plan which had used one sheet of plywood for two [...]
Natalie Broadhurst (not verified)
Wed, 12/29/2010 - 13:52
I literally spent over 4
I literally spent over 4 hours trawling the shops for a short bookcase to house a small stereo, record player and small collection - with no success!! This looks ideal, thank you so much for sharing :)
Jessie C (not verified)
Sun, 01/09/2011 - 19:24
We were so excited to find
We were so excited to find these nice simple plans. My husband and I are currently using nightstands that are about a foot shorter then our bed! The build went really well, it took (mostly) my husband about six hours to build two of them. The poor guy did all of the cuts with a miter saw....if we had the proper tools he could have done it faster. Thanks so much for posting this and all of the other plans. We hope to do a bed soon, well, after we invest in some tools!
Mandy (not verified)
Wed, 01/12/2011 - 08:37
I would also love to know if
I would also love to know if there is a drawer option. I'd love to use this as a nightstand!!! :) Thanks so much!!!
Guest (not verified)
Wed, 09/28/2011 - 10:30
Height of bookshelves
I am interested in doing this project and I really like the design of the photo that is posted with the three shelves. What is the overall height of the whole bookcase or what is a standard gap between shelves?
Aaron (not verified)
Mon, 09/03/2012 - 21:01
Top, Front piece of trim.
Why do you use a piece of trim instead of using a solid piece? Just curious. Is there a reason. I want to build this project and was wondering... thanks.
Mrs_Arcona
Sun, 10/26/2014 - 00:19
How do you make it look like the picture?
I am wondering how to make it look like the main picture with the 3 shelves?