


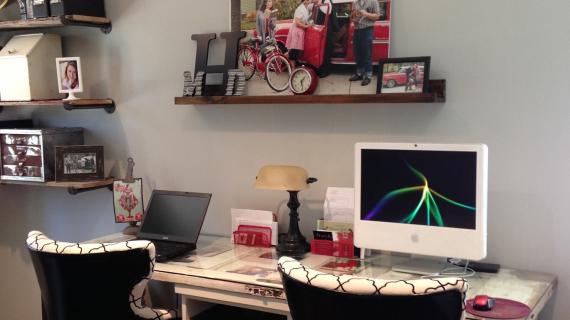
Get the office suite you want - one project at a time!
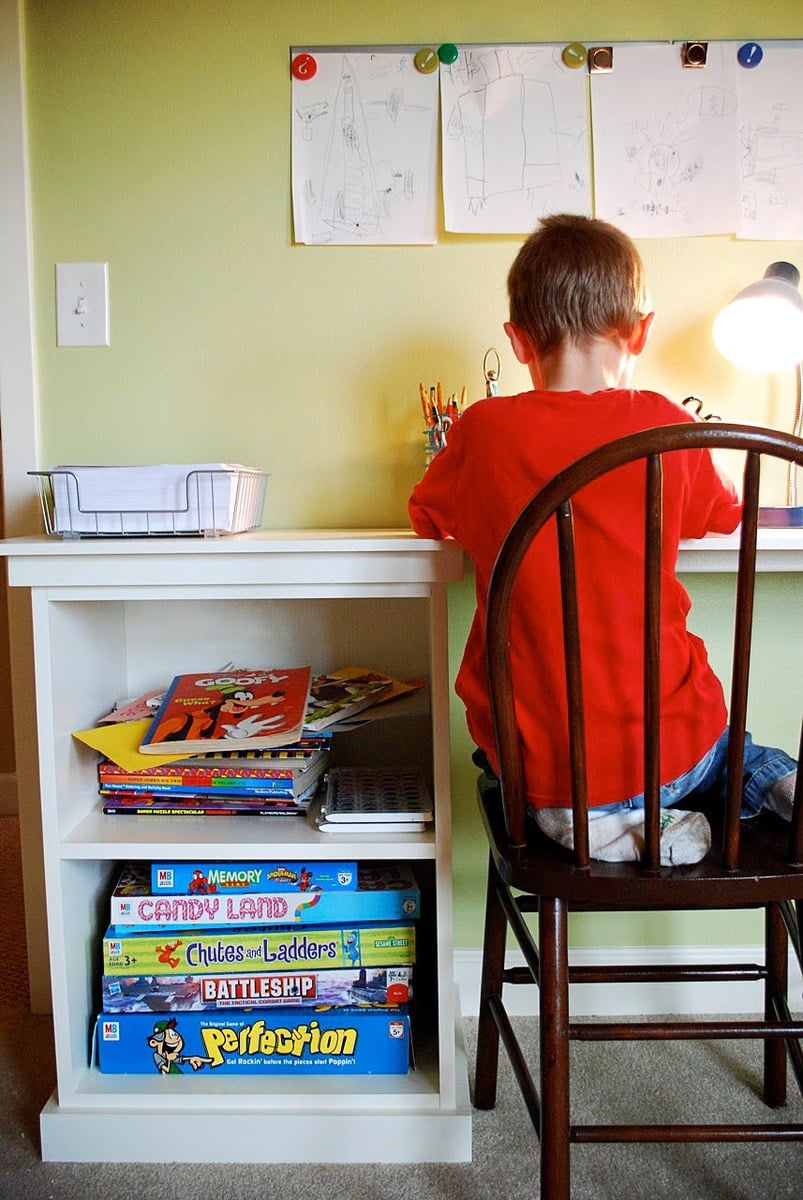
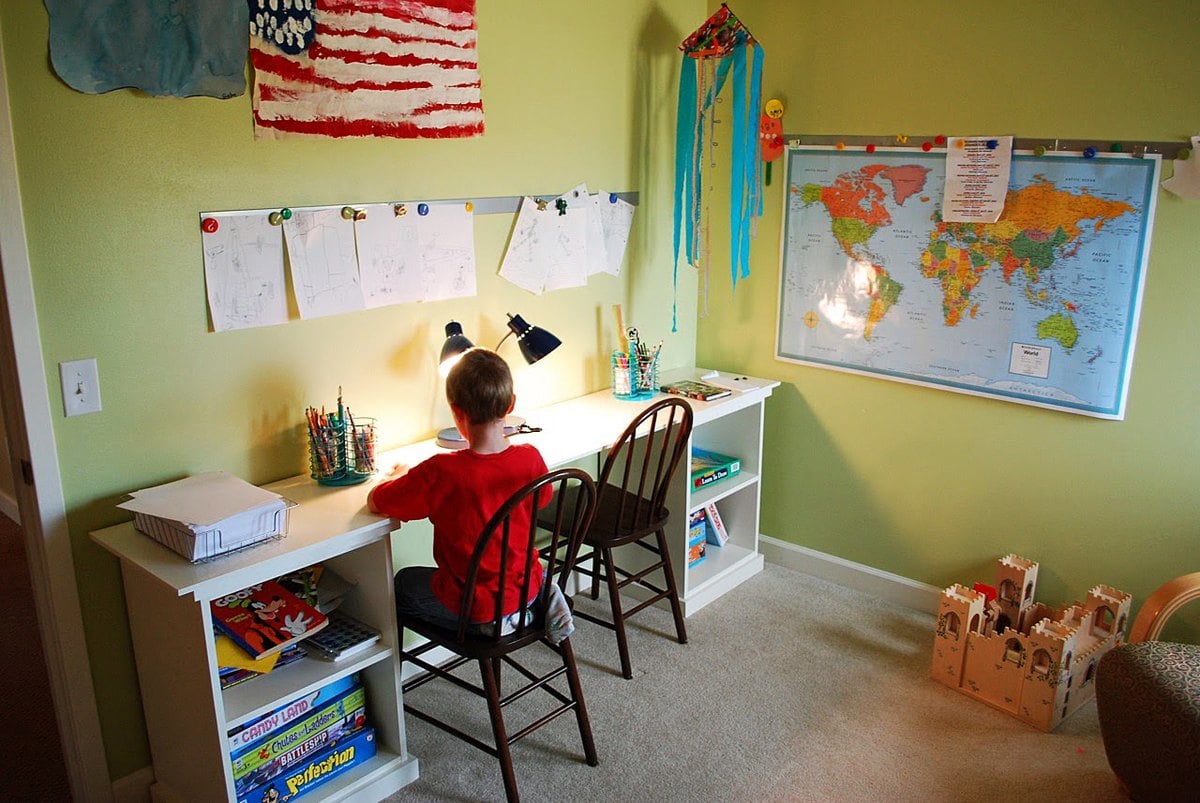
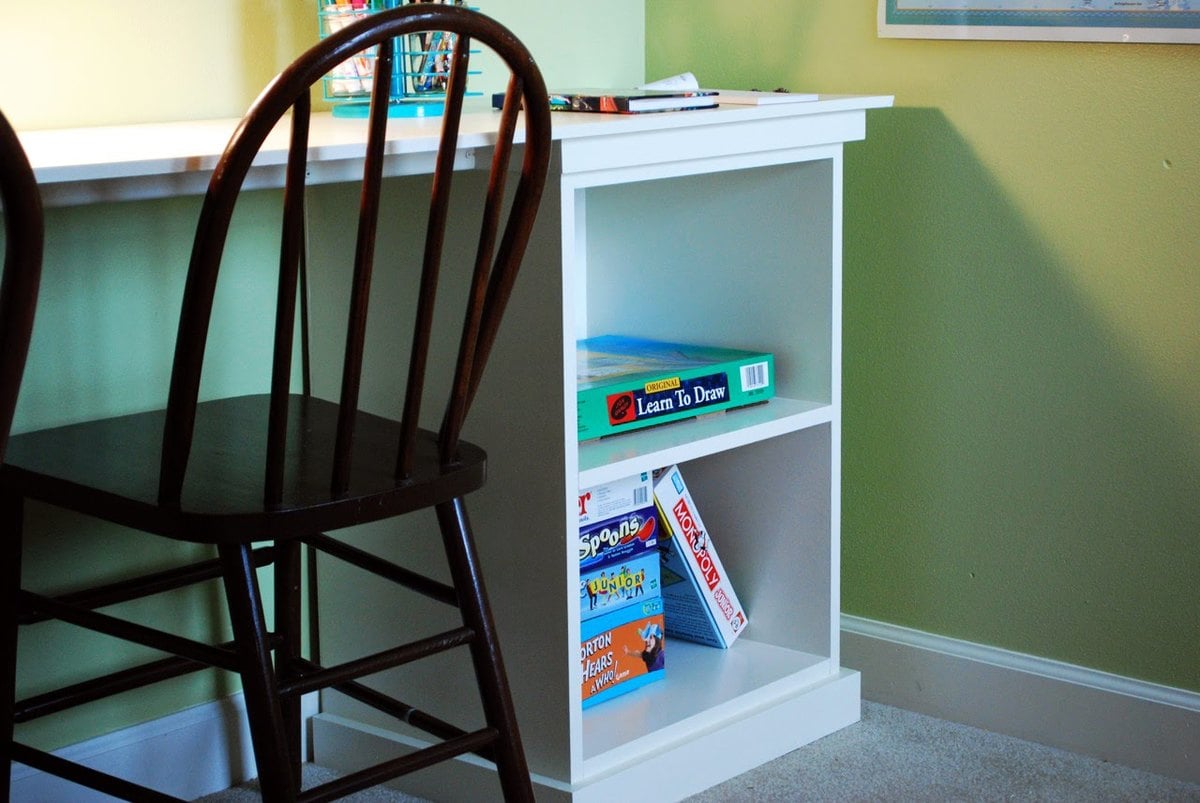
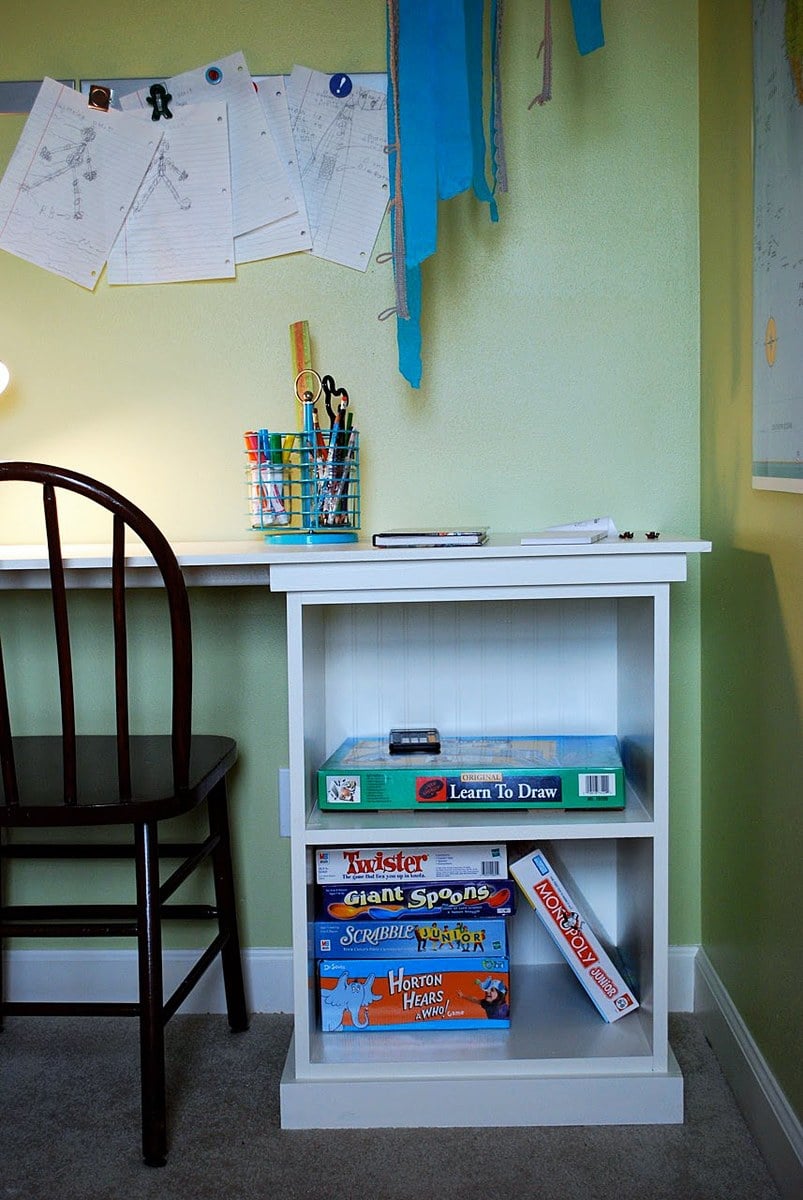
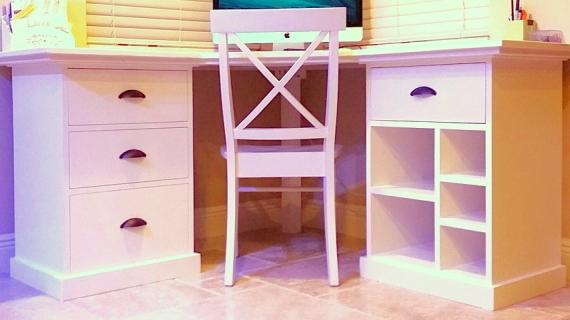
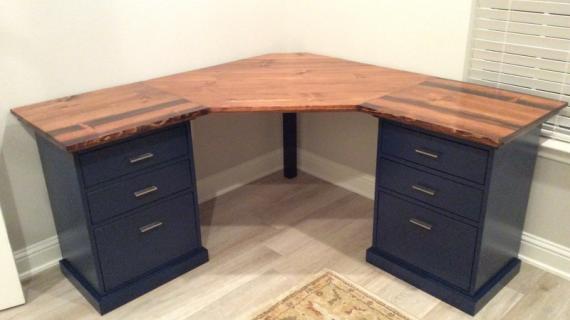
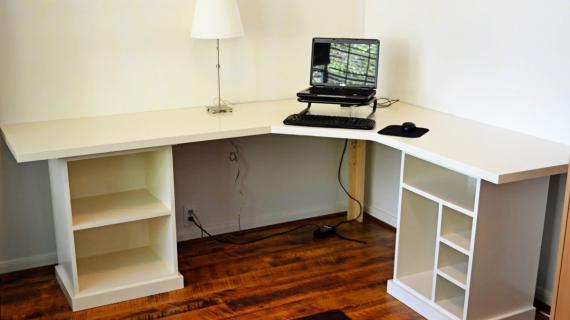
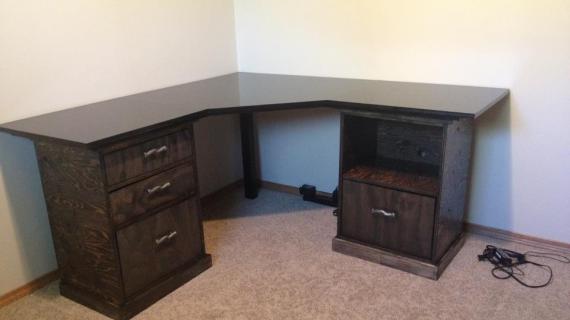
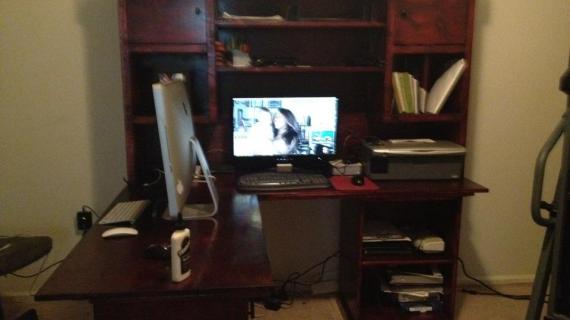
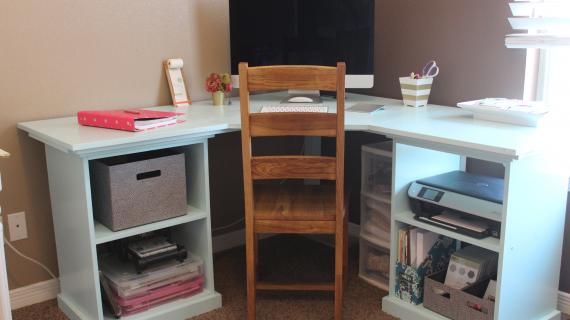
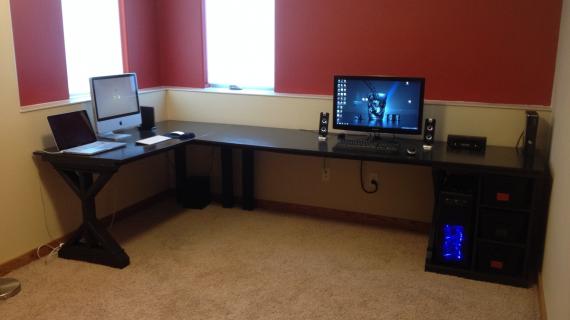
A complicated storage desk system is broken down into simple, modular pieces, that you can tackle, one project at a time. This woodworking plan is for a narrow open base unit, and has an optional matching drawer plan.
You can view the entire collection of plans with lots more base options in the Modular Office System here.

Preparation
- 1 – Sheet of 3/4″ MDF or hardwood plywood ripped into strips 15-1/2" wide x 8 feet long (scrap strips can be used throughout this collection)
- 1 – Sheet of 1/4″ MDF or plywood (for the back, you will only need a piece 31″ x 21″)
- 1 - 1×2 @ 8 feet long
- 1 - 1×3 @ 8 feet long
- You can use 1-1/4" pocket hole screws for joinery (recommended but not required), or screws and glue.
- Edge banding to finish front plywood edges (not required if you are using MDF). You'll need an iron to apply the edge banding and a razor knife to cut excess of the edge banding off.
- 1 – 3/4" plywood @ 15-1/2" x 19 1/2″ (Top)
- 2 – 3/4" plywood @ 15-1/2" x 29″ (Sides)
- 2 – 3/4" plywood @ 15-1/2" x 18″ (Shelves)
- 1 – 1/4 Plywood @ 19 1/2″ x 29 3/4″ (Back)
- 1 – 1×2 @ 18″ (Top Inside Trim Piece)
- 1 – 1×3 @ 18″ (Bottom Inside Trim Piece)
- 2 – 1×2 @ 15 1/2″ (Top Side Trim Piece)
- 2 – 1×3 @ 15 1/2″ (Bottom Side Trim Piece)
- 1 – 1×2 @ 21″ (Top Front Trim Piece)
- 1 – 1×3 @ 21″ (Bottom Front Trim Piece)


Work on a clean level surface. Always wear appropriate eye and ear protection. Always use glue. Predrill and countersink your screws. Avoid fastening MDF within 1″ of edges. Measure and mark out your joints prior to fastening. Check for square after each step. Keep outside edges flush.
Instructions
Step 1
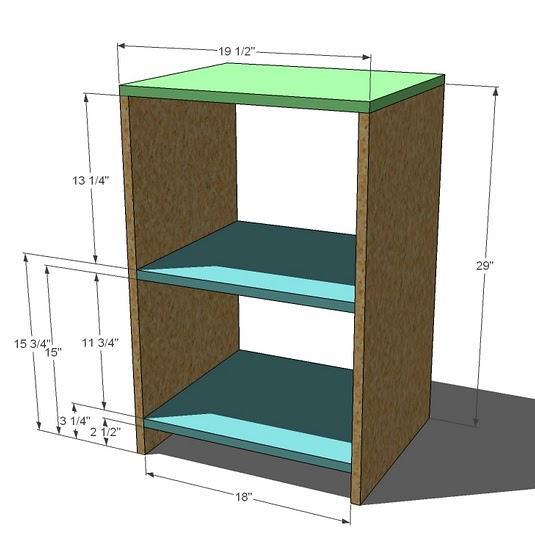
Build the Box. Begin by fastening the shelves to the sides, as shown above. Then fasten the top to the sides. Use the screws and glue.
Step 2

Back. Fasten the back to the bookshelf using the 1 1/4″ nails and glue.
Step 3

Inside Front Trim. Fasten the inside front trim, top and bottom, as shown above. Use the 2″ finish nailers and nail through the sides, and top shelves into the edges of the inside front trim, top and bottom pieces.
Step 4

Side Trim. Lining up with the front edge of the shelves and top, fasten the side trim pieces, bottom and top in place. You will need to use the 1 1/4″ nails and glue. Make sure you fasten the top side trim piece to both the top and the sides. This will reinforce the side joints.
Step 5

Measure and cut the front trim. Attach with 1-1/4" brad nails and wood glue.
Step 6

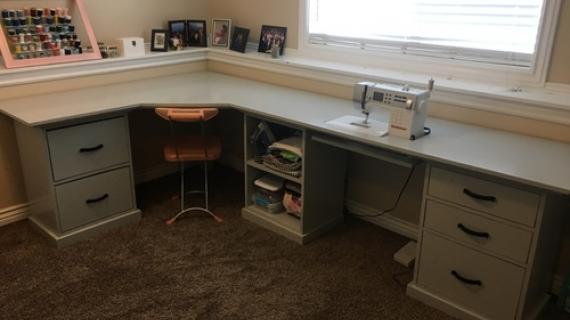
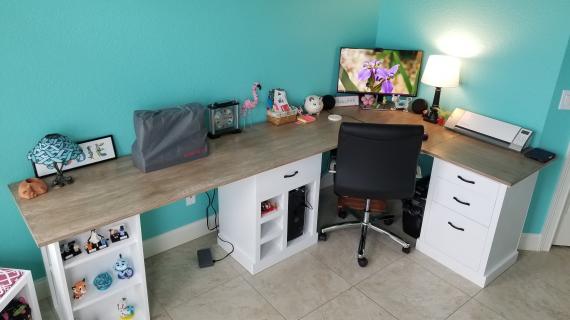
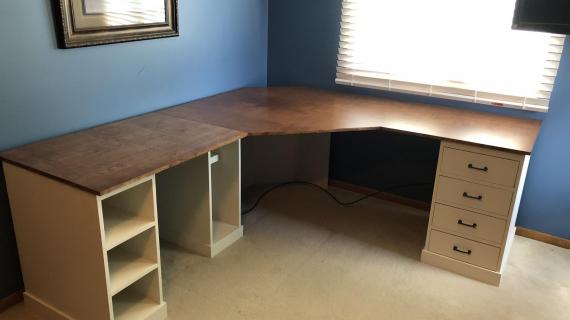
Composition as shown

Comments
My coastal home (not verified)
Mon, 02/22/2010 - 23:55
Love it! Great images from
Love it! Great images from Pottery Barn. Thank you! / Jackie
Betsy (not verified)
Tue, 02/23/2010 - 03:01
Ana, I don't know if you
Ana, I don't know if you realize how many lives you are touching. Since I found your blog, I check it 3 or 4 times a day, just in case you update it with more wonderful plans or pictures! Thank you for taking the time away from your busy life to make our lives better. You are an angel! I'm saving your plans to my jump drive everyday so I don't have to worry about ever losing them! Thanks again for everything! Betsy
Barefoot Books Liz (not verified)
Tue, 02/23/2010 - 03:06
You have so many fabulous
You have so many fabulous ideas here. Now I just need a bigger home to fit all the new planned furniture in!
Carla (not verified)
Tue, 02/23/2010 - 04:13
Ana, you are so incredibly
Ana, you are so incredibly talented.
erika (not verified)
Tue, 02/23/2010 - 05:09
Wow, I think this is just for
Wow, I think this is just for me!! I've been stalking your blog for a week trying to decide what plan to use for my kitchen desk...woo hoo - love this!!!
Tara M (not verified)
Tue, 02/23/2010 - 05:15
Thank you! Thank you! I wait
Thank you! Thank you! I wait eveyday to see what I can use to plan my dream office! These plans will really help in my layout. Will you pretty please do a corner desktop???
Laurie (not verified)
Tue, 02/23/2010 - 07:57
Excellent! I'm pretty sure
Excellent! I'm pretty sure this is the desk I'm going to build for my youngest son once the warmer weather gets here. Thank you so much Ana!
sseebeck (not verified)
Tue, 02/23/2010 - 08:04
Ana I love your blog I went
Ana I love your blog I went out the other day to buy a mitre saw and ended up having to return it as it only cut through 4.5" wood. I should have read your tool post first but found it after I returned the saw. Have you ever used a radial arm saw? I came across a few while looking up miter saws and after reading a bit about them they seem to be pretty flexible. From what I have read it can rip boards do crosscuts mitre cuts dadoes (I don't even know what these are) Rabbets (I know that one I thought that may be handy for making picture frames) bevels and complex miters as well. Just wondering what your thoughts are on this particular tool.
Yolanda (not verified)
Tue, 02/23/2010 - 08:36
I am absolutely loving this
I am absolutely loving this collection. I have a big plan brewing in my head to convert half of the walk-in closet in our master bedroom to a craft/workspace for me and the versatility of these pieces would work wonders. I have a feeling this is going to be our big summer project.
Marry (not verified)
Tue, 02/23/2010 - 08:49
maybe you could answer a
maybe you could answer a question for me... I was referred to your blog as I am in the process of redoing our office... how do you paint it to get that nice clean smooth sleek look? so it just doesn't look like painted wood?
Sugar and Spic… (not verified)
Tue, 02/23/2010 - 10:06
will you be giving plans for
will you be giving plans for the rest of the small desk (table top and legs?) thanks so much for all of this....you are amazing!:)
Connie (not verified)
Fri, 02/26/2010 - 07:55
I have been looking for a
I have been looking for a little desk forever and FELL IN LOVE with the picture of the one above I know the plans are for the drawer but will the plans ever come out for the attachment of the little side part of the desk top and legs? thanks so much!
Nancy (not verified)
Mon, 03/01/2010 - 04:56
Thanks so much for these
Thanks so much for these plans. I have wanted this desk system from Pottery Barn for several years but never could justify spending so much money. My husband and I started the base this weekend. So far so good. And since I want to make several bases I'm sure it will get easier! I'm so excited..thanks again for sharing your talent!
Jody (not verified)
Fri, 03/05/2010 - 05:45
Can this bookshelf be made
Can this bookshelf be made with file cabinet drawers for regular files? That would really help with my office! I am going to try this!
Charles and Lynn (not verified)
Sun, 03/07/2010 - 09:29
My husband and I are in the
My husband and I are in the process of building this, and came across one little problem. We bought pine, and apparently 1x2 pine is actually 1x2, rather than 1x1.5 like some of the wood at Lowe's. So we got the base units made, as well as the top, and the base units wouldn't fit into the spaces under the top. We had to take it apart and cut them down. Other than that, its going well. We just weren't expecting this minor issue. Maybe this will help someone else who builds it- make sure that you're 1x2's are actually 1x1.5's to work with this particular plan. Either way, we love this site!!! This our second piece, and we plan to make a few Hyde side tables next weekend! Thanks Ana!
Ana White (not verified)
Sun, 03/07/2010 - 09:31
Charles and Lynn, thanks for
Charles and Lynn, thanks for letting us know. I need to post a "getting started" section that talks about board sizes, because the plans assume you have perfect lumber (which isn't always the case). Glad you were able to find a solution.
Cocheiska (not verified)
Tue, 03/23/2010 - 09:09
We are making these as night
We are making these as night stands and so far so good for our first attempt (ever) at woodworking. A table saw would be REALLLLY helpful ;) A comment about the plans: if you dont plan on painting them (we're gona stain them), you need to trim the front edges with some 1x1 so the cut edge of the plywood isnt so ugly. Also, a top piece may make the table top part look nicer since you end up with joints on top. Anyway, we've had fun making it and plan to make the kids picnic table, maybe the murphy bed and more (after we invest in a table saw)!! Exciting!
Rolenthegreat (not verified)
Wed, 03/24/2010 - 09:38
Do you have any idea what
Do you have any idea what type of weight this shelf would hold? I was wondering if it would be safe to store a microwave on the shelf in the middle, rather than the top, so I could have a little bit more counter space in my tiny kitchen.
MDF always seems so flimsy to me, is there some type of support I could use to keep it from sagging?
Ana White (not verified)
Wed, 03/24/2010 - 09:41
The sagulator is a fantastic
The sagulator is a fantastic tool to help determine weight ratios for wood species http://www.woodbin.com/calcs/sagulator.htm
Adding a frame to the face (1x2 trim) will strengthen immensely.
Rolenthegreat (not verified)
Fri, 03/26/2010 - 04:19
Awesome, thanks so much Ana!
Awesome, thanks so much Ana! Love your stuff!
Mr. Wight (not verified)
Sun, 03/28/2010 - 11:53
I want to try to build this
I want to try to build this in legal width - 14" across. Should I just add 3" to every front- or back-facing horizontal dimension?
I have two decrepit old desks in my classroom and no money with which to replace them. If I can do it myself, then that's much better!
Enjoi the Poss… (not verified)
Tue, 05/11/2010 - 03:58
I hope this is not a silly
I hope this is not a silly question but What is the difference between a screwgun and a drill and can i use a drill for this project...thanks in advance
Stephanie (not verified)
Tue, 06/01/2010 - 02:07
Ana, I love the inspiration
Ana, I love the inspiration you provide on this blog. My friend and I attempted to make this yesterday but didn't get very far. It was very difficult to attach the sides to the shelves without some type of support. Can you provide better guidance on how to fasten the sides so that you get a square shelf? It seems like maybe building the base first would help support the case as you attach the shelves.
Ana White (not verified)
Tue, 06/01/2010 - 07:01
If you've got the cutting
If you've got the cutting done, you've gotten further than you know!
What I do is lay the boards on their edge on the backs. Make sure your boards are marked where the joint goes on BOTH sides of the side boards, so you know where to line the shelf up and where to nail or screw. Then just concentrate on getting ONE screw or nail in, say on the top corner of the bottom shelf. Don't worry about getting it square just yet, just get that one screw in. Then pivot the shelf so that it lines up with the marks you made on the sides.
Don't worry about the shelf being square until after you have attached the shelves. Then square all the shelves and sides up together. Hope this helps! Ana
SBS (not verified)
Sun, 07/04/2010 - 00:11
Ana, this is beautiful! I
Ana, this is beautiful! I love it! My friend and I made it yesterday for the beginnings of the desk. We did however run across a small problem....the side trim is listed at 15 1/2 inches but that is to short.... It needs to be 16 1/4 to go all the way across....luckily though, we had some extra wood, so it was no big deal. But, I thought others would like to know. Thanks for all you do!
anna (not verified)
Tue, 08/24/2010 - 06:38
So the question I have if
So the question I have if this says it only requires 1/2 sheet of the 3/4" plywood or MDF, does that mean I can make 2 of them out of one sheet, or should I get 2 sheets just to be sure I have enough material?
diyman (not verified)
Tue, 09/07/2010 - 08:22
Anna. If you cut the full
Anna. If you cut the full sheet of MDF into the 1x16 sheets, you should get 3 - 1x16 @ 8' long. this is enough to make 2 of them. no need for another sheet of MDF.
3dogMcNeill (not verified)
Mon, 09/20/2010 - 13:11
Thanks for the plans, Ana. I
Thanks for the plans, Ana. I saw this post when it was published and kept it in mind while looking for a desk on Craig's list, Overstock, etc.—just couldn't find one that I liked *and* wanted to pay for! I decided to build this one instead and I intend to use this as my craft desk, mainly for making jewelry. I built this piece last weekend; actually, built this, the table top and most of the legs. I ran out of glue so I finished it this weekend. It's sanded and ready to be painted!
A couple of helpful hints for future builders:
--I echo what SBS said, that "the side trim is listed at 15 1/2 inches but that is to short…. It needs to be 16 1/4 to go all the way across"
--before attaching the underside trim (http://ana-white.com/2010/02/before-we-get-to-that-corner-desk-lets.html), get the final dimensions of the top of the base unit. My base unit does not fit inside the rectangle created by the underside trim pieces. I'm not sure what I'm going to do about this but I have some ideas. Not a big deal, but you'll save yourself from making modifications later.
--if you're worried about using plywood because of its rough texture, don't be. With an affordable belt sander ($40-ish), it smooths out nicely—maybe not enough for a showpiece, but definitely enough for paint, a craft table, or anything that is going to get used a lot.
--if you have Lowe's or somebody else cut your wood, be aware that they're not exactly precise. I was disappointed at first but my husband mentioned that if I had cut it (we don't have a table saw), it likely wouldn't have been perfect either. =)
Hope this helps! Thanks, Ana. I really enjoyed making this!
Laura (not verified)
Mon, 10/04/2010 - 10:01
I am having a heck of a time
I am having a heck of a time keeping the MDF from splitting. I am using the countersink bit and even switching to a longer one to try to make sure I have a good pilot hole in the shelves and it just keeps splitting...any ideas?
orangesugar (not verified)
Tue, 10/26/2010 - 14:16
Laura, we clamped the piece
Laura, we clamped the piece while we were drilling to help prevent the MDF from splitting. Or buy a Kreg Jig, it will save you a lot of headaches.
AllisonRipoll
Wed, 03/30/2011 - 18:44
Can I build this using lumber?
I don't like the idea of using MDF or plywood for the desk, so can I use lumber? I want to stain the desk and the plywood where I live is terrible and can't be used for anything! I feel like MDF is too weak for what I want to do. I can get 1x8's that are actually 20cm making them 7.87 inches, so it ends of being just perfectly 15 1/2. Would that be fine to use and just attach them and fill them???
In reply to Can I build this using lumber? by AllisonRipoll
dan-k
Wed, 03/30/2011 - 20:19
Solid wood will work
You'll want to join the pieces along the edges first. There are a number of options to do that, including gluing and clamping, pocket holes, and dowels. There will be a bit more sanding to get the joints smooth.
AllisonRipoll
Thu, 03/31/2011 - 20:48
Thanks!
I am thinking of a good way of joining the boards. I don't have a pocket hole drill. They don't even exist where I live!!! I am hoping to get one when I travel though :) So can I glue and clamp and wait for them to dry and then just build with that? Will they actually hold with just glue?!
In reply to Thanks! by AllisonRipoll
dan-k
Fri, 04/01/2011 - 10:41
Gluing up boards
Yes glue will be plenty strong to hold the boards together. Most good wood glues dry stronger than the wood itself. Just be sure to use plenty of clamps to hold the joints tight.
Cauls are a great way to help keep the boards flat.
Check out:
http://www.newwoodworker.com/cauls.html
http://www.finewoodworking.com/item/35878/clamping-cauls-the-secret-to-…
to see what I'm talking about. Even using two flat pieces of wood will work.
Amy G. (not verified)
Tue, 01/24/2012 - 09:04
I'm wanting to make the file
I'm wanting to make the file drawers for the desk to hold a 12x12 sheet of paper for scrapbooking. Has anyone made the drawers to fit scrapbooking paper? What would the dimensions be for the drawer and the base cabinet to fit that size?
Guest (not verified)
Fri, 04/06/2012 - 16:39
help... I can't find the dimension for the table top center
We are cutting out all of our pieces to build the desk. I just realized that the cut list only is for one side of the desk. Also these plans only tell you how to build the base and don't reference anywhere where/what the center joining piece's measurements are. I don't think it would be hard to just wing it, but I would feel alot more comfortable if I could find what measurements and method was used to make this one... I saw the above post about the trim pieces being too short, and plan to take their advice. Any advice for joining the two bases to make the actual desk?
TK (not verified)
Tue, 07/24/2012 - 11:06
Rough cuts?
Can someone post instructions for rough cuts? I cannot fit the full size pieces in my vehicle, but am unsure of what to tell the guys at home depot.
Connollye11
Sun, 05/26/2013 - 09:45
Picture for step 3
I think the picture for step 3 might be a mistake, It would be really helpful if the correct one could be up there, Thanks!!!
dzaydon
Tue, 08/11/2015 - 16:21
Magnet Strip
Can you tell me where I can get the magnetic strip on the walls of the Modular Office - Narrow Open File Base posting? Thanks!