


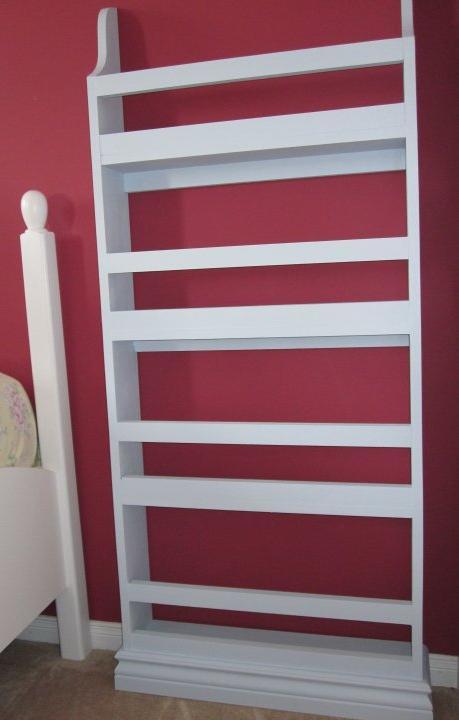
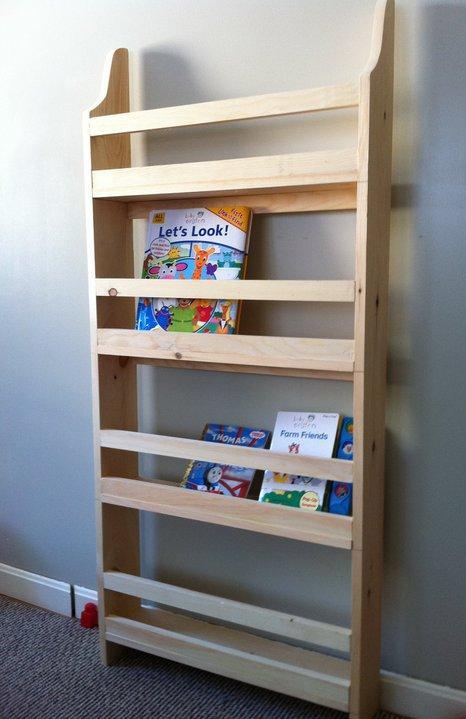
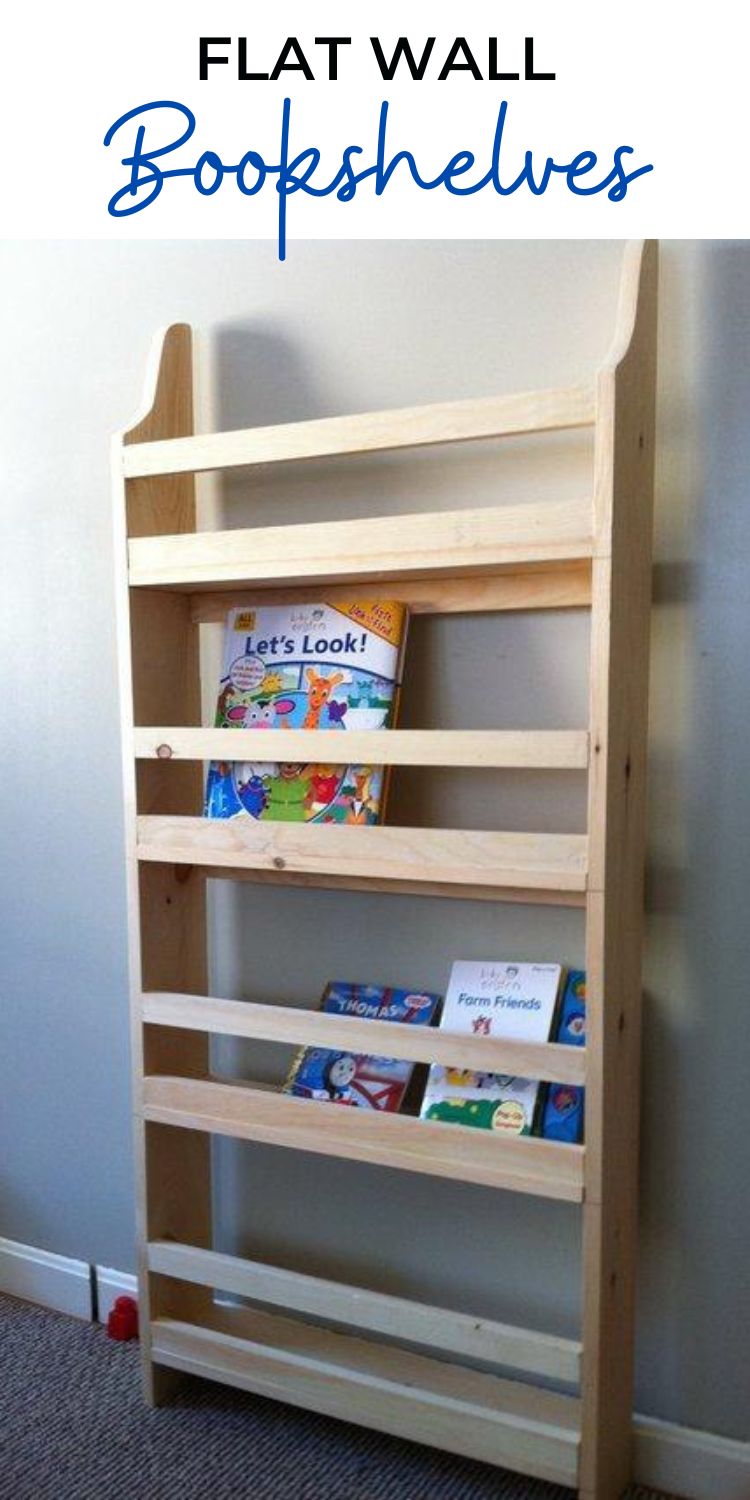
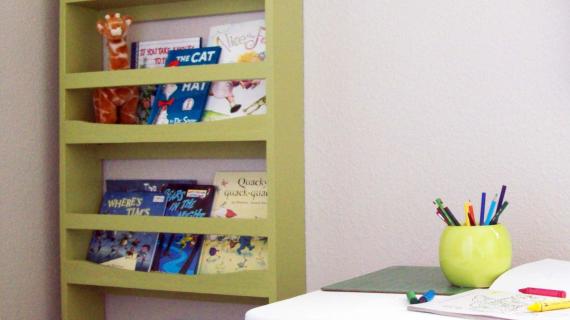
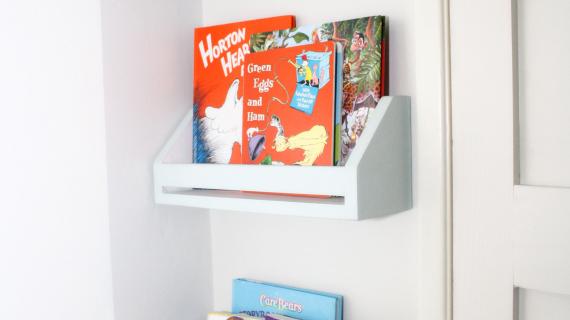
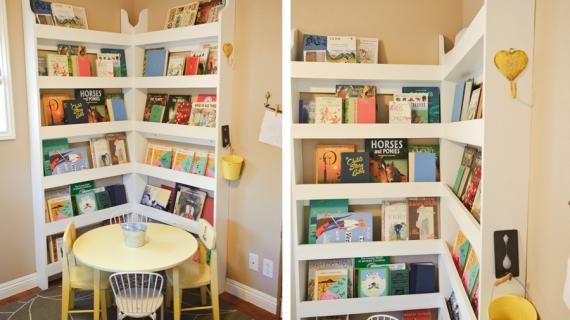
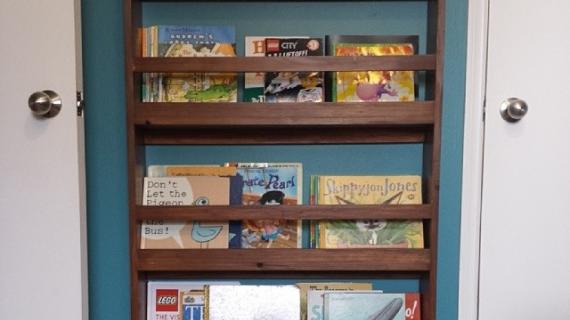
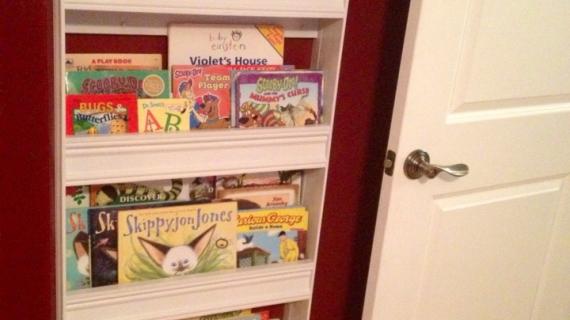
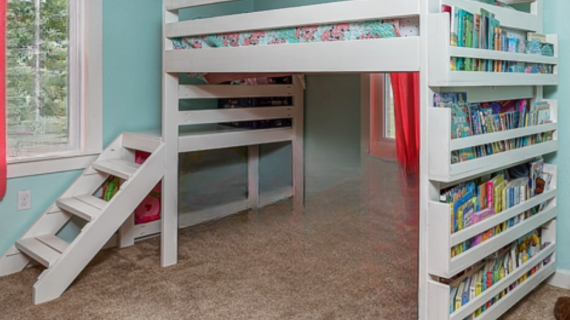
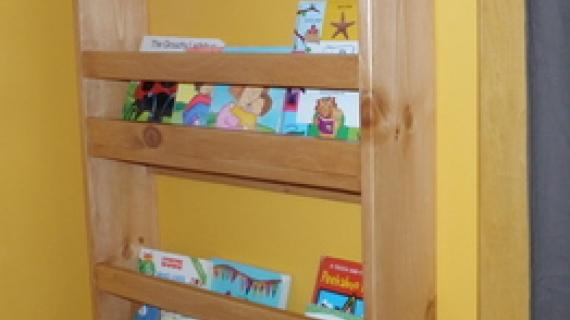
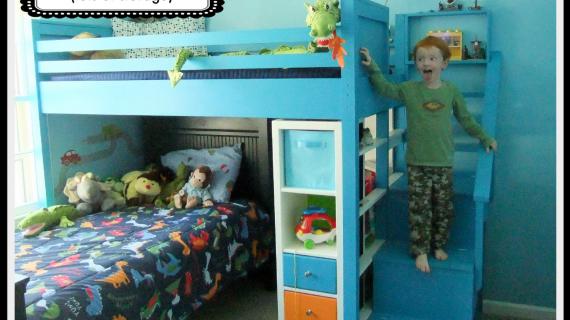
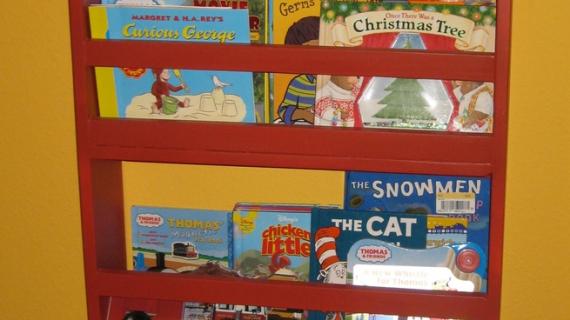
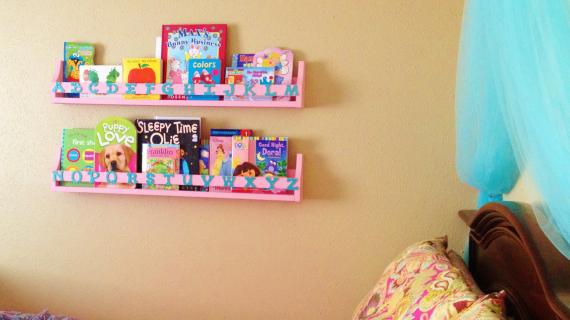
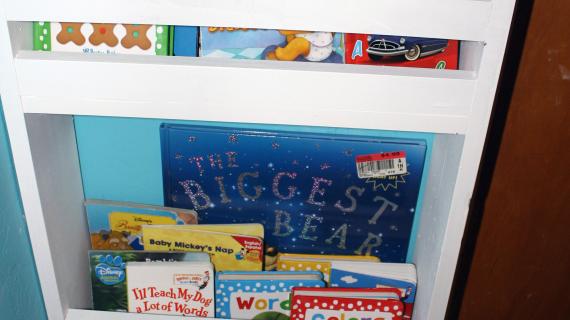
In a children's room, it just makes sense to store books facing flat. Then children can put their own books away. Also, flat bookshelves take up less floor space, a bonus for often tiny secondary bedrooms. Special thanks to Matt, Heather and many other readers for sharing their photos.
Pin For Later!

Preparation
1 – 12′ 1×6 Board (cut sides out of this board)
2 – 1×6 @ 57″ (Sides, Top Cut out in step 1)


Instructions
Step 1

Side Cutouts. Using the measurements above to guide you, cut out the sides at the top as shown above. Once one side is cutout to your satisfaction, use it as a pattern for the other side. This will keep the side the same. Use either a bandsaw or a jigsaw.
Step 2

Box. Build the box by using 2″ screws and fastening the shelves to the sides, as shown above. Measurements above are to the bottoms of the shelves.
Step 3

Back Supports. Fasten the back supports to the sides and the shelves. Make sure the bookrack is square before this step. Use 2″ screws and glue.
Step 4
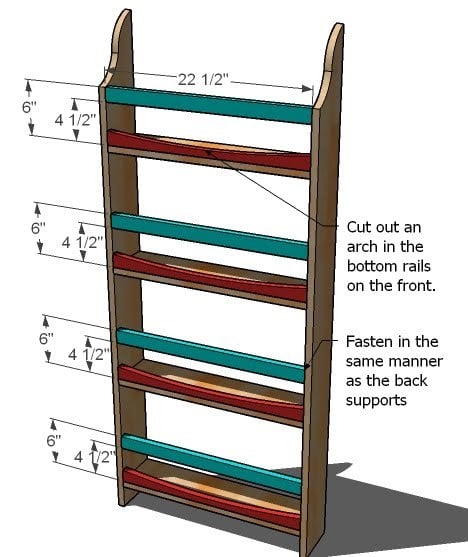
Front Rails. Cut out 4 of the front rails (1×2 @ 22 1/2″) in a simple arch shape above as shown in red. Then, as you did the back supports, fasten the front rails in place. Make sure you bookrack is square before fastening the rails, as this step will set the bookrack.
Step 5

Step 6
Finishing. Fill any holes with wood filler and sand and finish as desired. Screw through the back supports into a stud in the wall to keep the bookrack in place. You could alternatively use a picture hanging kit to fasten the bookrack to the wall.
Comments
Renee (not verified)
Mon, 04/05/2010 - 01:34
Oh I have wanted one of these
Oh I have wanted one of these for SO long! But I have never built anything since high school shop... could a beginner do this? Really all you need is a jigsaw and screwdriver??
Don't think I've ever commented on your blog, but I love it, and I love how freely you share of your talents. Thanks so much for all the lovely inspiration (even if I never work up the cajones to build anything!)
GreenerLinen (not verified)
Mon, 04/05/2010 - 02:47
This is a very sweet little
This is a very sweet little bookcase.
My father and I designed and built something like this when I was about 11. (He did most of the designing) But we cut a star design into the top because I was WAY into the constellations at that point.
I think this could be really cute with a personalized design cut into the top too
Keep up the good work.
(P.S. I still have the bookcase we made together. So your children will probably cherish the things you make for them too.)
Leah (not verified)
Mon, 04/05/2010 - 04:45
As a momma, Ana, do you
As a momma, Ana, do you expect these shelves would support the weight of a toddler? I have 2 climbing boys :)
Grandpa (not verified)
Mon, 12/31/2012 - 14:48
mounting to wall
My daughter has asked me to build these shelves for a future grandchild. I plan to attach them to the wall with four 3 1/2 inch screws. You just need to be sure the screws go into the center of studs, which you can find with an inexpensive stud finder from any hardware store, and that the back shelf supports are firmly attached to the sides of the shelf. I plan to use two studs and two back supports to distribute the stress and make them strong enough to hold two climbers if necessary. Good luck.
Nicole (not verified)
Mon, 04/05/2010 - 05:36
How would I modify it to
How would I modify it to include the baseboard cut out on the back so that it sits flush on the wall?
Love this so much Ana! Thank you!
Ana White (not verified)
Mon, 04/05/2010 - 05:39
Nicole, all, I just had this
Nicole, all, I just had this thought myself last night as I went to bed. I would measure the thickness of the baseboard, and then cut out the sides as you are cutting out the top of the sides. Then cut your trim for the footer sides shorter to accommodate this cutout. It's going to need to sit flush with the wall for the books to stay in place.
Laura (not verified)
Mon, 04/05/2010 - 05:46
I just wanted you to know
I just wanted you to know that my husband bought me a jigsaw for my birthday last week! And this looks like a great way to start using it!!! :)
Jennifer (not verified)
Mon, 04/05/2010 - 06:03
Another great one to add to
Another great one to add to my growing list of stuff we're going to make. Thanks!! :)
Mommy to a 6 y… (not verified)
Mon, 04/05/2010 - 08:46
wow! I came across your site
wow! I came across your site last night while googling plans to build a murphy bed...I was hooked after that! I can't wait to try to make some things myself. I'll be starting with something a little easier like a bookcase first tho, lol!!
PickingUpStitches (not verified)
Mon, 04/05/2010 - 10:03
This is fantastic! I have
This is fantastic! I have been drooling over the various book displays on Ohdeedoh and wondered how I might be able to make one myself.
This is just perfect! I will do the cutouts at the back for our baseboards so it will sit flush with the wall. Our house is only 3 years old too, so I might still be able to find the baseboard trim to use for the bottom of the bookshelf.
rob (not verified)
Mon, 04/05/2010 - 10:31
Hi Ana,This is unrelated to
Hi Ana,
This is unrelated to today's plan (which by the way are awesome!)...
But are you by any chance the model for a swimsuit collection that Costco is selling? The hot brunette on the huge ads in the Costo store looks completely like you :)
-Bonnie.
Anonymous (not verified)
Mon, 04/05/2010 - 11:22
I have wanted these for
I have wanted these for FOREVER,and I would have made this my very first project 2 yrs ago when I bought a cheap knock-off from another dept store. I was glad to see the comments about the climbing issues, and I also was thinking about the post on Pottery Barn's reviews about the books needing to be thicker in the bottom shelf because of the wall gap. One review mentioned that Pottery Barn ones were made so that there was NO way to make sure you hit the studs on both sides when installing it, because it was just a bit off. Now I know that I can solve it by making sure I make mine attach 16" so they hit studs both sides, and I don't have to worry about my little climbers (all 6!)
Amanda (not verified)
Mon, 04/05/2010 - 14:28
I love this and have wanted a
I love this and have wanted a bookcase like this for my son for ages! How would I modify the cuts to make it like the wider 3 shelf one? The wall I want to put a bookcase on is on a slant(cape cod style house) I need a shorter wider shelf unit. I tried to figure it out but I am very mathmatically challenged!
Megan (not verified)
Mon, 04/05/2010 - 15:33
Happy dance!! Thanks for the
Happy dance!! Thanks for the plan, Ana!
sharla@mylittlegems (not verified)
Mon, 04/05/2010 - 18:07
We already are planning on
We already are planning on doing this in our new home- when we move soon- but we are mounting it to the wall so that it takes up even less space, and have a little bit different construction in mind. This way it won't get knocked over and it will take up less space. It will be months before I get it built. :) Thanks for sharing your great plans ;)
Christina (not verified)
Mon, 04/05/2010 - 19:13
Ana, I never comment, but I
Ana, I never comment, but I love your blog! I just want you to know (as if you don't already) that you have managed to make a difference in this world in more ways than most of us can dream of. You are not only helping us afford nice, durable furniture during these tough economic times, but you are enabling us to become more self-sufficient and learn skills that could very well serve us in rougher or disasterous times ahead. How lucky that you get to serve such a noble purpose. Thank you!
ps. I love these bookcases. I'm making them for sure!
Jeanne (not verified)
Tue, 04/06/2010 - 02:30
Ok ... so I'm a dishaholic
Ok ... so I'm a dishaholic and I've been trying to think of as way to display more of my dishes. I'm thinking this would make a great shelf to display them on and I could easily change out my display when the mood hits. Thanks for all your wonderful ideas!
Haley (not verified)
Tue, 04/13/2010 - 11:21
There's nothing like a
There's nothing like a built-in wall bookshelf! I left for the afternoon once, and came home to find that my husband had built this in our living room: http://www.flickr.com/photos/thezenofmaking/4518471931/
The Neally Family (not verified)
Wed, 04/21/2010 - 05:49
My husband will have to make
My husband will have to make these. I've been eyeing them on the other site and they've been back ordered for a long time.
Aaron (not verified)
Fri, 05/07/2010 - 14:48
I built this today. It took
I built this today. It took around 3 hours but I think I over did the screws and what not. One of my kids will climb this for sure. It is awesome. Thanks for the plans.
PowerfulMojo (not verified)
Fri, 05/28/2010 - 06:16
Great set of plans!I used a
Great set of plans!
I used a router to dress up the rails & outside edges a bit, and I'm really happy with how that turned out.
Here's a tip: If you're going to route the outside edges, don't forget to stop just above the base boards. That will leave a nice, square edge to tack them to instead of the little gap I have :-).
Melissa (not verified)
Fri, 06/04/2010 - 06:04
I built this as my first
I built this as my first project and I'm very proud of it! My 2 year old daughter is very excited to have a special place for her books and all three of my boys want one now, too! I am looking forward to building many more items along with this one three more times. At $119 each four of these would have been a budget buster!! Thank you for the great plans!!
Johanna (not verified)
Sat, 06/12/2010 - 18:34
This is so awesome! I have
This is so awesome! I have been wanting something just like this. I would love some modified plans so you could hang this flush on the wall like this book shelf here at land of nod:
http://www.landofnod.com/family.aspx?c=89&f=857
Four Easy Ways… (not verified)
Fri, 09/10/2010 - 15:24
[...] Ana White strikes again
[...] Ana White strikes again with this simple build, plans here. [...]
Heather C (not verified)
Fri, 10/15/2010 - 06:23
These were awesome plans,
These were awesome plans, easy to modify. Thanks so much!

Kristin (not verified)
Sat, 11/20/2010 - 09:33
We just built this and it was
We just built this and it was super quick and easy. We made it with only three shelves and didn't do the cut out at the top - just rounded the corners. We didn't put any moulding at the bottom either, so it's kinda blocky but that's ok with me. I'm about to paint it red and the hardest part of the whole project is trying to decide if I should spray paint or brush/roll it!
The Girls Nurs… (not verified)
Sun, 11/21/2010 - 11:13
[...] put up the ‘butterfly
[...] put up the ‘butterfly kisses & ladybug hugs’ expression. The plan is to build some wall book shelves beneath that somewhere down the line. Maybe with some of their Christmas/birthday money in a couple [...]
Brandee Spohr (not verified)
Wed, 01/05/2011 - 10:28
Yay, my dad just made this
Yay, my dad just made this for my 3yo!! It holds a ton of books and we placed it on a very short wall that would not hold anything else. I love it!
heiartlop
Wed, 04/13/2011 - 09:42
Our first! But shorter and wider.
Ana,
I looooove your website. I have high respect for what you do, and with 4 children! I would love to do what you do!
Too often my husband asks what I am doing on the computer, and he is never surprised to see that I am looking at stuff on your site. So, this book rack was our first project. We built it shorter and wider, though, to fit the girls' space. I am posting pictures in the brag blog.
Thanks for everything!
DeeDee (not verified)
Tue, 06/07/2011 - 05:27
Plate Rack
These plans really remind me of a cottage style plate rack. Do you suppose that I could modify this to suit that. I have a perfect place for it! If anyone has any ideas or suggestions, please let me in on your secrets!
Thanks!
Lesley (not verified)
Sat, 06/18/2011 - 05:58
Great Project
I got a wild hair and went the the hardware store and gathered everything on the material list. I came home and completed this project in a few short hours. It looks so great and is so appropriate for a childs room. My children love books and they can access the books themselves. I just love it. I am going to do a bunk bed next. Then some tables and storage for my sewing room!
Thanks!!!!