
Difficulty
Beginner Projects
| 
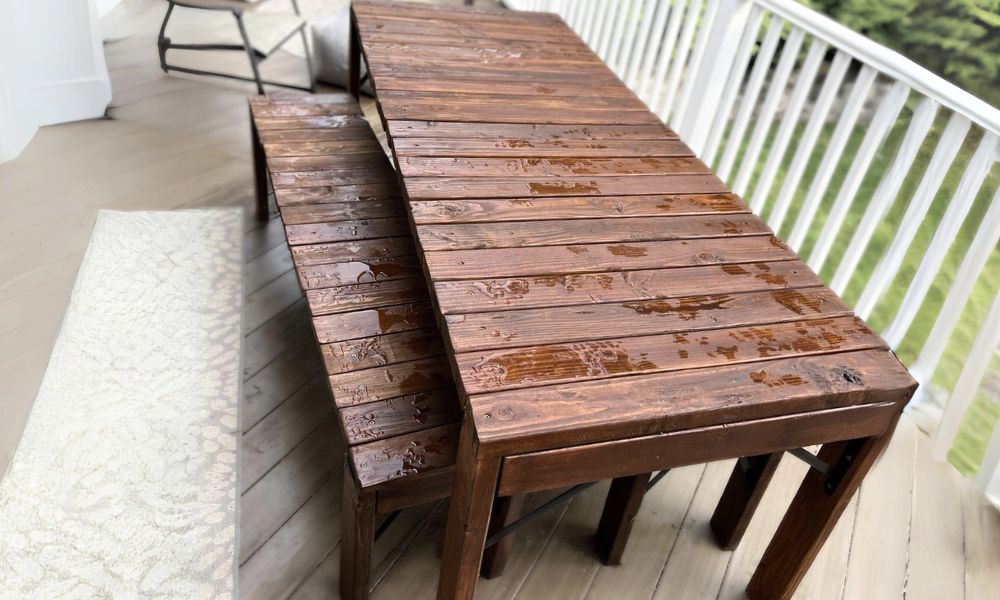
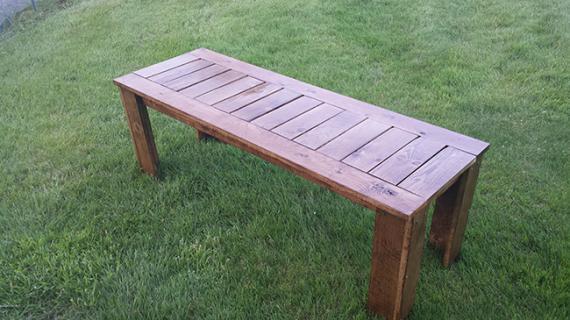
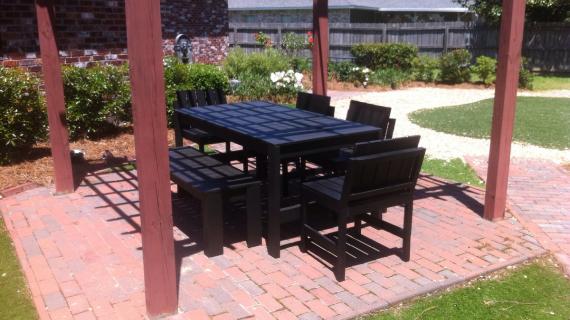
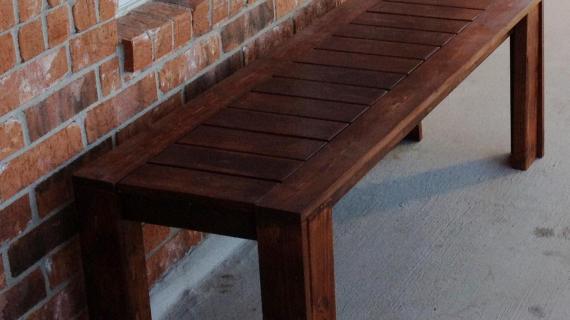
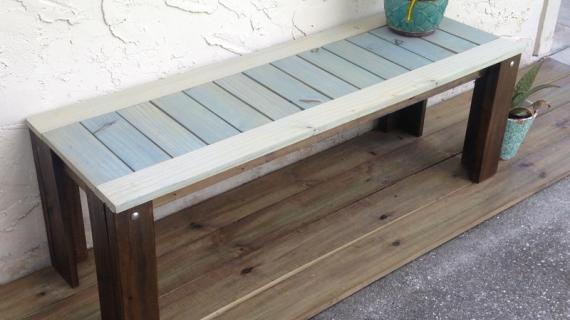
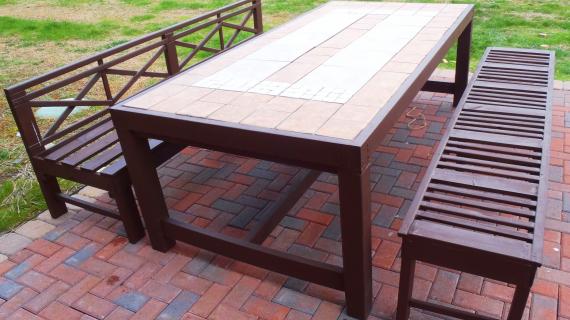
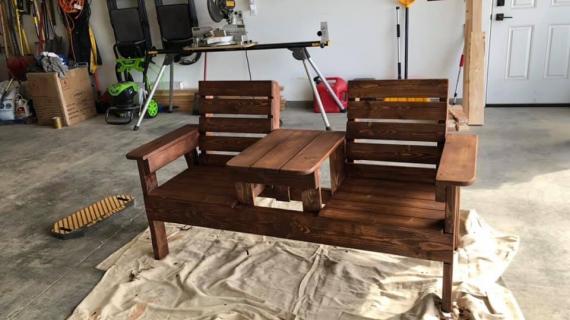
Build your own dining bench - matches the Simple Modern Outdoor Table
Collections
Dimensions
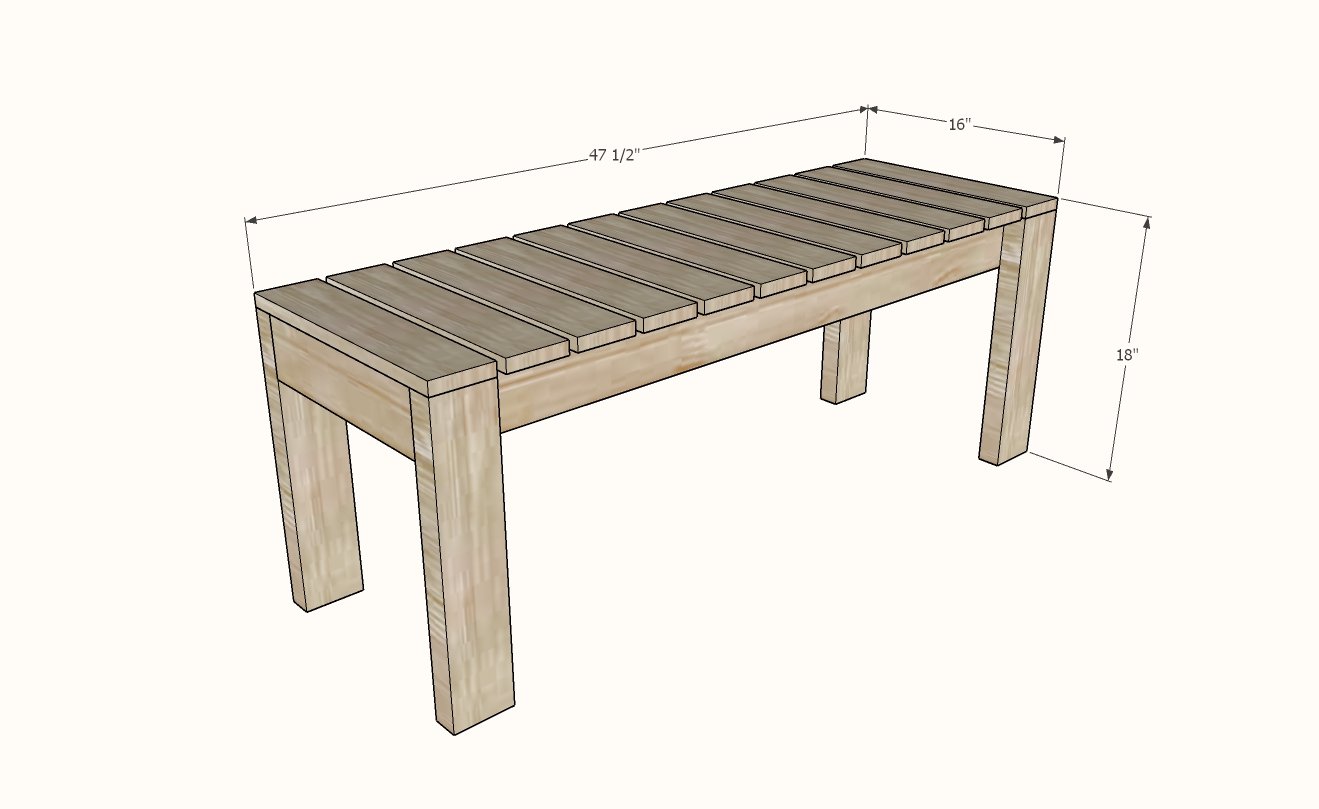
Dimensions shown in diagram
Preparation
Shopping List
Shopping List is Per 1 Bench
- 2 - 2x4 @ 8 feet long
- 2 - 1x4 @ 8 feet long
- 20 - 2-1/2" long exterior screws (look for the star bit ones)
- 50 - 1-1/2" long exterior screws (look for the star bit ones)
Cut List
- 2 - 2x4 @ 12-7/8" - Frame ends
- 2 - 2x4 @ 44-1/2" - Frame sides
- 4 - 2x4 @ 17-1/4" - Legs
- 12 - 1x4 @ 15-7/8" - Bench Slats
Tools


Instructions
Step 1

Build the basic frame for the bench with the longer screws. The cut list is correct with the ends at 12-7/8".
Adjust the frame for square by taking opposite diagonal measurements and making sure the two opposite diagonals match.
Step 2

Screw the legs to the frame with the longer screws.
Step 3

Lay the slats out on top with a 1/2" gap in between.
Screw down with the shorter screws.
Project Type
Room
Comments
Viola (not verified)
Sat, 04/24/2010 - 08:06
Thank you Ana for the plans.
Thank you Ana for the plans. I so want o build this.
Congrats on the domain.
Jamie (not verified)
Sat, 04/24/2010 - 09:19
Thank you Thank you Thank
Thank you Thank you Thank you!!! I am so excited for both of these plans!!
Kai (not verified)
Sat, 04/24/2010 - 09:52
Thank you so much for posting
Thank you so much for posting this! I was so hoping you would do the bench as well! I can't wait to build.
Heather (not verified)
Sat, 04/24/2010 - 10:28
Ana, you are wonderful. Keep
Ana, you are wonderful. Keep these plans coming!
The {G} Family (not verified)
Sat, 04/24/2010 - 10:47
Beautiful Ana...thanks so
Beautiful Ana...thanks so much!
Vicky (not verified)
Sat, 04/24/2010 - 14:35
Ana,I am new to your blog but
Ana,
I am new to your blog but not new to wood working. I have fallen in love with your site and just spent the better part of two hours going through the reader to mark my favorites!! Thanks so much for sharing. I'm looking forward to putting your 'well laid plans' to good use!
Cristy (not verified)
Sun, 04/25/2010 - 05:18
You are fantastic! Thanks!
You are fantastic! Thanks! I can't wait to make a couple of these benches to go next to my firepit.
dana (not verified)
Mon, 04/26/2010 - 17:28
This is all way too cool.Just
This is all way too cool.
Just found your blog. So glad I did!
- dana
www.dana-made-it.com
Deb (not verified)
Fri, 04/30/2010 - 09:36
We just had the concrete
We just had the concrete patio poured at our house and I was looking for some type of patio furniture that would be study and not cost a fortune. Thanks for the plans, I am going to build this tomorrow!
you give GREAT step by step information that doesn’t need any questions asked,
THANK YOU!
-Debbie
Jennifer (not verified)
Fri, 05/07/2010 - 11:15
Can't wait to try this plan
Can't wait to try this plan along with the table to match!
mollymadd (not verified)
Sun, 05/09/2010 - 16:57
Hey Ana! I am about 70% done
Hey Ana! I am about 70% done ... I just wanted to say 1 - you are a genius for creating this simple modern design knock off and 2 - I laugh that I am such a novice- seriously - I never used a saw or a drill until today... but I kept making mistakes on the drilling - especially on the ends. I would start to countersink where it looks like the drills should go and then realize my drill is not moving because there were already screws from my last fasten ... I probably made that mistake 5 times before I finally paid more attention. Both end slats have like 10 holes because I kept hitting screws and or I kept missing the wood that it was to attach to. I feel like a dummy...and my husband laughed when he saw the warped wood that I brought home the first time from lowes... anyhow, I should be finished tomorrow and I am super excited to post the pics. I just wanted to mention those comments for the super green novices like myself... thanks again for your big brain and the easy laid out plans!!
Lukesf (not verified)
Tue, 02/14/2012 - 10:32
Good for you!
Hello mollymadd,
It's great that you are trying! Trying and fouling it up is the only way to learn. Keep in mind that everyone is an "dummy" when doing something for the first time. Keep at it and you will get better. Meanwhile, if your husband keeps laughing at you, make him sleep on the couch. Meanwhile, always wear your safety glasses. Eyes are hard to fix, and even harder to replace!
Kellie (not verified)
Tue, 05/11/2010 - 11:08
What kind of wood was used in
What kind of wood was used in the photo? I love the grain!
Sandy H (not verified)
Sat, 05/22/2010 - 02:49
This is my first completed
This is my first completed project. I just made one bench to sit on my pool deck, so it is out of pressure treated lumber. It came out great!! The plans were super easy to follow - all thanks to Ana! I had the same problem as mollymadd that I put screws and the wood wasn't there. I will have to do a better job of measuring. I also think a chalk line would help to keep the screws straight. I'm using solid stain on this, so it won't matter that much for me. Thanks again Ana!!
Ellen (not verified)
Tue, 05/25/2010 - 15:52
I cannot believe I've never
I cannot believe I've never seen your site until now. Amazingly well done.
One question about this particular plan: what length boards are the 1x3 and 1x4's? You specify 4 of them, but not their length. Have I missed that somewhere? Thanks!
fhmaughan (not verified)
Fri, 05/28/2010 - 03:05
Ellen,I would be almost sure
Ellen,
I would be almost sure they are 8' long boards - that is pretty much the standard length for buying boards of this width.
Iceberg (not verified)
Sun, 05/30/2010 - 06:53
I have a question: How well
I have a question: How well does the junction between the seat slats and the side pieces hold up? Where the ends of the slats butt up against the sides, I can't see that they are actually attached to each other, just sort of floating next to each other. How does that hold up to warping, expansion/contraction, etc? Is this a potential splinter place? Should I get some small screws and pocket screw the slats to the side pieces? I expect it's pretty stiff since they meet midway between the two lower skirt pieces, but is that enough?
Ana White (not verified)
Sun, 05/30/2010 - 21:27
This design is very similar
This design is very similar to West Elm's Wood Slat bench, and you can go here to see a detailed diagram of how their bench goes together http://www.westelm.com/weimgs/rk/images/i/201020/0008/images/pdf/assemb…
If you would like to make sure the boards are joined together, you could easily use a kreg jig to build the top.
Drama Queens (not verified)
Wed, 06/30/2010 - 11:56
Just finished building this!!
Just finished building this!! Great project! I love it out on my front porch--just need to sew a few pillows to go at the back of it! Thanks for a great pattern! The only trouble I had was attaching the seat slats in the right spot--the directions were a little confusing because it said to mark 1" on the main directions but on the bigger diagram it said 1 3/4"--but i could have been reading it completely wrong--I don't know!
ashley.zel (not verified)
Mon, 08/23/2010 - 07:42
My husband and I (mostly my
My husband and I (mostly my husband) just finished building two of these benches. Love them. But we couldn't find treated 1x3's and we live in an area where there are estimated to be 6 swarms of termites per acre. We've found two swarms on our little bit of land in the last year (luckily not on our home! Keep your termite bonds up to date!) so we had no desire to put wood outside that wasn't pre treated (just in case we missed a spot sealing it).
All of that said...using only 1x4's we had no problems.
Great plan and easy to understand. Can't wait to build our next project.
Thank you!
NYC Interior Design (not verified)
Tue, 12/07/2010 - 17:10
There are definitely many
There are definitely many other kinds of wood that can be used for these benches rather than Nyatoh, have seen similar pine and oak benches like these.
Jasmine (not verified)
Fri, 01/07/2011 - 12:56
Hi Ana, I have been wanting
Hi Ana, I have been wanting something like this for our outdoor patio for a while now, so we are going to have a go at building two of these benches.
Thanks for the plans, lots of inspiration here.
algdoughty
Sun, 04/17/2011 - 04:44
About the legs
Hi All,
mzloca
Tue, 04/26/2011 - 19:46
Exactly what I need
After looking at outdoor furniture to replace our old set and getting sticker shock. I am so happy this site shows us how to make great looking stuff! Now to get started on this and the table....then BBQ time!
angie b (not verified)
Tue, 05/24/2011 - 21:02
hi, Im new here...what type
hi, Im new here...what type of paint and how many coats? first project..this site is unbelievable cool!
angie
In reply to hi, Im new here...what type by angie b (not verified)
claydowling
Wed, 05/25/2011 - 08:34
Finishing
For this you probably want some variety of outdoor deck stain or paint. The number of coats will depend on how dark you want it and manufacturer recommendations.
angie b (not verified)
Wed, 05/25/2011 - 22:44
the slats
the slats are screwed from underneath right? i'm building it right now and don't see the screws on the top of the bench
thx
angie b (not verified)
Thu, 05/26/2011 - 03:06
i figured it out, blonde
i figured it out, blonde moment there ")
gka (not verified)
Tue, 07/05/2011 - 21:59
Love this site! Quick
Love this site! Quick question... do you feel the 1x4 legs offer enough weight support if the people sitting down are larger? I was thinking about either lengthening the frame to accommodate 2x4 legs or even a 4x4 with a square notched out for the frame to sit in. I also wonder about the 2x2 on the stackable chairs. I just don't know enough about weight loads and wouldn't want it to break on anyone.
Steve S (not verified)
Sat, 07/09/2011 - 13:12
Leg comment
I just got about 3/4 of the way through finishing this project, sat on it, and the legs immediately tore off ripping some of the wood to shreds after I shifted my weight on it a little (and I'm not that heavy).
I see in some of the photos people have "doubled up" on the legs, squaring them off on both sides of each corner instead of just one - looks like that's probably the way to go if you don't want this collapsing on you.
I'm hoping mine didn't get tore up so badly that it can't be salvaged, but we'll see.
claydowling
Sat, 07/09/2011 - 14:11
Attaching the legs
There are tricks to attaching legs with screws. You need to use regular wood screws to do it, #8 at minimum, #10 or #12 would be ideal. Drywall or deck screws will fail exactly as you described.
You also need to pre-drill and countersink the holes. It is easy with the counter-sinks to be deluded into thinking that the drill bit provided is sufficient for your pre-drilling. That is definitely untrue. The hole you drill for the shaft should be as big around as the shaft of the screw, minus the depth of the threads.
The joint also needs to be extremely tight. There can't be any wiggle room or visible gaps, or it will fail.
These are all lessons learned from hard experience.
Guest (not verified)
Sun, 07/24/2011 - 19:25
making more sturdy
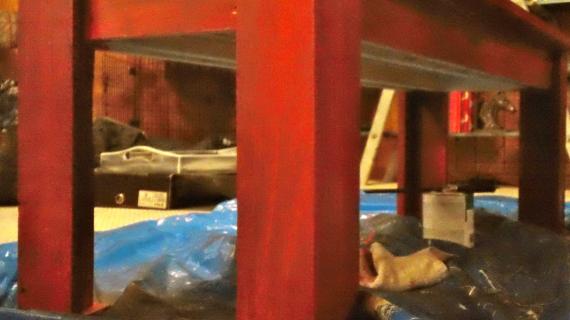
one thing I found when I first sat on it was that the slats bowed down while the sides of the bench top did not. I fixed this by screwing the inside and outside boards of the frame (the blue and green boards in the first construction picture above) together.
I did this by cutting eight spacers from 1x3 boards 2 inches wide. I spaced these out evenly, four on each side of the frame, between the two boards and placed four scres (two outside and two inside) of each spacer.
This helped make it so it didn't bow.
Brvogt
Wed, 08/10/2011 - 22:49
Project 2 For me!
I'm planning on making this to go with my simple table, but I am going to adjust it so I can do the legs the same as the table. I think the 2x4 legs will be sturdier for my family... And I'm already familiar with the other plan! Thanks Ana for giving me the courage to experiment!
itsalark
Thu, 09/08/2011 - 10:06
Do I have to use a Kreg Jig
Do I have to use a Kreg Jig to attach the slats? I didn't see it on the tools list.
Sharon L (not verified)
Thu, 09/08/2011 - 17:05
Kreg Jig
Nope! You screw down into the aprons, and then fill the holes with putty
Steve S (not verified)
Thu, 09/08/2011 - 18:02
Holes n puttyq
I tried this with the matching table I built last fall - recessed screwed and then filled in the holes with wood putty. Didn't do the job - the wood and/or putty expanded or otherwise didn't live through the winter season and by spring it was all either falling out or sticking up over the surface of the table. Swore if I built it again I would use the pocket hole method.
claydowling
Fri, 09/09/2011 - 05:22
Filling holes
If you predrill and countersink your screws, you can glue a dowel into the hole and then cut it off with a flush-cut saw.
Steve S (not verified)
Fri, 09/09/2011 - 05:48
Countersinks & dowels
Yes, after the trouble I had with the putty someone else recommended this and I re-drilled everything so I could glue a bit of 1/4" dowel in there instead. Still doesn't look *perfect*, but it's much better than it looked before. With the dowels I also had trouble with the wood expanding with the weather for a while so I found myself going back to it a couple of times to smooth things out again, and also a 1/4" spade bit (at least in my hands) doesn't cut a perfectly symmetrical 1/4" hole so many of the dowels have tiny gaps between the dowel and the outside wood, but it's not very noticeable. It's probably the best solution to fix the problem I created by countersinking from above instead of using pocket holes from underneath, but if I were starting this project new, I would *definitely* go with pocket holes (BTW Kreg isn't the only brand that makes pocket hole jigs, but does appear to be the only brand that consistently gets good reviews from owners).
claydowling
Fri, 09/09/2011 - 06:36
Drill bits
A spade bit is a pretty crude instrument, and I try to avoid using them. I have found that because they're made of tool steel, they do make excellent blades for marking knives. A little work with a grinder and my whet stones and I've got a first-rate blade.
I'd recommend picking up brad-point drills, which hold position much better. You can spend a fair bit of money for good ones, or you can buy a cheap Chinese set for not much as all. I bought a cheap Chinese set because it came with a nice metal case, and in time the bits will be replaced with good North American tooling.
You might also consider buying regular countersink drill bits. I found them to be useful.
Guest (not verified)
Tue, 11/15/2011 - 09:34
make this
make this
Rachel Wright (not verified)
Sun, 11/20/2011 - 08:55
Simple Outdoor Bench
Hi! My husband built this bench for me yesterday. I love it! The instructions were so easy and well written that he didn't have a stitch of trouble. Because the space we needed it for was a little too short for the measurements you gave, we did shorten it a bit and we modified the legs slightly for stability (I knew it would get a lot of wear and tear.)
In fact, I love it so much now that I decided it needed storage as well. I considered several possibilities and settled on a kind of "drawer" to go under it. It's essentially a box with wheels and a couple simple handles on the front. I'd like to put the design on Instructables and reference your bench so that people can make that if they like to go with it. May I link to this article on your site in my set of instructions?
Thanks for taking the time to read this comment.
Cassey (not verified)
Fri, 03/02/2012 - 12:24
Visible screw holes
This is my first project and I'm trying to envision it before starting, but I have a question. I'm curious how people filled in all the holes from the screws. Many of them are drilled down from the top of the table, right? I can't see evidence of that in any of the pictures even though most are stained. I want to use stain, not paint, but in my experience the fillers don't really match when stained over (even the stainable ones). Have people used fillers that specifically match the stain or does the stain just cover that well? Thanks for any help!!
claydowling
Fri, 03/02/2012 - 12:48
Hiding screws
The easiest way to hide the screw holes is to come from underneath. You can do it with a pocket screw. Another easy alternative is to use a dowel pin instead of screws. A bit more labor intensive but no screws to hide. You just need to make sure you use a waterproof glue (titebond III would be a first pass).
LEM (not verified)
Fri, 08/03/2012 - 08:44
Exactly what I need
These plans are exactly what I need but I am going to use them for a TV stand for my overly large TV. THIS IS PERFECT!!!!
jigganancy
Thu, 03/07/2013 - 15:03
foldable legs?
Anna - at the picture at the top .. it looks like the legs are built different. It looks like a 2x4 inside the frame. Is that correct? Did you use a bolt or other hardware in the inside frame to make the bench fold-able?
Sheriann13
Sat, 06/29/2013 - 11:12
Slats 1x3??
Yeah, I'm in the middle of assembling this puppy, and have 5 "extra" seat slats. The slats in the pics look like 1x3, not the 1x4 in the instructions. Since I am already deep into this process (and out of 1x3, and it doesn't structurally matter) I guess I'm soldiering on...
ETA: now that I'm done and I have a coffee table and not a bench...I realize I used 1x4 and 1x5. Super fail.
Hali
Sun, 07/21/2013 - 10:53
pocket hole placement
I am a beginner, trying to envision using the Kreg Jig to attach the slats. Any advice on pocket hole placement? Would I put pocket holes in the seat supports and screw the slats in from the bottom? Or do I put pocket holes in each end of the slats and attach them to the bench top?
Thank you!
MariahEliza
Wed, 06/04/2014 - 11:45
Board Length
This might be really obvious to everyone other than me, but how long do the boards need to be?
4 – 1×3 Boards
4 – 1×4 Boards
I'm planning on making the table to match too, and those plans had the board lengths listed. Not sure!
Thanks!
brenleyransome
Sun, 02/12/2017 - 16:58
Great as a Meditation Table
Just completed this project. We are using it as mediation table that houses some plants and special items to us. The design really suites our intent! I did notice that the completion piture had an additional 1x4 as the legs, but the plans did not include them. I'm unsure if there is a reason. I think I may try to add them for additional suport and a more complete look. It almost makes the table look it is sitting on a 4x4. As always, thank you for the plans Ana!
brenleyransome
Sun, 02/12/2017 - 17:05
Tip on the nails
Sorry I forgot to mention this in my previous comment-
I used 8 gauge, 2" nails and they split almost every board (poplar). I switched to 6 gauge, 1 1/4" nails (that was all I had laying around) and the boards stopped splitting. I'm very new to build, but if is possible to get the 2" nails in a smaller gauge, I'd highly recommend that. You need the 2" length for sturdiness if you plan to use this for sitting.