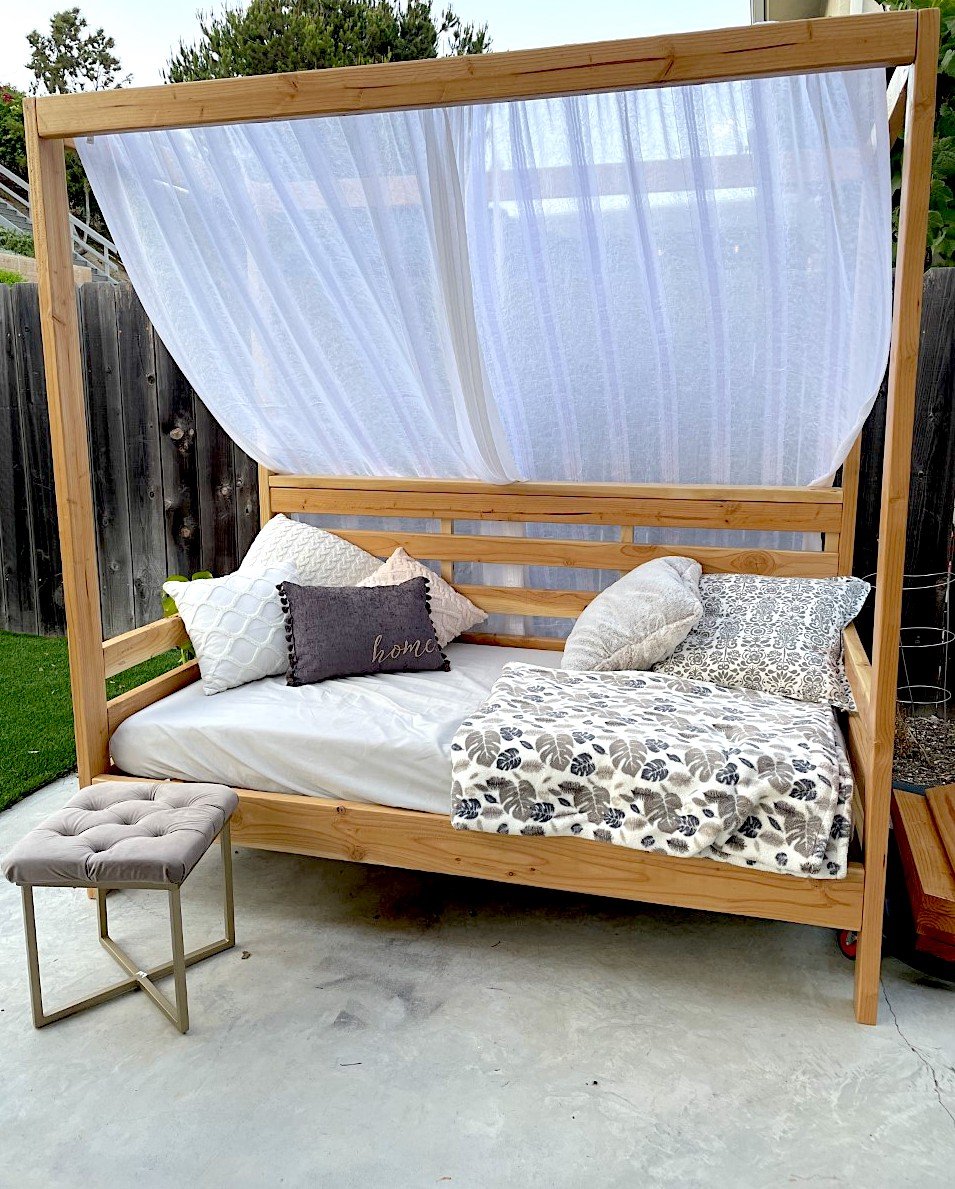


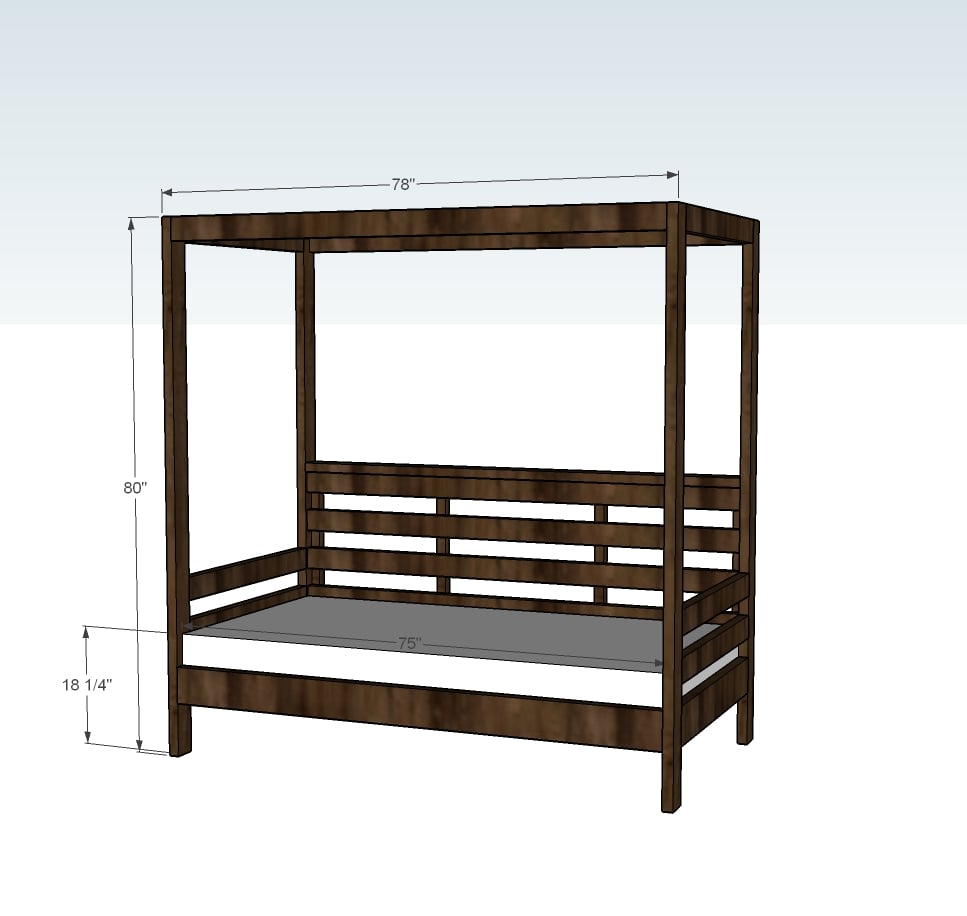
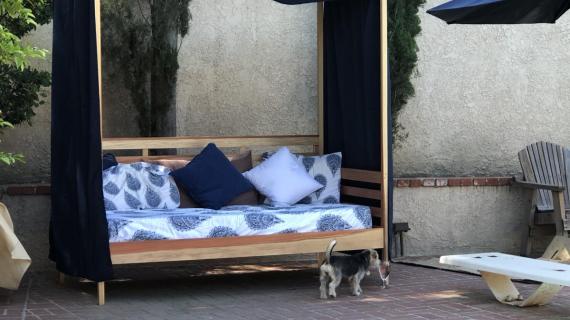
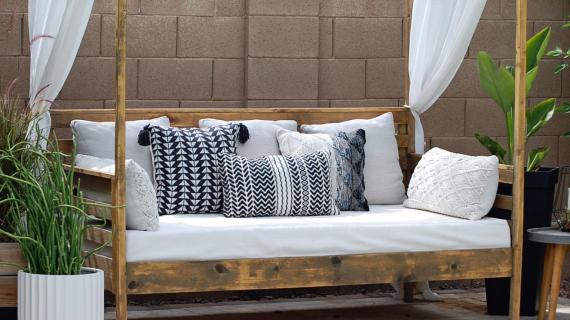
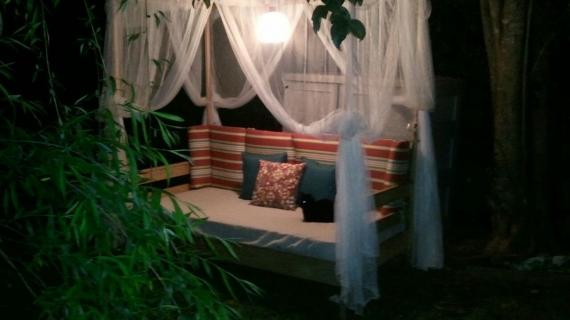
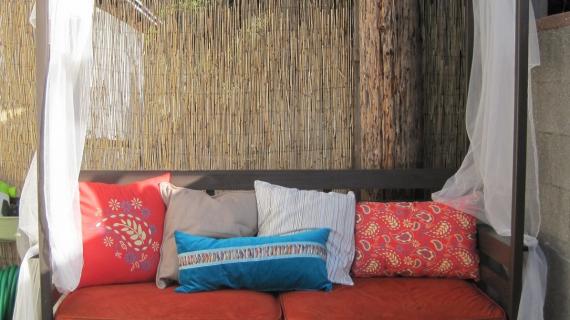
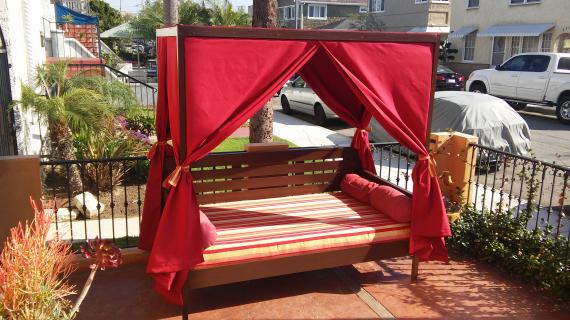
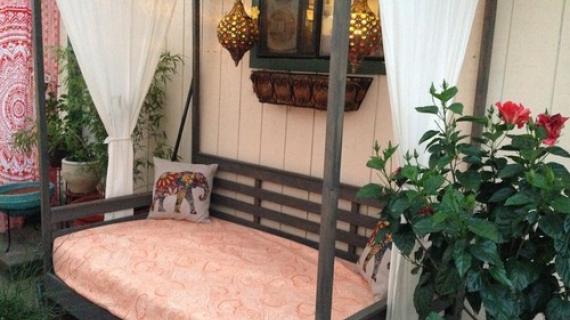
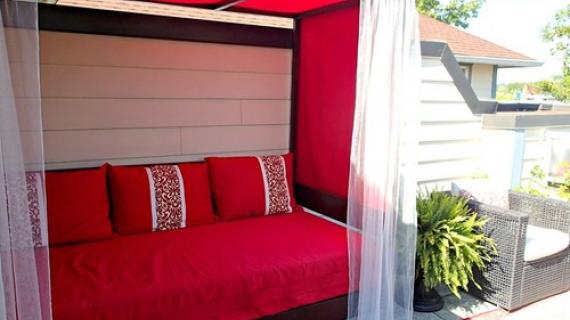
Create a backyard retreat by building your own outdoor daybed with canopy designed to fit a standard twin mattress. This plan uses standard off the shelf lumber and basic tools to construct. Check out the step by step diagrams and materials list from Ana-White.com.
Preparation
13 - 2x4 @ 10 feet long
2 - 2x6 @ 10 feet long
2 - 2x2 @ 8 feet long
Use leftover 2x4s, 2x2s and 2x6s for the mattress slats @ 39" (cut to fit)
4 - 2x4 @ 80" - legs
6 - 2x4 @ 36-1/2" - ends
2 - 2x6 @ 36-1/2" - ends
2 - 2x6 @ 75" - front/back
9 - 2x4 @ 75" - front/back and cleats
4 - 2x2 @ 31-1/2" - back trim
Use leftover 2x4s, 2x2s and 2x6s for the mattress slats @ 39" (cut to fit)


Instructions
Step 1
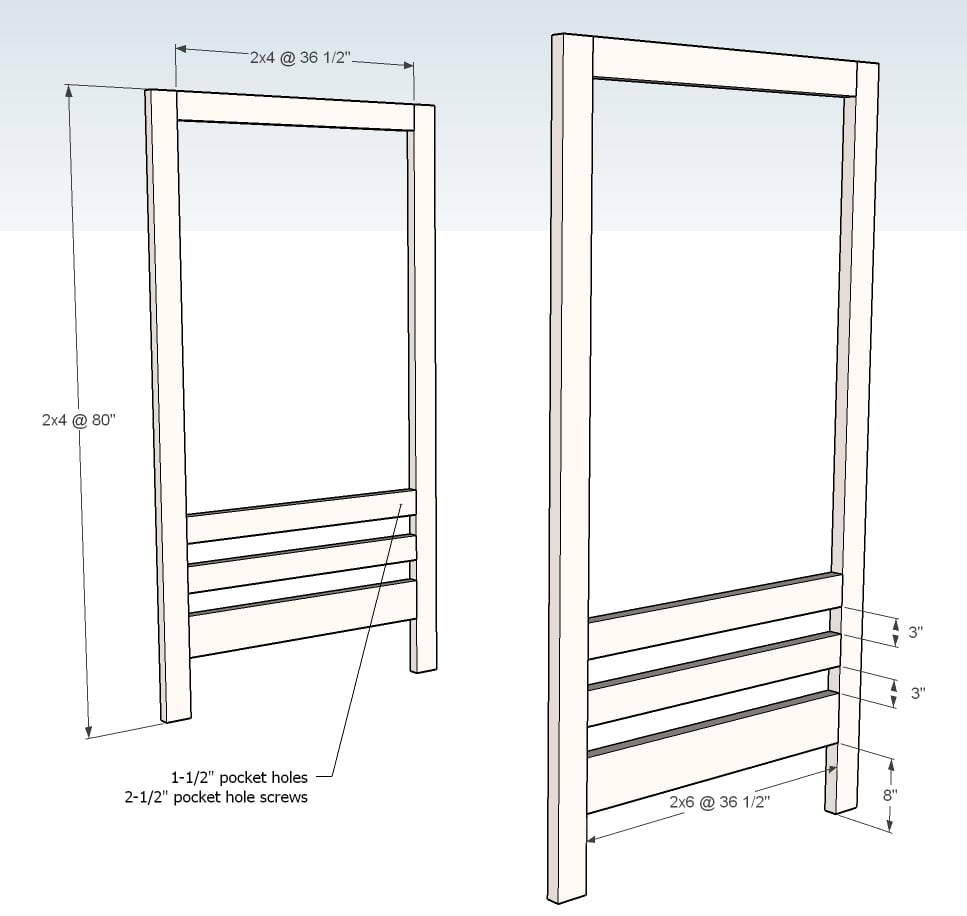
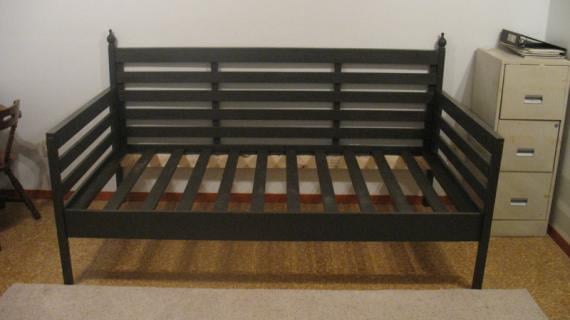
SIDE PANELS
Build your side panels as shown above. Drill two 1-1/2" pocket holes on both ends of all horizontal boards shown. Attach to the legs with 2-1/2" pocket hole screws. Build 2 side panels.
Pocket holes can be filled with plugs or exterior appropriate wood filler.
Step 2
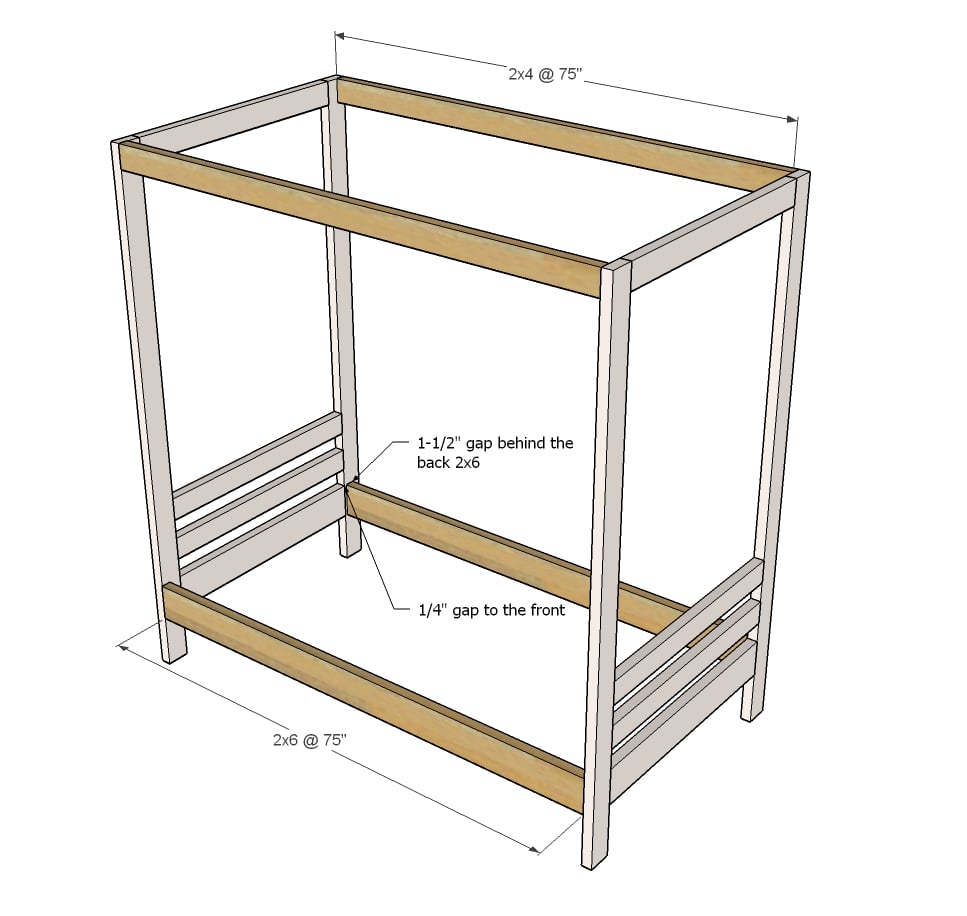
Drill two pocket holes on each end of all the horizontal boards shown. Drill three per end for 2x6 boards.
Attach to the legs with 2-1/2" pocket hole screws. Keep pocket holes on insides to keep hidden.
Step 3
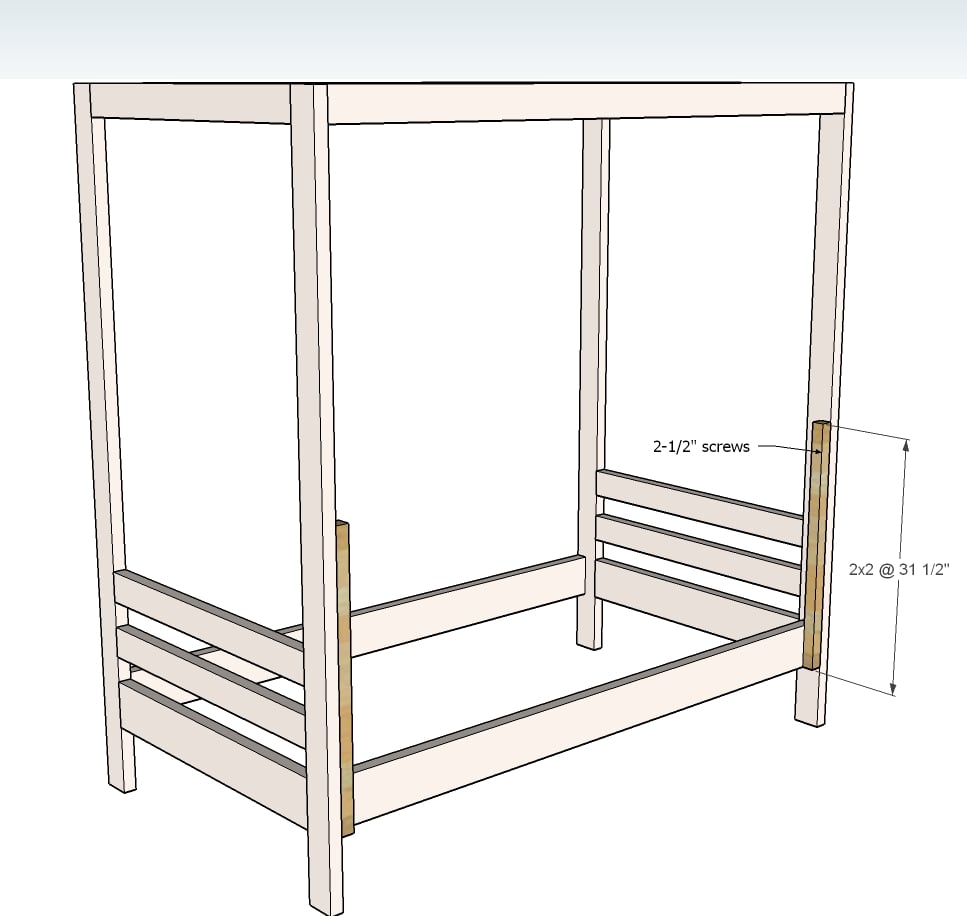
Attach 2x2s to back side of daybed with 2-1/2" self tapping exterior screws, flush to back edge.
Step 4

Attach back slats to the 2x2 with 2-1/2" screws.
You can also attach from outside of leg with 2-1/2" screws.
Step 5
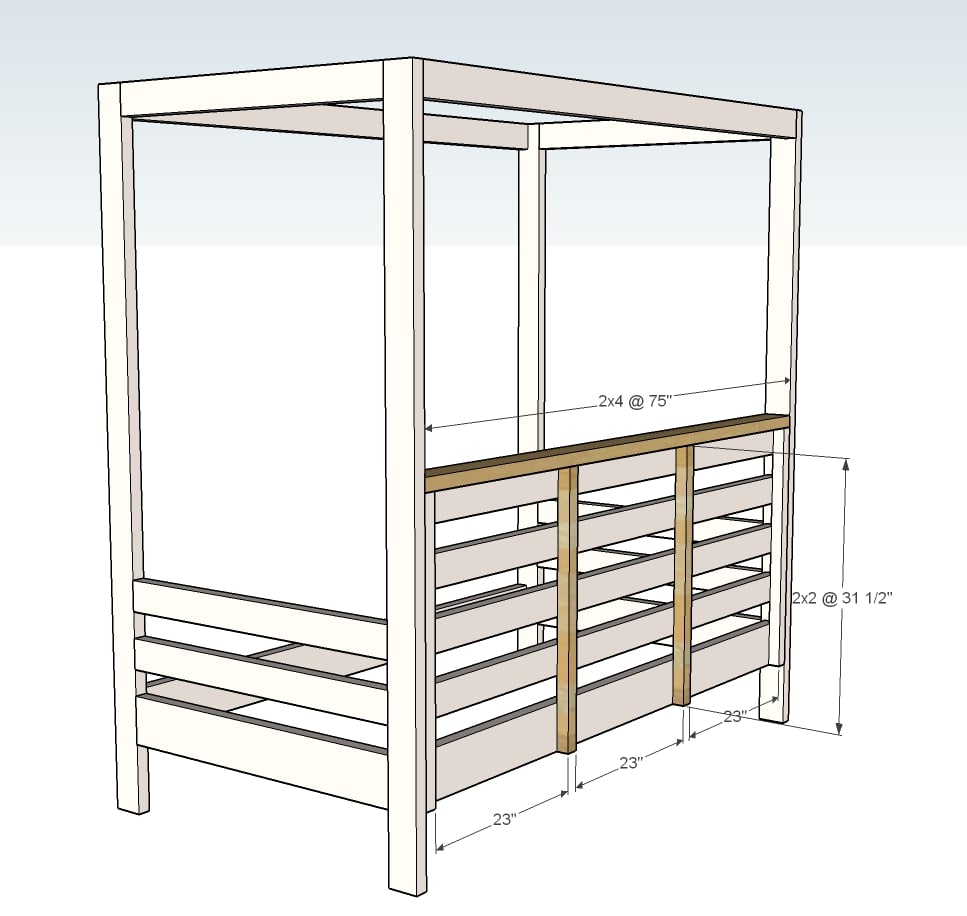
Complete the trim out of the back by adding 2x2s and 2x4 cap with the 2-1/2" screws.
Step 6
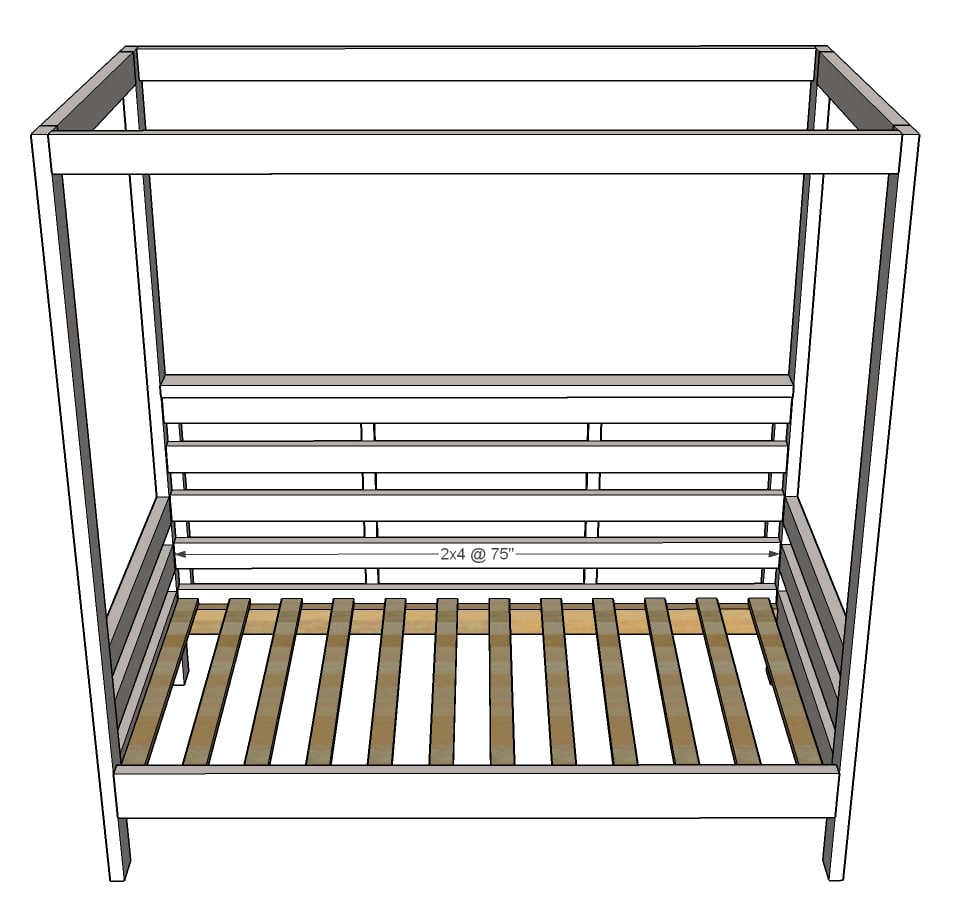
Attach 2x4 cleats inside the 2x6 bed aprons with 2-1/2" screws every 8" approximately.
Measure and cut the slats to fit. Lay on the cleats and screw down with 2-1/2" screws.
Comments
ainhoa vega (not verified)
Mon, 05/31/2010 - 02:05
Love it!! I kept seeing the
Love it!! I kept seeing the facebook picture and thinking, I hope Ana's posting plans for that sometime soon.
Marti (not verified)
Mon, 05/31/2010 - 04:32
This looks great! I thought
This looks great! I thought it was going to have screen cloth around the ends and thought that would be a great idea too.
Jennifer Doherty (not verified)
Mon, 05/31/2010 - 04:36
Oooooh, pretty! I'm so
Oooooh, pretty! I'm so excited about this! Thank you Ana!
Natalie (not verified)
Mon, 05/31/2010 - 07:25
Thank you!!!
Thank you!!!
the mama monster (not verified)
Mon, 05/31/2010 - 12:21
ohhh thank you, thank you
ohhh thank you, thank you thank you! i have been wanting a day bed but even the target and walmart ones are $400-700. thank you sooooo much!
LouAnn (not verified)
Mon, 05/31/2010 - 15:32
I love this. I think I would
I love this. I think I would use it as a daybed in our guest room - it's my fave of all the ones you've posted so far!
Kilobelle (not verified)
Tue, 06/01/2010 - 07:10
Yes, I've been waiting on
Yes, I've been waiting on this one. Building as I type can't wait to post pictures of this and my finished saw horse table. Thank you ANA :)
erin (not verified)
Tue, 06/01/2010 - 09:05
This is so beautiful! I wish
This is so beautiful! I wish my back yard were a little more private.
Meredith (not verified)
Wed, 06/02/2010 - 10:48
am i correct in assuming that
am i correct in assuming that if i just shorten the sides and bottom slats this could be a bench?
Ana White (not verified)
Wed, 06/02/2010 - 11:31
Meredith, that's actually a
Meredith, that's actually a fabulous idea. I would make the bench seat not so deep (it's 39" deep for the twin mattress) but it would work perfect for a bench with an arbor over it! Can't wait to see what you come up with!
Kilobelle (not verified)
Sat, 06/05/2010 - 15:15
Hey ana, a I right in that
Hey ana, a I right in that the 2 x 4 for the cleats is missing from the shopping list, but it's on the cut list.
Kilobelle (not verified)
Sat, 06/05/2010 - 15:20
Also, I have some 1x6 lying
Also, I have some 1x6 lying around, can I use that instead or or does it have to be 2x4 ?
Tree (not verified)
Mon, 08/02/2010 - 12:02
I am new to your site and...I
I am new to your site and...I am in love! What you are doing is so fabulous! I love this daybed! How would I alter this for a full matress? My daughter is in need of an upgrade and her bed is just on a metal frame. I would love to surprise her with this! Thanks for sharing your gift!
Carrie and 3Chicks (not verified)
Mon, 09/06/2010 - 07:24
I'm going to add this to
I'm going to add this to Lizzie's 6 drawer platform bed (ana's plans) when I build it. Her bed now that I built 8 years ago has a canopy and she loves it, so we can keep the concept!
Carrie and 3Chicks (not verified)
Mon, 09/06/2010 - 07:29
Kilobelle, I've used 1x6 for
Kilobelle, I've used 1x6 for cleats before. I think you'll be fine. Remember though that the slats sit on this. You'll then want an outside board that will be even wider to hide the slats. Think too, that you'll be altering how high the actual box spring & mattess.
I'd just run out and grab a couple $1.98 2x4's instead of doing all that changing of the plan layout to make it work.
kbailey22 (not verified)
Mon, 09/06/2010 - 17:27
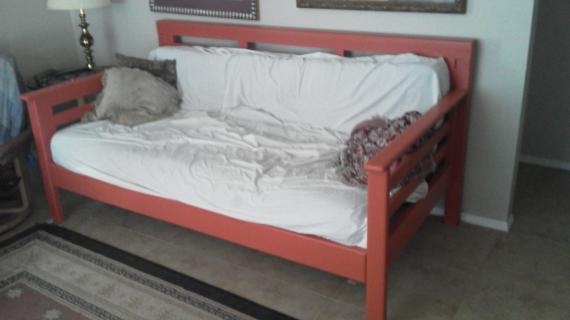
I love this bed! I just
I love this bed! I just finished making it for our little girl and posted the pictures on here. I actually modified it to be full-sized to go with the mattress set we already had. And we already had it on a metal frame, so I was kind of lazy and actually built the bed around the frame instead of adding slats and putting the mattress on top! Tree, I just changed the length of everything that was 39" to be 54" (which is the width of my bed... I think I actually did 54 1/2 to allow for space around the metal bed frame). Then it just went together the same way! I added an extra support piece on the side panels to hold the slats up since they were wider. It all went together so easily. If you want to make this, don't hesitate! You can totally do it!
Ana White (not verified)
Mon, 09/06/2010 - 19:12
Kate, your bed is so amazing!
Kate, your bed is so amazing! Here is the link to the photo - WOW! It's a room maker! And the clip art rails are so cute!
Rachael (not verified)
Thu, 01/27/2011 - 14:50
So, if I wanted to turn this
So, if I wanted to turn this into a full-size day-bed, what specifications would I need?
nate (not verified)
Tue, 02/22/2011 - 09:42
I'm thinking pretty hard
I'm thinking pretty hard about putting one of these on my rooftop deck, however it gets a bit windy, so I'm considering 4x4's instead of 2x2's for the posts. Would that substantially effect the plan?
traciecook
Thu, 03/24/2011 - 08:49
Used as everyday bed?
If this was going to be used as an everyday bed, would any additional support be needed for the bottom (slats)?
Thanks!
Milca (not verified)
Fri, 04/15/2011 - 20:59
Fantastic!
I just looove the look of this bed! Its either going in my daughter`s bedroom or our sewing room/playroom :D
NatalieQP
Sat, 06/25/2011 - 00:58
Soooo excited!!
Just bought all the wood and had the guy at HD cut it all for me,too! All I have to do is put it together tomorrow! I am making some modifications because it is part of a "castle bed" I am building for my youngest. I am too excited to sleep, but I must so I can get up and BUILD!! I was telling everybody at the store to go to your website!! They all thought I was a little crazy with all my wood...lol!! P.S. My husband thinks I will give up in the middle of building it...hmmm...don't think so...I have too many mentors on this site to inspire me!!
Robyn (not verified)
Fri, 07/08/2011 - 13:09
Price
I really want to build a day bed for my outdoor patio... how much did this cost you all to do??!
I'm inspired!
shawneycarson
Sat, 04/06/2013 - 11:13
Detachable Canopy?
Ana,
I stumbled across your site sometime last year and have LOVED reading about projects and builds. I am FINALLY ready to begin my first build; attempting this beautiful outdoor canopy daybed. I LOVE the canopy but my question is, could I somehow make it detachable to store for winter? I would love to utilize this on my patio and I am excited to get started.
P.S. I'm also from Alaska (I grew up in Anchorage, but moved to the lower 48 as an adult.)
Kindest Regards,
MestUpGoonie
Wed, 11/05/2014 - 13:30
What is the best wood?
What would you all reccomend for making this project?
Sb1212
Sat, 07/06/2019 - 04:45
Original plans
Hi Ana, The link for the original plans doesn't work. Is there another way to access the original plans?
Thank you
grisellegarcia03
Mon, 10/19/2020 - 18:22
I completed this project…
I completed this project this week and it is AMAZING!