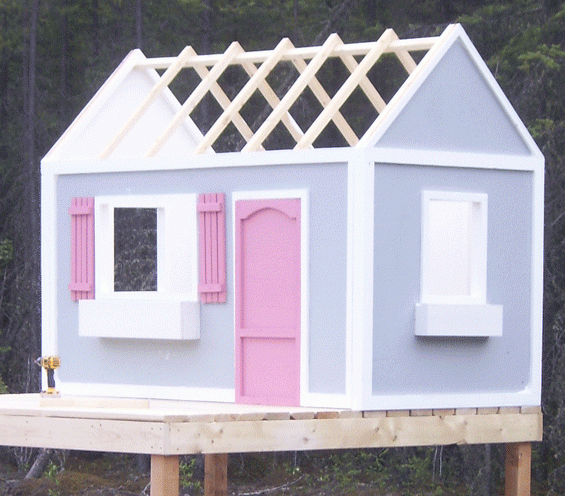
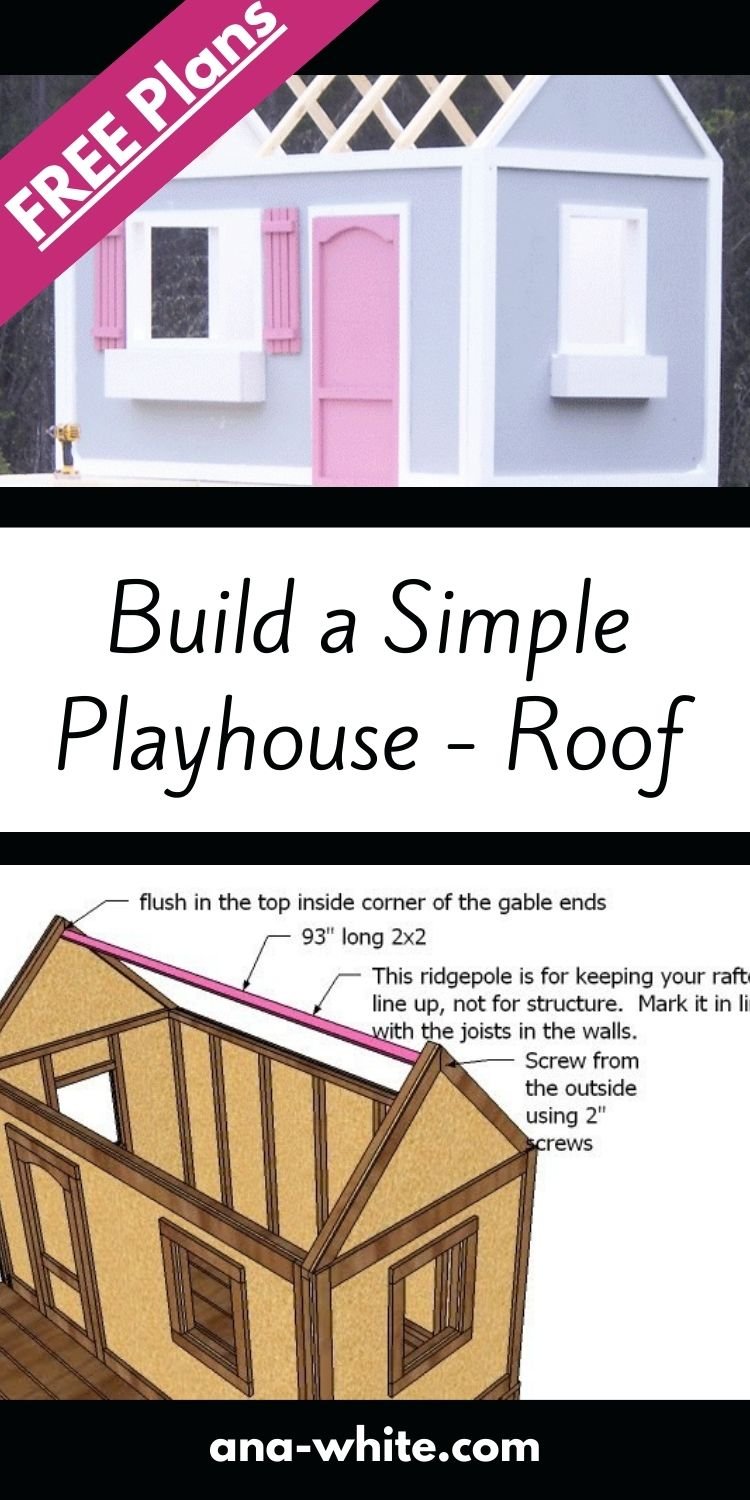
Think putting up a roof on a playhouse is difficult? Reconsider with this plan. This simple roof design will take all of the confusion out of rafters. We've had this playhouse up through a windy Alaska summer (and winter), through rainstorms, and even with lots of snow!
Pin For Later!
Preparation
- 2 – 3/4″ Plywood or OSB 4×8 Sheets (Can be the builder grade stuff)
- 6 – 2×2 Furring Strips
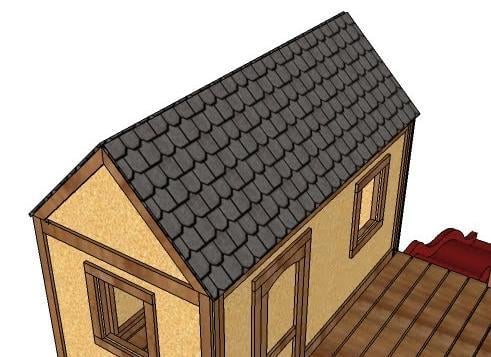
- 50 Square Feet of Roofing - cedar shinges would be adorable
- 8′ Roofing Ridge Material
- Roofing Nails or other Roofing fasteners
- 2″ self tapping wood Screws
- 1 1/4″ self tapping wood screws
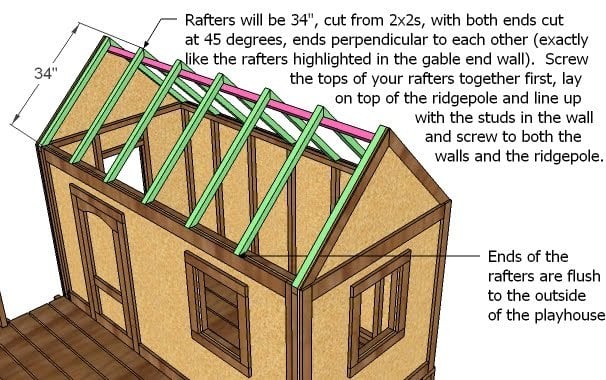
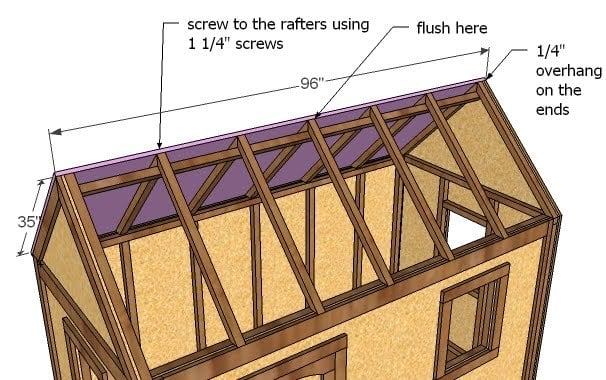
10 – 2×2 @ 34″, Both Ends Mitered down 45 degrees perpendicular (Rafters)
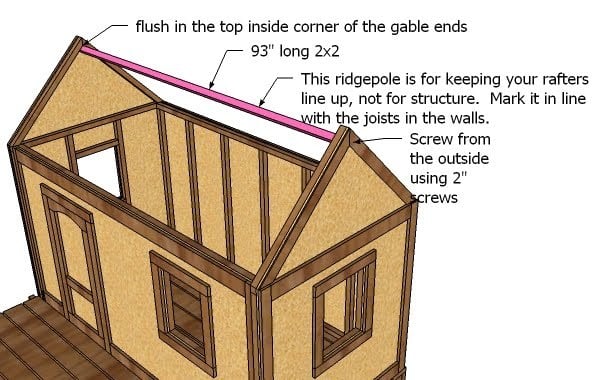
1 – 2×2 @ 93″ (Ridge Pole)
2 – 3/4″ Plywood or OSB @ 96″ x 35″
Instructions
Step 1
Step 2
RAFTERS
Build your trusses by screwing the tops of the trusses together using the 2″ screws and glue. Lay your trusses on top of the ridgepole and line up with the markings from step 1. The ends of the rafters should be flush with the outsides of the front and back walls, matching the trusses built into the gable end walls (also highlighted in green above). Screw to both the front and back walls and to the ridgepole.




Comments
Janelle (not verified)
Sun, 05/30/2010 - 11:06
Do you attach the house to
Do you attach the house to the deck at all, or is it free-standing?
chona (not verified)
Sun, 05/30/2010 - 11:09
Amazing! How many hours do
Amazing! How many hours do you guesstimate you've spent on this project?
Becky Jean (not verified)
Sun, 05/30/2010 - 11:50
oooo... I can't wait to see
oooo... I can't wait to see the finished little house. You do great work.
Ana White (not verified)
Sun, 05/30/2010 - 12:06
Off and on, I've been at this
Off and on, I've been at this project for about two weeks, but it's interrupted hours, here and there. If you made good time, it would be entirely possible to build this in a weekend.
Yes, make sure you screw the walls to the deck so the wind doesn't blow it off.
:)
MomBrose (not verified)
Sun, 05/30/2010 - 14:33
I need to go back and read
I need to go back and read the plans but did you put the whole decking into concrete footings? I would be worried that it would topple because it's "back heavy."
Ana White (not verified)
Sun, 05/30/2010 - 14:40
Hi Mom Brose, the playhouse
Hi Mom Brose, the playhouse is actually much lighter than you would expect (my husband and I carried it acrossed the lawn) and there is no issue of being top heavy. The deck that the playhouse sits on is heavy and a large footprint, so you shouldn't have trouble with the playhouse toppling over. Check this one out from ToysRUs, sits right on the lawn, and it's even taller with a smaller footprint http://www.toysrus.com/product/index.jsp?productId=3040627
These questions make me glad I built this playhouse before I blogged! That said, we will probably move the playhouse to concrete pier or deck blocks just because the extra step will preserve the playhouse longer and create greater stability. Just can't buy deck blocks locally.
Buckeyegal (not verified)
Mon, 05/31/2010 - 09:10
Our yard is slightly sloped
Our yard is slightly sloped so we opted to level the decking by burying the footings in the ground and cementing them in. Overkill the dear hubby says but it's not going anywhere. : )
Heather (not verified)
Thu, 06/03/2010 - 12:51
Yes!! Please pretty please,
Yes!! Please pretty please, blog the covered porch option, that is awesome! Love it...Thanks Ana!
L + M (not verified)
Mon, 06/07/2010 - 10:38
I really like the stilts! We
I really like the stilts! We decided not to do stilts but to go high in the roof and do a sandbox next to it. I had a stilted playhouse as a kid.
Pictures of one weekend's worth of work are on our blog right now.
Twigs @ Twiggl… (not verified)
Mon, 06/14/2010 - 13:43
i just discovered your blog.
i just discovered your blog. no joke, i've bookmarked 20+ projects & i'm begging my husband to show my how to use his basic tools. i plan on listing our girls giant plastic kitchen on craigslist this weekend & making them a wood kitchen (as per our original plan!!) with the directions/plans you've posted. thank you so much for such great ideas!
doodooguru (not verified)
Fri, 07/16/2010 - 08:00
My family used your playhouse
My family used your playhouse plans over the 4th of July. Thanks!
http://hippieville.blogspot.com/2010/07/celebrating-our-freedom.html
Vicky (not verified)
Sun, 08/15/2010 - 00:01
I think it would be great if
I think it would be great if you adapted this to be a full-size tool or potting shed. My husband and I were looking for a plan we could build ourselves recently. I'm sure the term "DIY tool shed" it would increase male traffic to your site!
tjhester22 (not verified)
Mon, 09/20/2010 - 12:35
I am in the middle of
I am in the middle of building this playhouse... by myself, or actually with a little "help" from my 6 and 8 year olds, and it is basically my first project. I have to say I am pretty proud of myself!! Thank you for your easy to follow instructions!
I am actually building this for two goats. I don't want to put it up on a deck. Could I put it on concrete blocks? And the flooring I guess would just be the same grade plywood as the roof? Do I need floor rafters similar to the walls? This might be in the instructions somewhere. Point me in the right direction, if so!
Thank you Ana!!