

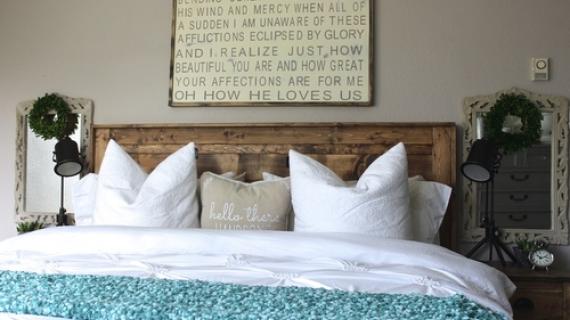
A simple low headboard with a cutout made from 1x3s and 1/4" plywood. You can build it for about $30 with just power basic tools.
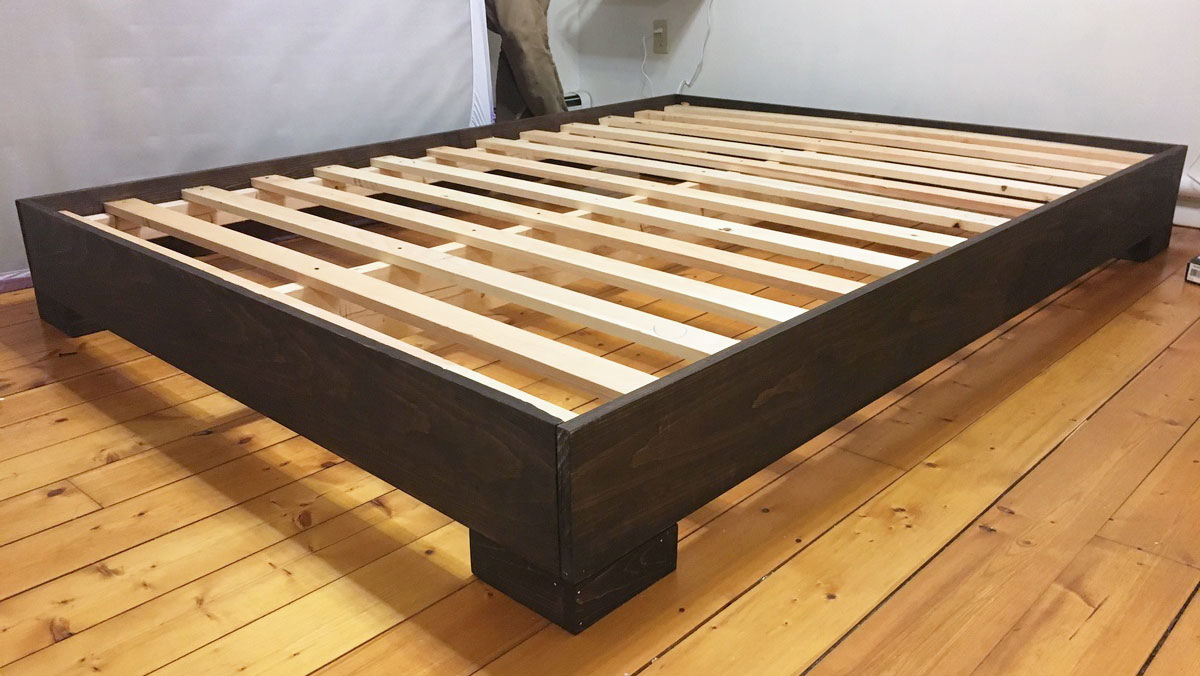
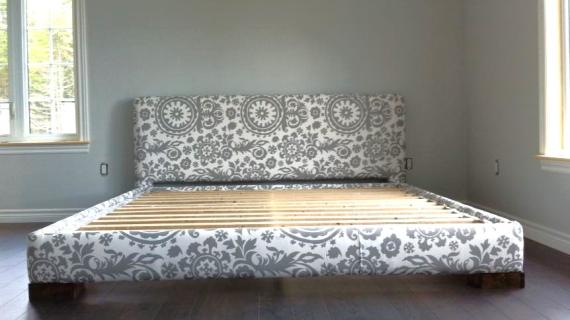
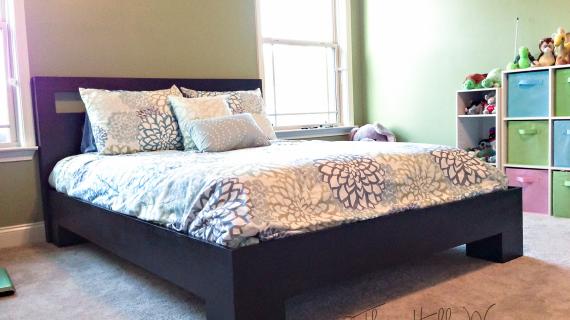
Related: We love it paired with our modern platform bed frame base.
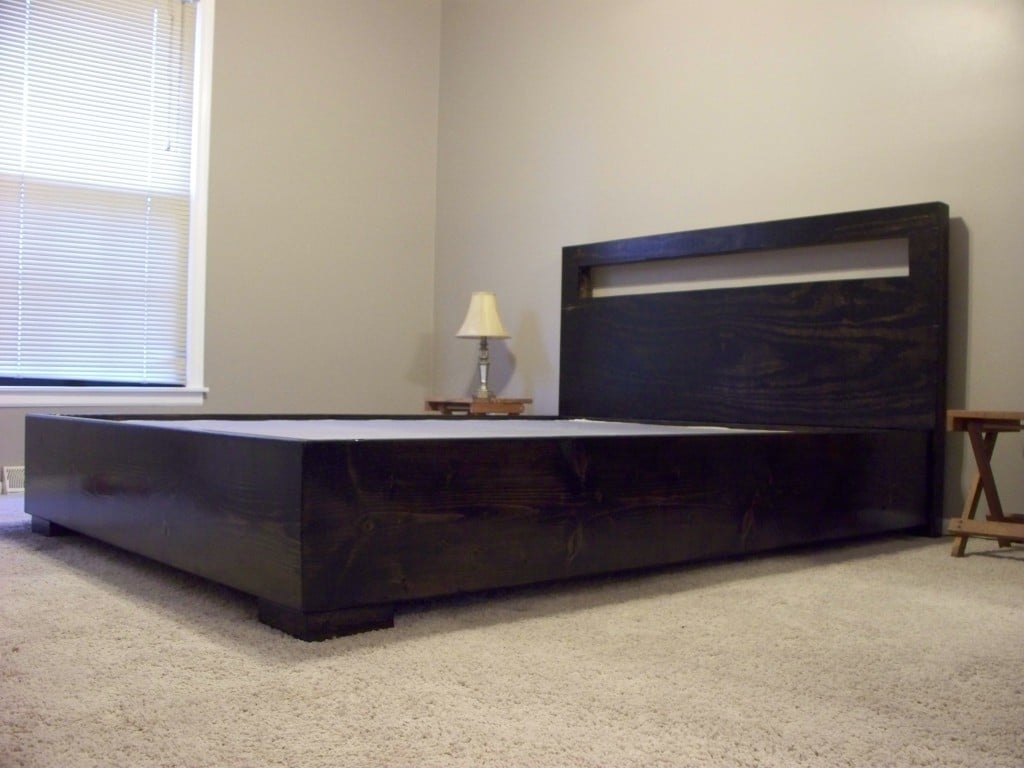
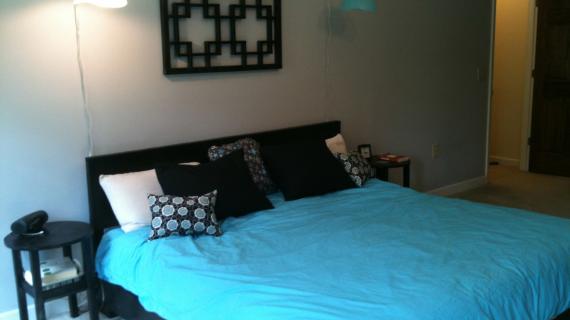
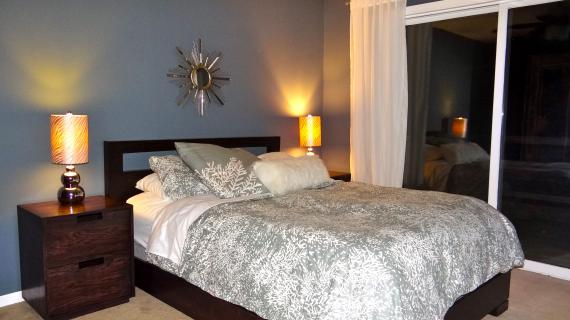
This easy to build headboard will turn your bedroom into a modern hotel-esque suite!
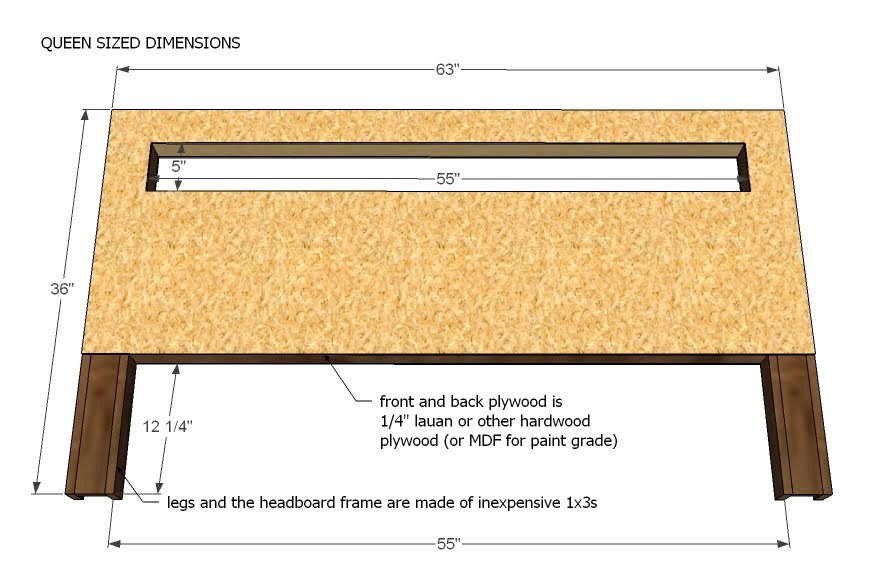
The plans as written are for queen, but it's easy to modify the plans to any width and we show you how in the plans.
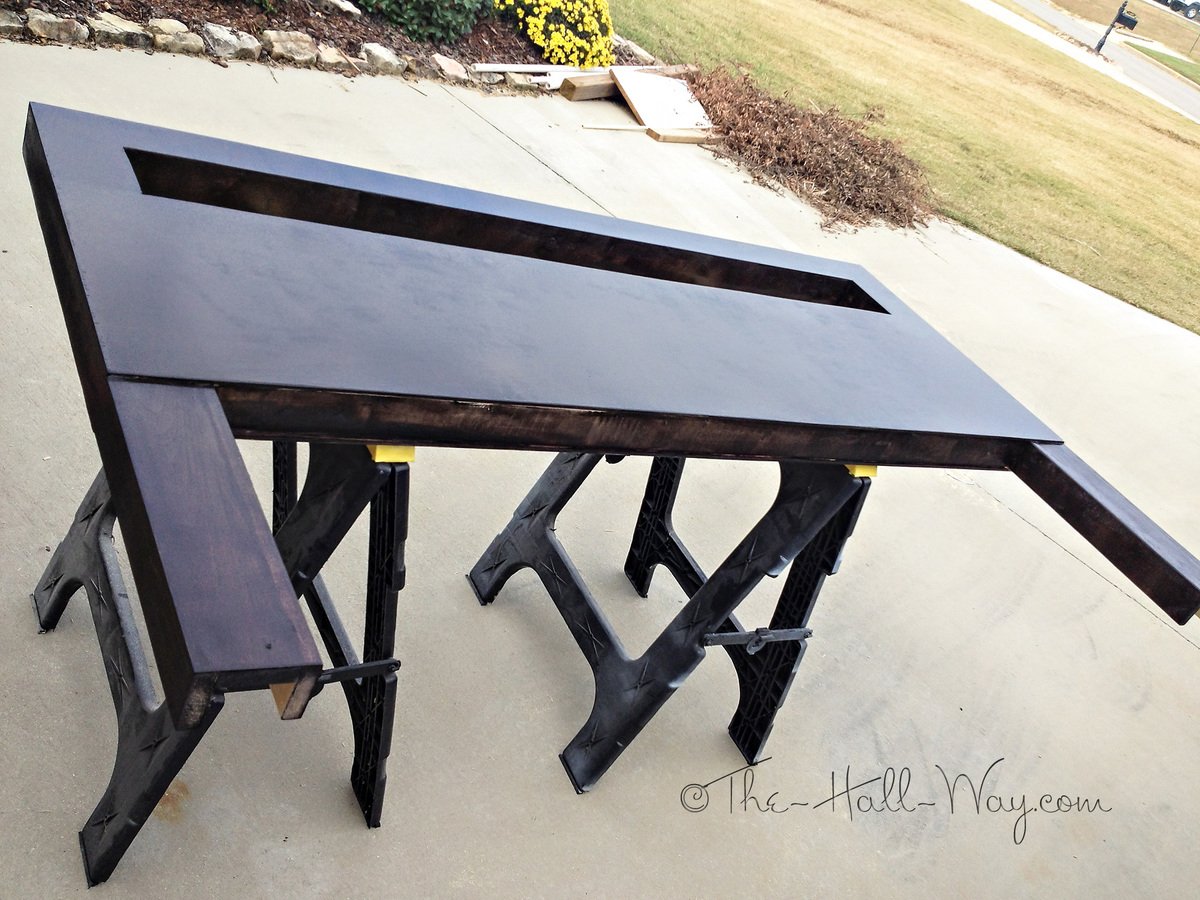
Reader submitted photo by The Hall Way
This headboard can be used alone, or pair with our modern platform bed frame.
Preparation
- 1 Sheet of 1/4″ Hardwood Plywood or MDF (for painting)
- 4 – 1×3 Boards, 8′ Long (Furring Strips would work fine and are about $1.50 a stick)
- 3 – 1×3 @ 55″ (Lateral Frame Pieces) *
- 2 – 1×3 @ 35 1/4″ (Inside Leg)
- 1 – 1×3 @ 61 1/2″ (Top) *
- 2 – 1×3 @ 36″ (Outside Leg)
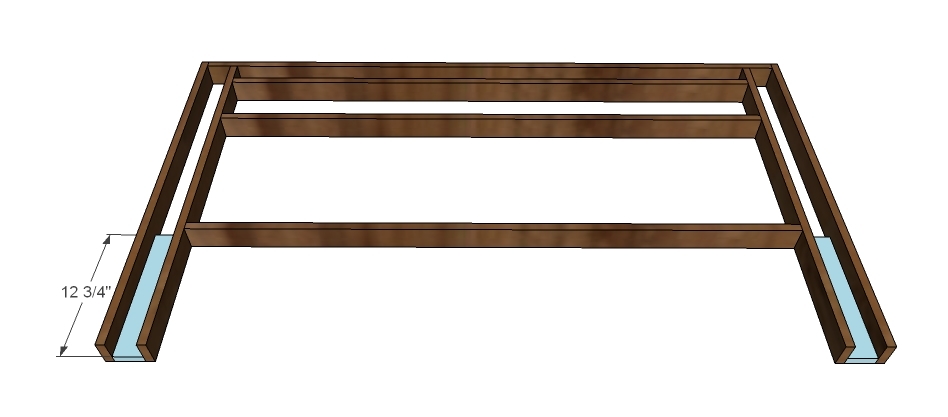
- 2 – 1×3 @ 12 3/4″ (Leg Front)
- 2 – 1/4″ Plywood @ 24″ x 63″ (Front and Back Panels)
* For other widths, simply add to these dimensions to make the headboard wider as noted below:
- 38" x 75" Twin: Subtract 22"
- 54" x 75" Full: Subtract 6"
- 76" x 80" Standard King: Add 16"
- 72" x 84" California King: Add 12"


Work on a clean level surface with straight boards. Check for square and use glue. Be safe and have fun!
Instructions
Step 1

FRAME ASSEMBLY
Assemble your frame as shown above, marking the legs where the joints go. Use 2″ nails and glue. Check for square.
Step 2

TOP
Mark the top board 2 1/2″ in from the ends on both ends. Attach to the top of the frame as shown above with 2″ nails and glue. Check for square.
Step 3

SIDES
Attach the sides to the top as shown above, keeping your outside edges flush. Use the 2″ nails and glue. Check for square.
Step 4
LEG FRONTS
Attach the leg fronts as shown above, using 2″ nails and glue. Adjust for square.
Step 5

Step 6
Step 7

SIZE MODIFICATIONS
It’ easy to convert this headboard to a king or full or even twin. Measure your mattress overall width and for numbers larger than 60″, subtract 60″. Add this number to the cut length of all of the pink boards shown above. Also cut your plywood accordingly. For overall measurements under 60″ (fulls and twins) subtract the measurement from 60″. Now take this number and subtract it from the cut length of all boards shown above in pink. Cut your plywood accordingly.
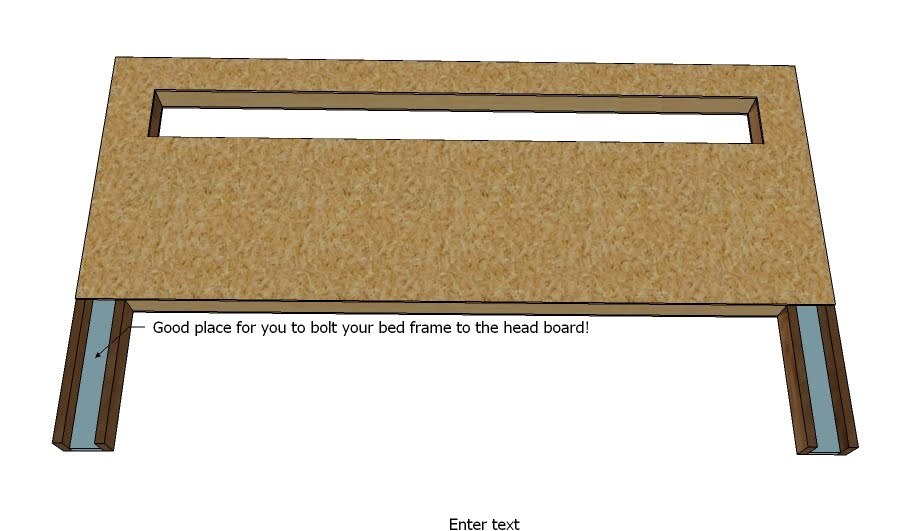
Fill all holes, including any differences between the plywood and the frame, with a stainable wood filler. If you want, you can use a wood filler that matches your stain to conceal even better. Overfill the holes and let dry thoroughly. Sand. Then fill again and sand again. The goal is to make the edges look like a hollow core door, with the seam invisible. Vacuum with a soft bristled brush to remove any residue. Then stain or paint as desired. Shown above, the legs are designed so that you can easily bolt a bed frame on.

Comments
Emma (not verified)
Wed, 06/23/2010 - 05:05
Woooooow, thank you for this
Woooooow, thank you for this plan, currently I'm making a bed like this in my carpintery course (I'm fromo mexico) and I had terrible troubles to figuring out how to do the headbord so this comes perfect, thank you very much Anna.
the Rew Crew (not verified)
Wed, 06/23/2010 - 05:29
Gorgeous! I adore modern
Gorgeous! I adore modern pieces!
This piece has me itching to start building NOW, but I'm kind of terrified of making plunge cuts with my jig saw. I just don't want to destroy the piece with really rough edges.
Any one have tips for newbies?
orange sugar (not verified)
Wed, 06/23/2010 - 06:08
Awesome!
Awesome!
Heather (not verified)
Wed, 06/23/2010 - 06:23
@ the Rew Crew....the jigsaw
@ the Rew Crew....the jigsaw cutting is easy, first drill a hole in the cutout area, then you insert your jigsawblade into that hole and start cutting. Make sure you have a "clean cut" blade on the jigsaw so that it doesn't splinter the wood. Go slowly and you should be fine. :)
Allie (not verified)
Fri, 06/25/2010 - 10:50
I'm just going to say:
I'm just going to say:
WOOOOOOOOOO!!!!!!
And,
Thank you!!!
Stephen (not verified)
Fri, 06/25/2010 - 19:59
Cool project. I've been
Cool project. I've been thinking about building this but I am a bit confused about the nails.
It says to use 1-1/4" and 2" nails from a pneumatic nailer; I'm new to pneumatic nailers so is the correct type "finish nails" for this project? Is there a recommended gauge size? I see that 15/16/18 are common gauge sizes for these nail lengths. I know the glue does most of the work keeping the pieces together after it dries, but I'd like to know what you recommend.
Now to find a friend with a nailer to borrow...
Ana White (not verified)
Sat, 06/26/2010 - 07:20
Stephan, you are correct in
Stephan, you are correct in assuming that the glue is the strength, and the nails only hold everything together until the glue bonds. For everyone, think of MDF or particle board, or even OSB (most houses are sheathed in OSB) - it's sawdust and glue. So if glue can hold together OSB, which holds your house together, we can count on it for little projects too.
I use a 16 gauge finish nailer, but you can use an 18 or 15, just make sure it shoots brad or finish nails of the correct lengths.
Kelblue (not verified)
Wed, 08/11/2010 - 14:40
We don't own a jigsaw or
We don't own a jigsaw or tablesaw so we made ours out of all 1x6 boards and I love it. I adore the modern furniture you post and so glad we figured out how to acheive the same great look, but a very simple plan (and just $25 including paint). My first project w/o my hubby :)
Here's a link to how we did ours if anyone is interested: http://mydiyhome.wordpress.com/2010/08/10/build-headboard/
AlaskaClays (not verified)
Wed, 09/01/2010 - 13:35
I LOVE this bed frame & I
I LOVE this bed frame & I want to make it as an anniversary present for my hubby, but I have a king matress... do you know what the conversion would be?
Ana White (not verified)
Wed, 09/01/2010 - 14:26
Hi there, I live in interior
Hi there, I live in interior Alaska! What you need to do for a king is build the frame 78" wide instead of 60" wide for the queen. A standard king measures 78x80. The length will not change, so you will not need to add extra slats. However, because kings are so big, you should add a center support of fifth leg to the center of the bed. Also, consider how you will get the frame into the room, as door sizes are right at 80". Good luck with your bed frame!
bryana (not verified)
Wed, 11/10/2010 - 20:19
oh my, i just found your site
oh my, i just found your site and im going crazy i want to make everything, this bed is awsome, but i was just woundering if the bed frame was already added is so were can i find the plan, thank you for all that your doing.
traciecook
Mon, 03/21/2011 - 08:34
Bed frame plans?
Do you have the plans for the platform bed frame too? I would love to make the bed frame with the headboard. Thanks!
Guest (not verified)
Mon, 03/21/2011 - 21:09
I just came across this
I just came across this website and I'm absolutely in love with EVERYTHING. I'm dying to make this bed for my new house that we'll move into next month but I only see the plan for the headboard. Is there a plan for the actual bed too or is that going to be a later project?
robbandbec (not verified)
Tue, 05/17/2011 - 18:22
Where is the bed?
I have seen several people refer to the bedframe, questions and answers about the bedframe, but don't see a plan for one, and Ana says there isn't one....
Is there? I would love to make it if there was.
In reply to Where is the bed? by robbandbec (not verified)
aria_dia
Tue, 05/17/2011 - 21:58
The headboard attaches to the
The headboard attaches to the platform bed if I read things correctly. hth
Guest (not verified)
Thu, 05/26/2011 - 15:35
where is the bed?
I just sent a email to contact and asked the same thing - I asked if she is going to put plans together. I am waiting for an answer
In reply to Where is the bed? by robbandbec (not verified)
claydowling
Thu, 05/26/2011 - 19:18
The bed is a box
The bed frame itself is pretty straight forward. It's a box, with the inside dimensions the same as your mattress. Build the sides out of plywood, and secure the corners by screwing into a 2x2 post. Alternately, put the 2x2 post on the outside, and attach to it with pocket screws through the plywood.
You support the mattress by screwing a 2x4 cleat down each side, 1 inch below the top, and then screwing or nailing 1x4 cleats across the width of the bed. If the bed is a queen or larger, you should also have a center support rail. That should be supported by a 2x4 screwed to the head and foot of the bed, just under the side support rails.
If you're really ambitious, you can make this bed so that it can be easily disassembled with bolts and wing nuts (hint: don't nail the support slats down). I built one similar for my daughter last summer, when my mother-in-law moved in and we needed an additional bed.
Alison L (not verified)
Fri, 05/27/2011 - 10:17
The bed plan
Here is a link to Ana's bed plan:
http://ana-white.com/2010/06/furniture-plans-much-more-than-a-chunky-le…
luis cano
Wed, 07/27/2011 - 18:18
LOVE!
I just love this bed style and can't wait till i can make my own.
Guest (not verified)
Mon, 08/08/2011 - 10:26
Drawers?
Is there a way to build storage drawers underneath?
Allison Adams (not verified)
Mon, 08/15/2011 - 06:05
Has anyone figured out how to
Has anyone figured out how to make the rest of this bed? I am waiting to start this bed and i dont want to do it and mess it up!
In reply to Has anyone figured out how to by Allison Adams (not verified)
claydowling
Mon, 08/15/2011 - 06:20
Please see above
Three or four posts up is a link to the bed plan itself. The bed frame is really just a box with some support structure for the mattress. With a little bit of thinking about the structure you could come up with a plan of your own without any trouble. That's especially useful if you decide you want something different than the plan linked above.
KrissyMarie
Mon, 01/26/2015 - 11:08
Issues separating
Has anyone else experienced issues with the plywood separating from the frame? Even with glue and nails mine is separating. Any ideas how to fix it?
mangood
Sun, 12/04/2016 - 02:26
Hi Ana - Thank you!
Could you be kind and write the measurments for a king bed?
I'm literally just begun my wood journey and it would help me a lot! (I DON'T want to make my first mistake ...
Thank you very much, I really appreciate that.
In reply to Hi Ana - Thank you! by mangood
Ana White
Mon, 12/05/2016 - 15:00
Check out step 7 "SIZE
Check out step 7 "SIZE MODIFICATIONS
It=E2=80=99 easy to convert this headboard to a king or full or even twin. =
Measure
your mattress overall width and for numbers larger than 60=E2=80=B3, subtra=
ct 60=E2=80=B3.
Add this number to the cut length of all of the pink boards shown above.
Also cut your plywood accordingly. For overall measurements under 60=E2=80=
=B3
(fulls and twins) subtract the measurement from 60=E2=80=B3. Now take this =
number
and subtract it from the cut length of all boards shown above in pink. Cut
your plywood accordingly." Hope this helps! Jen