
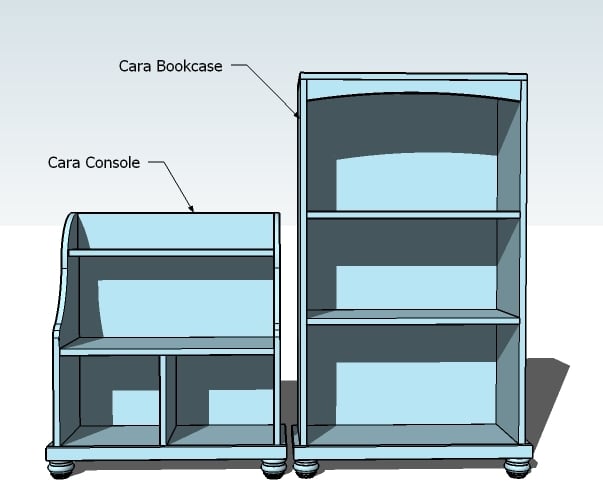

A bookcase that completes the Cara console and bookcase pair.
The little console was just sooooo cute yesterday, I had to add the matching bookcase.
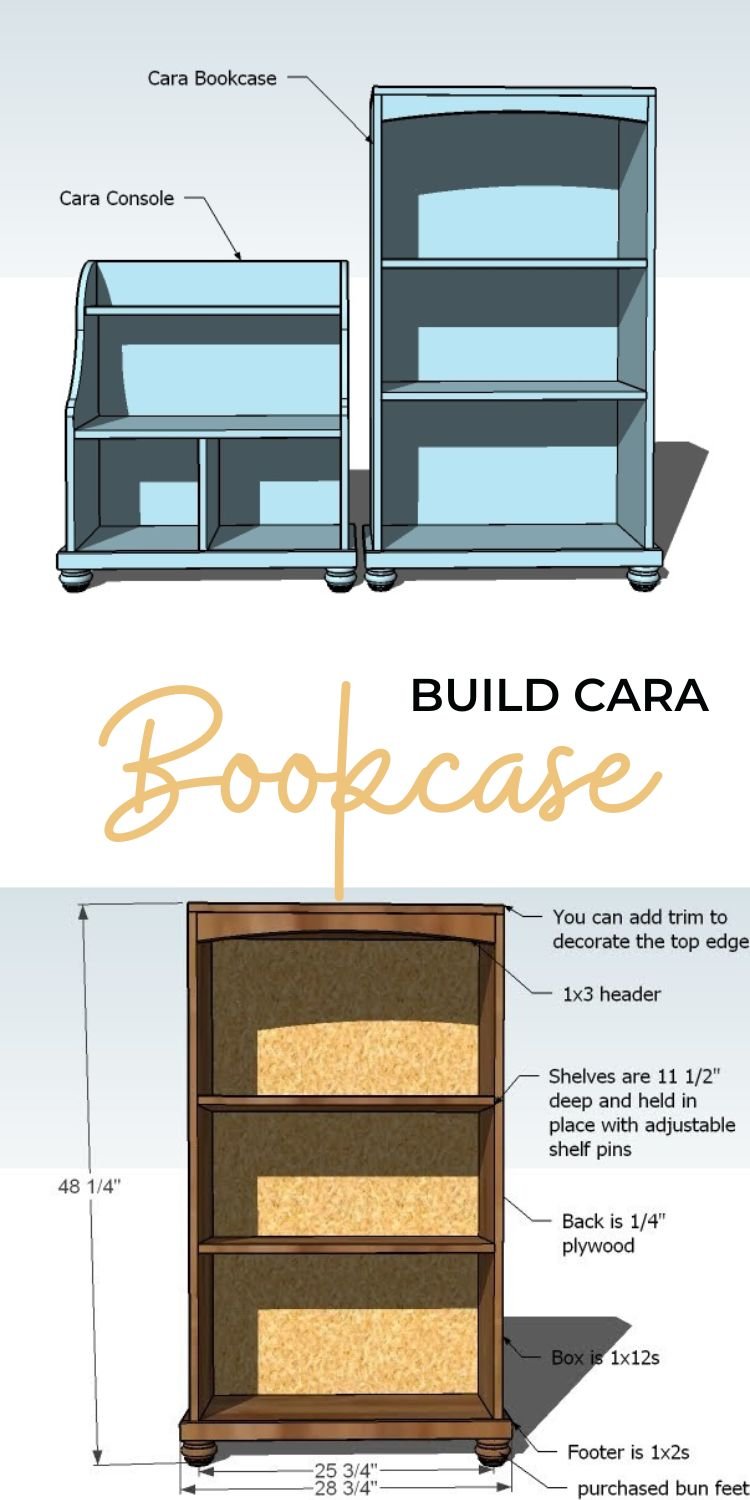
Pin For Later!
Preparation
1 – 8′ 1×12 Boards 1 – 10′ 1×12 Board 1/4″ Plywood 1 – 1×2 1 – 1×3
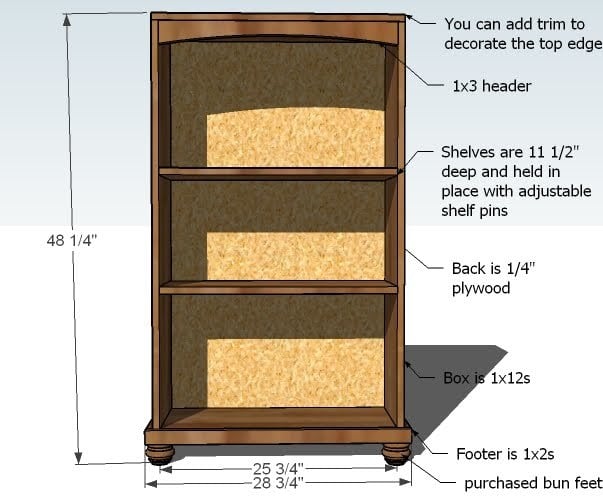
2 – 1×12 @ 45 1/2″ (Sides) 1 – 1×12 @ 27 1/4″ (Top) 3 – 1×12 @ 25 3/4″ (Shelves) 1 – 1×3 @ 25 3/4″ (Header) 1 – 1/4″ Plywood @ 46 1/4″ x 27 1/4″ (Back) 2 – 1×2 @ 11 1/2″ (Side Footer) 1 – 1×2 @ 28 3/4″ (Front Footer)


Instructions
Step 1

BUILD THE BOX
Screw the box together as shown here. Make sure there is a 3/4″ gap under the bottom shelf. Use 2″ screws and glue. Check for square.
Step 2

SHELVES
You can either drill holes as specified by your shelf pins to create removeable shelves, or you can fasten the shelves in place with 2″ screws and glue.
Step 3

BACK
Attach the back to the bookshelf as shown here. If your shelves are screwed in, also fasten to the shelves.
Use glue and check for square.
Step 4

SIDE FOOTER
Attach the side footer to the bottoms of the bookcase as shown here. Use 1 1/4″ nails and glue.
Step 5

Step 6

BUN FEET
Attach the bun feet as directed by the manufacturer.

Comments
The Trees (not verified)
Thu, 07/01/2010 - 20:47
Love this set. Perfect for
Love this set. Perfect for our girls' room. Thanks for your amazing plans!
The Homesteadi… (not verified)
Thu, 07/01/2010 - 22:12
Recently became a new
Recently became a new follower and so glad I found your lovely blog (: I look forward to coming back for future posts!
These look wonderful and really are simple. Great suggestion!
Michele
XOXO
Laura (not verified)
Fri, 07/02/2010 - 02:28
Love both these pieces! Now
Love both these pieces! Now I just have to decide which of your amazing bookcases to build for my kid's rooms.
*MICHELLE CAUDLE* (not verified)
Fri, 07/02/2010 - 15:12
I love these more girly
I love these more girly bookcases! Perfect!! I can't wait to build one after a few other projects!!!