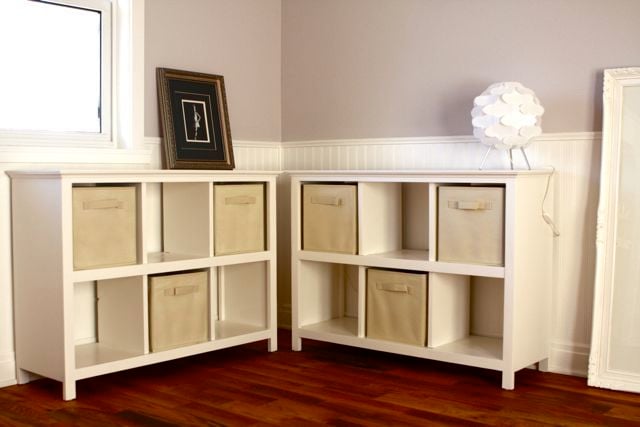


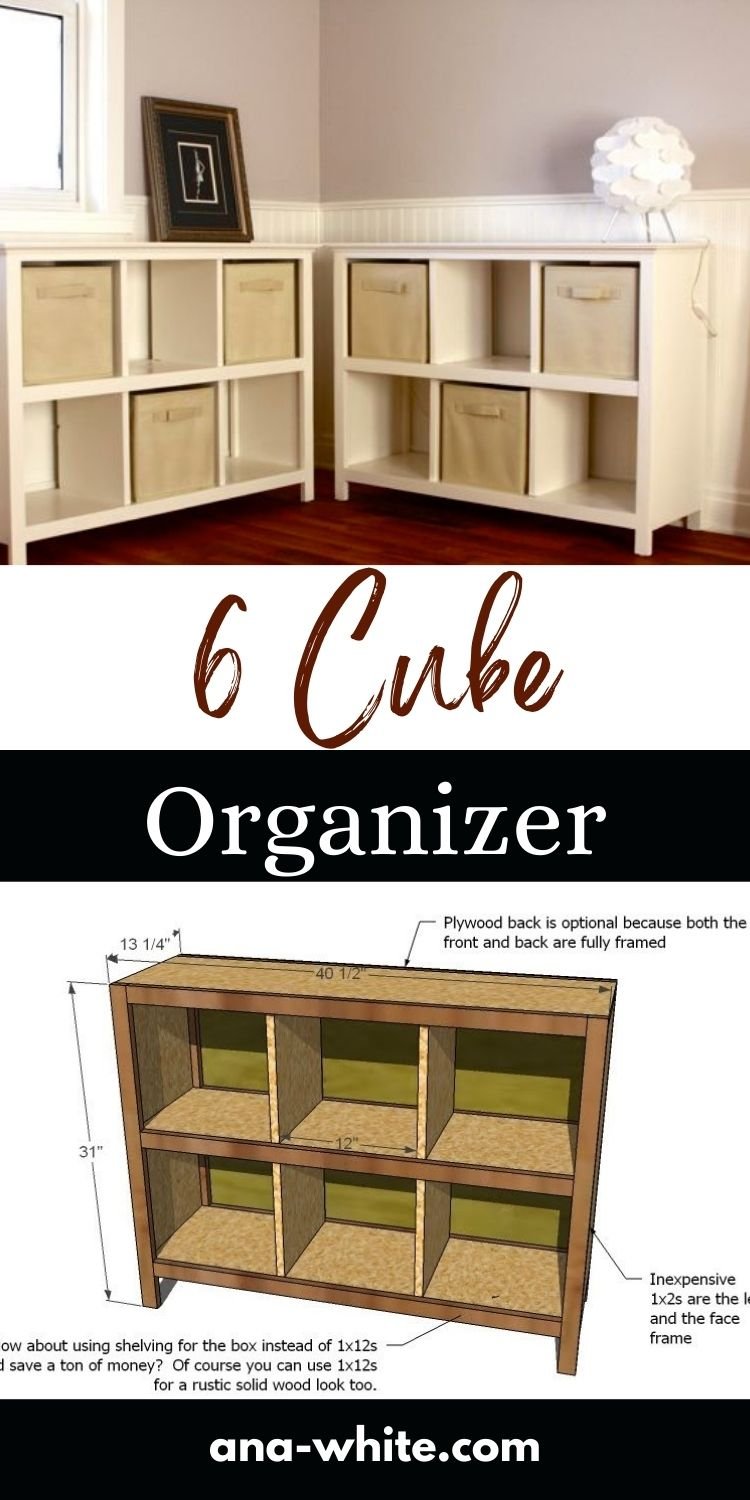
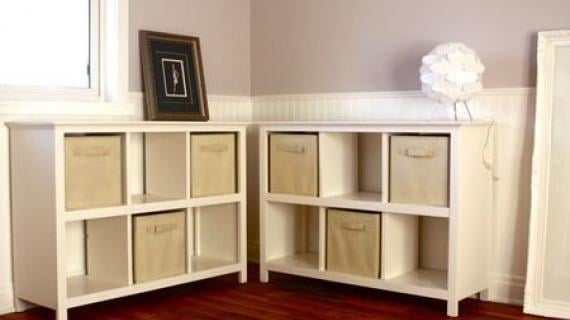
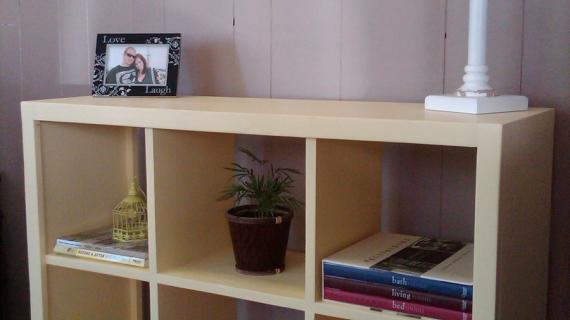
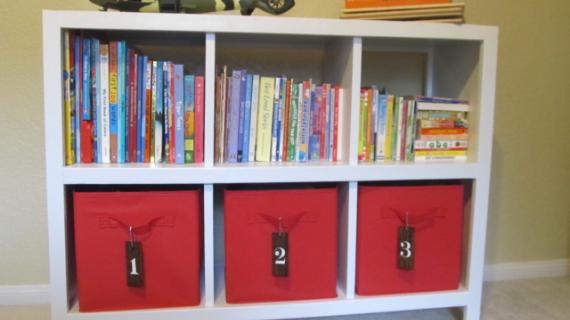
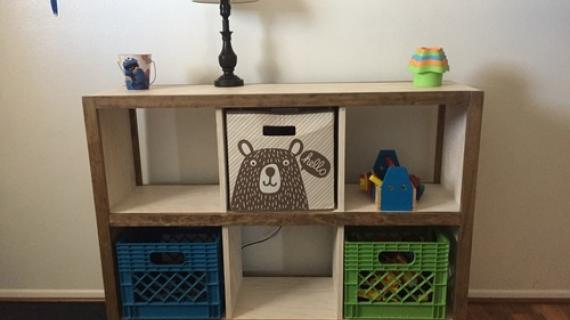
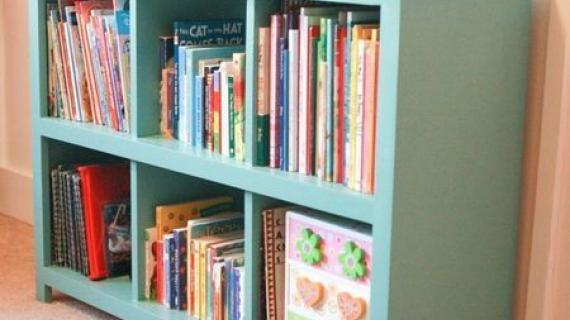
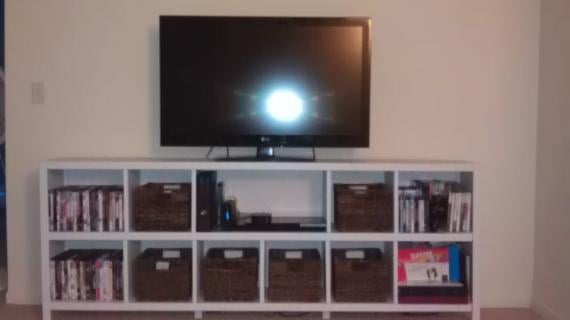
Build your own 6 cube organizer bookcase designed to fit standard fabric cubes! The cubby design helps with organization and keeping items separated. We love the legs - so it's more like a real piece of furniture. Solid wood construction is easy to paint or stain. Free step by step plans from Ana-White.com
Pin For Later!
Preparation
- 1 1x12, 12’ Long
- 1 1x12, 8’ Long
- 5 1x2s, 8’ Length
- 2” self tapping wood screws or 1-1/4" pocket hole screws
- 1 1/4” and 3/4" brad nails
- Small Tube Wood Glue
- Medium Grit Sandpaper
- Finishing Supplies including wood filler, paint or stain of choice
Shopping List is for One 6 Cube Organizer Bookshelf
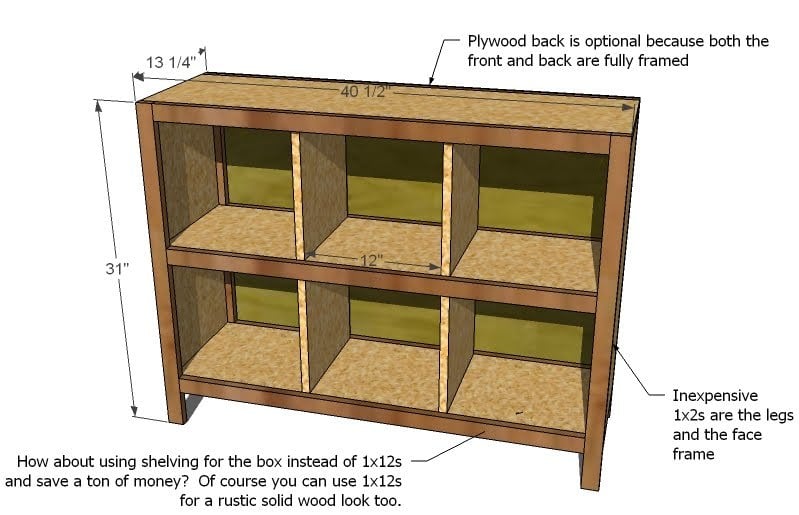
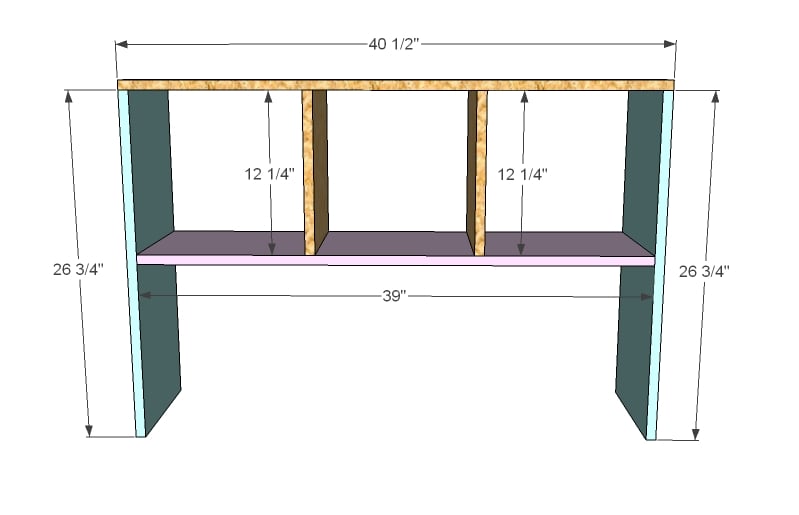
- 1- 1x12 @ 40 1/2” Top
- 2- 1x12 @ 26 3/4 “ Sides
- 2- 1x12 @ 39” Shelves
- 4- 1x12 @ 12 1/4” Cubby Dividers
- 4- 1x2 @ 31” Legs
- 6- 1x2 @ about 37 1/2” Side Shelf trim - you should measure and cut these pieces to fit


Instructions
Step 1
Mark out all of your joints as shown in the diagram on the cut pieces. Predrill and countersink all screws, using 2” screws and glue. Adjust for square.
NOTE: You can also use 1-1/4" pocket hole screws and a Kreg Jig for construction.
Step 2
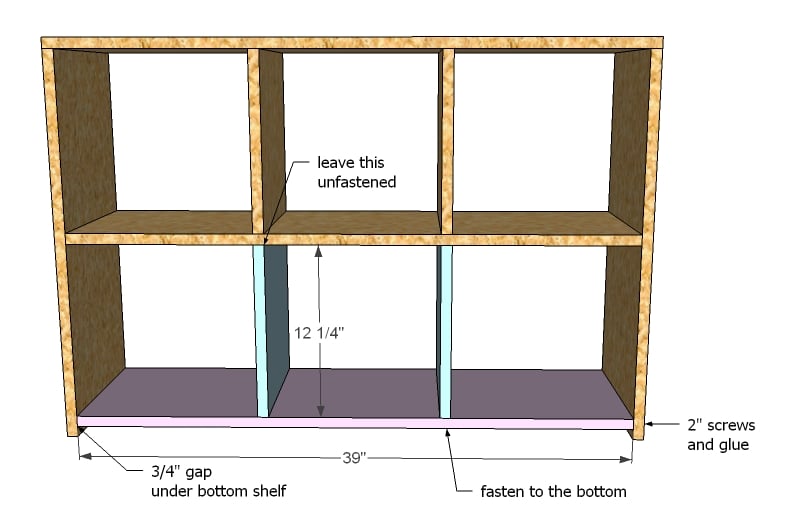
Attach the bottom shelf divider pieces to the bottom shelf with 2" screws.
Then attach bottom shelf to sides (with glue where the vertical cubby dividers line up).
A 1x2 will be added to further strengthen this joint.
Step 3
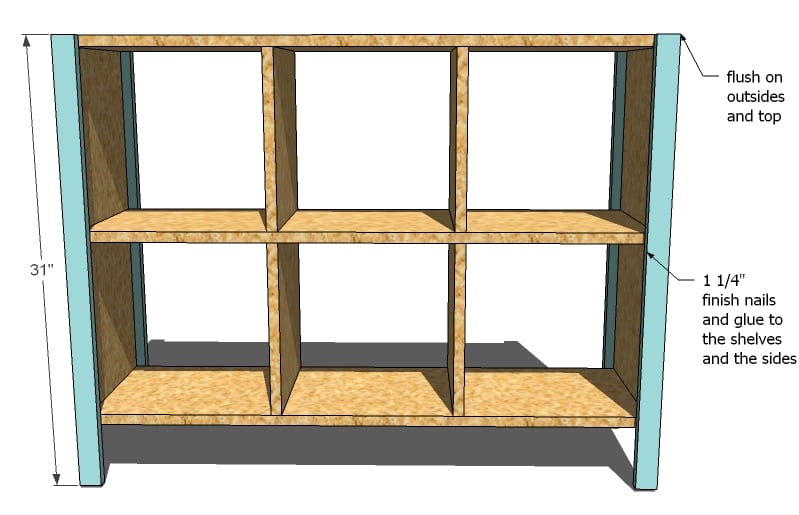
Attach legs to the sides, flush on all sides, with 1-1/4" brad nails and wood glue.
Step 4
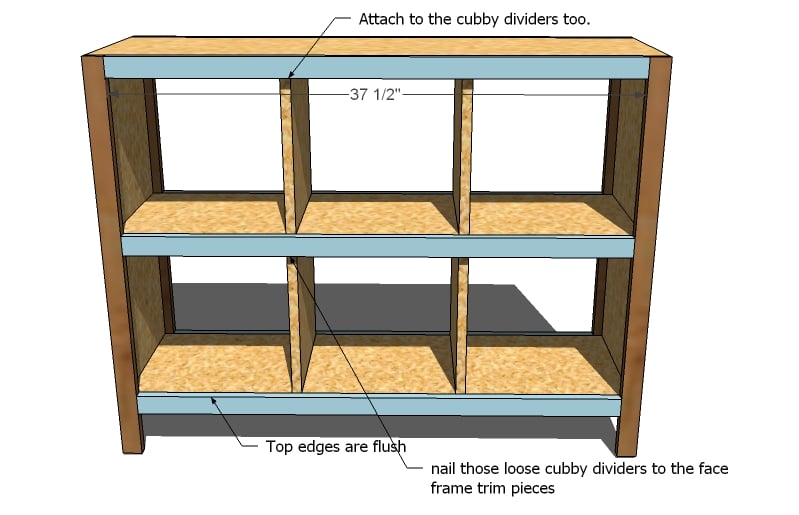
Measure and cut the horizontal trim to fit on the front and backs of the bookshelf. Repeat for back.
Step 5
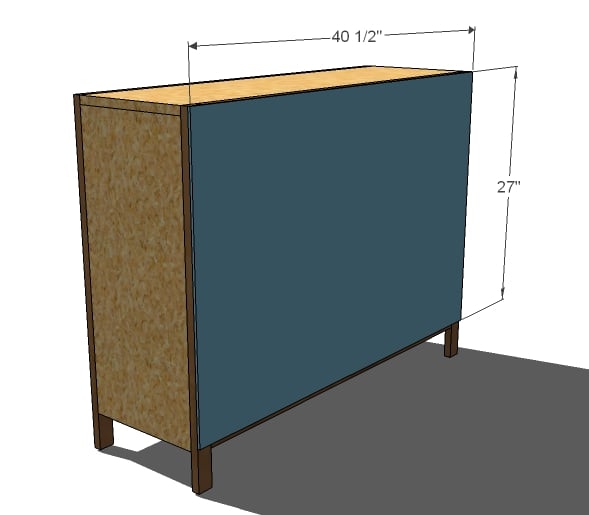
Attach back with 3/4" brad nails and glue.


Comments
Little Lizard King (not verified)
Tue, 07/20/2010 - 01:16
Hi Ana,I just wanted to share
Hi Ana,I just wanted to share our first knock off wood project!
http://littlelizardking.blogspot.com/2010/07/pottery-barn-wanna-be-part…
We still have to hang the hooks and either fix the drawers or add baskets, but we love them!!! You are pretty amazing! Thanks a million.
GreenerLinen (not verified)
Tue, 07/20/2010 - 03:29
Awesome book cases. I love
Awesome book cases. I love the plans with little legs on them :)
For any seamstresses who wants to DIY a cloth bin in the fabric of their choosing. This is a fantastic tutorial.
http://jezzeblog.blogspot.com/2010/03/no-interfacing-storage-basket-tut…
Keri-Anne (not verified)
Tue, 07/20/2010 - 08:21
@greenerlinen thanks!!! i had
@greenerlinen thanks!!! i had been looking for a tutorial like that!!!
mary elizabeth (not verified)
Sun, 10/10/2010 - 06:05
Hi Ana! I love the new site
Hi Ana! I love the new site and love your plans. We are just finishing building our house and I can't wait to have all the tools set up in the garage so I can start building some of these great things myself! Just a quick thought, I don't know anything about blogging but have seen on some other blogs verification thingy at the bottom where you enter in a word shown to keep advertisers and non-real people from posting. I think Casa Modern et al are pretty terrible for trying to get free advertising on your site. Boo. If they think Ana White fans would like their stuff and you are cool with them as a sponsor they should pay you for the ad space. Anyways, just wondering.
Jessica (not verified)
Wed, 11/10/2010 - 13:25
This may be a stupid question
This may be a stupid question but this is my first project so have a little mercy!! haha but I'm going to build this for my cousin who just had a baby. What kind of wood do I use....see told you it was a stupid question!
Thanks!
Ana White (not verified)
Thu, 11/11/2010 - 07:16
Jessica I used pine or
Jessica I used pine or whitewood boards. Cheap and paints well! And easy to work with for a first project. Make sure you ask for furring strips for 1x2s, 1x3s, 1x4s and 2x2s - but check the quality. Where I live, the furring strips are the same as the premium boards, but this is not always the case. Good luck! Ana
Bonnie (not verified)
Thu, 12/30/2010 - 22:05
I'm in love! I can't wait to
I'm in love! I can't wait to start my first project. I was curious you might go about adding the 'lip' like the reader's pictures? I think it is beautiful and I would love to replicate it.
Kristen (not verified)
Mon, 01/24/2011 - 06:37
I am unable to save this
I am unable to save this project as a PDF for some reason. Not a huge deal, but I thought you might like to know. Have a great day!
Kristen (not verified)
Mon, 01/24/2011 - 06:46
Well, it appears that I
Well, it appears that I completely overlooked the embedded file that was further down the page. My apologies.
Allison Ripoll (not verified)
Fri, 03/11/2011 - 19:30
Substitute for 1x12's
Hi Ana,
I have a dilemma! I live in Venezuela and nothing is the same here!!! I can't buy wood filler or 1x2's, 1x3's or anything else!!! I have learned to substitute a lot of things. I made the $4 stackable chairs and Clara's table and had to improvise on a lot of things! I finally found countersink bits for the drill, but at $20 a piece, I have had to learn to join my boards in a different way!!! But my most current problem is not being able to purchase 1x12's. I can buy 1x7's and then I have to cut them to the width that I need. I am new to building, but I LOVE it!!! So please forgive my dumb question, but what can I substitute for 1x12's??? I can get mdf board and compressed pine board in large sheets. Could I just use one of these or would they maybe not be as strong??? Is there something else I could use since a lot of plans call for these.
MacDaddy (not verified)
Sun, 08/26/2012 - 17:19
You can substitute plywood of
You can substitute plywood of just about any type just fine - you'll just need to cut it to your dimensions. (Many lumber or hardware stores will offer cutting services for you, so be sure to ask)
LindseyA (not verified)
Sun, 04/17/2011 - 18:47
Doors?
Do you have any suggestions for adding doors? I would love to do this project with doors on either end for some hidden storage. Thanks for your time!
Hallmark Interiors (not verified)
Mon, 04/25/2011 - 05:20
Nice Post
The designs in the images are quite nice, it seems that the designer has taken more efforts.
jamigraham
Tue, 05/31/2011 - 21:28
I may be a moron!
Okay, we made the cubes bookcases this weekend and OMG, I clearly am lame! How do you successfully get your cubbies square?! We used a speed square but it's embarrassing! I almost (really) don't want to post pictures!
papabear
Sat, 09/27/2014 - 01:35
get your cubies quare
If your cubies are fixed and you can screw your 2 sides to the top square. The easy way for me is to cut a piece of scrape the height of the shelfand use that as a spacer. Then using pocket hole screws attach shelves in to sides.Then move spacer down to align the next shelf .and repeat unil all shelves are done . I hope this help .
remember : There is no soch thing as a stupid question!!
claydowling
Wed, 06/01/2011 - 07:46
Getting things square
When you first start out, that's a major challenge. I have some horrendous practice joints to prove it. Eventually you will develop a very practical understanding of geometry and a greatly reduced dependency on numbers.
To make sure my shelf dividers were vertical, here's what I would do:
1. Arrange my top and bottom pieces so that their back edges touched, and the faces that would touch the vertical dividers were both up. Assuming that the pieces were the same size, I would make sure the ends were aligned.
2. On -one- of the front edges, mark off where the vertical dividers will go. Establish that this will be either the right or left edge of the divider.
3. Using a framing square (the really big metal ones), extend those lines back across both faces. If the shelves are deeper than the framing square can handle, mark as much as I can and then extend it with a good metal straight edge. There's no skimping on the straight edge though, it needs to be at least as long as the two faces combined.
4. During assembly, use these reference lines to line up the edges of the dividers and secure them. And always remember to keep the same side of the divider, on both top and bottom, on the same side of the reference line.
Because I'm not very trusting of my ability to line things up against a line and keep it there while fastening, I'd probably cut a dado, or shallow groove, to hold the vertical dividers. That's a mildly advanced topic though.
payne.kj
Wed, 03/07/2012 - 04:58
1x12 alternative
The diagram mentions using shelving instead of 1x12s to save money. How would you do this? What type of shelving?
claydowling
Wed, 03/07/2012 - 05:44
Using shelving
You can find pre-finished shelves at most home improvement stores. Menards has huge piles of them in varying lengths and widths.
You'd use them just like a 1x12, cutting them to the appropriate length and attaching them with pocket screws just like you would a 1x12. The material is typically particle board, usually with melamine veneer on the faces.
Jarachristensen1018 (not verified)
Sat, 07/28/2012 - 17:29
Hello! I love this tutorial!!
Hello! I love this tutorial!! My hubby and I need to built a COUPLE of these things for a project we are making and we are trying to figure out how much money we need. How much did it cost you (estimated guess) per unit?
Jarachristensen1018 (not verified)
Sat, 07/28/2012 - 17:30
Hello! I love this tutorial!!
Hello! I love this tutorial!! My hubby and I need to built a COUPLE of these things for a project we are making and we are trying to figure out how much money we need. How much did it cost you (estimated guess) per unit?
cje023 (not verified)
Mon, 11/19/2012 - 21:33
Great Project!
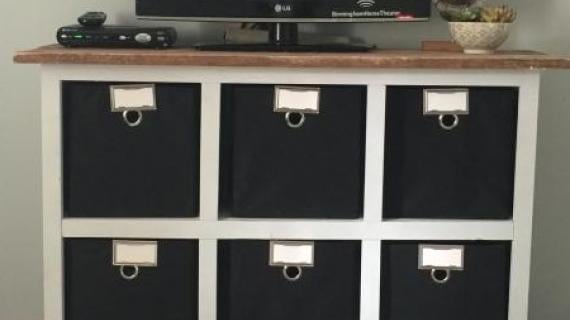
Hi! My boyfriend and I decided to take on this project for our first DIY build together :) We modified the plans a little as we added another row of cubes on top and put trim around the top edge. We painted it black and it inspired us to paint the rest of our living room furniture (coffee table, end table and tv stand) black as well. It looks very modern and classic... i Love it!!
The hardest part we found was actually getting the wood cut to size as we have limited space and no power tools of our own. It turned out great and we can't wait to get started on our next project! :)
Check out my page for pictures!
http://www.chocolatencharm.blogspot.ca/search/label/Decor'NDesign
Anthony F (not verified)
Sun, 11/25/2012 - 06:38
Suggest one thing
I love the plan. I do suggest using wood dowels for the bottom where you couldn't "nail" directly into the wood. I might even use wood dowels for the "bottom" portion of each divider and nail in the top portion of each. Other than that, love the plan. I will be using this with a tweaking to make laundry basket holder in our utility room. Thanks!
maribelle123
Mon, 04/08/2013 - 07:11
6 cube storeage
Can't wait to make these--thanks for sharing! The problem the pdf for the plans are not working...Adobe says file is corrupted? Instead of text, it is just symbols. The drawings come through for some reason.
3154802952_1279598460.pdf
thanks!
ilanaj
Sun, 02/14/2016 - 19:34
Building my first project now
Building my first project now... how do I know whether to use screws vs nails and how many do I use on each joint to build the "box" (ie. step 1)? thanks
cpinckney04
Thu, 07/14/2016 - 12:33
bowing shelf - help?
Hi,
I've been making a shelf like this during my free time, and admittedly it's been made over different sessions rather than all at once. When I completed construction and put the trim across the front two shelves they had both bowed and were no longer straight. This is causing a problem in that the trim is straight and no longer lines up across the entirety of the shelf board.
Any recommendations of how I can fix this, or more realistically, avoid this in future projects?
Thanks!