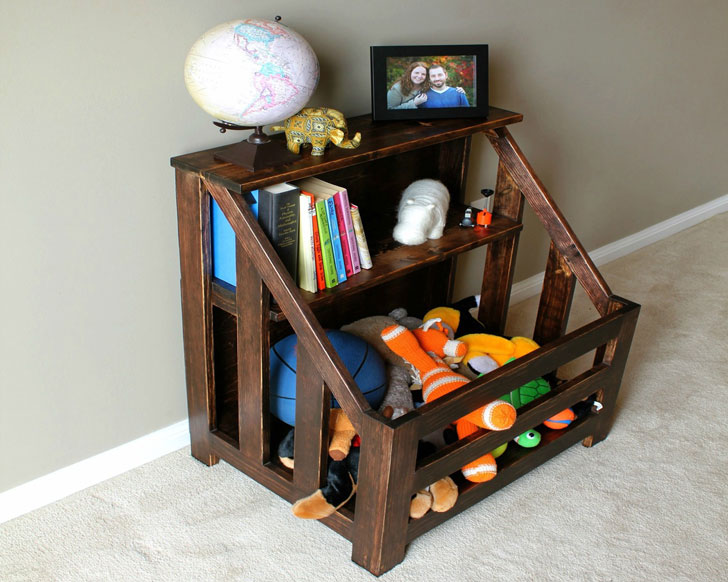


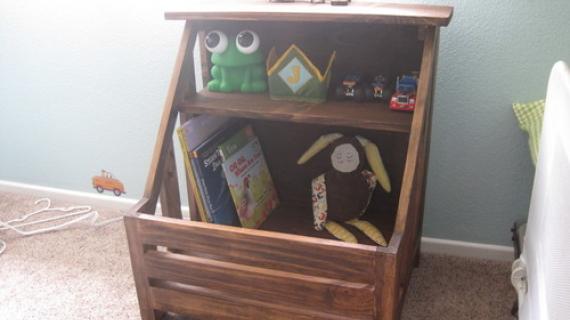
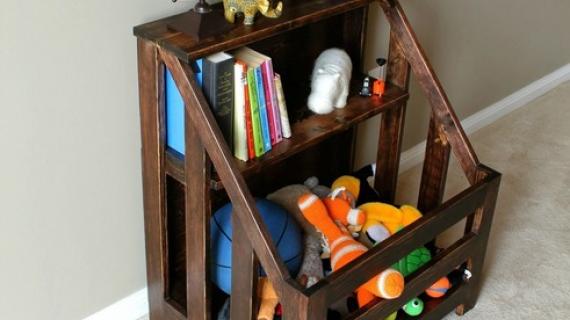
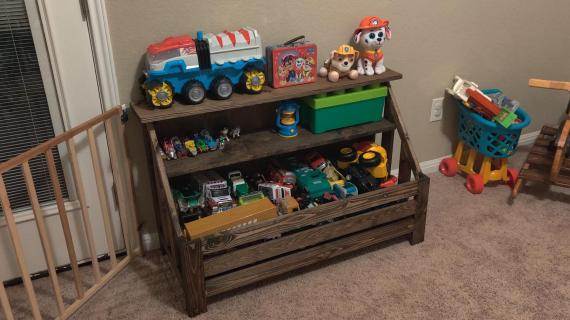
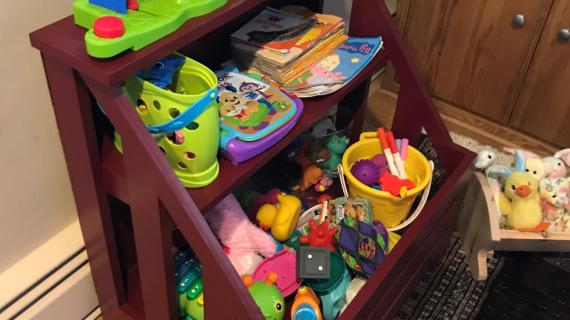
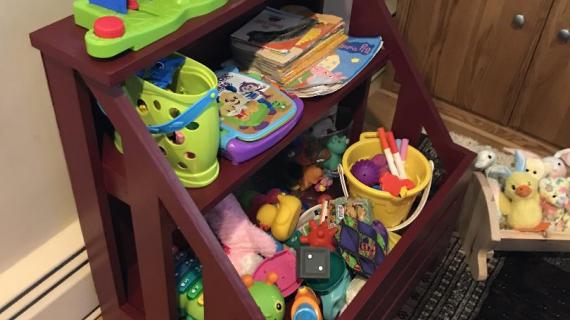
An economical side table or nightstand for a child's room that features a open bin base and two top shelves. Perfect for holding stuffed animals or ball or other toys in the bin, shelves great for books, clocks, art and other toys. Step by step woodworking plans include shopping and cut list, detailed easy to follow diagrams.
Reader submitted photo by BDEL
Preparation
- 2 – 1×2 Boards, 8′ Long
- 3 – 1×3 Boards, 8′ Long
- 1×10, 24″ long
- 1×8, 26″ long
- 3/4″ Plywood 23″ x 17 1/2″
- 1/4″ Plywood 21 1/2″ x 24 1/2″
- 1 1/4″ Pocket Hole Screws
- 1 1/4″ Nails
- 2″ Screws
- 2 – 1×2 @ 21″ (Handrails, cut ends at angles as shown in step 1)
- 2 – 1×3 @ 17 /4″ (Longer Rails, see step 2)
- 2 – 1×3 @ 11″ (Shorter Rails, see step 2)
- 2 – 1×3 @ 26 1/4″ (Back Legs)
- 2 – 1×3 @ 13 1/2″ (Bottom Trim, Sides)
- 2 – 1×2 @ 12 1/2″ (Side Legs)
- 2 – 1×2 @ 4 1/2″ (Top Shelf Supports)
- 2 – 1×2 @ 7 7/8″ (Middle Shelf Supports)
- 2 – 1×2 @ 17 1/2″ (Bottom Shelf Supports)
- 2 – 1×3 @ 12 1/2″ (Front Legs)
- 3 – 1×3 @ 19 1/2″ (Front Rails)
- 1 – 3/4″ Plywood @ 17 1/2″ x 23″ (Bottom Shelf)
- 1 – 1×10 @ 23″ (Middle Shelf)
- 1 – 1×8 @ 25 1/2″ (Top Shelf)
- 1 – 1/4″ Plywood @ 21 1/2″ x 24 1/2″ (Back)


Instructions
Step 1
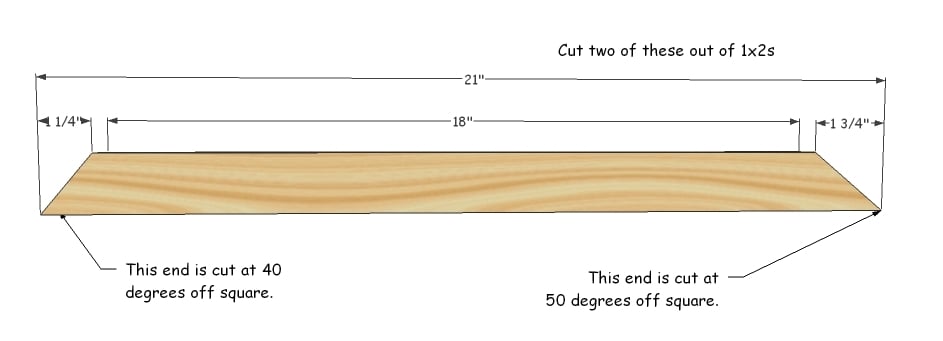
Cut the “Handrails”
For lack of a better term, cut the handrails from 1x2s. If you are lucky enough to have a miter saw that will cut a 50 degree angle, I’m envious. For the rest of us, it’s a protractor and a jigsaw . Cut two of these.
Step 2
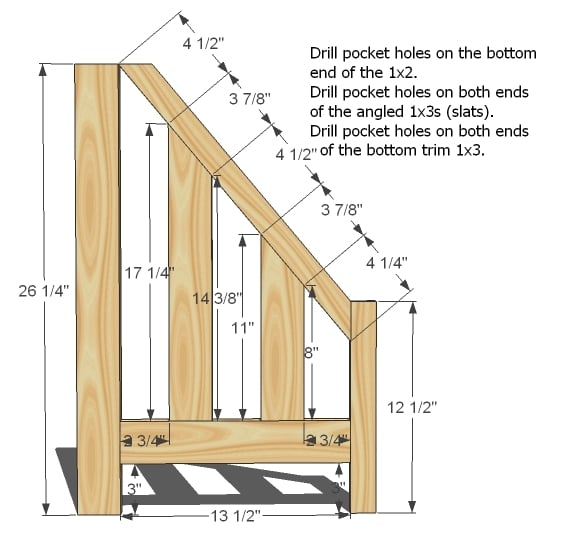
Build the Sides
This is the tricky part. First, cut your slats from 1x3s with the top angle. Cut two of these. Then drill pocket holes as noted in the diagram above. Be careful to drill pocket holes on the insides if you are staining – it does matter on the angled boards which side you drill the holes. Lay out the side and clamp and glue, then screw together with 1 1/4″ pocket hole screws.
Step 3
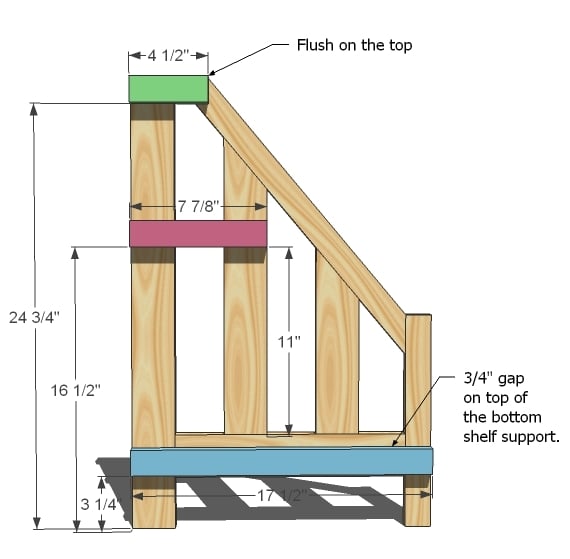
Shelf Supports
Use 1 1/4″ screws or nails and glue to attach the shelf supports to the insides of the sides.
Step 4

Build the Front
Drill pocket holes (two per end) on all front rails (the 1×3 @ 19 1/2″). Then mark the front legs, leaving 1″ gap between the rails. Screw the rails to the front legs.
Step 5

Step 6

Bottom Shelf
Attach the bottom shelf to the shelf supports. A screw through the front wouldn’t hurt too.
Step 7

Middle Shelf
Attach the middle shelf as you did the bottom shelf.
Step 8

Top Shelf
Attach the top shelf as you did the other shelves.
Step 9

Back
Tack the back on with 1 1/4″ finish nails and glue.

Comments
Tsu Dho Nimh (not verified)
Sat, 09/25/2010 - 05:37
Learning the tool and setting
Learning the tool and setting up what you need is well worth taking the time. Do you have "primitives" ... the stock bits like 1x- whatevers the right height for a table leg, your plywood slabs, etc made ahead so you can grab and copy it?
This would be a great nightstand for people with cats or small dogs. Put the pet bed in the bottom. For small doge, leave out one of the short side boards to have easier entrance.
tiat (not verified)
Sat, 09/25/2010 - 06:51
Ana- YOU JUST MADE MY DAY!!
Ana- YOU JUST MADE MY DAY!! I have the wood that I thought I'd need for this project sitting in my garage right now but I was still trying to figure out how to do it! You've just made my life so much easier. Thank you for inspiring me to build. This will be my fourth project and my homemade pieces are quickly becoming my very favorite pieces of furniture.
As a child, my mom would sew me and my three sisters beautiful matching dresses. It was a way she showed her love for us. I recognized a long time ago that sewing was not my thing but I hope that my four children will feel that same love when I build for (and with) them. You're talents are blessing homes all over the world! Thank you so much!
edkeogh
Fri, 12/30/2016 - 16:36
Kendra Storage Unit
What angle was the longer and shorter side pieces cut at 40 degrees or something different I can't seem to get them to meet the handrail
CrabbyGrandpa
Fri, 08/23/2019 - 17:41
It's been a heck of a long…
It's been a heck of a long time since I was in a math class. What are the angles on the top of the two middle boards (17.25" & 11")?
CrabbyGrandpa
Fri, 09/13/2019 - 19:26
With the mitre saw at 40…
With the mitre saw at 40 degrees - cut one side on both handrails. Now change the mitre saw to 50 degrees to cut the opposite ends. This is also the angle on the middle slats.
brandon.oxton
Thu, 02/18/2021 - 20:15
Modified a little
Just finished today, made mine 3 feet wide. Love it!