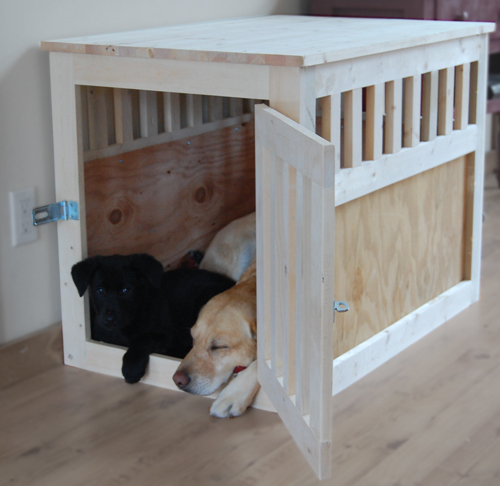


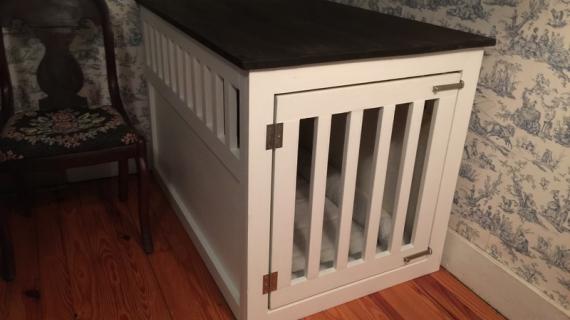
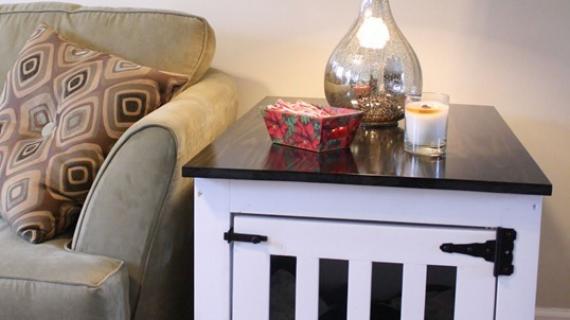
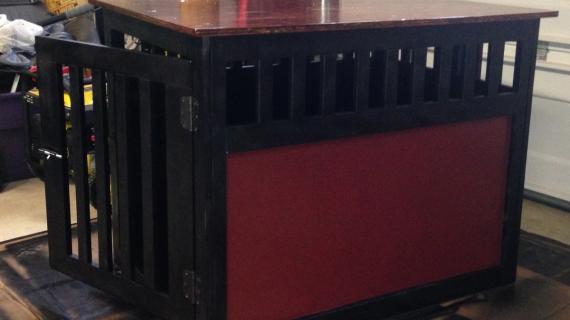
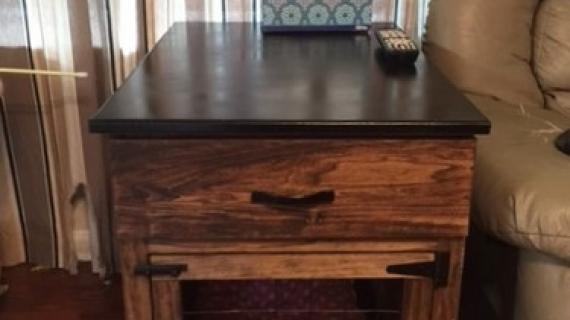
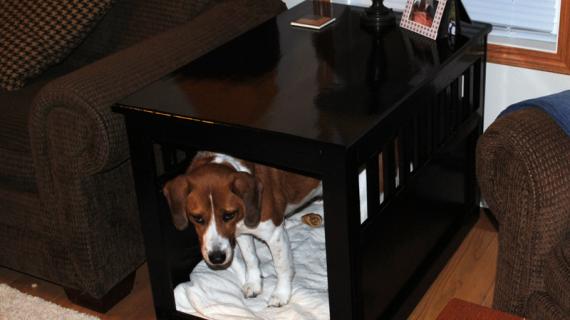
Build your own wood pet kennel with our free step by step woodworking plans.
Preparation
- 1 – 24″ x 36″ Pine Project Panel or 3/4″ plywood or MDF
- 5 – 1×3 Boards, 8′ Long
- 1 – sheet of 1/4″ plywood
- 4 – 1×2 Boards, 8′ Long
- 1 – set of hinges
- 1 – latch
- 1 1/4″ pocket hole screws
- wood glue
- 3/4" brad nails
- 21 – 1×2 @ 6″ (Rails)
- 6 – 1×3 @ 30 1/2″ (Side Boards)
- 4 – 1×2 @ 26 1/4″ (Side Legs)
- 4 – 1×3 @ 26 1/4″ (End Legs)
- 1 – 1/4″ Plywood @ 17 3/4″ x 33 1/2″
- 1 – 1/4″ Plywood @ 17 3/4″ x 21″
- 5 – 1×3 @ 18″ (Door Frame and Back Boards)
- 2 – 1×3 @ 17 1/2″ (Door Top and bottom)
- 2 – 1×2 @ 15 3/4″ (Door Sides)
- 3 – 1×2 @ 15 3/4″ (Door Rails)


For long term durability and more professional results, I recommend using a pocket hole joinery system for wood joints. Here is a video with tips for using a pocket hole jig:
Instructions
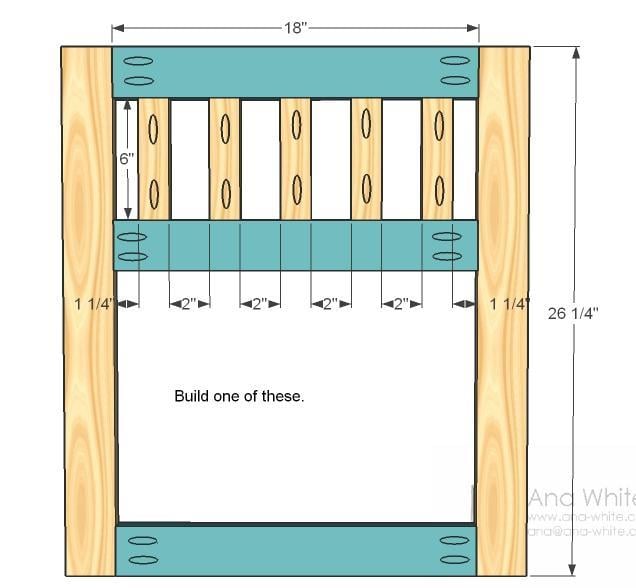
Step 1

Build Side Railings
Build the side railings as shown above. Use 1 1/4″ pocket hole screws and glue.
Step 2
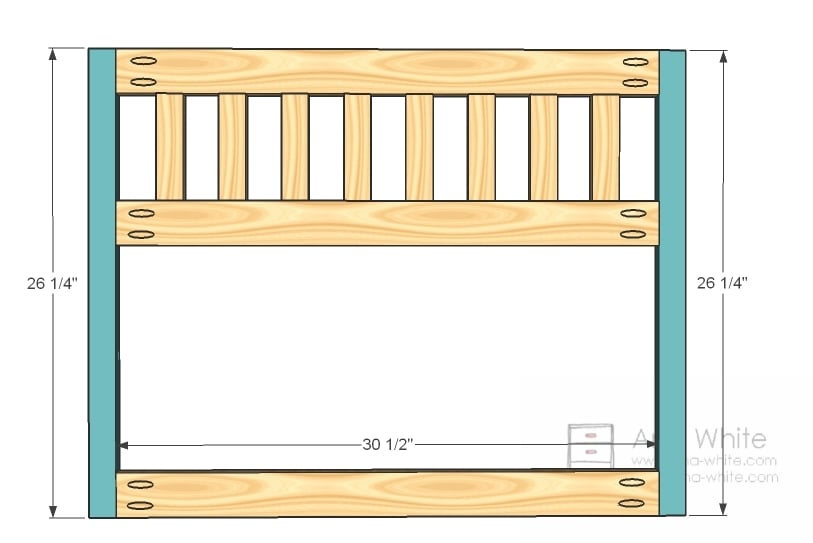
Sides
Finish building the sides as shown above. Use 1 1/4″ pocket hole screws and glue.
Step 3

Plywood Sides
Add the plywood to the sides as shown above. Use 3/4" brad nails and wood glue to attach.
Step 4
End
Build the end as shown above. Use 1 1/4″ pocket hole screws and glue.
Step 5

Attach with 3/4" brad nails and wood glue.
Step 6

Door
The door should be a piece of cake. Just mark and screw together with 1 1/4″ pocket hole screws and glue.
Step 7
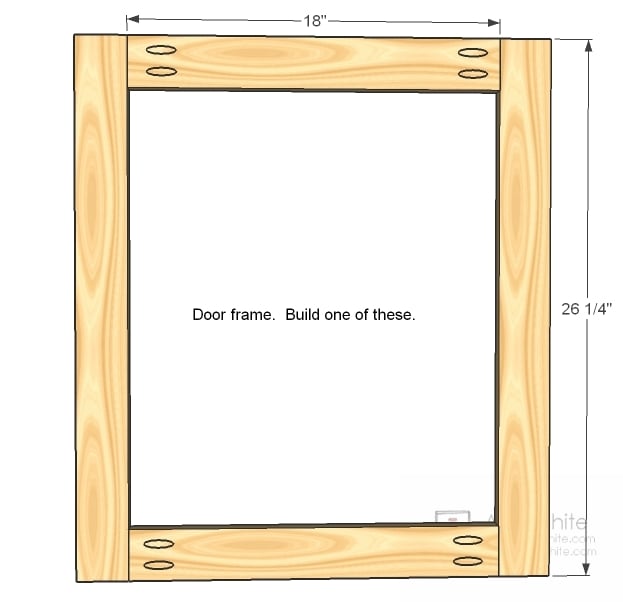
Door Frame
Build the door frame with 1 1/4″ pocket hole screws and glue.
Step 8
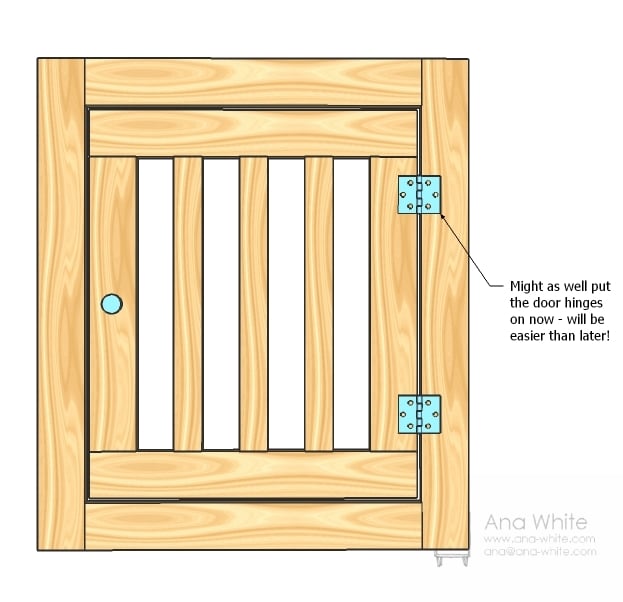
Door Hinges
Why not add the hinges while it’s easy? We did, and the hinges were much easier to install this way. I also installed the latch.
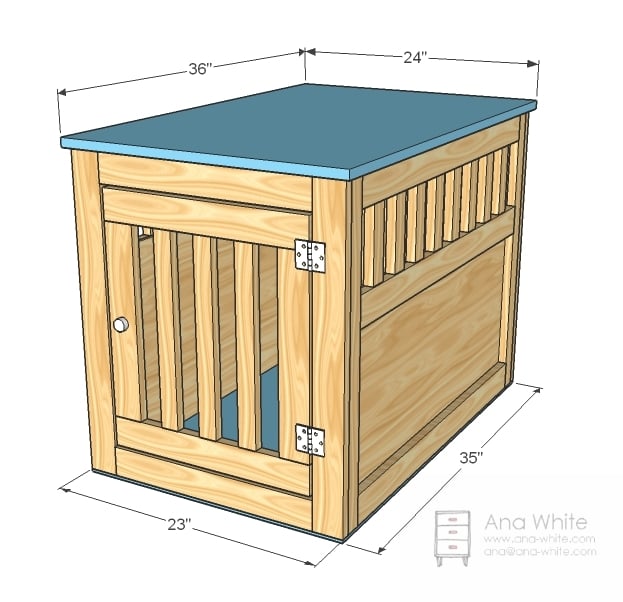
Step 9

Assembly
So you have really just built four walls. Now assemble the walls! I highly recommend finishing the walls separately first – then you can easily assemble and reassemble the crate as needed. Another idea – use corner brackets to screw the walls together from the inside. Then you can break the crate down to flat pieces for storage and travel. I filled all the pocket holes with wood filler three times and let dry. Then sanded with 120 grit sandpaper. Still need to paint
Step 10
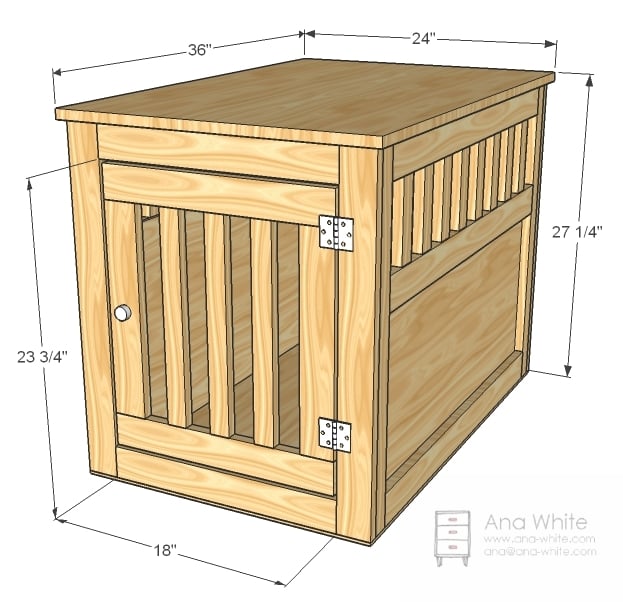
Top and Bottom
Screw the project panel to the top. We choose to leave the bottom off (our girls are house broken) but you could use some of the leftover 1/4″ plywood to make a bottom for the kennel. Simply line with plexiglass for a waterproof bottom.

Comments
t_tran88
Fri, 12/06/2013 - 03:12
HELP!!!
Hi Ana,
I love your creative ideas. This is my first time every building a project like this and it seemed very simple steps to follow but how do I attach the walls together? Is it attached through screws? And if so, how so do I attach the walls together. I'm stuck. =/
shellyward
Tue, 01/14/2014 - 10:47
Advice
Hello! My husband and I are actually going to build 4 of these for our furry babies. We will need to modify the plans for 2 that are larger than this and 2 that are smaller and I think that I have that figured out. however, the 2 smaller ones will double as a window bench seat and I am just trying to make sure they are sturdy enough to do that. anyone have an idea how i can determine how much weight they can handle on the top?
zackburnet
Thu, 02/27/2014 - 08:37
Nice pet house
Nice pet house , I have just exploring your site , can't find Bird house yet , do you have it ? Also chicken coop , still can't find yet , anyway thanks for sharing Ana ...
deathtolife
Thu, 06/05/2014 - 10:57
amount of wood
I already made one of these for my 50lb lab mix and I am planning on building another one for my St. Bernard. I need to change the dimensions though, I know what I need to change them to but I have not had to adjust plans myself before and am having a hard time figuring out the amount of wood I need, can someone help? The needed dimensions are 54 length by 35 width by 45 height
rkross
Thu, 10/16/2014 - 13:53
Wood filler
Hi, I am planning to make this soon and was curious about the wood filler. It is purely for aesthtics or does it serve another function?
Thanks!
joeyh
Thu, 11/06/2014 - 08:00
small dog
I really like this I was wondering if there are any plans for small dogs
Tshanky007
Tue, 01/13/2015 - 11:18
Smaller Kennel?
Hi,
I am wanting to pad this on the top to make it an ottoman. I have two mini wiener dogs so I'm looking to make this shorter, about half the height, and possibly wider. Any chance of getting adjusted plans? Thanks!
bradf31
Tue, 06/30/2015 - 17:45
LargerSize
Does anyone have this cut plans for a larger size crate?
MJS1966
Tue, 01/10/2017 - 11:52
Door Fabrication
I'm really sorry if I missed it, but is there a step where the door itself is fabricated? I mean I can figure out the measurments, but if it is already there and I'm missing it I'd love to have let someone else do the work. :)
chris1252
Sat, 11/23/2019 - 18:05
Take a look at step 6. I…
Take a look at step 6. I believe that is what you are looking for.
Adam_Taurus
Mon, 02/05/2018 - 16:41
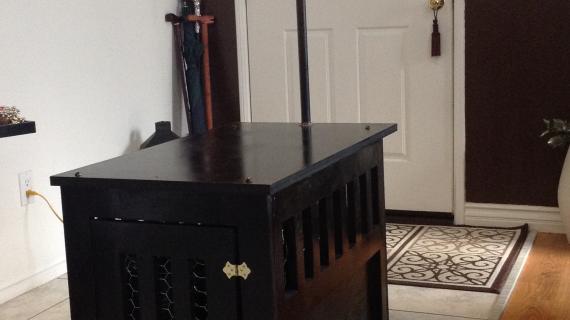
Colors
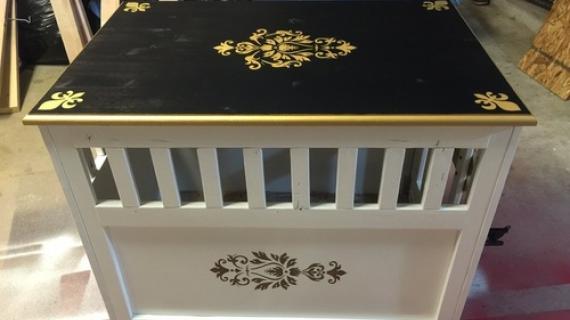
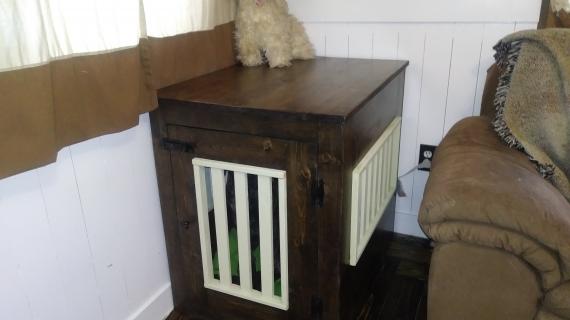
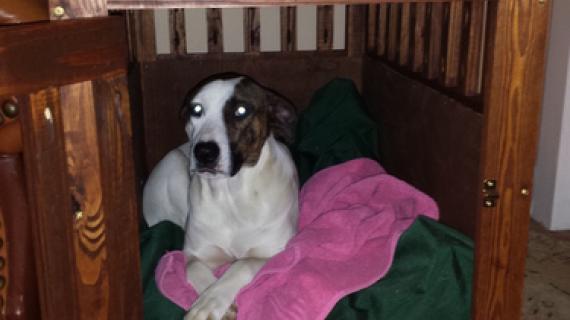
I made one and I stained it with Early American stain. It looks really good.
Rennwyll
Tue, 06/05/2018 - 08:43
Edits
Im a little late to the show here, but Step 6 has the wrong picture. I believe it should have a picture of the door layout but instead it has the "plywood for end" picture from the previous step duplicated. Also the cut list states "1 – 1/4″ Plywood @ 17 3/4″ x 33 1/2″ " but it should be "2 – 1/4″ Plywood @ 17 3/4″ x 33 1/2″ " as this is the plywood for the sides. Other than these two things, this is exactly what I was looking for.
SpikeVFR
Mon, 05/20/2019 - 09:03
possible mistakes, questions and suggestions
Just starting making this yesterday with my daughter. I think there are two mistakes with the cut list or am I wrong? We haven't started assembly yet, just cut all the boards yesterday. Took a little longer than I had planned since I had "help" ;-)
1) Where it says "2 – 1×2 @ 15 3/4″ (Door Sides)" shouldn't those be cut from 1x3's? All the pictures look like those are 1x3's
2) Then where it says "1 – 1/4″ Plywood @ 17 3/4″ x 33 1/2″" Shouldn't there be two of those not just one? One for each side? Or am I missing something?
And all the wood cost a lot more than I thought, part of it may be because I am in CA where everything is more expensive and part because I used Poplar instead of cheap pine. There was some nice pre-primed MDF, with rounded corners that I thought would look nicer than the squared off corners, but I was worried about the Kreg and how it would work with the MDF. Going thru the Kreg stuff yesterday for the first time, it specifically mentions MDF is fine. So if anyone out there would like to use MDF and was worried about it, like me, don't.
Weird the instructions don't cover how to attach all the panels, just a simple "Now assemble the walls!". What have people been doing? more pocket holes? simple screw it together? corner brackets on the inside?
Same for the top?
For the 7/8" wood screws, I couldn't find them at either Home Depot or Lowes, so had to go with "or smaller." In my case 5/8". Might be able to find them online.
For the hinges, what size have people been using?
For people without a truck to get the 4'x8' sheet of plywood home, you can still do this project. Don't let that stop you! Home Depot, and presumably Lowe's, sells 2'x3' sheets for projects. Much easier to carry and load in your car. Slightly more expensive that way, but not a HUGE difference. And if you are doing the project with kids, the smaller piece is much easier for them to maneuver around.