
Difficulty
Starter Projects
| 
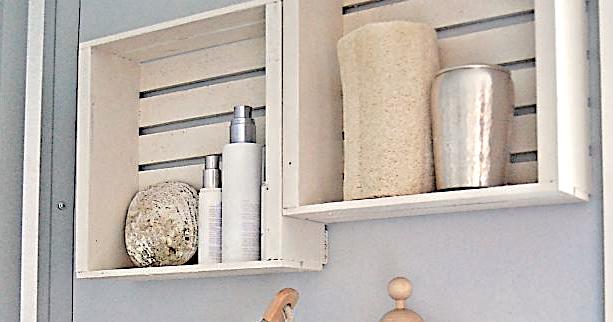
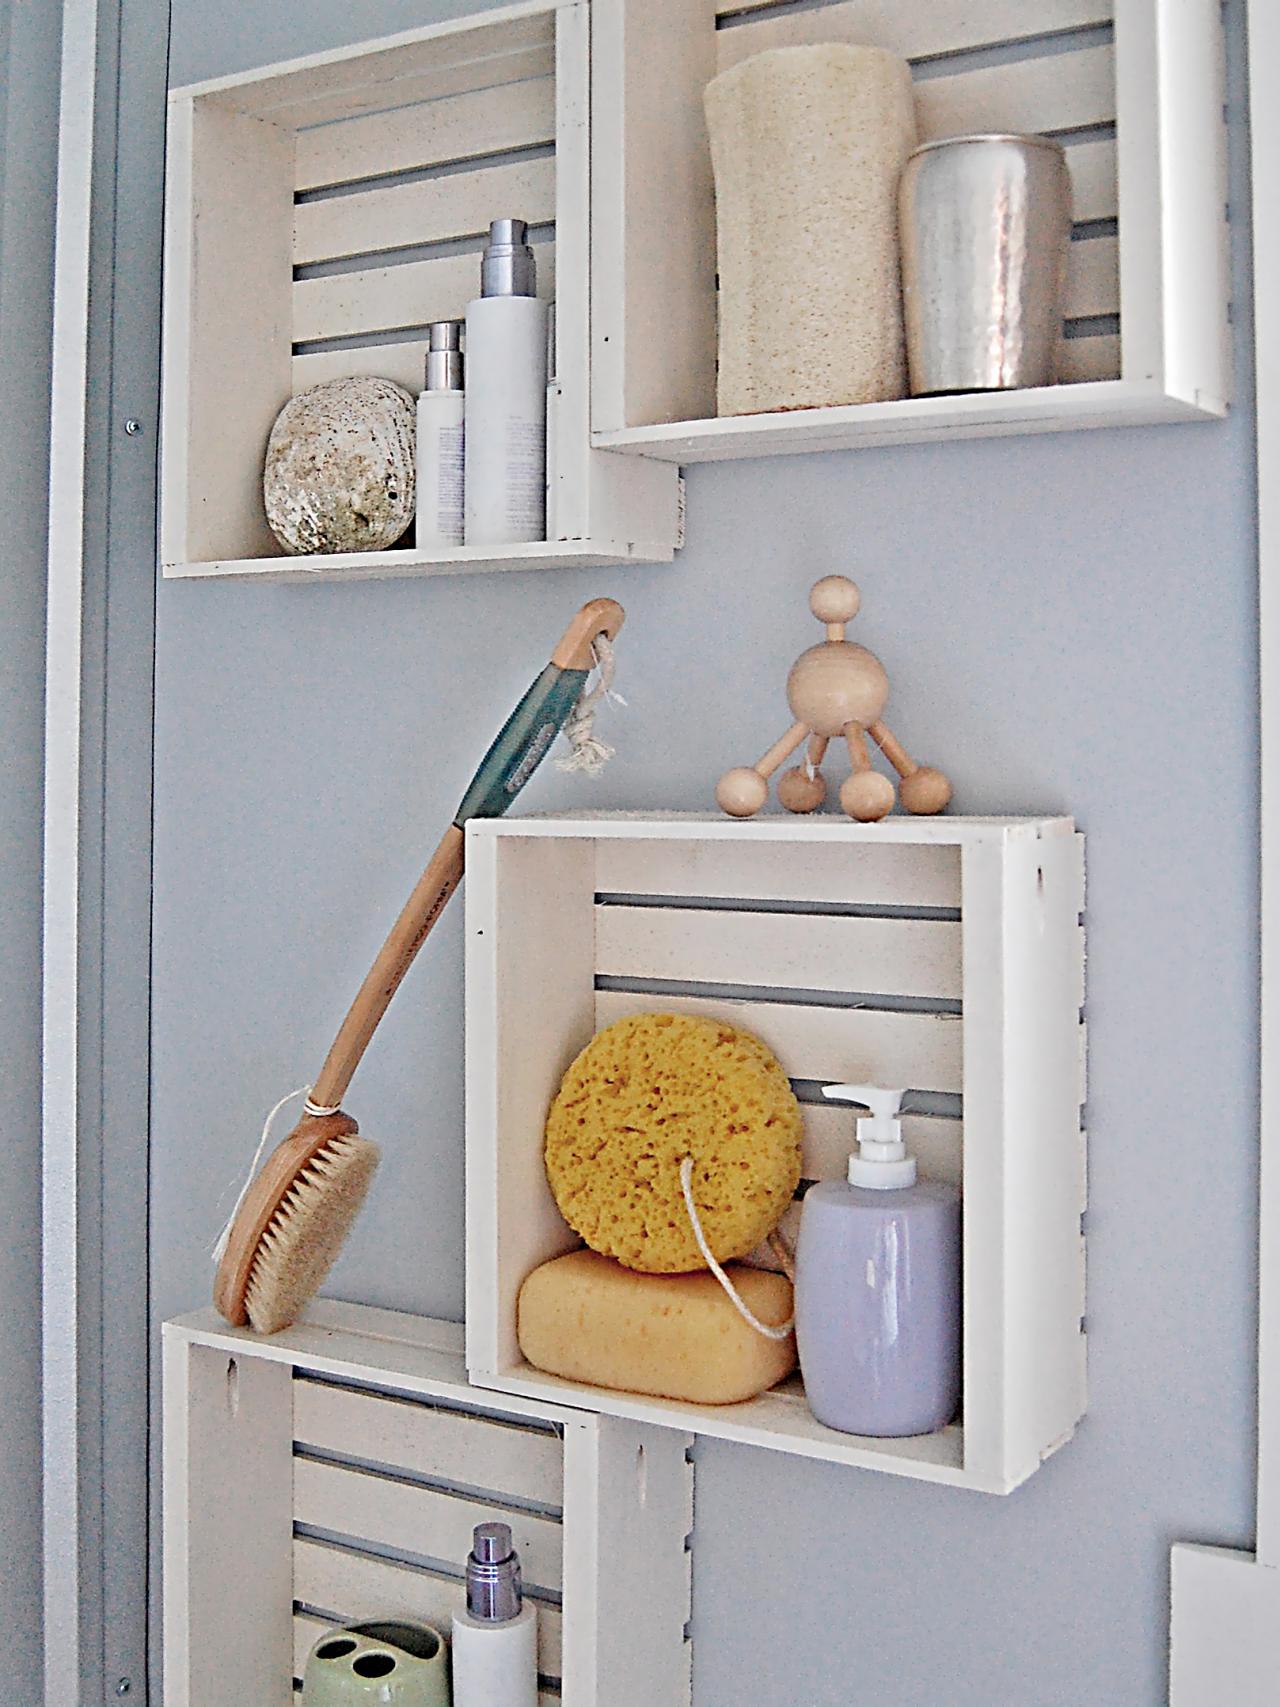
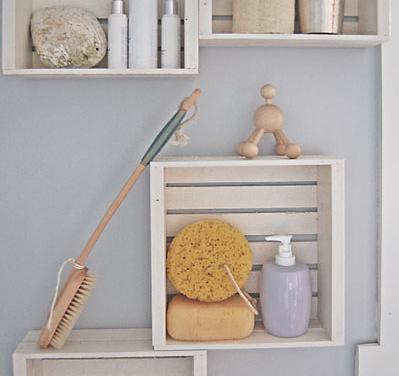
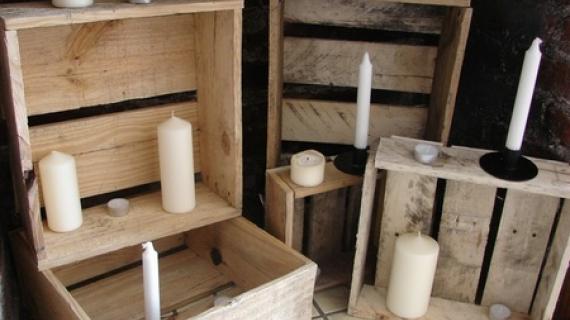
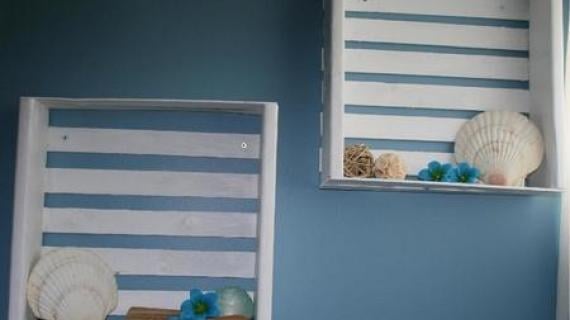
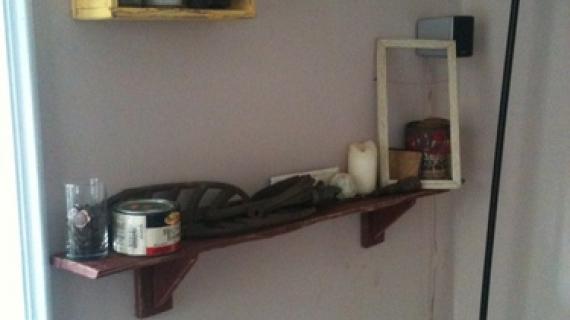
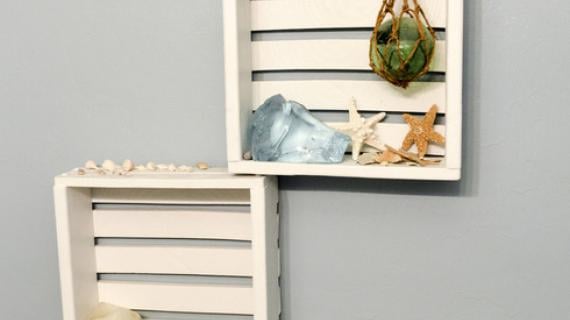
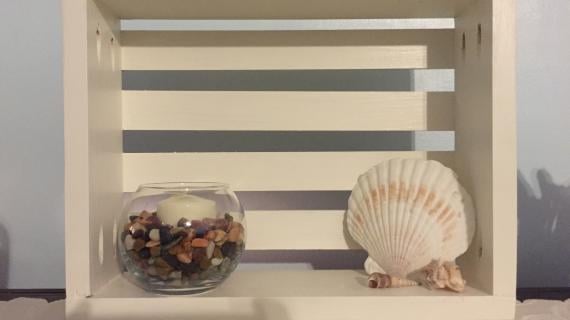
Little crates made from wood lath, can be used as trays, or wall frames for wall storage. We love these wood crates as wall shelves that beautifully frame your items.
Free step by step plans from Ana-White.com
Collections
Dimensions
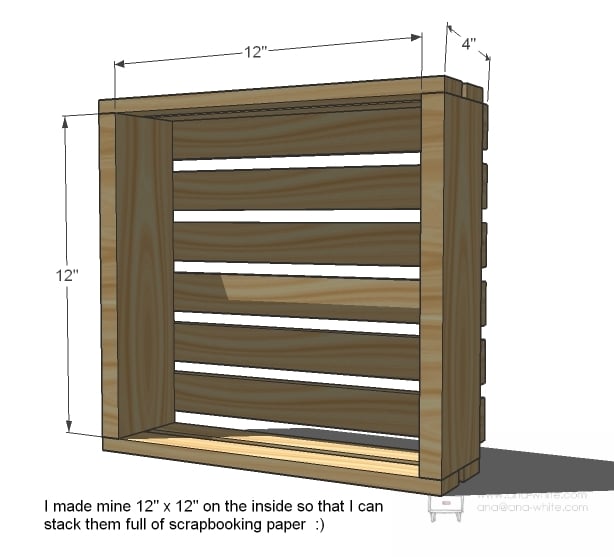
12″ x 12″ on the inside
Preparation
Shopping List
- 2 feet of 1×4
- 3 – 48″ long lath sticks
- 1-1/4 nails wood glue
Cut List
- 2 – 1×4 @ 12″
- 10 – wood laths @ 13 1/2″
Tools


Instructions
Step 1
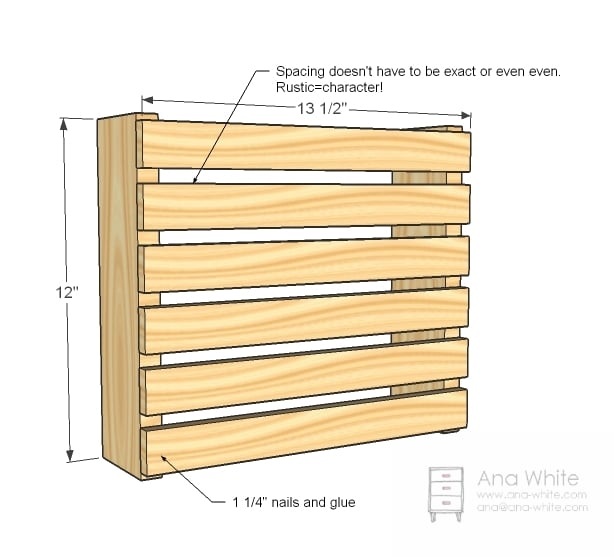
So here is the trickiest part – at least if you are sans a nailer. Glue and nail the lath to the back of the 1x4s as shown above.
Step 2
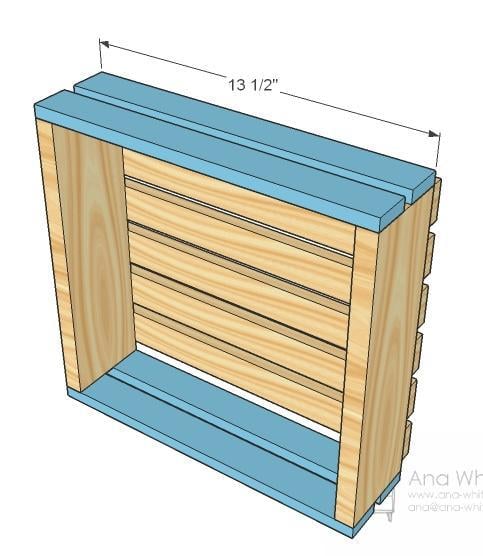
And now the ends. And you are done! I added a two coats of Antique White in Satin by Valspar. These stack and hang quite nicely!
Finishing Instructions
Preparation Instructions
light sanding
Finish Used
white semitransparent wood stain
Room
Style
Comments
Rebekah (not verified)
Tue, 10/26/2010 - 20:39
Love how simple and cute
Love how simple and cute these are! I will me making these this weekend for sure! Thanks so much for your endless inspiration. You're amazing!
Stephanie (not verified)
Tue, 10/26/2010 - 21:09
No. Freakin'. Way. JUST
No. Freakin'. Way. JUST today I was thinking of how I could build some crates for the house. But seeing as how I'm not even close to being a carpenter or anything related to it, I couldn't figure out how to do it. You posted those other crates with the solid sides on caster wheels, but I just wanted to use lathe strips and boards for a more rustic feel; pretty much EXACTLY like your plan. You are so totally awesome. And you're obviously a mind-reader.
Unfortunately I'll have to get to those after I finish my table (the farmhouse with stretcher) and benches...
Green Gracie Home (not verified)
Tue, 10/26/2010 - 23:35
I love these Ana...sometimes
I love these Ana...sometimes a "day off" is the most productive day! I can't wait and try these, because I definitely have the paper!
Amanda (not verified)
Wed, 10/27/2010 - 00:28
Lovely! These might be going
Lovely! These might be going up in my bathroom. It's between these and the floating shelves...
Michelle (not verified)
Wed, 10/27/2010 - 03:05
These are so cute!! Glad to
These are so cute!! Glad to hear that you enjoyed your day off!
Angel s. (not verified)
Wed, 10/27/2010 - 03:22
Love these! I could use some
Love these! I could use some in the bath for shelves and in the craft room for storage. THANK YOU for the link to the lathing strips, I have been wanting some and none of the local stores seem to have them, now I know where to find them! The hard part will be not using the all up in projects so I can use them on my loom.
Heather - Doll… (not verified)
Wed, 10/27/2010 - 03:24
Fun & simple project - thanks
Fun & simple project - thanks for sharing! :)
Beckie (not verified)
Wed, 10/27/2010 - 03:34
Lovely! What do you use to
Lovely! What do you use to hang them on?
Tracie (not verified)
Wed, 10/27/2010 - 03:37
That is soooo me! I think
That is soooo me! I think that is why you are so popular...your work is your passion---me too!!!! I made this!

Tsu Dho Nimh (not verified)
Wed, 10/27/2010 - 03:40
I envision Ana whirling
I envision Ana whirling around her place like the Tasmanian Devil cartoon.
Cute crates! Very cute.
Tsu Dho Nimh (not verified)
Wed, 10/27/2010 - 03:52
OH ... forgot! One of these
OH ... forgot! One of these cheap things will make those danged finishing nails easier to set. It also gets your fingers out of the danger zone :)
http://www.acehardware.com/product/?productId=1288962 (holds it and countersinks it - and it's way easier to hit then the head of a 3/4 finishing nail.)
http://www.micromark.com/NAIL-HOLDER,7356.html Just holds it.
And at the end of a long day of setting toe moldings into baseboards, your hands will not be cramped into claws, unable to pick up your cold beer.
Kristen (not verified)
Wed, 10/27/2010 - 04:03
Thank you for posting
Thank you for posting this--I've been pricing a finishing nail gun, but this is far more affordable for the time being. I'll be able to enjoy that beer now, after a day of projects!
Kristen (not verified)
Wed, 10/27/2010 - 04:06
Ana, when do you ever find
Ana, when do you ever find time for scrapbooking??!! Especially considering your day-off schedule :O)
Sydney (not verified)
Wed, 10/27/2010 - 06:56
Love them!!!! Are those kreg
Love them!!!!
Are those kreg holes on the side? Were these just oops boards or did you actually use a kreg on this?
Kim (not verified)
Wed, 10/27/2010 - 07:07
Do you think that nail holder
Do you think that nail holder countersink thing will help if your problem is nails bending while trying to hammer into plastic trim? That's the problem I am having.
Kimberly (not verified)
Wed, 10/27/2010 - 07:24
I LOVE these! I can't wait to
I LOVE these! I can't wait to make them! Adding them to my list of "To-make" things now!
nancy (not verified)
Wed, 10/27/2010 - 07:50
Thanks for sharing these
Thanks for sharing these cheap tools! :)
nancy (not verified)
Wed, 10/27/2010 - 07:51
Ana, you amaze me! Thanks for
Ana, you amaze me! Thanks for these awesome plans. :)
Anne (not verified)
Wed, 10/27/2010 - 09:08
Oh what a busy day you had
Oh what a busy day you had BUT sounds amazing and fun at the same time!!!
Tiff (not verified)
Wed, 10/27/2010 - 09:15
Just a quick question. Your
Just a quick question. Your 1x4's look like they have pocket holes in them. Yet, it doesn't look like they could be doing anything where they are. Were they just already in the scrap you happened to use for this project? Or, am I missing something?
Jamie M. (not verified)
Wed, 10/27/2010 - 10:56
LOVE THESE!! Thanks Ana.
LOVE THESE!! Thanks Ana.
Anson (not verified)
Wed, 10/27/2010 - 20:45
Hi Tiff, Yes, those pocket
Hi Tiff,
Yes, those pocket holes don't serve a functional purpose for this project. As you suggested, they are likely just there from a previous project that didn't come to fruition.
Tracie (not verified)
Thu, 10/28/2010 - 02:21
Had to share my incredibly
Had to share my incredibly old, and incredibly cool vintage shelves....cut with a hand saw---to not damage wood....

April (not verified)
Thu, 10/28/2010 - 03:13
Ana, you mentioned
Ana, you mentioned scrapbooking paper... Now all we need is a stand that we can slide our new crates into so we can label the outside of them with the color of paper that they contain :-) And I agree with Kristen. How on earth do you have time for scrapbooking with your building schedule?
Danielle Z. (not verified)
Thu, 10/28/2010 - 07:41
How did you hang these on the
How did you hang these on the walls, just normal picture hangers??
I was also wondering about the pocket holes. : )
Isabel Jenson (not verified)
Mon, 11/01/2010 - 07:56
I love these, they look so
I love these, they look so easy to make! I think I will be making these and stacking them the scrapbook paper idea! Maybe removing one of the sides, no? Is that a good idea? You are amazing!
Deb Weyrich-Cody (not verified)
Tue, 12/21/2010 - 05:50
Nice, clean finish with the
Nice, clean finish with the pocket nailing! Now that you're doing tutorials, this might be a good subject for those looking for more advanced technique?
Zaira (not verified)
Tue, 01/11/2011 - 11:04
love these, had to make them!
love these, had to make them! http://learnwithp.blogspot.com/2011/01/easy-peasy-crates.html
TayBaxter
Wed, 04/20/2011 - 12:05
love!!
modified a little bit as i could find the right boards.. i bought a 2x6x8 kiln dried whitewood and 3 1x3x8 premium furring strip and 1 lb of nails. whole thing cost me $11.47! and i had enough to build 2. little larger than yours but beautiful none the less. saved me almost $300 bucks as apposed to pb! btw did a white wash finish, they look gorgeous!
Craig Sparks (not verified)
Sat, 05/05/2012 - 13:15
Started some of these today
Started on 4 of these today. Got all the wood cut, just gotta sand and paint and assemble. Perfect gift for mothers day.
Thanks for the great site Ana, it has helped me get going in woodworking.