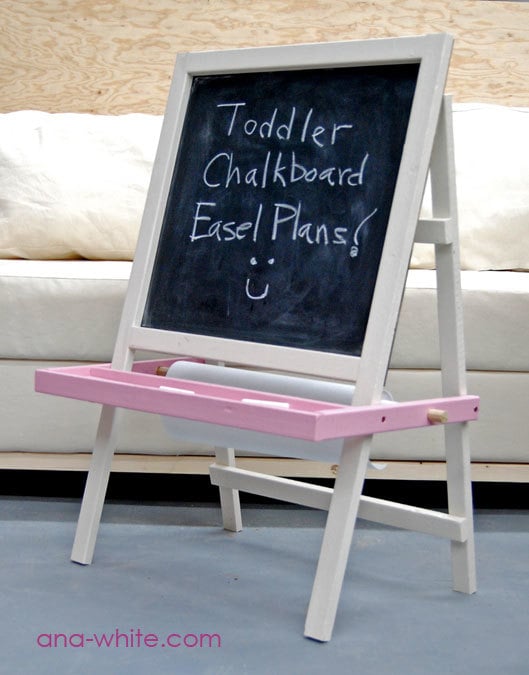


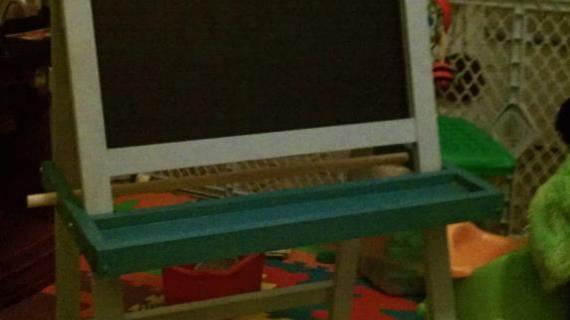
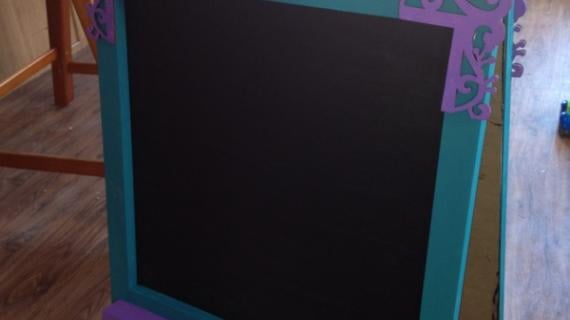
My daughter's favorite thing. A just my height toddler chalkboard that also works with a roll of craft or freezer paper to become a easel.

It is that time of the year. Time to think about gifts. This year, I challenge you to handmake at least one gift for someone you love. By putting your time into a gift, you not only give a treasured present, but your loved will feel even more loved knowing you made with your hands their gift.

And if you just so happened to know a toddler that needs a chalkboard (under 4 is recommended), this might be that gift. Also shown, Clara's Table and the Four Dollar Stackable Chairs.

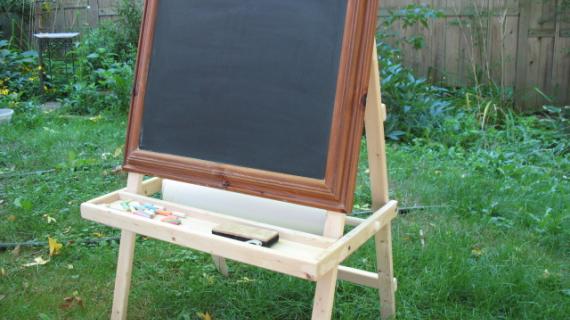
And with the addition of a cheapo wood dowel and some good ole freezer paper, this little guy turns into an art easel too!

Complete with a little tray. Is this the one? If not, expect lots more smaller, giftable projects in the next month or so.
Preparation
1×2
1×4, 24 inches
2″ screws
3/4″ screws
wood glue
1/4″ hardboard scrap (I used the backside of scrap paneling)
chalkboard paint
finishing supplies
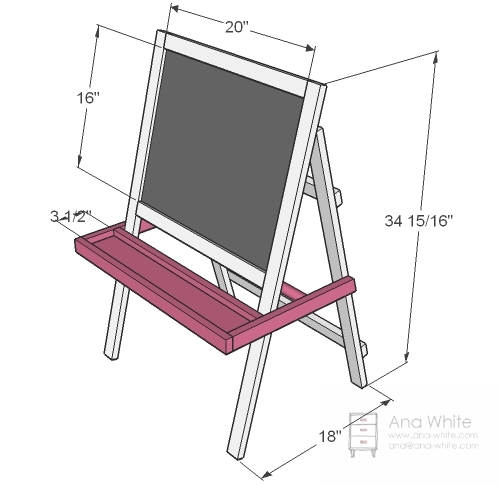
2 – 1×2 @ 20″ (Tops and Bottom of Frame)
2 – 1×2 @ 36″ (Frame Legs)
1 – Chalkboard (made my own out of hardboard paneling and chalkboard paint) @ 23″ x 19″
2 – 1×2 @ 23″ (Back)
2 – 1×2 @ 31″ (Back)
1 – 1×4 @ 23″ (Tray)
1 – 1×2 @ 23″ (Tray Back)
2 – 1×2 @ 15″ (Tray Sides)
1 – 1×2 @ 24 1/2″ (Tray Front)
3/4″ wood dowel @ 28″ (Paper Holder)


Instructions
Step 1
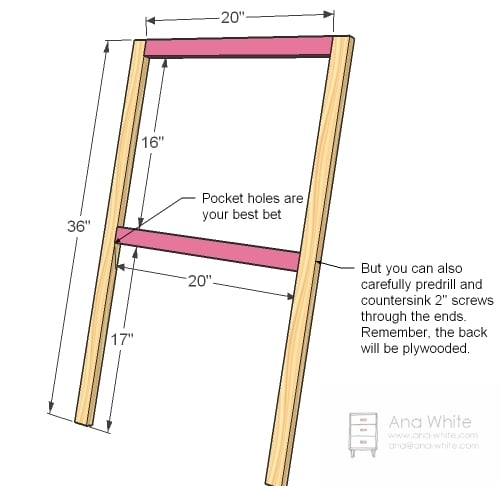
Build the Chalkboard Frame
Simply glue and screw the chalkboard frame together. Check for square. Then paint and paint the chalkboard too.
Step 2
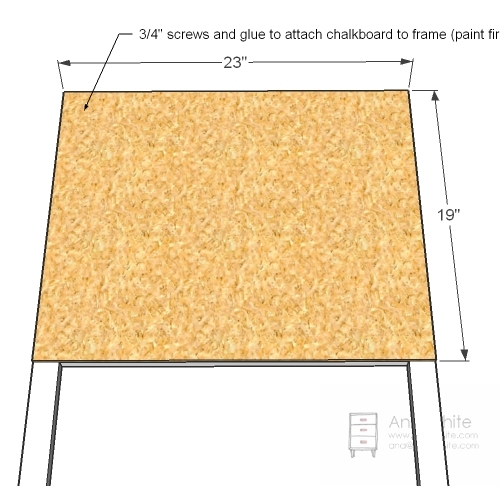
Chalkboard
With the frame and the chalkboard painted, screw the chalkboard to the frame. Use the 3/4″ screws.
Step 3

Back
Now build the back as shown above. Adjust for square.
Step 4

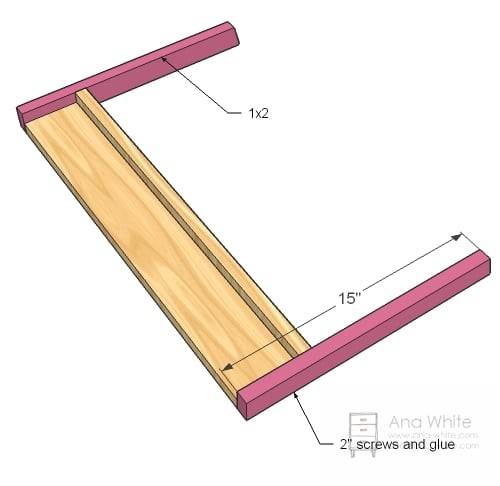
Back Edge of Tray
Screw the back edge of the tray to the tray bottom with 2″ screws and glue.
Step 5
Step 6

Tray Front
Attach the tray front as shown above.
Step 7

Dowel Holes
Mark the tray sides as shown above and drill 3/4″ pilot holes. Thread the dowel through. I cut my dowel with 1 1/2″ on each end so that the dowel wouldn’t easily slip throug
Step 8

Assembly
Now simply assemble everything, and use a level to get that tray on straight with the floor.


Comments
Shawn (not verified)
Fri, 11/12/2010 - 01:57
Adorable Anna, you are an
Adorable Anna, you are an inspiration!!!!
Erica (not verified)
Fri, 11/12/2010 - 02:20
Can't wait to get started!
Can't wait to get started! Is that, by chance, the new sofa plan you are working on in the background??? If so, Christmas definitely came early!
Estela @ Weekly Bite (not verified)
Fri, 11/12/2010 - 02:34
I just forwarded this post to
I just forwarded this post to my husband! Its now on his honey do list :)
michelle (not verified)
Fri, 11/12/2010 - 04:13
Love this. I may have just
Love this. I may have just found my first project and a holiday gift for my kiddos!! I'll have to see how big the big one is, though.
But in the meantime, does anyone have any ideas about the modifications that would be necessary to make this flat-folding for storage? I'm thinking a hinge at the top of each back leg where it hits the front frame and some washer/bolt combination where the tray attaches to the back legs. Also, then some type of peg/ledge/stop on the front legs to rest the tray on?
Maranda (not verified)
Fri, 11/12/2010 - 04:42
I wonder if that could be
I wonder if that could be made double sided. I have two toddlers that would absolutely love this. I've been wanting to get them an easel anyway. What a perfect gift for Christmas!
Ana White (not verified)
Fri, 11/12/2010 - 05:57
I don't see why that wouldn't
I don't see why that wouldn't work!
Ana White (not verified)
Fri, 11/12/2010 - 06:01
Michelle, thought and worked
Michelle, thought and worked on this, but you pretty much have to loose the tray to make this one flat folding :( But if you use blolts, you could make it so it's at least easy to foldup.
michelle (not verified)
Fri, 11/12/2010 - 06:09
Thanks - I figured you had
Thanks - I figured you had thought it through. And, actually, I guess FOLDING is really my goal - not necessarily completely flat, just more compact than the "in-use" position. Thanks for the input!
Rachael (not verified)
Fri, 11/12/2010 - 07:26
I'm completely new to
I'm completely new to building stuff, can anyone give me an estimate of how much this would cost to do?? Thanks everyone! <3!
Laurel Kramer (not verified)
Fri, 11/12/2010 - 08:14
I was so hoping you would
I was so hoping you would come up with a child's easel plan for Christmas. Thanks a bunch.
Laurel
Carolyn (not verified)
Fri, 11/12/2010 - 08:59
This is soooo cute! I need to
This is soooo cute! I need to make it right away for my 3 year old granddaughter. She will love it! Where do you buy a roll of freezer paper? Thank you Ana for all your wonderful plans! You are the GREATEST!
leigh7911 (not verified)
Fri, 11/12/2010 - 09:47
This easel is absolutely
This easel is absolutely awesome, and I'll probably give it a whirl once I trust my kiddo to not be strapped in at the table under very strict supervision when she wants to color. ;) However, what I'm really excited for is that COUCH and to see what else there is in store. Thanks, Ana. :)
Val Payne (not verified)
Fri, 11/12/2010 - 11:27
Oh man, I just bought an art
Oh man, I just bought an art easel for my almost 4 year old. I see a return in my future........ about when will the larger easel plans be posted?
Laci Waner (not verified)
Fri, 11/12/2010 - 12:40
Have I told you lately how
Have I told you lately how much I LOVE you and your site!! I am building/making almost all of our Christmas gifts this year (thanks to your site..and my fam members are gonna love their gifts!!), and this is PERFECT for my nephew! Thank you, thank you, thank you!
Laci Waner (not verified)
Fri, 11/12/2010 - 12:41
...I'm already working on the
...I'm already working on the $4 chairs, fyi.
Tombi (not verified)
Fri, 11/12/2010 - 22:50
Hi Anna, Thank you for the
Hi Anna,
Thank you for the plans there are such an inspiration.
Could you please add the plans for the day bed or sofa that shows behind Clara's table & chalk board.
Your response will be highly appreciated.
Thank you ( Tombi )
Leslie (not verified)
Sat, 11/13/2010 - 08:29
Oh gosh, I know a certain 2
Oh gosh, I know a certain 2 year old that is going to love this easel. Thanks so much!
Lora (not verified)
Thu, 11/18/2010 - 13:51
I got the wood in KY at
I got the wood in KY at Lowe's and the chalk board paint at Walmart and The total cost is about 15.50 without paint for to finish it. Good luck!!
Jami Lynn (not verified)
Thu, 12/09/2010 - 11:51
I love this, and it's compact
I love this, and it's compact size! I was wondering if there would be an easy way to make it a little taller? My daughter is 4 and I'd like it to last a little while :)
Jenny V (not verified)
Thu, 12/30/2010 - 11:25
I made this for my 3 year old
I made this for my 3 year old niece for Christmas. It was easy to do and she LOVED it!! Thanks so much, Ana.
Julie (not verified)
Mon, 02/28/2011 - 21:54
I modified your two easel
I modified your two easel plans to fit the needs of my almost 9 yr old daughter. She just told me she wanted an easel for her birthday which is less than a week away and I was able to whip one up for her. Thanks so much for the plans!
https://lh4.googleusercontent.com/-gASoMCMe8xU/TWygNja52aI/AAAAAAAAA_Q/…AbsoluteAspiring (not verified)
Tue, 08/09/2011 - 21:08
Ana,
What kind of chalkboard paint do you use?
In reply to Ana, by AbsoluteAspiring (not verified)
Ana White
Tue, 08/09/2011 - 22:12
Oh, just the spray stuff!
Oh, just the spray stuff! Make sure your wood is really smooth and you put on several coats and season it with chalk.
Guest (not verified)
Wed, 01/18/2012 - 00:58
Two sides
Anyway to make this two sides and put a whiteboard on one side?!
DotClark
Mon, 03/26/2012 - 06:01
LEARN MORE
hello there
Navy_Woodworker
Sun, 07/22/2012 - 14:24
My Firsy Project
This is my first project from your site. I can't wait to finish and post my brags. Quick question about the pocket holes in the 1x2 x 20" support. The plans show the pocket holes on the bottom, would it work to put the pocket holes on the face since it will be covered by the chalk board? My first attempt at putting the pocket holes on the 3/4" side placed the hole to close to the side. Any advice Ana or other more experienced builders on placement in the Kreg to get the holes centered.