


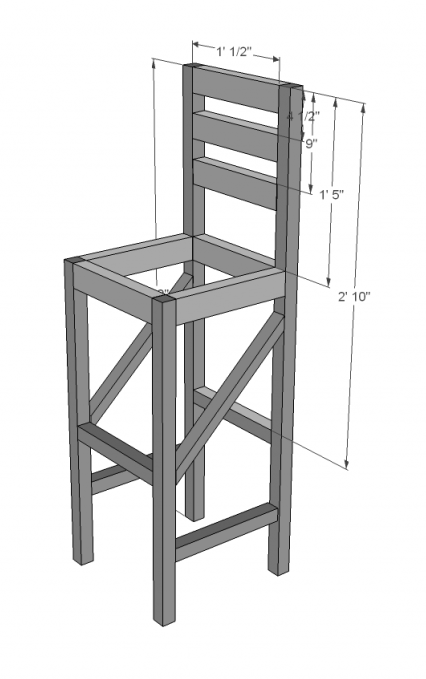
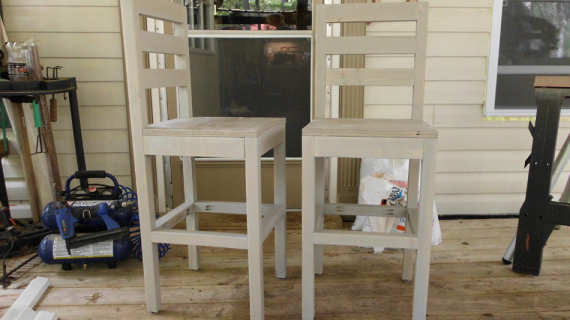
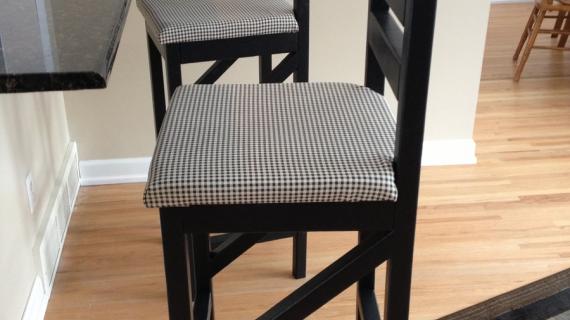
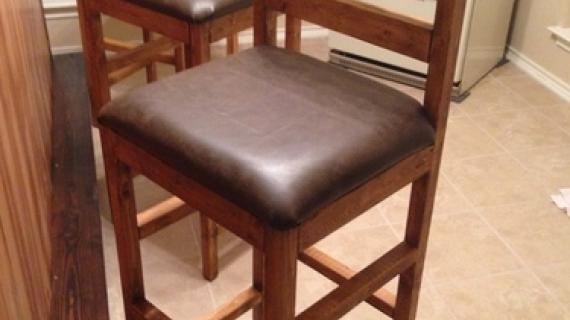
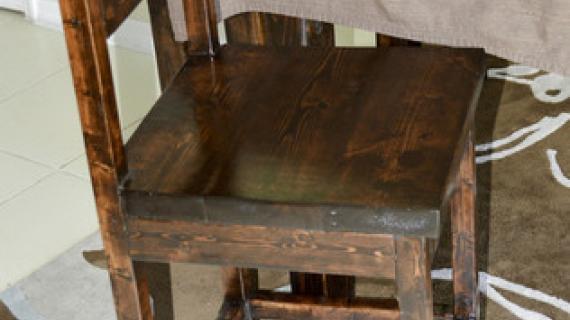
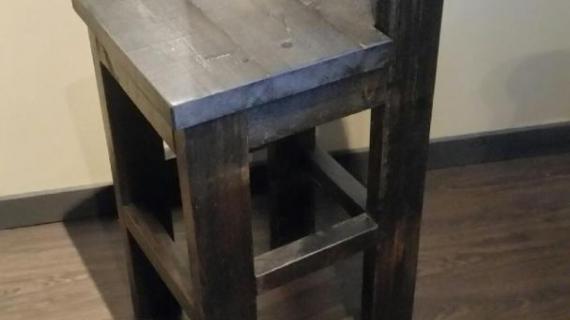
An extra tall bar stool with cross bracing for added support.
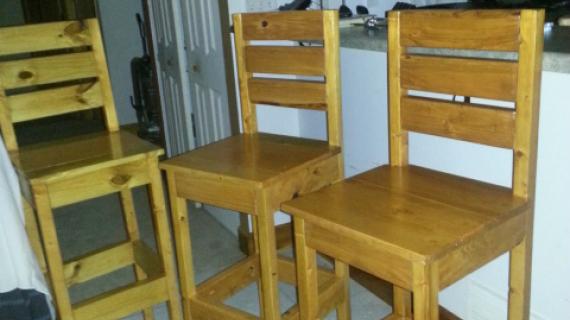
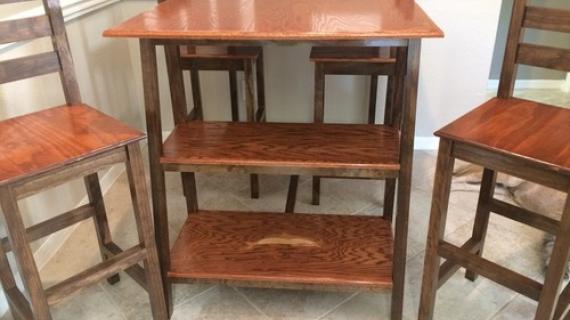
We have an extra high island/bar in our home. From the floor to the top of the counter it measures 45.5 inches. This requires extra high bar stools of at least 33 inches in height. Bar stools at this height are either really expensive or really ornate. I love basic furniture and simple lines, so I designed a bar stool and cut wood to try a tester one. It worked so well that my husband and I built three more for a total of four bar stools.
We have an extra high island/bar in our home. From the floor to the top of the counter it measures 45.5 inches. This requires extra high bar stools of at least 33 inches in height. Bar stools at this height are either really expensive or really ornate. I love basic furniture and simple lines, so I designed a bar stool and cut wood to try a tester one. It worked so well that my husband and I built three more for a total of four bar stools. Using cheap wood and even with buying paint, each stool came in around $15. So for less than the cost of one stool I could have bought, I got 4 custom made stools! And I love them! You could use these plans for shorter stools, but you would need to cut off an equal amount on each leg and move the footrests and siderests up the same amount. While this is an easy stool to build, I put it at intermediate because it can be difficult to square up. It needs to be very square if you want a stable stool at this height. My plans were hand drawn on a piece of paper, but I attemped SketchUp for the first time to pass this on.
Builder: Chrissy
Blog: Home Life Kids
Skill Level: Intermediate
Estimated Cost: Under $20
Preparation
3 – 2×2 @ 8 feet long
1 – 2×3 @ 8 feet long
1/2″ thick solid wood or plywood for seat
2 1/2″ screws
wood glue
finishing supplies


Instructions
Step 1
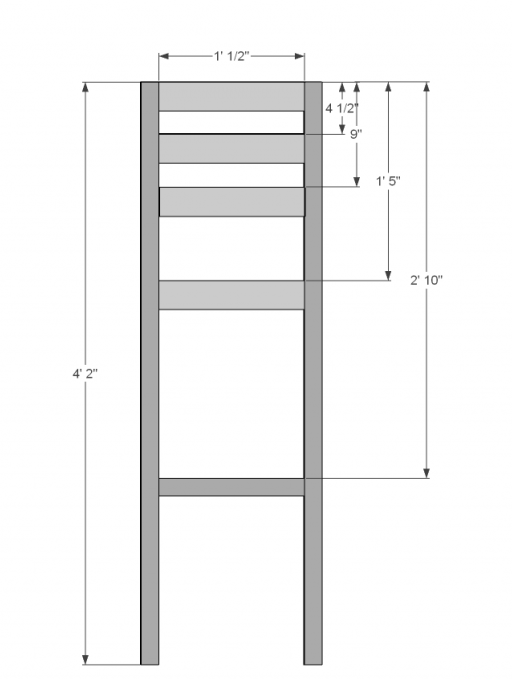
Build on a flat surface. Assemble the back of the stool using the 50 inch legs. Predrill all holes, glue, and countersink screws. Attach 3 of the 2×3 (12.5 inches) boards for the backrest with centered screws. Attach the 2×3 seat rest board with the screw towards the top. Do not center this screw as you will have another screw coming into this board and you don’t want them to hit. Attach the 2×2 back foot rest with screws in the center of the board. Be sure to square up every single angle and adjust screws as needed.
Step 2
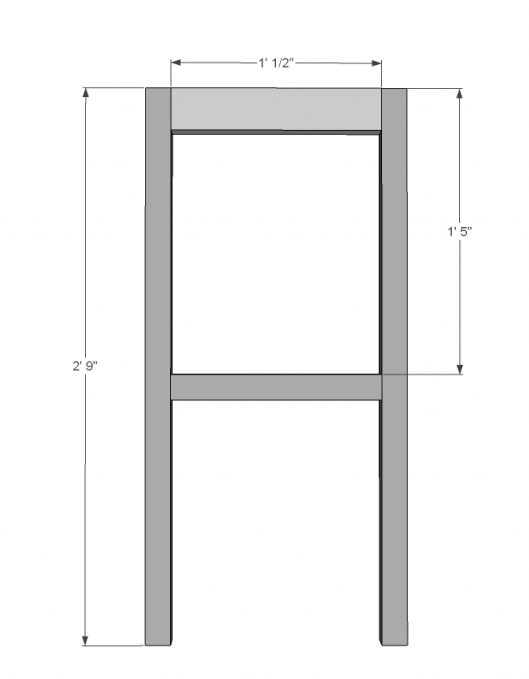
Assemble the front of the stool using the 33 inch legs. Predrill all holes, glue, and countersink screws. Attach the 2×3 seat rest board with a screw towards the top. Attach the 2×2 front foot rest with a screw in the center of the board. Be sure to square up every single angle and adjust screws as needed.
Step 3
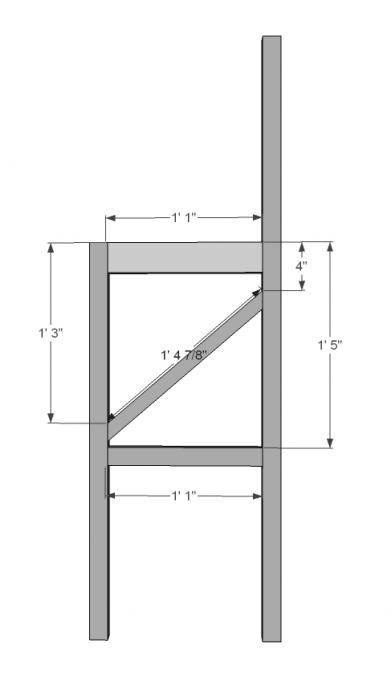
You will need to attach your back and front pieces together now Predrill all holes, glue, and countersink screws. Using a 2×3 (13 inches)board, attach this for the side of the seat rest. Put screws in towards the bottom so you don’t hit your other screws. Attach the 2×2 (13 inches) flat side rest. Be sure to measure and measure again before cutting your mitered 45 degree angled piece. This piece is important for stability. Attach it under your side seat rest and above the side flat footrest. Repeat to complete other side. Be sure to square everything up and do this on a level surface. You may need to twist, push or pull things to get it square and make sure you tighten your screws.
Step 4
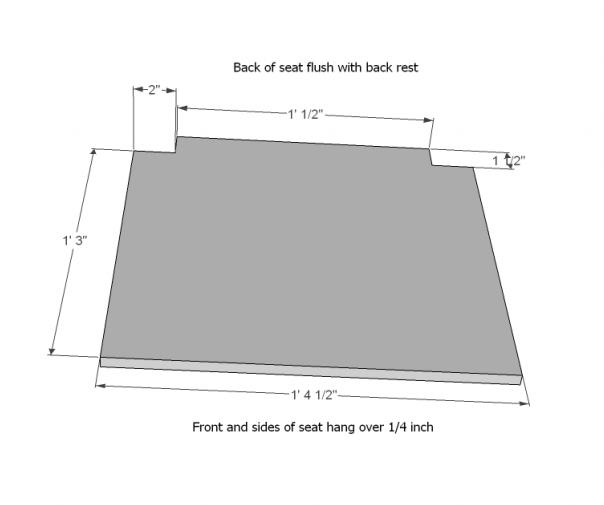
Assemble your seat. I cut mine out of a solid piece of pine. I got 4 seats out of a board that was 18 inches wide by 6 feet long. You could use plywood or just use 1×4 boards to make a seat. The front and side edges of the seat overhang by 1/2 inch. The back is flush with the backrest. You will have to notch out the board to go around the back legs. Attach with screws down through the seat and countersink. You could use right angle brackets attached to the bottom of the seat and inside of the seat rest boards if you want to avoid holes in the seat.
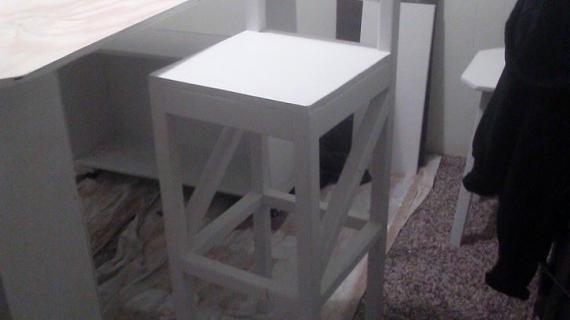
I filled holes, sanded, put on primer, sanded again, primed again, and put on 2 coats of paint. I finished mine with Valspar Paint in Polar Star. You can even add cushions or slipcovers to these stools. These stools are sturdy enough that I feel safe letting my 6 and 3-year-old kids sit on them with supervision. Happy Building!

Comments
melanie (not verified)
Fri, 01/28/2011 - 09:12
thank you for sharing. I need
thank you for sharing. I need bar height stools as well. Given they are a mim of a hundred a piece for wood ones I am ver excited to build them. Thank you .
Chrissy (not verified)
Fri, 01/28/2011 - 09:30
Wow! Thanks for posting this
Wow! Thanks for posting this Ana! I was surprised to see it! Now I just need to build a media center with some of your wonderful plans! Thanks so much for all you do!
Mahin (not verified)
Fri, 01/28/2011 - 10:18
So excited! I just did a
So excited! I just did a happy dance at work! I also have a 45" counter top and the tall stools are just way too expensive, but now I can build one! Thank you!
Laura Williams (not verified)
Fri, 01/28/2011 - 10:39
We are so super excited to
We are so super excited to try these plans. When we bought our house my mother in law bought us some bar stools that are only 30" and they are too short for our 45" counter. Now I am going to build these!!! Woot!
Karly (not verified)
Fri, 01/28/2011 - 15:39
YAY!!! I know I asked about
YAY!!! I know I asked about this a while back. Thank you for the plans!!!
lucy (not verified)
Sat, 01/29/2011 - 13:57
I love the look of these. Do
I love the look of these. Do you find them to be comfortable?
Chrissy (not verified)
Sun, 01/30/2011 - 10:30
Lucy, I do find them to be
Lucy, I do find them to be pretty comfortable for a wood stool. They're not any different than sitting at my wood dining chairs. Eventually I would like to make cushions for them, but since the stools are pretty comfortable I'm sure I won't be making cushions anytime too soon! Thanks for asking!
christins 23 years (not verified)
Tue, 08/23/2011 - 18:56
OK ladies,i started this
OK ladies,i started this project three days ago.Let me start by saying i did everything from the wood cutting to putting it together by myself.Its hard freaking work..My counter is a bit higher than the one specified so i had to do some adjustments to the design.Instead of an side angel bar i just did straight ones all across its was easier.I will say this is hard work...
Dan Fall (not verified)
Thu, 12/13/2012 - 20:51
Is the old design gone? I
Is the old design gone? I was here and found a 1x design painted black and now I can't find it. Did I look under the wrong search strings or have you removed it. Thanks. Dan in MN
blaidd_drwg
Fri, 08/16/2013 - 07:23
Perfect!
I have a 48" counter and this is just what I need!
What type of wood do you suggest and are these sturdy enough for adults?
thanks!
Sonny19
Mon, 02/15/2016 - 17:48
Thanks a bunch for the post
Thanks for the post on the chairs, I found them and exactly what we needed, so today we went and got the stuff and they turned out great, and we had a blast doing it.