
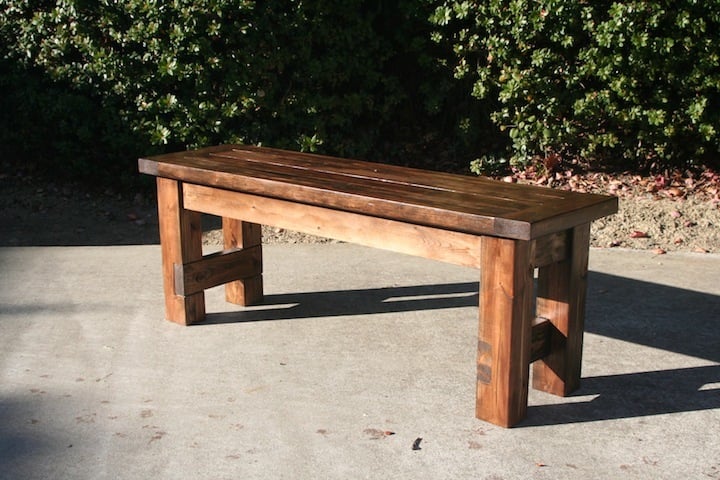

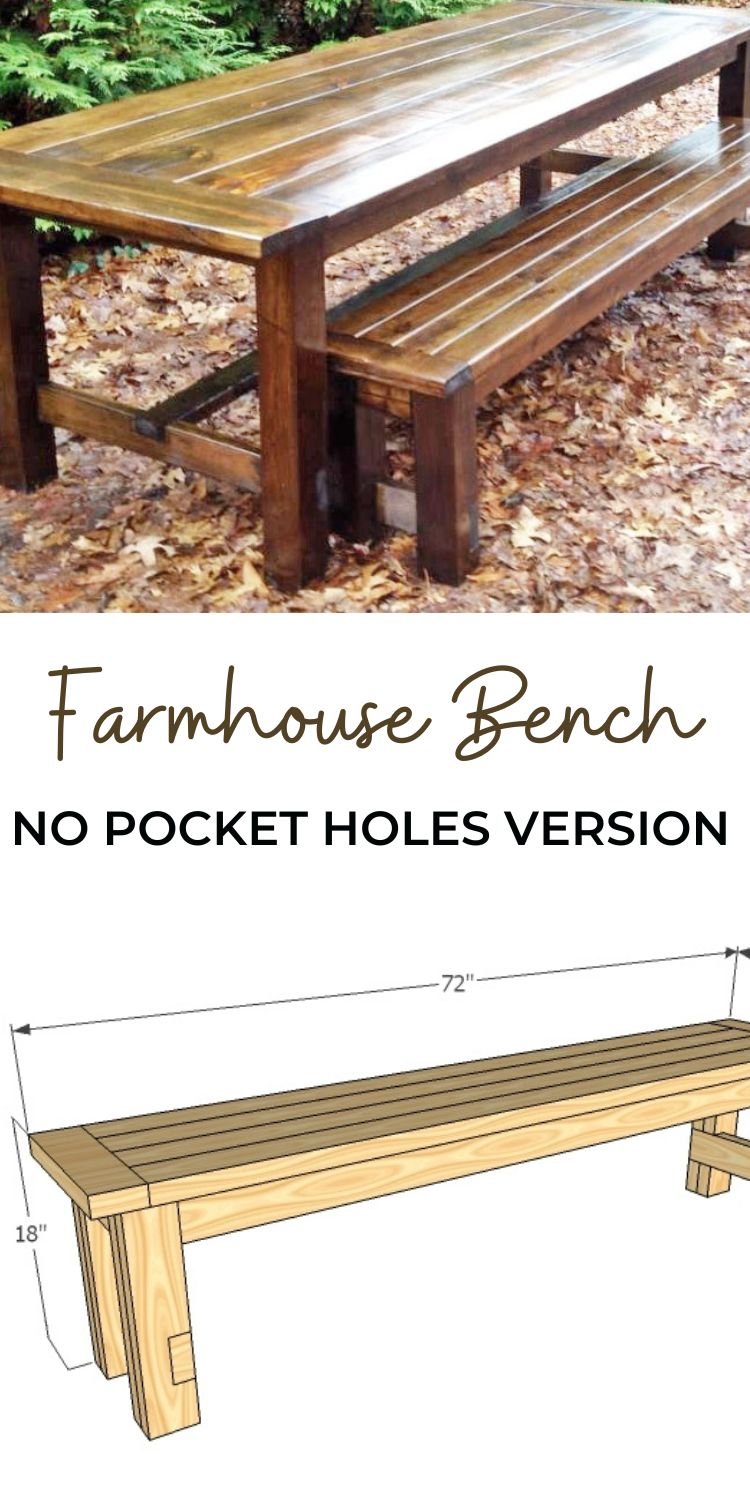
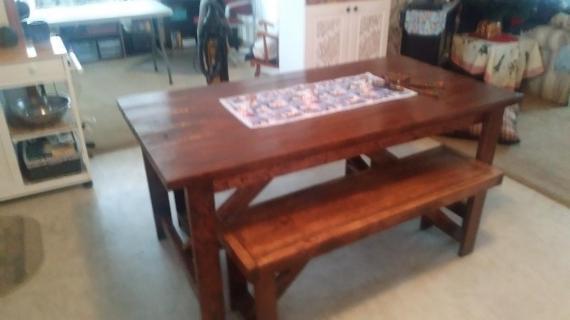
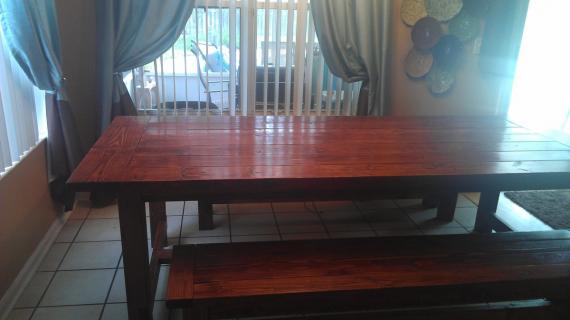
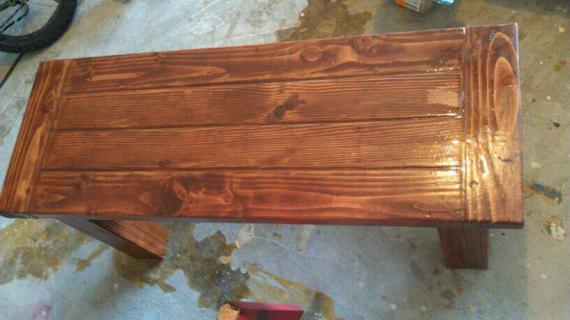
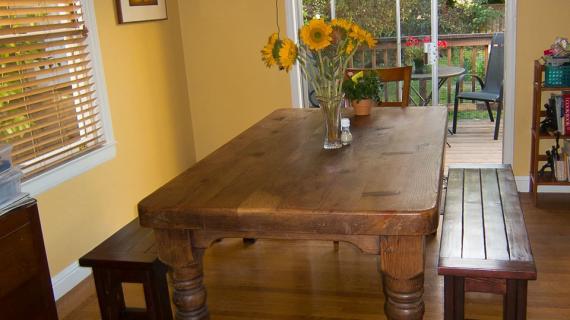
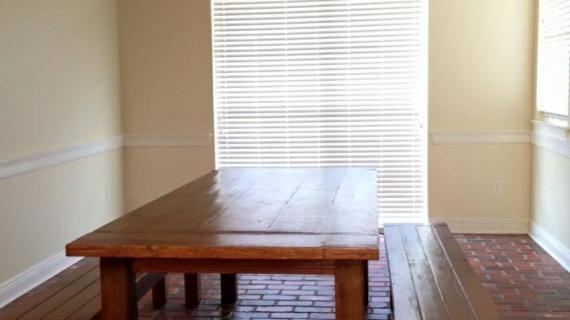
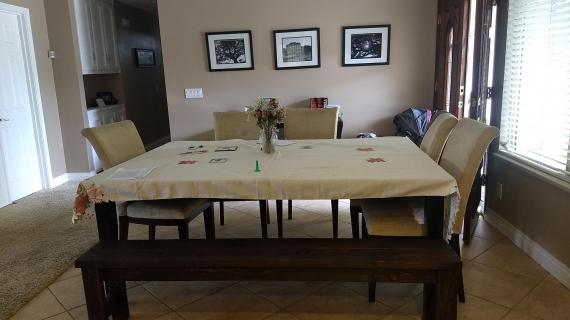
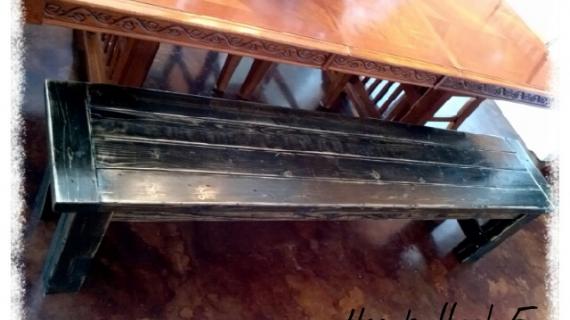
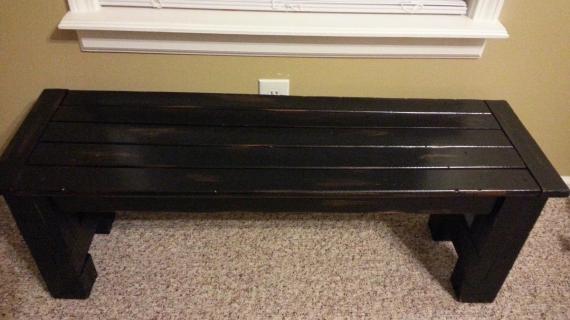
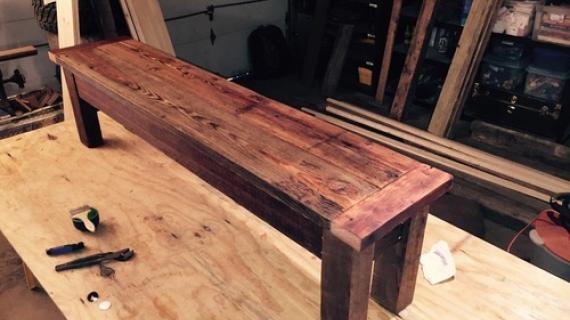
This farmhouse bench is easy to build and is rustic and substantial. It is designed to match our Farmhouse Table Plans.
Pin For Later!
Preparation
4 – 2x4s, stud length or 8 foot length
2 – 1x4s, 8 foot length
1 – 1×2, 8 foot length
2 1/2″ screws
2″ screws
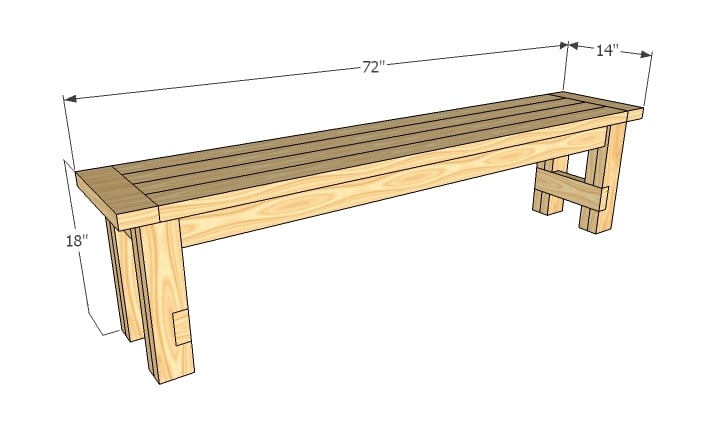
8 – 2x4s @ 16 1/2″ (Legs)
2 – 1×4 @ 2 1/4″ (Spacers)
2 – 1×4 @ 6″ (End Aprons)
2 – 2×4 @ 12″ (Stretchers)
2 – 1×4 @ 61″ (Side Aprons)
2 – 1×4 @ 9 1/2″ (Inner Aprons)
5 – 1×2 @ 9 1/2″ (Supports)
4 – 2×4 @ 65″ (Bench Seat Boards)
2 – 1×4 @ 14″ (Breadboard Ends)


The Farmhouse Bench is designed to work with this Farmhouse Table, but there is no reason you could not modify the dimensions or use it as a coffee table or outdoor bench. If you plan to build the Farmhouse Table, starting with the bench will give you a chance to test out your skills on a smaller version. For those of you who have a pocket hole system, you can use the pocket holes to build your bench seat separate. You can also fasten your aprons directly to the legs without spacers.
Instructions
Step 1
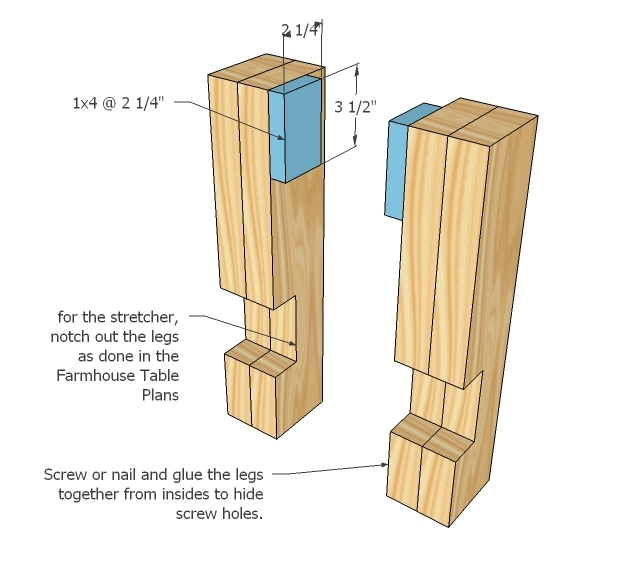
Legs The notches and stretchers on the legs is optional. Notch out your legs (for full instructions see the Farmhouse Table post) and laminate your legs together in pairs of 2 with glue and 2 1/2″ screws. Then take note of the placement of the spacers and attach to the insides of the legs. This will differ depending on the leg. Attach with 2″ screws and glue.
Step 2
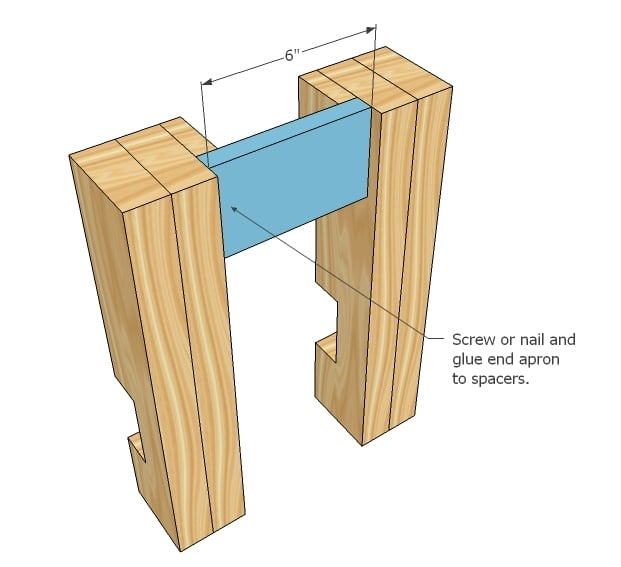
End Aprons Attach end aprons to the spacers as shown above. Use glue and 2″ screws.
Step 3
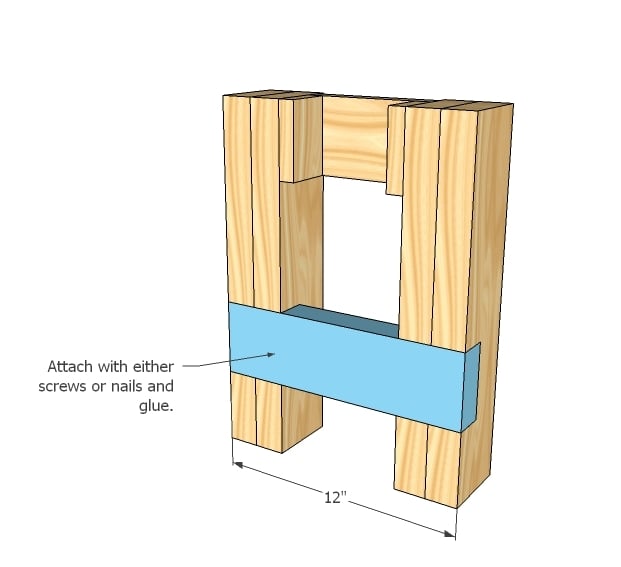
Stretcher The stretcher gets attached in the same method. Screws and glue.
Step 4
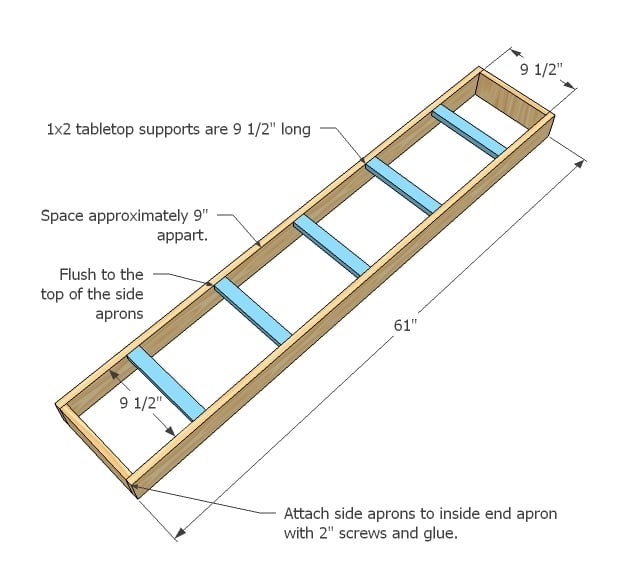
Bench Frame Build the bench frame, keeping the 1×2 supports flush to the top. Easy method is to flip it all over and keep the supports flush to the bottom :)
Step 5

Step 6

Seat Boards Find the center of the supports and begin attaching seat boards from the underside. Work with the boards to minimize gaps as you go. Attach all seat boards. If you have a pocket hole system, you would build your bench seat separate, and then attach.
Step 7

Breadboard Ends If you have a pocket hole system, you would attach the breadboard ends directly to the seat boards in step 6. Otherwise, attach to leg bases.
Step 8
Finishing If you are staining, be very careful to not let glue dry on the project, as these areas will not take stain. Fill holes with wood filler, sand and paint or stain as desired.

Comments
Brian Palacios (not verified)
Sun, 11/18/2012 - 08:15
Bench witha back rest
Does anyone know if there are plans online for the same bench but with a back rest. I have kids and would like to know they are going to fall back.
Thanks
Mamanola
Sun, 03/10/2013 - 04:25
Finishing what hubby started.
My husband built us a beautiful 8 seater teak table but has yet to even start the chairs, that was 2 years ago. I am going to make this bench as a surprise, hope it goes well. Thanks for the plan :)
Allen Lulu
Wed, 05/08/2013 - 19:04
Are the plans correct now?
After reading all the comments I realize that I might have purchased the wrong lumber now. Unless Ana updated the plans after the comments had all been made.
I am wondering, though, also about sanding and finishing. Did everyone use a power sander to make the 2x4s as smooth as possible on top or did you mostly leave it kind of rough? I'm not sure what to do. Thanks.
DJR
Sun, 08/18/2013 - 06:23
Just built this beautiful bench... here are some tips
This is a beautiful bench and not difficult to build. I want to provide some useful tips for anyone wanting to build it too.
1) Corrections to plans - See comment by Don on 2/2/2011.
2) Take care to make sure everything is square when building the bench frame in step 4. the 9 1/2" end pieces must be vertical in order to properly attach to the legs in step 5. This will ensure the bench legs and seat are at a 90 degree angle. If the the 9 1/2" end pieces are not vertical you can use washers as spacers when completing step 5. Placing a washer between the 9 1/2" end piece and the legs will allow you to correct the angle error if it is not 90 degrees. (place screw through the washer)
3) When attaching the breadboards to the legs I noticed there wasn't much space left on the top of the legs to anchor the breadboard securely. I would recommend cutting the bench seat boards to 64" instead of 65"; this will provide a 1/2" more anchor space on each leg to be used for the breadboard. A 64" cut on the bench seat boards will still be long enough to be properly supported by the legs.
4) Wait to cut the 12" strechers until you have completed step 2. There could be some variation in the actual length needed due to variations in steps 1 & 2.
jrowell2323
Tue, 01/14/2014 - 12:28
Love this bench!
I love this design to go with the table....I made a few variations...I switched most of the 1x4 to 2x4s....made the bench more sturdy
sritchey
Mon, 03/21/2016 - 10:11
Pictures missing
There are no pictures for step 4-8. I am new and at a standstill without pictures. Thanks!
sritchey
Mon, 03/21/2016 - 10:15
Pictures missing
There are no pictures for steps 4-8.
Ana White
Tue, 03/22/2016 - 10:00
Pictures Replaced
Hi, so sorry for the issue with the step diagrams disappearing. I have reuploaded. If you have google chrome, there is a caching issue where the diagrams may not show, so try viewing in a different browser or install Google Chrome cache killer extension. Thanks!
redwoodrustics
Sun, 05/08/2016 - 09:04
caution making this bench if...
Caution to anyone making this bench. The bench is based on the old table plans, not the updated pocket hole farmhouse table located at:
http://www.ana-white.com/2012/11/plans/farmhouse-table-updated-pocket-h…
if you build the bench in these plans it will be too long to slide under neath the updated pocket hole farmhouse table. you'll need to reduce the overall size of the bench both the bench aprons (the long ones) and the bench seat boards by about 6 inches total if you want it to fit with the farmhouse style kitchen table that is made with pocket holes.
also as a side note, the breadboard ends should be made with 2x4's not 1x4's.
redwoodrustics
Sun, 05/08/2016 - 09:06
and actually for the bench to
and actually for the bench to slide easily underneath i'd say reduce the overall size by 8 inches length wise because the stretchers on the farmhouse table (pocket hole style) are 67 inches long so you'd want the overall bench length to be 64 or 65 inches long to comfortably slide in and out without dinging the sides of your table
moonprysm
Fri, 05/27/2016 - 14:26
Supply list is off
Ok so I've done my math several times to check this. Lumber list calls for 4 2x4x8. This is 384 in. But the cut list calls for 8 16.5, 2 12, and 4 65. That's 416 inches.
hulkster51
Tue, 09/20/2016 - 10:21
dread board /seat boards
the cut list calls for 2x4 seat boards , but the bread boards are called for as 1x4these are not going to fit. so yes i guess my bread boards will have to be 2x4. would i be wrong to use 1x4 as seat boards instead of 2x4s, and when io build the table should the top be 1x4 instead of 2x4 tso as to match the bench seat , or does it matter as i sell this stuff and i am new to carpentry
NinaNewbie
Sat, 11/12/2016 - 02:32
How many does this bench seat?
How many does this bench seat? I'm thinking 3 but I'd like a bench that seats 4 if possible.
dhaynes1206
Thu, 11/17/2016 - 17:54
Plans off?
The plans have 1x4 for breadboard ends, but 2x4 for the bench tops? I used 2x4 for my breadboard ends, suppose you could double up to have same thickness. I also shortened this to allow the benches to be slid under the farm table when not in use to save space! great plans.
dhaynes1206
Thu, 11/17/2016 - 17:55
Haha suppose I should have
Haha suppose I should have read the other comments first :p
Traddman
Mon, 01/16/2017 - 09:53
Pocket hole system
I have everything cut but don't know where to join the boards with the kreg pocket holes. Any help would be appreciated. I am using the bench for my nephew's wedding and want it to look nice with no screws showing. Also what size screws I should use. The base is made of pine and the top is cypress. Thank you