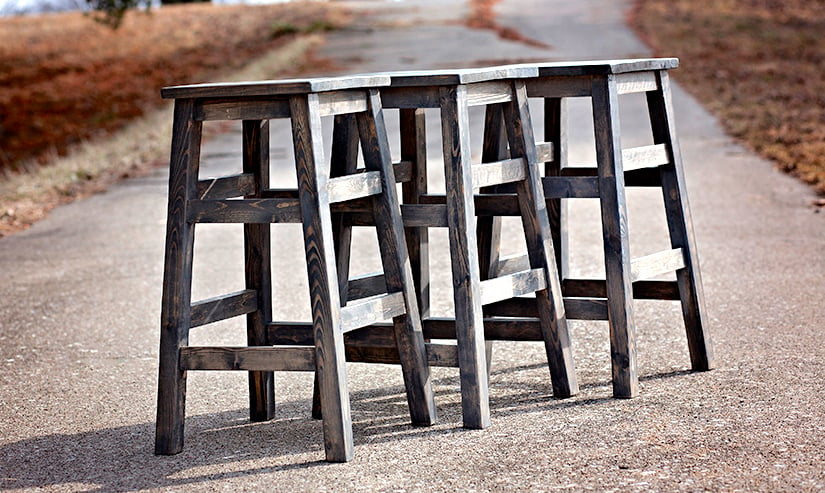


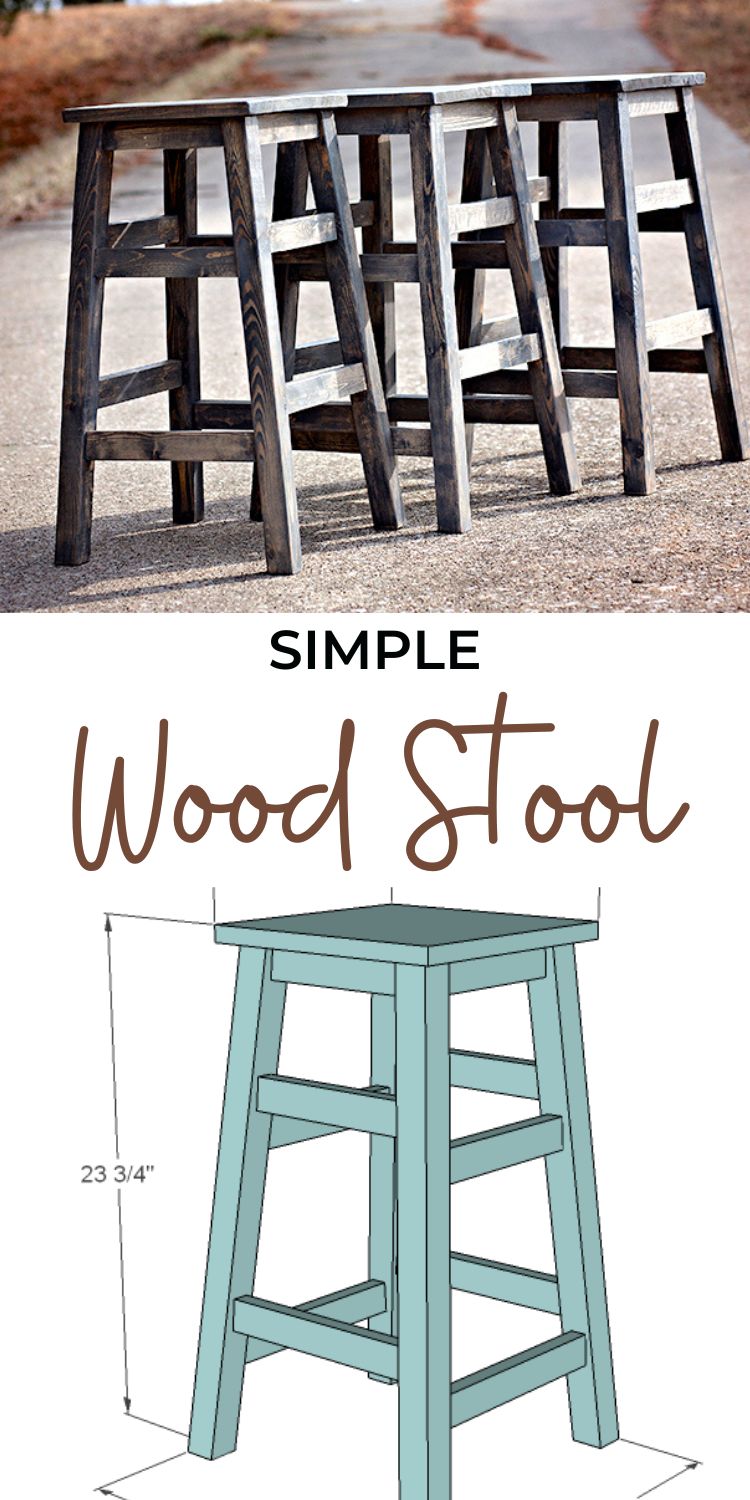
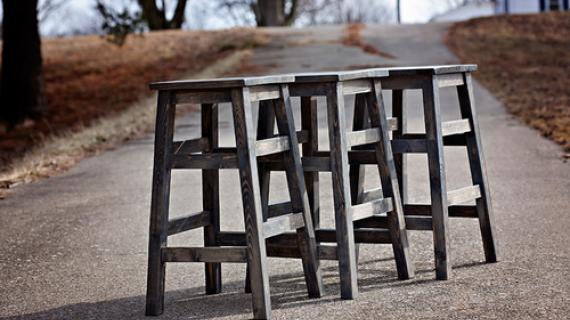
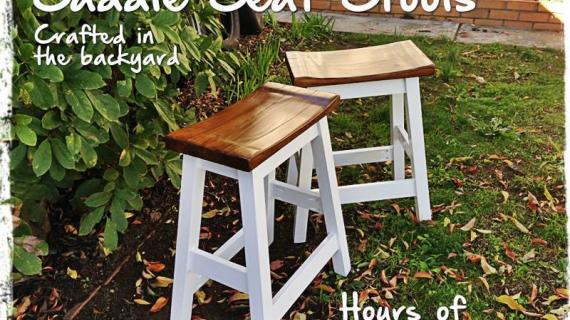
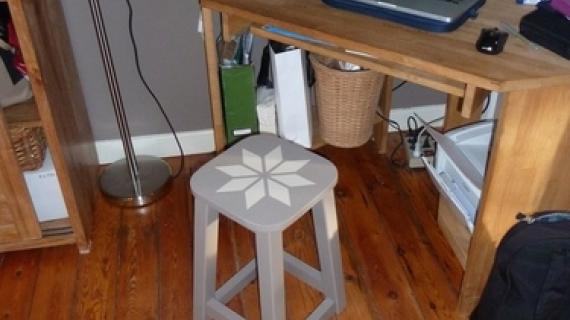
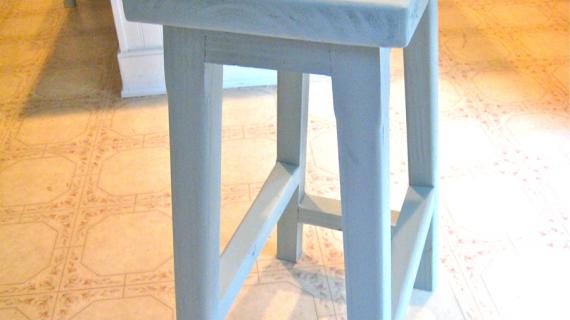
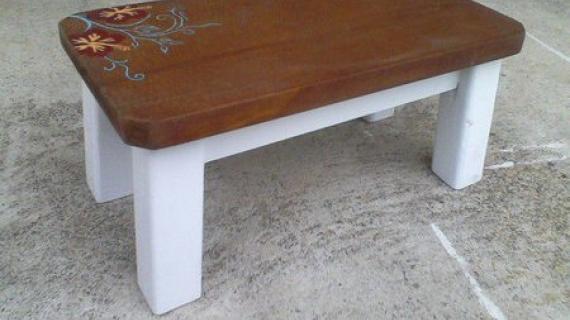
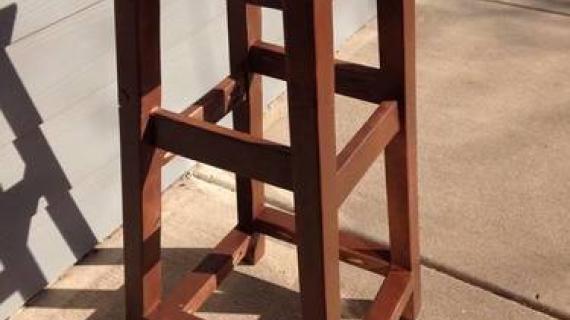
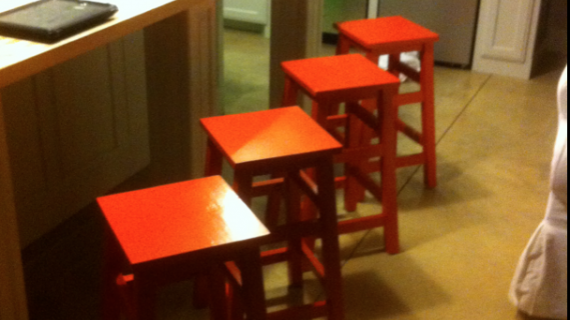
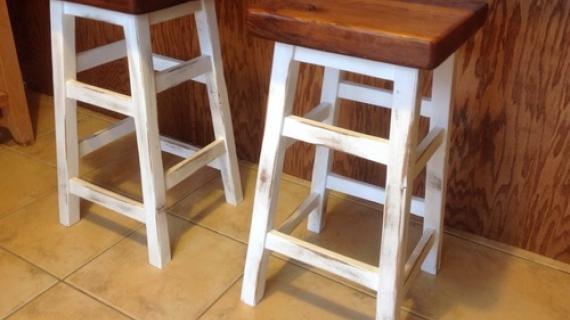
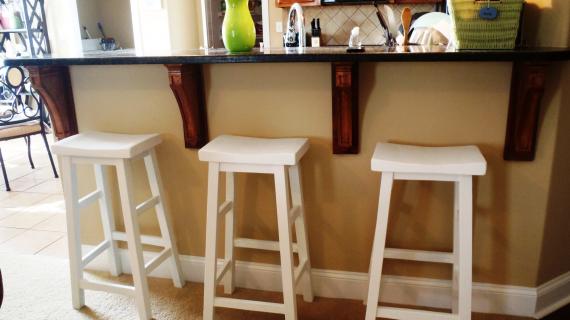
A very simple stool that can also be used as an end table. Try a round top, saddle seat or upholstered pad for a more comfortable stool. Free step by step plans with diagrams from Ana-White.com
Pin For Later!

Preparation
- 1 – 2×2 @ 8 feet long
- 1 – 1×2 @ 10 feet long
- 1 – 1×12 @ 11 1/2″ long or 12″ plywood round, 3/4″ thick
- 2 1/2″ screws (for countersinking) or 1 1/4″ pocket hole screws
- Wood glue, wood filler, sandpaper and finishing supplies
- 4 – 2×2 @ 23 1/4″ long, ends cut at a 5 degree angle AND a 5 degree bevel
- 4 – 1×2 @ 7″, short point to short point, ends cut at a 5 degree angle NOT parallel to each other
- 2 – 1×2 @ 10″ short point to short point, ends cut at a 5 degree angle NOT parallel to each other
- 2 – 1×2 @ 8 1/4″ short point to short point, ends cut at a 5 degree angle NOT parallel to each other
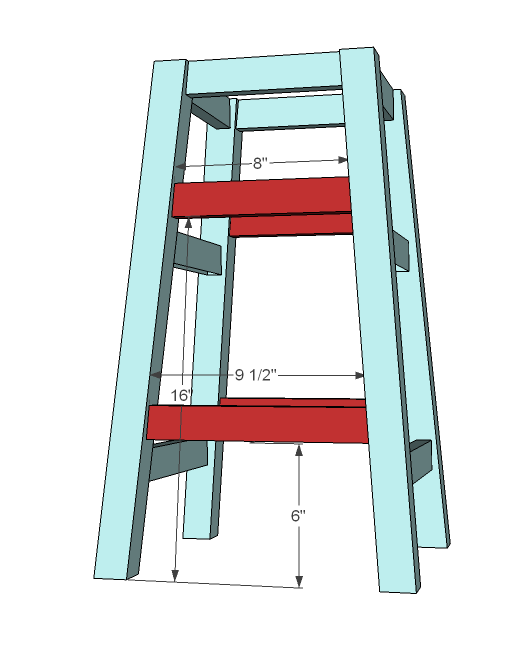
- 2 – 1×2 @ 9 1/2″ short point to short point, ends cut at a 5 degree angle NOT parallel to each other
- 2 – 1×2 @ 8″ short point to short point, ends cut at a 5 degree angle NOT parallel to each other
- 1 – 1×12 @ 11 1/2″ (cut to make a square, so measure the width of your 1×12)
To cut the legs, set you saw at a 5 degree angle and a 5 degree bevel. Trim off the end of the 2×2 as close to the end as you can. Then measure 23 1/4″ along the same edge and make a cut. You’ve got one leg. Continue simply sliding the board down and making more cuts (using the last boards cut as your first cut) until you have four legs. You should be able to get all four cuts out of one eight foot long 2×2. For the supports and rungs, all ends are cut at a 5 degree angle, NO BEVEL. Also unlike the legs, the ends will NOT be parallel to each other. Simply make a five degree cut, flip your board over by simply rotating it 180 degrees as you would rotate a rolling pin and measure the cut, short point to short point. Make another 5 degree cut.


For long term durability and more professional results, I recommend using a pocket hole joinery system for wood joints. Here is a video with tips for using a pocket hole jig:
Instructions
Step 1
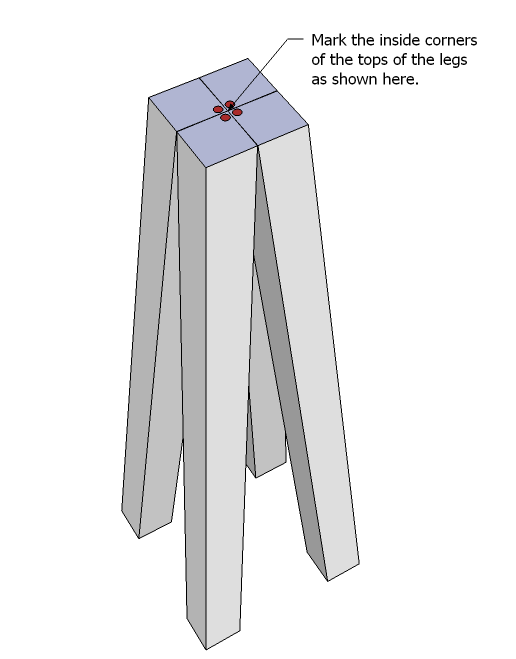
Mark Legs
Because the angle on the legs is only five degrees and is a double bevel, it is easy to loose track of the correct position of your legs. Stand your legs up as shown above, and mark the inside corners. Always remember that these corners will be to the inside of the leg.
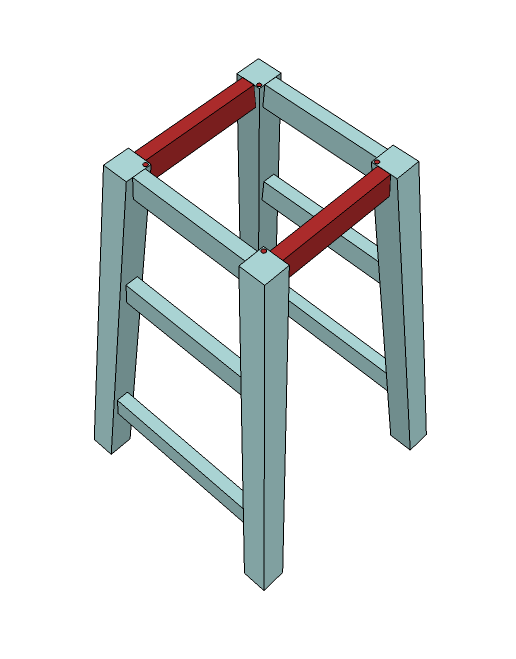
Step 2
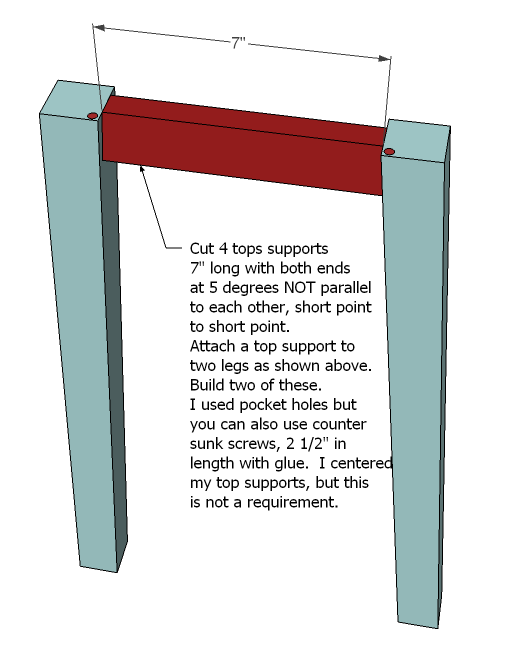
Top Supports
You will need to build two of the above legs sets, as shown above.
Step 3
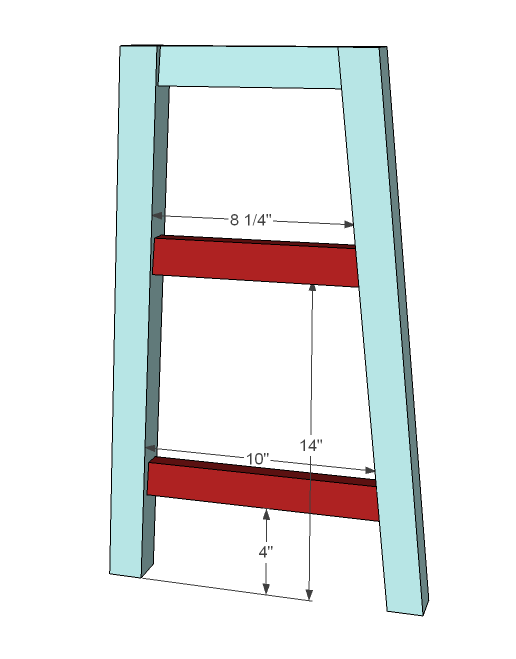
Additional Rungs
Add the additional rungs as shown above. Don’t forget the glue.
Step 4
Top Supports
Attach the remaining top supports to join the two leg frames as shown above.
Step 5
Step 6
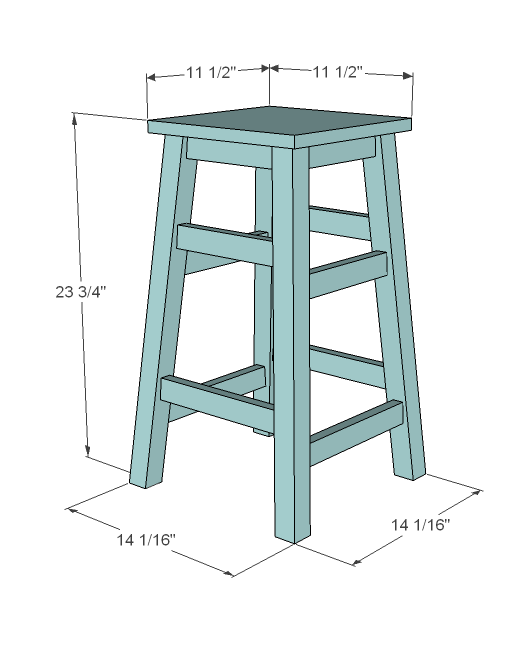
Top
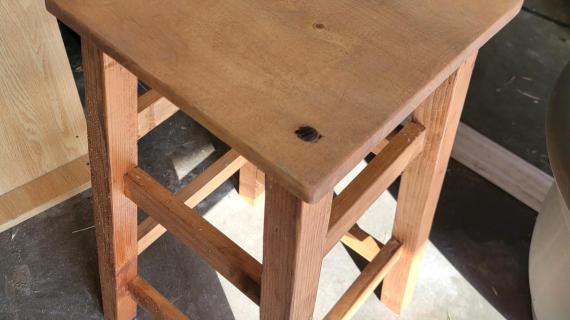
Attach the top as shown above. I screwed through the top supports into the underside of the top to hide screw holes.
Comments
Vanessa Fuson (not verified)
Tue, 01/18/2011 - 09:11
i love it! it normally is the
i love it! it normally is the simplest of things that we over look thanks ana!!
Jennifer (not verified)
Tue, 01/18/2011 - 09:14
You are a genius Ana!
You are a genius Ana!
kevin (not verified)
Tue, 01/18/2011 - 09:53
Hi Ana, Great little
Hi Ana,
Great little project. I am a little confused on the leg cuts. I think I get the idea of it, but this brought up an idea I had for you a while ago.. example videos. Is there any chance you would want to do some videos of yourself with some of these tips you provide? I'd love to see a close up of your miter saw and you setting it at 5 degree angle/bevel, and showing the cuts, for example. I am pretty sure you can set up a youtube channel and link the videos to your site here.
Mandy (not verified)
Tue, 01/18/2011 - 10:05
Ok I am so confused. My
Ok I am so confused. My counters and bar is the same height. They are 35.5" to the top of them. Would this be too short to use with them?
Marlene (not verified)
Tue, 01/18/2011 - 10:08
You are amazing! Just when
You are amazing! Just when our stools are starting to fall apart and you've posted plans for simple stools. I <3 this!!!
Thanks so much for your work.
Cari (not verified)
Tue, 01/18/2011 - 10:26
You state that these are for
You state that these are for "counter" height and not bar height... is there a reason that these plans (with a few adjustments) cannot work as bar height? We just finished our table and would love to add a few stools for when kiddos have company or we just have too many people and not enough seats... Your thoughts would be great! Our table is approx 43" tall and 44" square top! We just love it! If I could get the lighting right, I would post a few pics for you and your readers, but all my pics look horrible! LOL! Thanks!
Jayma (not verified)
Tue, 01/18/2011 - 10:34
Quick question: are all the
Quick question: are all the rungs cut with each end 5 degrees, not parallel?
Meg (not verified)
Tue, 01/18/2011 - 10:38
This is so fantastic! I need
This is so fantastic! I need to find a place in my home for a few of these....
Annalea (not verified)
Tue, 01/18/2011 - 10:42
This is really neat . . . to
This is really neat . . . to be able to see how a stool goes together. I saw a stool in the window of Pottery Barn (or was it Restoration Hardware?) that I'm going to knock off. It was beautiful, simple, and had a very clever twist.
Ah . . . it was PB: http://www.potterybarn.com/products/colby-stools/
Ana White (not verified)
Tue, 01/18/2011 - 10:56
Cari, if you made the legs
Cari, if you made the legs longer, then started with the top supports, these definitely could be bar height. I would perhaps add a third rung of supports. The structure is strong, so I see no issue there.
Ana White (not verified)
Tue, 01/18/2011 - 11:51
Jayma, that is correct, all
Jayma, that is correct, all the rungs are cut at 5 degrees, no bevel, end NOT parallel to each other.
Sara (not verified)
Tue, 01/18/2011 - 13:45
I love it... simple is the
I love it... simple is the best! What about a bar height one?
Anneke (not verified)
Tue, 01/18/2011 - 23:03
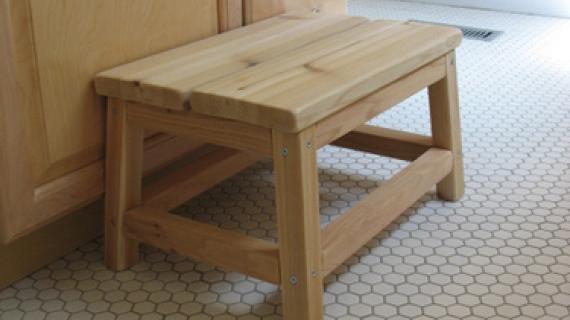
I'm thinking I might cut the
I'm thinking I might cut the legs shorter....I've been needing step stools in the bathroom for my 1, 3, and 5 year old. I love the design. And my hubby just got me a router and table for Christmas.....that would never have happened a year ago before I found your website! :-) Thank you!
denise (not verified)
Wed, 01/19/2011 - 02:53
I nominated you, over at
I nominated you, over at Apartment Therapy for best blog!
{{{Ana White
http://ana-white.com/
posted by deniseweber on January 19th 2011 at 7:51AM }}}
Tarah (not verified)
Wed, 01/19/2011 - 10:45
We bought a stool very
We bought a stool very similar to this for a side table next to the crib. I was just telling my hubby that we need more of them to use as tables.
Great timing on the tutorial. I'm stoked.
Ana White (not verified)
Wed, 01/19/2011 - 12:51
Mandy, counter height is
Mandy, counter height is approximately 36", so sounds like yours is the correct height for these stools. Bar height is 42", so you would need 30" stools.
SJC (not verified)
Thu, 01/20/2011 - 03:26
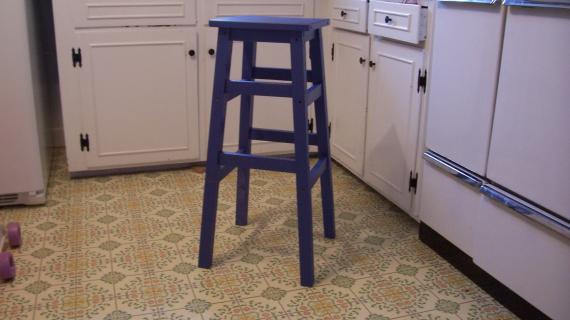
Okay, this has to go in the
Okay, this has to go in the project file too! I have lived in my new house for almost three years and have a counter height "breakfast bar" but have never had stools to go there. These would be perfect without the backs to tuck out of the way. And I think they would be fabulous in a lime green! Way better than all the boring brown and white ones in the stores!
lynnp (not verified)
Fri, 01/21/2011 - 05:05
I love this! Will work on it
I love this! Will work on it this weekend. Thanks Ana!
Ashley (not verified)
Sat, 01/22/2011 - 15:28
Ana, I love these. But what
Ana,
I love these. But what would the changes be to make them table height?
I desperately need some stools for the breakfast nook and I absolutely can't justify spending the $50-150 per stool that it would take to purchase them. Let alone purchasing something that I could make on my own (that would be silly)
bobgaivin (not verified)
Mon, 01/24/2011 - 16:02
I wish I saw this 24 hours
I wish I saw this 24 hours ago when I finished making a "stool" for my daughter's practice drum top without any plans!
Rhonda Roark (not verified)
Sat, 03/05/2011 - 01:50
Ana: Love your website.
Ana:
Love your website. It has inspired me at the golden age of 59 to start making furniture. Thanks.
My suggestion for these adorable stools is to post the correct dimensions for the legs and rungs for the various heights so readers can pick the one that adapts to their needs. I'd like one at chair seat height, but can't figure out the rung and support lengths.
Kerrie (not verified)
Sat, 03/05/2011 - 04:18
WOW!!! Thank you!!! My
WOW!!! Thank you!!! My husband & I made three stools for our island yesterday afternoon!!! It was so easy & fun! He is a woodworker and loves to build. It was fun to do this together. I can only imagine the look on his face when I sent him a text saying we need a Kreg jig!!!! It is good to keep him on his toes, never sure what to expect ;)!!! Thanks for all of your hard work & for sharing. I just recently found you. You are awesome. Thank you, thank you, thank you!!!!!!!!
MichaelCooper
Wed, 05/11/2011 - 20:15
Stool for $7! Wow!
I decided that a stool would be helpful in my garage-turned-shop so that I didn't have to stand all the time while I worked and this one caught my fancy--I've never done something with angled legs and it was cool to have such simple instructions on how to do it.
I made mine with 33" legs, though that turned out to be a bit too tall to be comfortable, so I'm going to trim them down to 30". I didn't add any additional supports and its still very solid.
I used 2 2x2s from orange that cost $1.47ea, a single 1x2 that cost me 3.12 and a picked up a scrap 1x10 that was about $0.50. To make it wide enough for the seat I attached two 1x2s to either side by glueing and screwing them on.
Voila! My wife wants me to make more for in the house now :)
Doug (not verified)
Sat, 07/09/2011 - 18:51
Simple Stool
Dear Ana,
You're cute and all, but you have worked me to death making these stools. I used your plan and knocked one out real quick on my chop saw but had to use 2 x 2"s all away around the top as I used up my 1 x 2 scraps. I put a red oak 11 3/4 round on the top. This made a great shop stool, but a number of friends saw it and you can guess the rest. Really great plan and very sturdy. Keep up the good work.
Guest (not verified)
Wed, 11/16/2011 - 04:57
plan modification
I need 36" tall stools to accommodate our 48" counter. How would I modify this plan for that? I don't know the first thing about woodworking but my husband has the basics. I think we could follow this plan if we knew where to make the appropriate changes. Thank you!
Erika (not verified)
Fri, 01/20/2012 - 12:37
Stools
Just made two, cost me $4 since I had scraps leftover from making the farmhouse table and two benches. Quick and easy, and cute, too! Thanks so much!!!
Milca (not verified)
Fri, 02/10/2012 - 21:23
Perfect height for my kids crafts table
Trying to figure out how to combine these dimensions with the Harriet chair. My kids have a higher than normal crafts table (custom built by my brother), and need chairs to go with the table. This plan provides the height I need, and the Harriet chair the style I would like. Just a little math and we should be able to make a sturdy craft chair. One for each girl, each a different color, it will be perfect :) Thanks Ana!
Menelom (not verified)
Thu, 05/24/2012 - 05:09
Web site design
Yes ... the design is clearly needed to be changed :)
What would be brighter , nebudu (
jaimecostiglio
Mon, 06/11/2012 - 10:11
round seat
Thanks Ana for these great, easy plans. I made this stool with a round seat top - 15" circle fits perfect.
http://thatsmyletter.blogspot.com/2012/06/s-is-for-stools-2.html
deschudon
Mon, 09/24/2012 - 06:25
Round Swivel Seat
Tried to make one of these with a round seat so I can add another round (or square plywood base and round top) with the swivel plate in between. Unfortunately, I cut my round at 12" as suggested in the PDF version, but it should say 16", so it provides about 5/8" overhang around. I now found the "Play Table Stool" plan and find it better explains how to install a round top as well as the stretchers with PHs. Attempt #2 for next weekend.
Jake
Sat, 10/06/2012 - 04:20
Circular Round Top
According to the Pythagorean theorem a round top should be about 16.25" in diameter to cover a square base with sides of 11.5 inches or a little over 14" to cover a square base with 10" sides. As such I would go with the 16" diameter round that you can buy at big Blue or Orange and simplify your life.
Mrswhetstone
Sun, 09/22/2013 - 05:34
Is it possible to make the 5
Is it possible to make the 5 deg. Bevel and miter cuts with just a circular saw? If so, how would I go about that? I haven't had the funds to buy a miter saw just yet.
Mrswhetstone
Sun, 09/22/2013 - 05:35
Is it possible to make the 5
Is it possible to make the 5 deg. Bevel and miter cuts with just a circular saw? If so, how would I go about that? I haven't had the funds to buy a miter saw just yet.
KBlend
Thu, 11/05/2015 - 07:57
Stool legs
Hi Ana love the site could someone answer this, are the legs mitered and beveled on both ends or just one. Also if just one which is the top.
cracker
Tue, 09/06/2016 - 16:46
confused & frustrated
I am attempting to make this stool as a "dry run" for a taller one. I am very confused at getting the correct angle/bevel on the legs & identifying the inside point/edge. I have a compound miter so did a 5 degree angle & 5 degree bevel at the same time. Hard to see the angle & that slight flattening - what is that for? Sorry to be a bit dumb in this but am a novice. Could not tell from pictures. Is it necessary to do the bevel - couldn't I just do the angle cut? I see where indicating the inside with a dot is a good idea - but I cannot tell which is the inside & which is the outside? HELP!
cracker
Thu, 09/08/2016 - 07:11
Cutting those legs
Ana - in yr instructions you explain making the legs out of one 8' 2x2. In my project I need the legs to be 5' long so not cutting out of one board but out of four 8' foot boards. Will it work the same - cut the first end, slide down 5' & cut the opposite end without lifting the board? Not sure if I messed this up making my dry run attempt. Yes, I said 5' - using this stool design to make a movable stand for a horse arena. Thanks for any help.
bennettoz
Mon, 11/11/2019 - 16:57
I am confused with the bevel…
I am confused with the bevel and angle portion of this. My miter saw only tilts to the right, but my base of my miter saw also rotates. Do I rotate the base by 5 degrees and tilt the blade 5 degrees at the same time? Also, do I rotate the base to the right as well?
queenie111
Sat, 05/01/2021 - 06:24
For the life of me. I can…
For the life of me. I can not figure out how to install the legs. Since it’s a double beveled cut, I don’t know which way to place the legs. Can you add a photo of them showing which way the bevels should be placed?