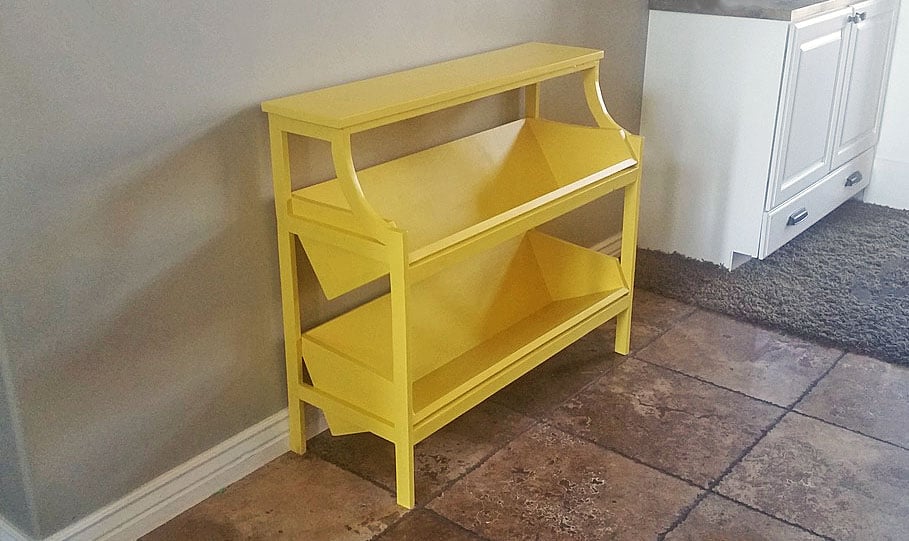


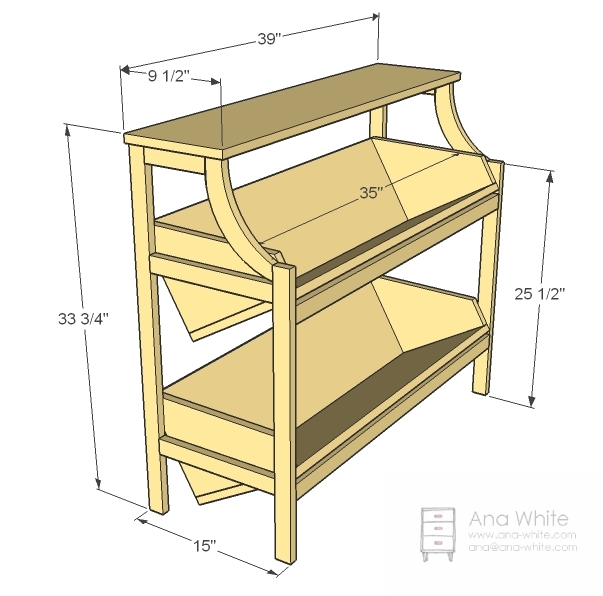
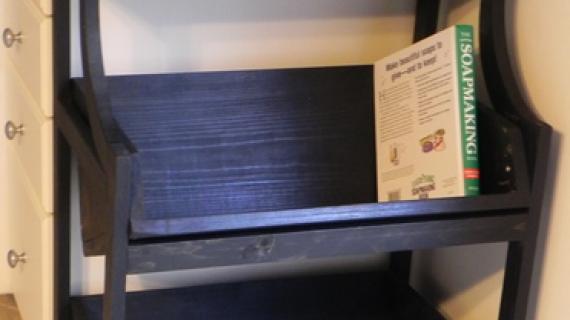
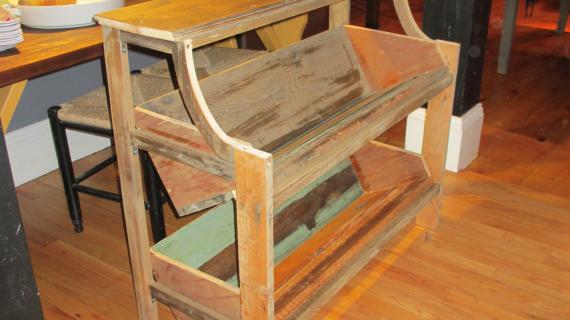
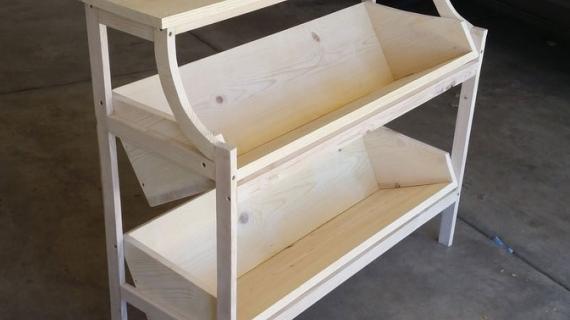
This library console table features two large shelves that are angled to keep books easily in place. Features a top shelf and curved sides perfect for cookbooks, magazines or children's books! Step by step plans with full diagrams from Ana-White.com
Preparation
- 1 – 1×12 @ 8 feet long
- 2 – 1×10 @ 8 feet long
- 4 – 1×2 @ 8 feet long
- 1 1/4″ self tapping wood screws or 1-1/4" brad nails and glue
- 1 1/4″ Pocket Hole Screws or 2 5/8″ Trim Screws
- Wood Glue, Wood filler and other finishing supplies
- 2 – 1×10 @ 6″ (Curved Fronts)
- 2 – 1×2 @ 33″ (Back Legs)
- 2 – 1×2@ 25″ (Front Legs)
- 4 – 1×2 @ 12″ (Sides)
- 2 – 1×2 @ 6″ (Top Sides)
- 4 – 1×2 @ 36 1/2″ (Front/Top Supports)
- 1 – 1×10 @ 39″ (Top)
- 2 – 1×10 @ 35″ (Backs of Shelves)
- 2 – 1×10 @ 11 1/2″ (Sides of shelves, cut to the width of your 1×12 boards)
- 2 – 1×12 @ 36 1/2″ (Shelf Bottoms)


Instructions
Step 1
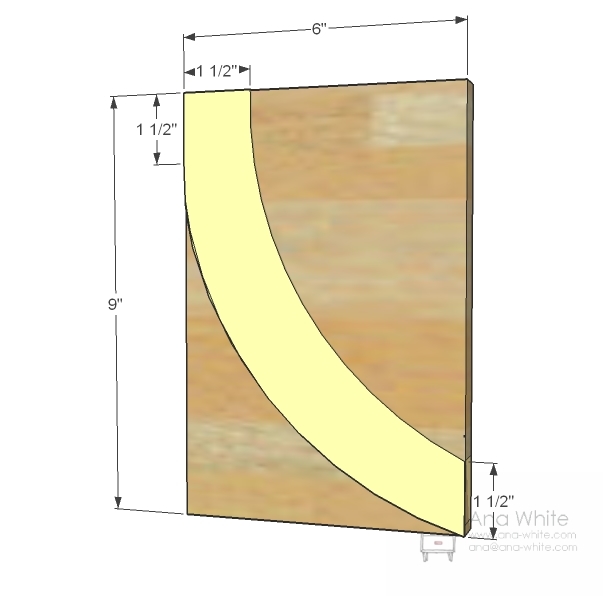
Curved Fronts
From the 2 1×10 pieces 6″ long, draw out a pattern as shown above and carefully cut out with a jigsaw. It’s a good idea to use the first one you cut out as a pattern for the second. Clamp the two cut pieces together and sand the cut edges until the two pieces match.
Step 2

Ends
Once your curved ends are cut out and sanded, lay out the end pieces as shown above. If you have a Kreg Jig™, predrill pocket holes. Otherwise, carefully glue and predrill holes with a countersink bit, and attach with 2 5/8″ trim screws. Clamps will really help out during this stage. You will need to build two of these. Make sure the two ends that you build match and are square.
Step 3
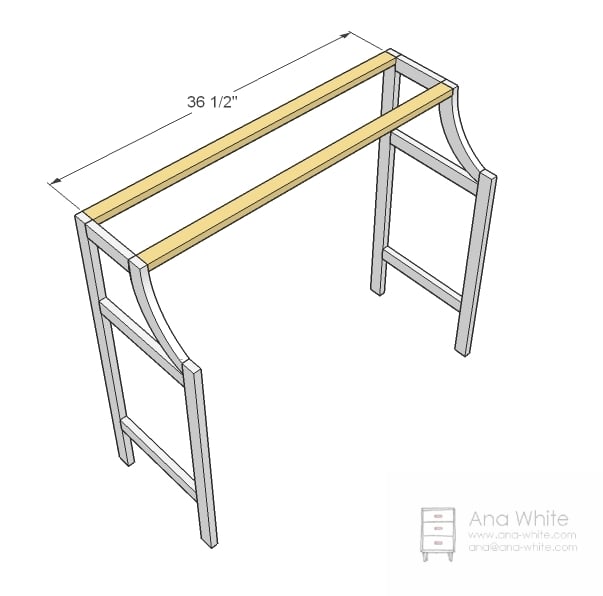
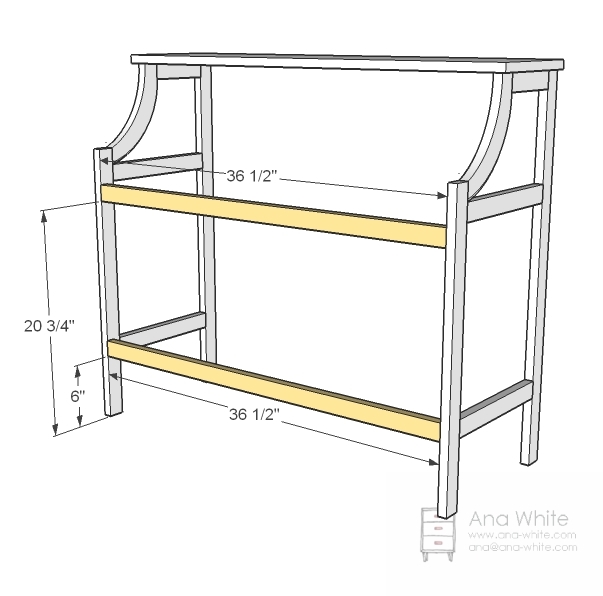
Top Supports
Attach the two legs together with the top supports as shown here. Use either pocket holes or the trim screws countersunk and glue.
Step 4
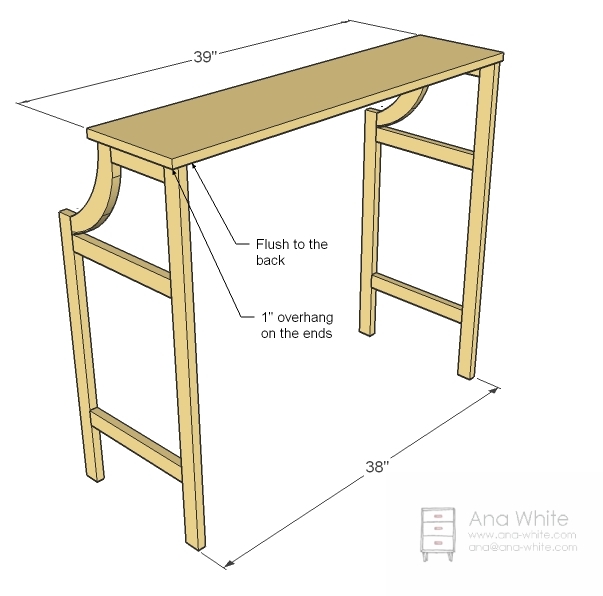
Top
Now attach the top to the sides as shown above. Simply screw through the top supports (not shown in diagram) into the underside of the top. Use 1 1/4″ screws and glue.
Step 5
Step 6

Shelf Sides and Back
On this step you need to measure the width of your 1×12 and adjust the cuts on the sides (the triangular shaped pieces) so the bottom (measurement shown at 11 1/2″) is the same as your 1×12 width. Cut the end pieces from a 1×10, with 9 1/2″ shown as the width of the 1×10. If your 1x10s are slightly less, it will not matter, as the back is also a 1×10. Attach with screws and glue.
Step 7

Shelf Bottom
Attach the shelf bottom shelf sides and back with screws and glue. Outside edges should be flush.
Step 8
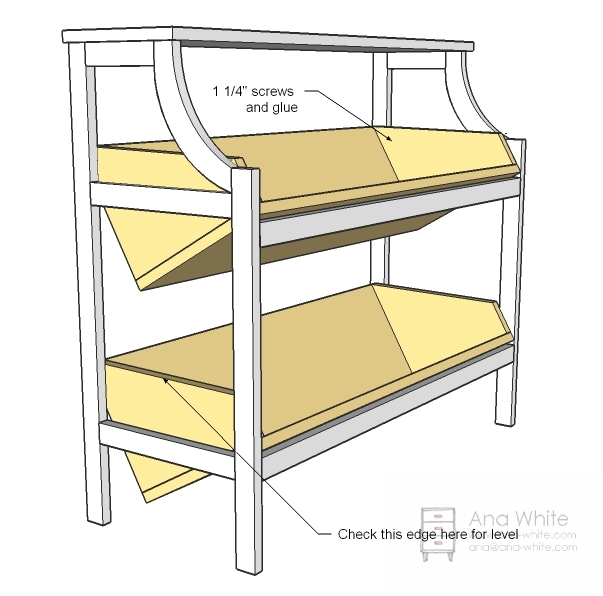
Shelf Assembly
Position the shelves inside the frame. The front can rest on the front supports. Use a level to ensure that the sides are level. Use 1 1/4″ screws and glue to attach the shelves to the sides.
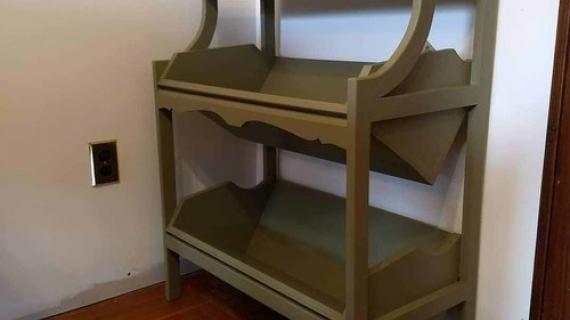
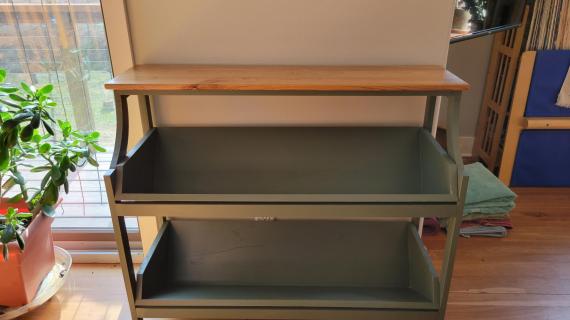
Fill all of your exposed holes with wood filler and let dry. Apply a second coat as needed. Sand with 120 grit sandpaper. Remove all sanding residue with a vacuum followed with a damp cloth. Apply primer (for painting) or wood conditioner (for staining) as instructed by the manufacturer, followed with paint or stain and a top coat as needed.
Thank you MIZZFRIZZ and everyone else who takes their time to request plans. I am listening, and hopefully, will be able to tackle lots more reader requests in the next bit. Have a great day, appreciate your support!
Comments
Lynn (not verified)
Thu, 02/24/2011 - 01:40
I love, love love this! I
I love, love love this! I have to make one (or two) for my office to organize files and forms, etc. One or two for the craft room woulb be great for sewing patterns and design books. Your the best! Thanks Ana!
Diana B (not verified)
Thu, 02/24/2011 - 03:27
This is great and so
This is great and so practicle for different applications. Thanks for posting!
Jill (not verified)
Thu, 02/24/2011 - 03:32
I have seen this in a catalog
I have seen this in a catalog somewhere but cannot remember which one. I loved it then and it looks even better now that I can build it myself!! I am wondering if it's possible to put the pocket hole visible on the sketch? I would like to build that way but admit it slightly confuses me:(( Just curious. Thanks Ana. As always, YOU ROCK!!
Bonnie from Lo… (not verified)
Thu, 02/24/2011 - 03:47
All of the above! Very cute!
All of the above! Very cute!
shelley (not verified)
Thu, 02/24/2011 - 07:01
Thank you, Thank you, Thank
Thank you, Thank you, Thank you, Thank you! I need about 5 of these for different spots around my house :)
Lavina D. (not verified)
Thu, 02/24/2011 - 09:25
I have been wanting this
I have been wanting this shelf ever since I saw it in a JC Penny catalog about 10 years ago! This one just moved up the list!!
Stevi (not verified)
Thu, 02/24/2011 - 11:23
FANTASTIC! I tore this out of
FANTASTIC! I tore this out of a catalogue 10 years ago! hahah you would have think I would have purchased it by now BUT now I can build it! Thanks for posting! OOPS LAVINA JUST READ YOUR POST! ~Me too!!
Mandy B (not verified)
Thu, 02/24/2011 - 12:28
I have been saying all day
I have been saying all day that luck was on my side. Coming home to find this plan on your website affirms just that. I have been looking for this plan for over a year. I have also been a faithful follower of your website for the last year and a half (you know - back when you were still "knock-off" wood). To be quite honest I have been afraid to try anything because I'm afraid of the circular saw. Pathetic, huh? However this last weekend I made my boyfriend stand-by while I tried the darn thing. Come to find out it's no big deal! It's actually quite easy! I bought an air compressor with a nailer and decided to give that a whirl too. Guess what? I do a better job than my boyfriend with the nailer! I think I might be on to something here! Then today I found this plan on your website. Hallelujah! I have been wanting this since I remodeled my bedroom. Like the requestor I have a huge pile of books on my nightstand, under my nightstand, and sometimes even in my bed! Goodbye dust bunnies.
Ana White (not verified)
Thu, 02/24/2011 - 12:44
Mandy, thank you for your
Mandy, thank you for your comment! You made my day! I'm so happy for you!
Jessica (not verified)
Thu, 02/24/2011 - 12:44
I have two kitchen cabinets
I have two kitchen cabinets in my living room (without the doors, painted, they look just like low bookshelves) because they fit the space I had and I *always* need more room for books. But, these would be so much cuter and they look really easy. Thank you Ana!
Ana White (not verified)
Thu, 02/24/2011 - 21:41
Thank you everyone! I'm so
Thank you everyone! I'm so glad you liked this design! I cannot wait to see it built!
meredith (not verified)
Sat, 02/26/2011 - 16:04
I am totally going to have my
I am totally going to have my students make this for our text books. The girls group could absolutely make this one! I feel a service learning project coming on....
Theda
Wed, 04/13/2011 - 04:39
I can't believe I've found
I can't believe I've found the plans for this unit. I just saw in Ballard Designs Catalog a few days ago and love it! Thanks for the post.
martha_aint_me
Mon, 06/13/2011 - 08:06
Books/Library
open display for mags., & books
Ryver (not verified)
Mon, 07/11/2011 - 15:01
How About DVD's
This would be great re-sized as a media cabinet for my collection of DVD's, Bluray discs and CD's.
KimM (not verified)
Sun, 07/15/2012 - 07:57
flat shelf instead of tilted on bottom
What if I wanted to have a flat shelf on the bottom like the one at Ballard Designs? How would I do that?
Ines (not verified)
Thu, 01/17/2013 - 18:33
I can't see the PDF
Hi, thanx for share your ideas I love them. Could you check please why i cant see the PDF file of this one and of the "Kendra Storage Console" I want to make them. Regards from Monterrey, Mexico :-)
craigaa22
Tue, 10/20/2020 - 12:08
Tweek
Any tips on adding/making this with a third shelf? My daughter has a LOT of books! Thanks so much!!