
Difficulty
Beginner Projects
| 
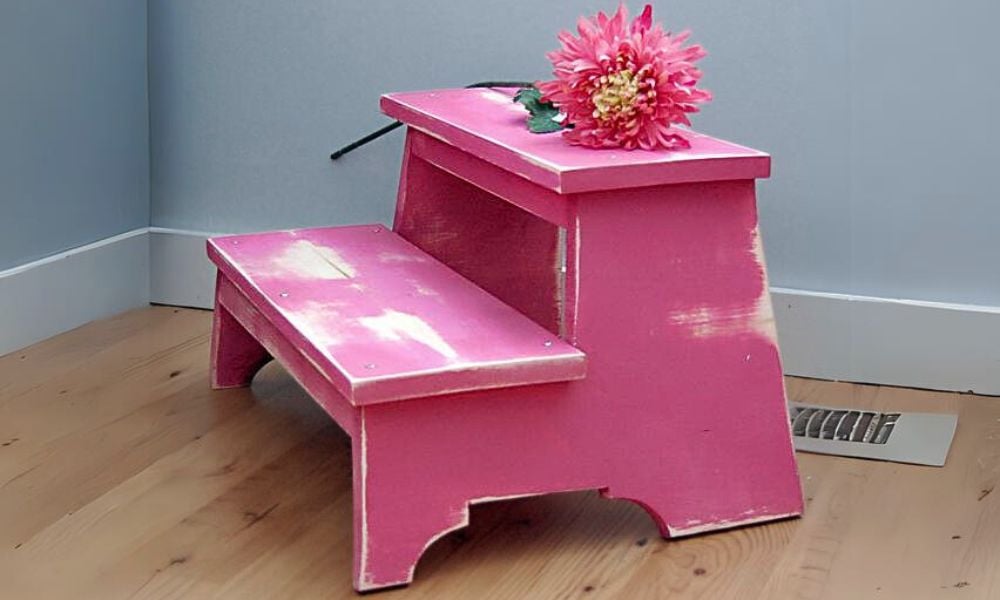
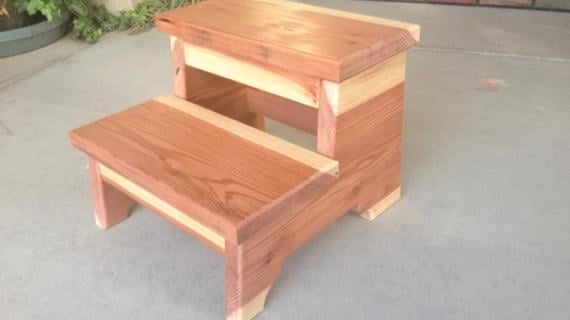
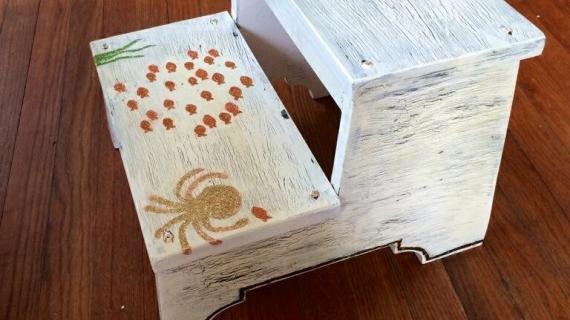
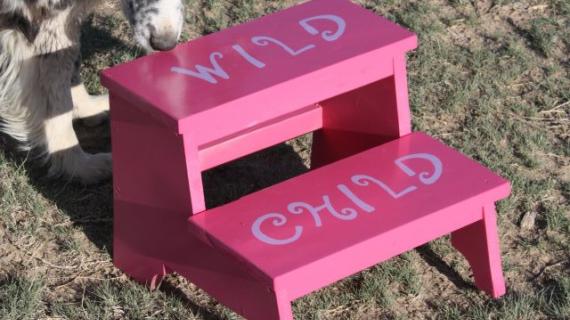
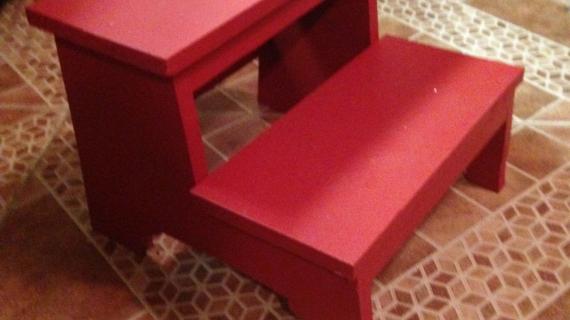
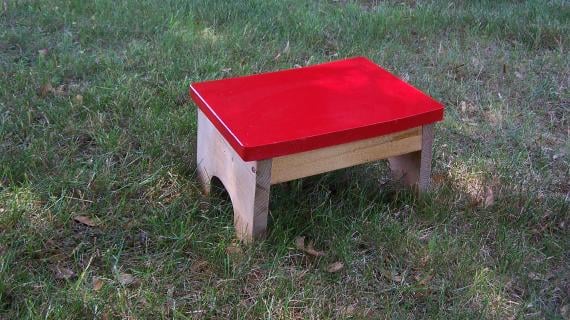
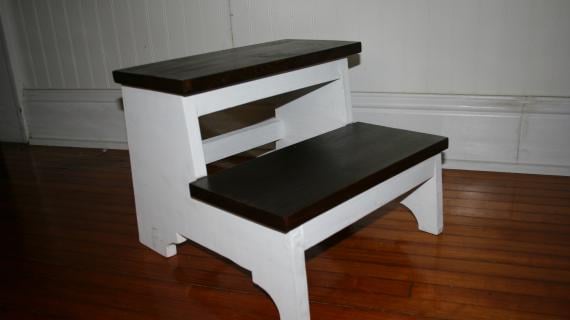
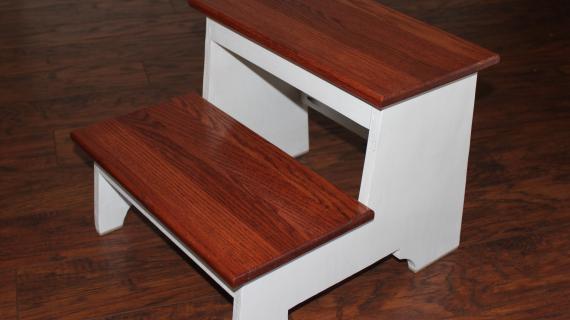
Free plans to build your own step stool. This step stool features splayed sides and lots of detail.
Related: Simple two step stool plans
Dimensions

Dimensions are shown above. I find this stool perfect to give Grace that extra boost to brush her own teeth, climb up on our Farmhouse Bed, or get in and out of the bath. You will be surprised at just how big this step stool ends up being.
Preparation
Shopping List
- 1 – 1×12 @ 32″ (Sides)
- 1 – 1×2 @ 50″
- 1 – 1×8 @ 32″ (Treads)
- 2″ self tapping star bit screws or 1 1/4″ pocket hole screws
- wood glue, wood filler and finishing supplies
Cut List
- 2 – 1×12 @ 15 1/2″ (Sides – cut out in step 1)
- 4 – 1×2 @ 12 1/2″ (Supports)
- 2 – 1×8 @ 15″ (Treads)
Tools


Instructions
Step 1
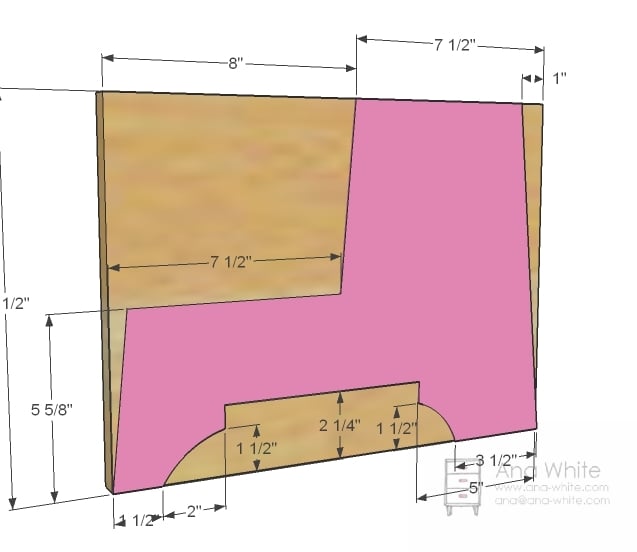
Sides
Use the measurements above to cut from the 1x12s sides as shown above. Use a jigsaw. Once you have on side cut out, use it as a pattern for the other side. Take note of which side of the line you should cut on and take your time cutting. Sand edges so the two pieces are the same.
Step 2
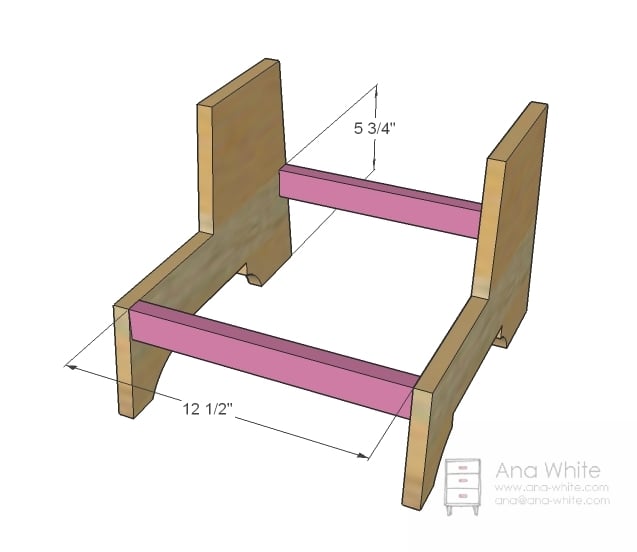
Bottom Supports
Attach the bottom supports with screws and glue. I used pocket hole screws, but you can also use 2″ wood screws and a good old countersink bit.
Step 3

Top Supports
Now attach the top supports in the same way as the bottom supports.
Step 4
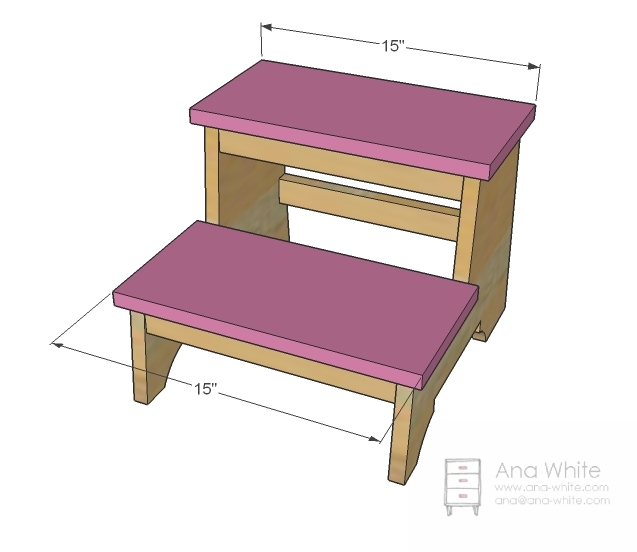
Step 5

Finishing Instructions
Finish Used
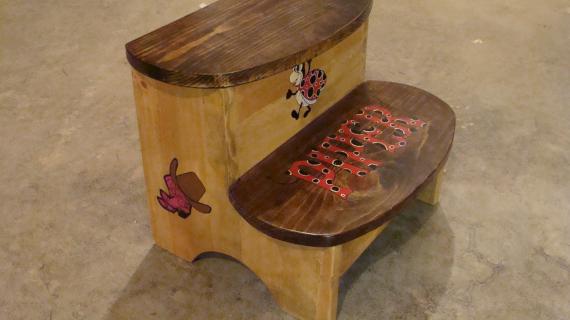
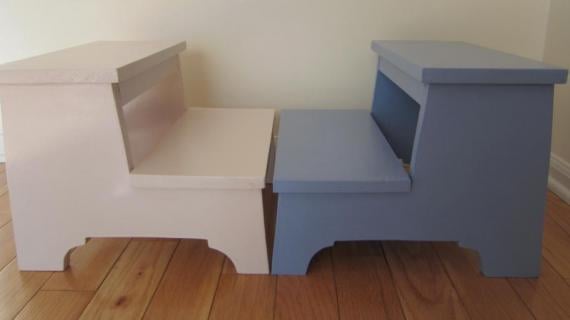
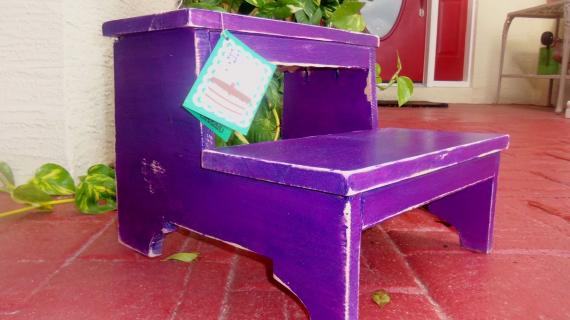
Now for the fun part. I love painting and finishing smaller pieces. I encourage you to try a unlikely finish on your step stool. You can always add another coat of paint! Have a great weekend!
Project Type
Room


Comments
Jaci (not verified)
Thu, 02/03/2011 - 20:10
Cute, Anna. Reminds me of
Cute, Anna. Reminds me of one my brother made for me many, many years ago.
mamma_joy (not verified)
Thu, 02/03/2011 - 20:21
I'm going to be making
I'm going to be making something like this, but hoping to add another step and some guardrails (side walls?) on the sides so that our just turned 1 yr. old can find his way down off of our tall bed. This gives me some more ideas! Oh, and I know I'm going to build it b/c I've heard my hubby tell my girls, "Mommy is going to make him something so that he can down safely"--he believes in me!
Sharon Lambirth (not verified)
Thu, 02/03/2011 - 22:28
I have some beautiful square
I have some beautiful square cut nails that would be perfect for this!
Leslie (not verified)
Fri, 02/04/2011 - 04:16
I have been wanting something
I have been wanting something like this ever since we've been considering potty training our toddler. And now... I want to paint it pink, even though we have a boy. Ana you are amazing.
Bonnie from Lo… (not verified)
Fri, 02/04/2011 - 04:59
Oh... how... cute... I
Oh... how... cute... I dont have any small children (or grandchildren yet) anymore, but I still want to make this, and paint it pink! I have all kinds of places where a stool like that will be useful in my house! I like how your stool is flaired at the base too. I love the exposed screw heads too. Makes it look, like you said, well used and far from perfect. Love it. Thanks again Ana!
Lori (not verified)
Fri, 02/04/2011 - 06:32
I've been waiting for
I've been waiting for something exactly like this. My niece is pregnant and this is something I planned on making for the new baby!! Thanks for the plan, Ana!
Lynn in Canada (not verified)
Fri, 02/04/2011 - 07:28
So so perfectly vintage! Love
So so perfectly vintage! Love it and the colour choice. This is such a great piece, thanks Ana!
Chair (not verified)
Fri, 02/04/2011 - 10:55
I have a very tall bed and a
I have a very tall bed and a step stool like this with an upholstered top would be soooo lovely. I'll have to get on that :)
Robin (not verified)
Fri, 02/04/2011 - 13:10
I LOVE this finish!! That is
I LOVE this finish!! That is SO cute!! I have boys, so mine would have to be blue but I'm SO taking sand paper to that baby!! (The stool, not my actual baby.)
Theresa (not verified)
Fri, 02/04/2011 - 13:24
I love this and I need this
I love this and I need this for me !!!!!! The finish info is very helpful. Thank you Ana. i need to start collecting scrap and recycle wood for these little projects.
michelle (not verified)
Fri, 02/04/2011 - 15:11
I totally need this since I
I totally need this since I am short. :) Thank you sooooo much.
aubri (not verified)
Fri, 02/04/2011 - 16:01
I am excited to make this,
I am excited to make this, might need two or three for all my boys :) unfortunately not pink :I
Barbara (not verified)
Sat, 02/05/2011 - 08:43
This is adorable but it looks
This is adorable but it looks like the one you built has angled legs. Do you have the angles? I love the look.
guest (not verified)
Tue, 03/06/2012 - 18:24
Hi Barbara, I was thinking
Hi Barbara, I was thinking the same thing and thought they looked angled. Did you angle any of your cuts? If so do you mind sharing what angle you used?
Lorna (not verified)
Sun, 02/06/2011 - 11:57
Just finished this step stool
Just finished this step stool and it turned out great! It feels very sturdy and is super cute. I wanted an easy project to test out my new Kreg jig (which, by the way, I LOVE). It took me about 2 hours and less than $20. Now I just need to decide on a color. This will be a great gift and cheap if you use scraps!
Amy (not verified)
Tue, 02/08/2011 - 06:00
Thanks Ana for the great
Thanks Ana for the great plans! I built this on Sunday. Pictures here. http://amykayparnell.wordpress.com/2011/02/08/super-stool/
amy (not verified)
Tue, 02/08/2011 - 10:26
@ Amy--great job! What
@ Amy--great job! What finishing technique did you use?
Amy (not verified)
Wed, 02/09/2011 - 17:45
Well I know next to nothing
Well I know next to nothing about finishing, so it's probably all wrong. But I stained it dark then painted it yellow. Oops paint FTW! Then sanded it. Everyone thinks it's really old, not a few days old!
rhonit
Mon, 03/14/2011 - 04:32
my 1st build!!
I decided to tackle this step-stool as a first build as an OMG moment. When my husband’s almost 4 yr/old granddaughter was taken just a little too much time in the bathroom washing her hands, cuz' she is "big enuf' to do it by herself", she was standing on the toilet washing her hands. All I could picture was her slipping and busting her chin or head on the countertop or toilet. So, after a quick trip to town, I had all my wood. Out to the barn and started cutting, it took me all of 15 minutes to cut everything out and sanding, well that took a few days. I had to clean out the storage building in the hunt for my sander. Which amazingly sprouted wings and flew away. After another trip to town to purchase a new sander, I finally had it sanded. I asked my husband to use his new (Valentines present, purchased with motive) Kreg gig, to drill the holes for me. Now it was together, what to do for the finish?? After having it sit on my kitchen table for about a week (nope don't use table much) I decided to stain the little step stool. I had oak stain and black stain (both from previous projects), oak stain first ... ugh, hated it; try the black stain, not a good look. Paint? Why not?! First some white then a touch of red and lastly turquoise. OMG again, that looks like one Hot Mess!! Sand like crazy, O' O' that is starting to look like something. But what? Old barn wood. Turned out great!! Woo Hoo! Husband thinks I did it purpose, little does he know. I have tried to post a picture but unable, not because of site, but because my lack of know-how. Love the new site!! Love all that you do!!
In reply to my 1st build!! by rhonit
rhonit
Mon, 03/14/2011 - 05:23
Woo Hoo!
Firgured it out, see the picture on the Blog Brag!
erinbarbour
Mon, 08/15/2011 - 20:47
question
I just bought the wood and started cutting for the foot stool. I only have a circular saw, not a jigsaw. Do you think I should buy a jigsaw - will it make the cuts easier for this? Also, should I buy a cheap one ($30-$50)or is it worth it to invest in a more expensive one ($100 -$150). Any advice would be appreciated!
Erin
In reply to question by erinbarbour
Ana White
Mon, 08/15/2011 - 20:57
Hi Erin, definitely having a
Hi Erin, definitely having a jigsaw is well worth the investment. You'll need it for all sorts of cuts, like finishing circular saw cuts or cutting curves. I'd definitely invest in one. I had an inexpensive one for years and it did just fine.
Another thought - and would love other reader's input here - is using a router or rotozip or dremel for cuts like this. Then you could use the dremel tool to finish edges as well.
Just some thoughts good luck! Just admiring my step stool today, still LOVE it and it's really the jigsaw work and the distressing that makes me love it so much!
claydowling
Tue, 08/16/2011 - 05:56
Routers and Dremel Tools
There's really no replacement for the jig saw, unless you decide to drop the big bucks on a bow saw or band saw.
Dremel tools are great if you're making models or doing fine detail work, but I hardly every use mine. Routers are better for duplicating an existing curve.
The only other option you might consider is a coping saw. It will take slightly longer, but it's quite inexpensive and perfectly capable of making these cuts.
erinbarbour
Tue, 08/16/2011 - 07:55
question answered
Thank you so much for the advice. I do have a coping saw, which I was thinking about using for the curves. I think I will invest in a less expensive jigsaw anyway. I'll try to post pictures when I'm done. Thanks again to Anna and Clay.
Erin
Sara (not verified)
Thu, 01/05/2012 - 07:11
Side measurement
Shouldn't the length of the side pieces be 16 1/2"? 8 + 7 1/2 + 1= 16 1/2. Right? Or am I missing something, which is ENTIRELY possible. ;)
In reply to Side measurement by Sara (not verified)
claydowling
Thu, 01/05/2012 - 07:16
Misreading plans
That 1" you're trying to add isn't and additional width. It's the inset from the edge for the back of the top step. It's irrelevant to determining the length of the side piece.
Sara (not verified)
Thu, 01/05/2012 - 07:50
really?
I would agree but the problem comes with looking at the picture. Because the back cut is at an angle, terminating at the full length of the cut board I think it does matter. In the picture, across the top it has 3 measurements which add up to 16 1/2 inches.
In reply to really? by Sara (not verified)
claydowling
Thu, 01/05/2012 - 07:56
Look closer
The 1" measurement is inside of the 7 1/2" measurement. That's common notation in plans.
If you want to make it 16 1/2" long in total that's your choice, but you'll have to adjust other measurements if you do. It's not really a problem, in practice you don't actually fit everything exactly to plan dimensions anyway. In fact unless I'm building machinery I very rarely use a detailed measured plan, but instead measure from the piece to fit my needs.
Sara (not verified)
Thu, 01/05/2012 - 08:24
Lightbulb!
Ahhh, okay that makes sense. Thank you so much Clay! I'm not a skilled or experienced woodworker by any means so I appreciate the assist!
claydowling
Thu, 01/05/2012 - 09:58
Back when I was a kid
In the dark ages before there was an Internet, shop class was a mandatory part of the educational curriculum, and drafting was about half of the introductory class. Unfortunately schools are defunding vocational training like shop class and home economics.
Guest (not verified)
Thu, 01/19/2012 - 20:46
stepstool
this is a great thing to build with youre dad because you get quality bonding time
winter_baby26
Thu, 06/28/2012 - 07:45
Adorable!
I love the finish on this stool - it's very inspiring! If the weather in Chicago cools down in the next few weeks, I might be tempted to make one that looks just like this!
Pauly (not verified)
Mon, 10/01/2012 - 17:37
Router to add corners?
Ana, I looked at many step stools (this one will be for our dog to get on to the bed) and my wife and I both chose this design. My question to anyone who might have experience with this. In so far as looks and possibly safety is concerned, how would it look if the corners were rounded on this vintage stool?
In reply to Router to add corners? by Pauly (not verified)
sharon-l
Sat, 10/13/2012 - 18:53
It would look amazing to
It would look amazing to round the corners...it's your stool!
Mike H (not verified)
Sun, 01/13/2013 - 17:49
A quick tip
Ana, when you are ready to cut out your sides from your 1 x 12 blanks, use some good double sided tape to adhere your two pieces together. When you cut, you'll get two exact sides. Keep them taped together and sand them. Pull apart when done. Cuts your time in half.
Jake
Thu, 08/01/2013 - 19:43
Splayed Legs
It appears that in the final photos the legs are splayed outward but in the plan it appears they are perpendicular. What gives and are there other plans for the stool with the splayed legs?
Jake
Thu, 08/01/2013 - 19:43
Splayed Legs
It appears that in the final photos the legs are splayed outward but in the plan it appears they are perpendicular. What gives and are there other plans for the stool with the splayed legs?
Brooke714
Sun, 06/01/2014 - 06:47
Did you figure out how to
Did you figure out how to make it with the legs splayed out?
Brooke714
Sun, 06/01/2014 - 06:44
Stuck
How can I make the stool with the legs at an angle like in the picture? I have cut everything out and it is ready to put together, but I'm stuck on what angle to make it. It makes the top come together too much. Any suggestions would be appreciated!!
prettygully
Sun, 06/01/2014 - 23:14
splayed legs
there are plans for a stepstool with angled legs in ana's book (project 14) - albeit with a slightly different (inset) front step
Debbie742
Sat, 09/13/2014 - 07:26
measurement question
Hey all...I am getting ready to cut out the sides and am confused about how far in to cut the front part of the stool. On the plan it has a height of 5 5/8s, but the mark to the left of that measures from the bottom of the page to the top saying 1/2" Is that how far to measure in from the bottom to the top of the 5 5/8 cut?? Please help...i'm ready to build today and would love to get this right the first time..
debbie cadene.