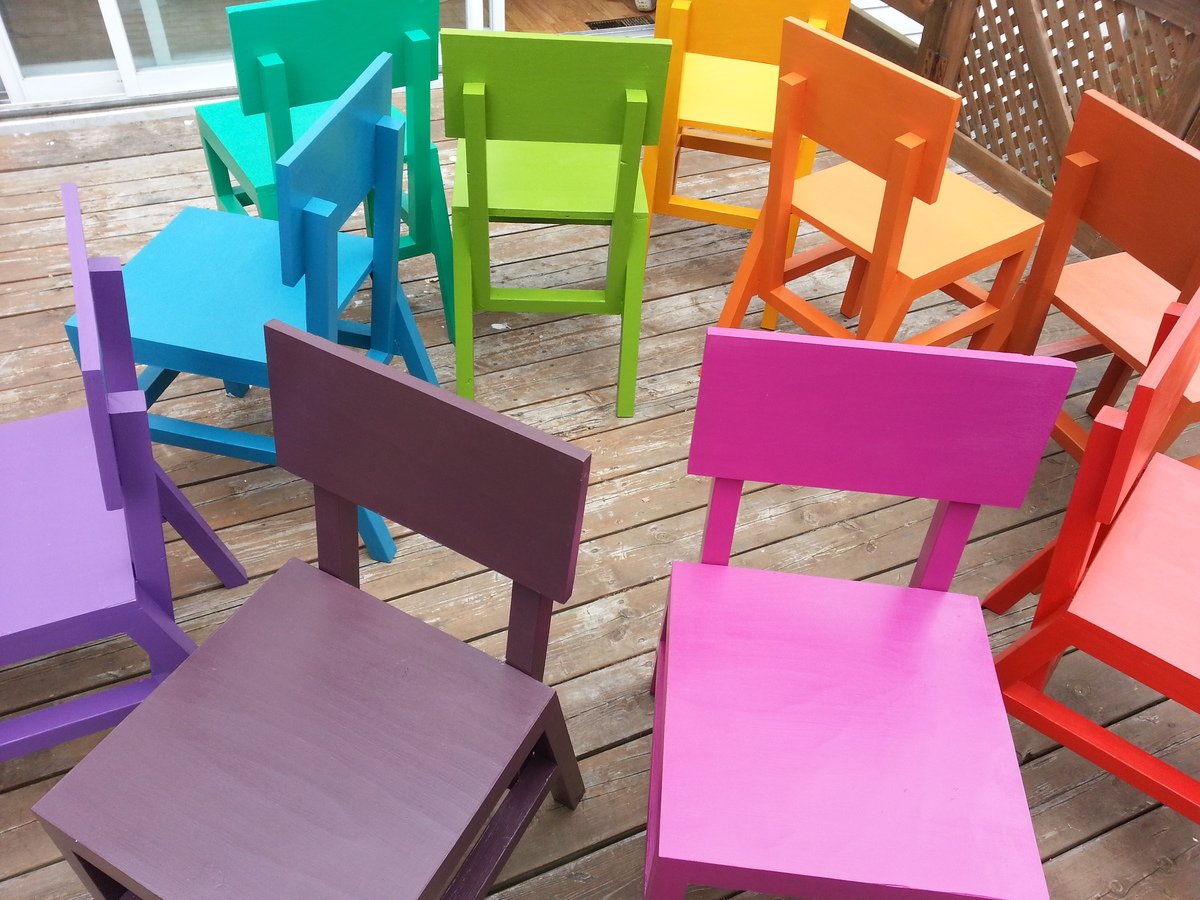


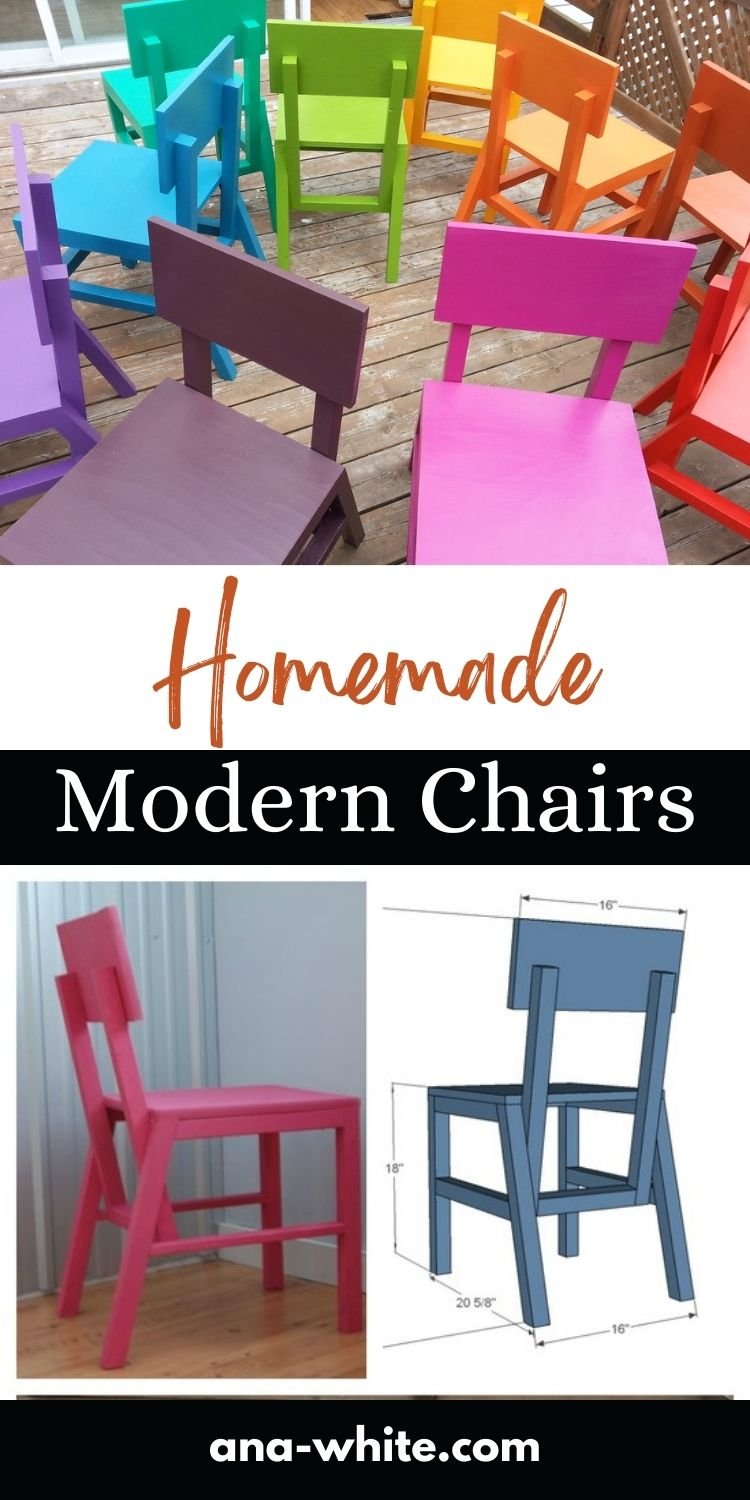
Build your own homemade chairs! These simple to build chairs and sturdy, stylish and comfortable. Featuring simple building steps and common materials, you can build your own chairs for way less than buying. Paint or stain any color.
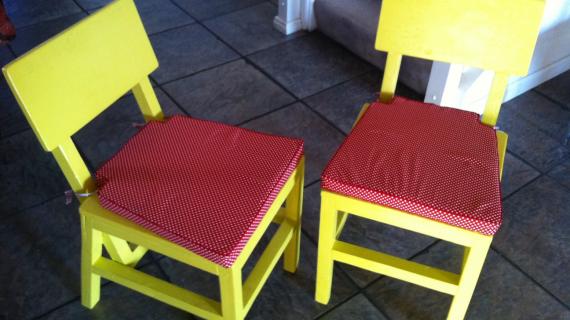
Photo by MA88IE_VAU8HAN
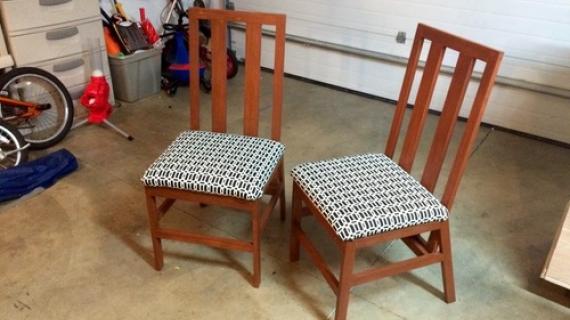
We love how this little diy chair turned out. Easy to build, but sturdy and comfortable!
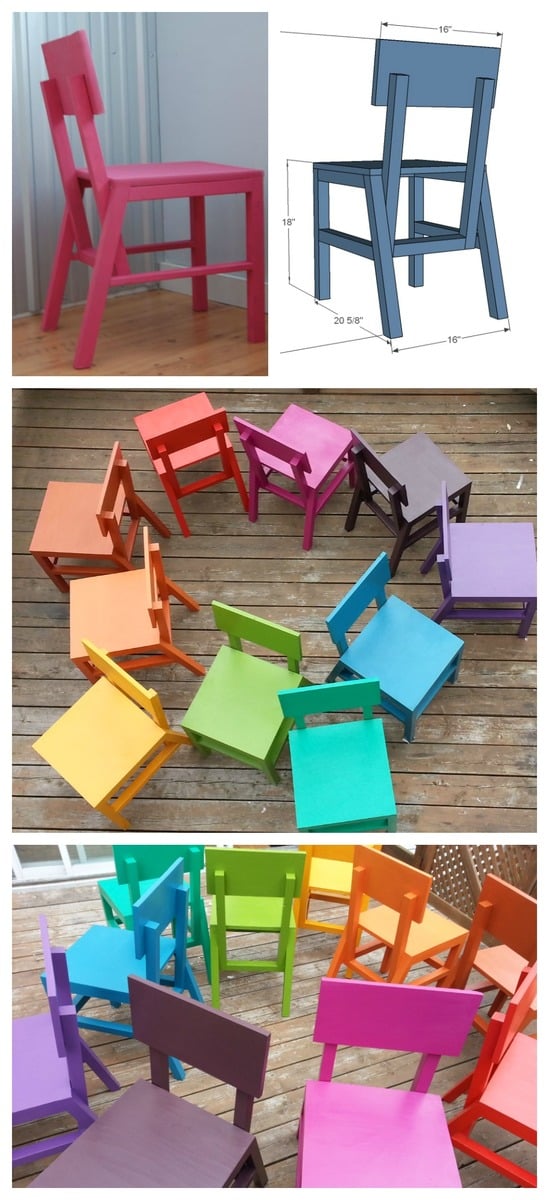
Pin For Later!
Preparation
- 1 – 3/4″ plywood or pine project panel 24″ x 16″ (for four chairs, simply buy a 16″ wide strip, 8 feet long. For six chairs, use a 1/2 sheet of plywood)
- 2 - 2x2 @ 8 feet long
- 30 – 2 1/2″ Screws
- 15 – 2″ Screws
- Wood Glue
- Wood Filler
- Paint
- 2 – 2 x2 @ 13″ (Short point, one end cut at 15 degrees off square)
- 2 – 2×2 @ 15″ (Short Point, one end cut at 15 degrees off square)
- 2 – 2×2 @ 17 1/4″ (Front Legs)
- 2 – 2×2 @ 17 7/8″ (Back legs, both ends cut at 15 degrees off square, parallel to each other)
- 1 – 2×2 @ 13″ (Front Apron)
- 1 – 3/4″ Plywood 16″ x 16″
- 2 – 2×2 @ 20 1/2″ (Back Sides)
- 1 – 2×2 @ 10″ (Back Bottom)
- 1 – 3/4″ Plywood @ 16″ x 7 3/4″ (Backrest)


Please read through the entire plan and all comments before beginning this project. It is also advisable to review the Getting Started Section. Take all necessary precautions to build safely and smartly. Work on a clean level surface, free of imperfections or debris. Always use straight boards. Check for square after each step. Always predrill holes before attaching with screws. Use glue with finish nails for a stronger hold. Wipe excess glue off bare wood for stained projects, as dried glue will not take stain. Be safe, have fun, and ask for help if you need it. Good luck!
Instructions
Step 1

Sides Lay out the sides and construct as shown above. Use 2 1/2″ screws and glue. You will need to build two of these. Lay the two sides on top of each other to confirm and adjust to match.
Step 2

Front Apron Join the two sides with the front apron. If you want an even sturdier chair (which can equal a chair that lasts longer) add a second support level with the side supports. 2 1/2″ screws and glue.
Step 3
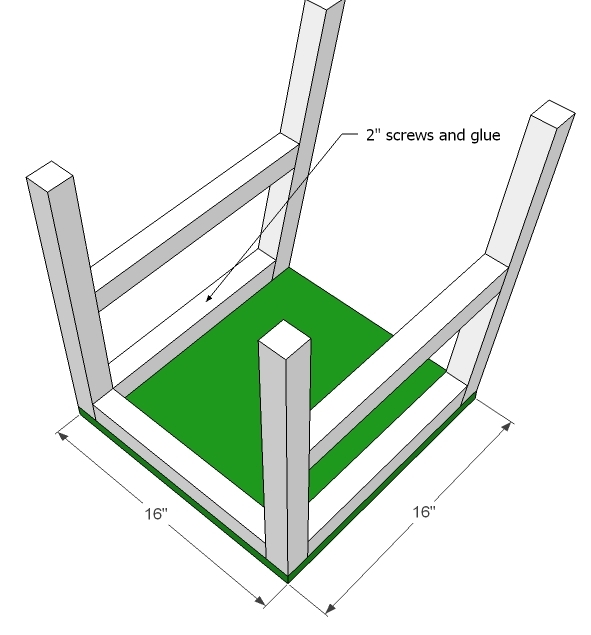
Seat Screw the seat down through the 2×2 aprons into the underside of the seat. Use 2″ screws and glue. Make sure your chair is sitting level at this point.
Step 4

Back Begin constructing the back as shown here. Use 2 1/2″ screws and glue.
Step 5

Step 6

Assembly Attach the backrest to the chair seat as shown above. Use glue and 2 1/2″ screws. The bottom of the chair back should be flush with the side supports.
It is always recommended to apply a test coat on a hidden area or scrap piece to ensure color evenness and adhesion. Use primer or wood conditioner as needed.


Comments
AlexWS
Thu, 03/17/2011 - 20:29
Oops
Hate to rain on the parade of an excellent plan, but the shopping list doesn't include the 2X2's. Happens to the best of us.
I can't believe how much that site wants for such a simple chair!
In reply to Oops by AlexWS
Ana White
Sat, 03/19/2011 - 09:33
Thanks for noting!
Thank you so much for noting this, I will fix the shopping list. And on the cost, handmade is not cheap :) If I didn't have the ability to make this chair, and could afford it, I would spend $300 on this chair. It's handmade, made locally, and built well. Can't wait to see your $300 chairs!
Guest (not verified)
Mon, 03/21/2011 - 11:09
The price for that chair
The price for that chair shows as $580 (unpainted) and $620 (painted) for me - double the $300 you mention.
Sharon L (not verified)
Tue, 03/22/2011 - 08:27
the price
is for a set of two chairs. free shipping. I agree, I'd rather build it for ten bucks and use up some leftover paint on it!
Guest (not verified)
Sun, 12/04/2011 - 20:00
Read the List
Hate to rain on your parade buddy. Look again. It does include the 2X2's.
Syamala (not verified)
Fri, 03/25/2011 - 22:59
stool
I'd like to build some counter stools for my kitchen, and this chair is perfect except for the height. Is there any way you could post a modified version of it, in order for the seat to be 24 inches tall?
CraftyLibra
Mon, 04/25/2011 - 18:55
Okie Dokie
I still live in an apartment and this is the perfect project to start out with. I'll have to make my table on the patio....
Guest (not verified)
Sat, 05/28/2011 - 04:51
bar stools
I can not find any bar stools on your site, how could I make these chairs taller for a 32" stool. That is from floor to seat. I can't get the stools option to open on this site so i don't know if you have any other designs. Thank you Lori
Brooke Robertson (not verified)
Mon, 05/30/2011 - 18:23
What size table
will these chairs best suit? I have an old farmhouse table and am thinking of making 6 of these to go with it. I just don't know if the height will be right or not.
Ben (not verified)
Thu, 10/20/2011 - 01:00
Only screws and glue or mortise and tenon or?
Hi,
I am very much interested in trying to build this chair for myself. One question though: do you only use screws and glue, or do you use some other assembly (mortise and tenon)? Can a chair be strong enough with only screws and glue?
Keep up the good work on this excellent site!
Ben
Guest (not verified)
Fri, 10/28/2011 - 16:06
I had the same question.
I had the same question.
Guest (not verified)
Sat, 12/03/2011 - 09:22
Very impressed with your ideas...
Greetings Anna,
I've been enjoying looking at you site for several days and all I can say is "Kudos" for a very Eco friendly and fun bunch of projects!
Any plans for making the simple style table that goes with the chairs inspiration?
Thanks,
Kathy
guest (not verified)
Wed, 02/29/2012 - 09:13
uncomfortable seat?
Has anyone found the flat seat to be uncomfortable? I currently have 2 types of chairs at my house--ones with "butt grooves" and ones with totally flat seats. The totally flat ones are almost painful to sit in. I guess you could just sand them strategically??? Any thoughts on this?
Guest (not verified)
Sat, 03/10/2012 - 19:12
Adjusting leg length for counter and bar stools
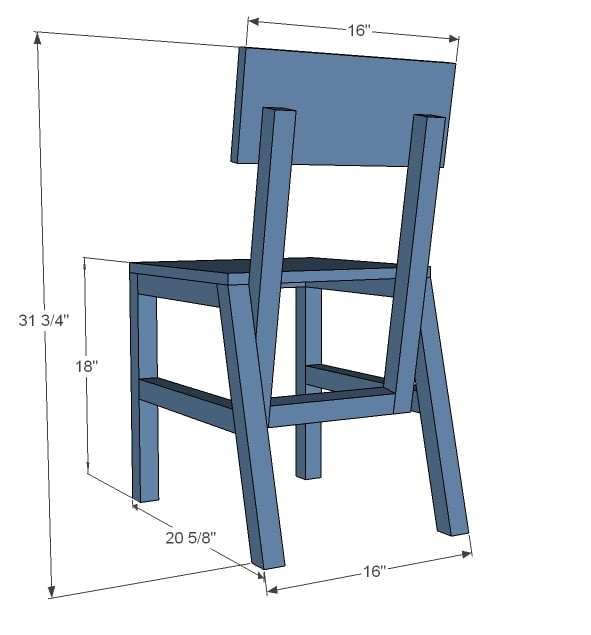
Just to answer some of the questions. Using the known length and angles you can solve for the rear leg length. You know the front leg is 3/4" shorter than the total height.
For counter height the front leg is 23.25 and the back leg is 24 1/16" (give or take) 23.25/sine(75)
For 32" tall chair, the front leg is 31.25 and the back is 32 3/8 (31.25/sine(75)
sine(75) = 0.966
Jackcampbell77
Mon, 05/02/2016 - 18:37
Awesome
I'm finishing up the sawhorse desk and this chair will be perfect to go with it