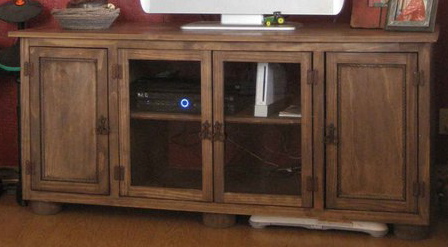


This was our very first build. I had spent many hours on Ana-White.com checking out plans, looking at the details of how things were built. I even downloaded Sketchup and learned it fairly quickly. The only thing left to do at that point was to buy some lumber. Well... that was going to be tough because my husband and I live off of social security disability (at the ripe old age of 34 3/4) so money was pretty tight.
Preparation
· (2) ¾” 4x8 sheet of plywood
(6) furniture feet, we chose bun style feet
(6) mounting brackets for the feet
(8) 1x2 pine – 8ft long
(1) 1x4 pine – 27” long
(4) Furniture pulls/knobs of your
choosing. We chose rustic furniture
pulls imported from Mexico
(8) Cabinet hinges
(1) ¼” 4x8 sheet of plywood
(2) Glass pieces (you can use lexan if
desired) 12 ¾” x 21”
(8) Mirror clips
Optional:
(4) decorative molding, 3 feet long
(2) decorative rope molding, 3 feet long
3/4" Plywood


Please read through the entire plan and all comments before beginning this project. It is also advisable to review the Getting Started Section. Take all necessary precautions to build safely and smartly. Work on a clean level surface, free of imperfections or debris. Always use straight boards. Check for square after each step. Always predrill holes before attaching with screws. Use glue with finish nails for a stronger hold. Wipe excess glue off bare wood for stained projects, as dried glue will not take stain. Be safe, have fun, and ask for help if you need it. Good luck!
Instructions
Step 1

Attach brackets and feet to bottom side of (A). Make sure the feet you choose will fit completely under the unit, no part should stick out from the sides/front/back.
Step 2

Take all of pieces (C) and mark 3” from the front and back sides and 8” from the top. Here is where you will drill the holes from your adjustable shelving. You will need a drill bit the same size as the shelving pins (in our case it was a ¼” drill bit) and a lock collar or a piece of masking tape. Measure from the end of your drill bit ½” and set your lock collar or place your masking tape to act as a depth guide. We don’t want to go all the way through the board! Keep track of your pieces as you will need to make sure that the holes for the adjustable shelving are in the inside of the end sections. See diagram for hole drilling details
Step 3
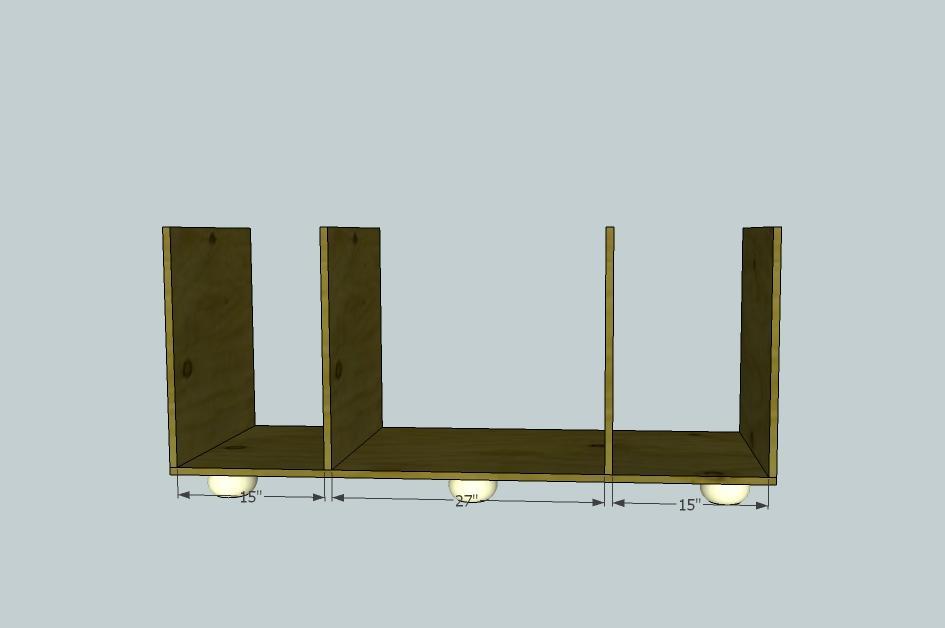
Attach a (C) piece on each end of piece (A). Use glue and 1 ¼” pocket-hole screws or 2” screws. If using regular screws, you will need to pre-drill from the bottom side. Attach two more (C) pieces as shown in the illustration. Your sections from inside to inside should measure 15”, 27” and 15”
Step 4

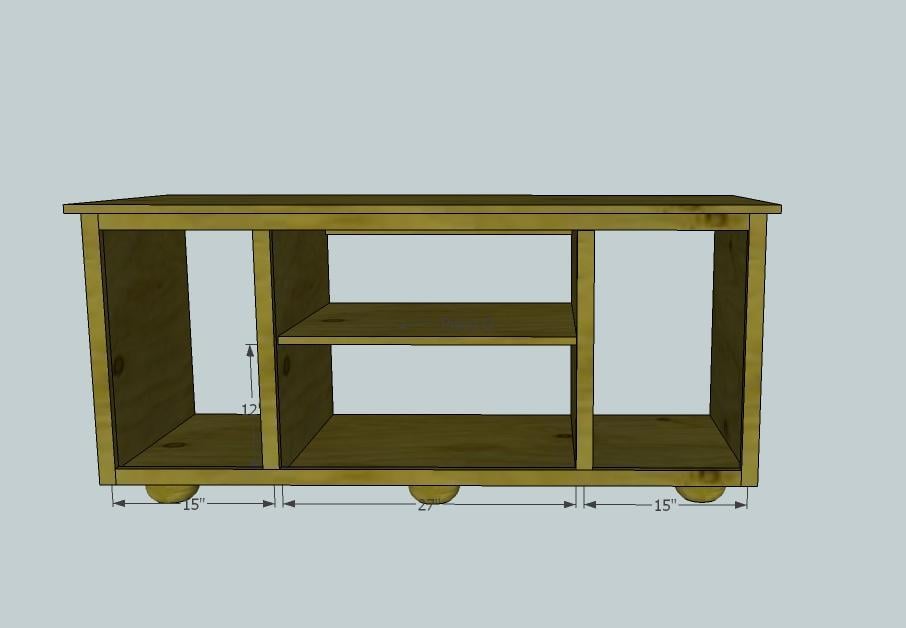
Attach (D) 12” up from the bottom of the center section.
Step 5

Step 6

Now comes the face frames. These you can either assemble apart from the console, or attach directly to it. Attach two piece of (F) to either end of the console across the front as seen in the image above. Next attach two pieces of (G) between pieces of (F), make sure everything is flush.
Step 7

Add the inside styles with either 1 1/4 pocket holes or 1 1/4 finishing nails if attaching directly to the front.
Step 8
Attach the top using glue and 1 ¼ pocket-hole screws.
Step 9
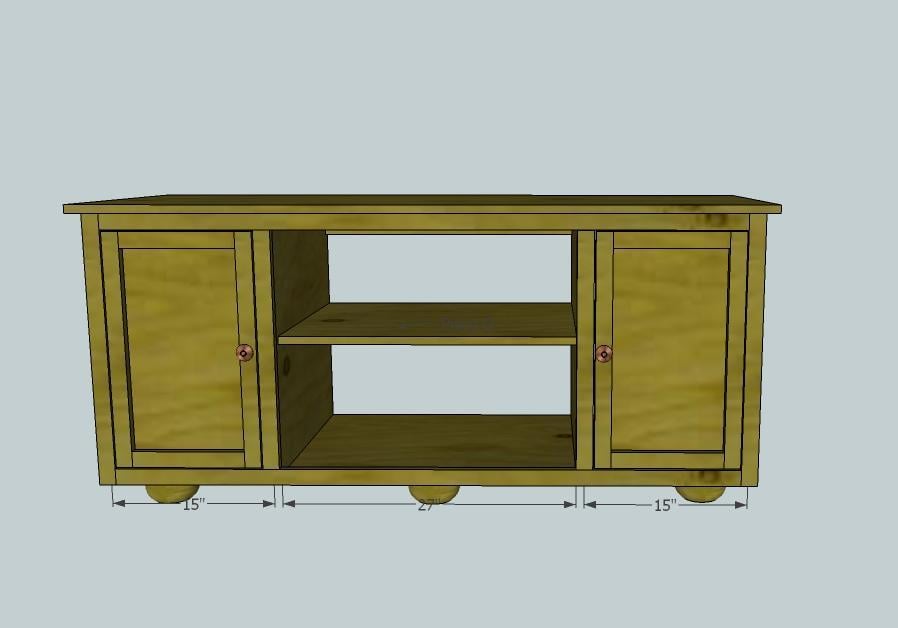
Now come the doors. Attach a piece of 1/4" ply (L) to your frame for the doors (you should make these frames by using pocket hole screws - using pieces (I) and (J). When it is all square, attach (L)to the back. Use glue and 1 1/4 pocket hole screws.
Step 10

To make the center doors, follow the frame instructions from the previous step, attach 4 mirror clips on each door to hold either glass or lexan.
It is always recommended to apply a test coat on a hidden area or scrap piece to ensure color evenness and adhesion. Use primer or wood conditioner as needed.
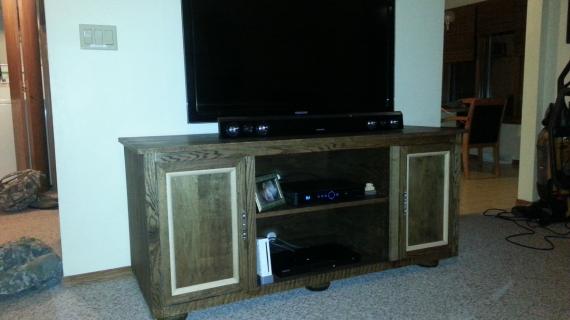
We used water based Minwax in Coffee and then applied a coat of furniture wax by Minwax to add a bit of luster.
Comments
Sonya (not verified)
Mon, 03/21/2011 - 10:16
Beautiful piece! You did a
Beautiful piece! You did a great job! Did you have to use edge banding since plywood were used?
In reply to Beautiful piece! You did a by Sonya (not verified)
tracysmith
Mon, 03/21/2011 - 11:17
Edge Banding
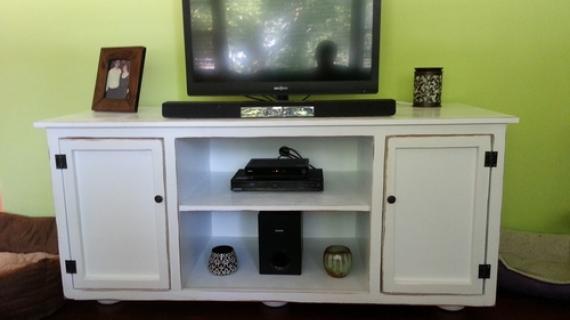
What we ended up doing on this particular piece was making the top a bit smaller and using 1x2's to edge it. However, edge banding would be the option I would choose if we did this piece again. It looks great, is simple to use and it prevents you from having to adjust the measurements and deal with any gap issues since the top is the thing you will look at most. Thanks for the question!! :-)
KSchmalz (not verified)
Sat, 12/17/2011 - 16:10
lumber sizing
This is beautiful! I'm actually going to use it as the base for an aviary for my finches- the aviary will fit on top. I have a question regarding lumber sizing- are the lumber dimensions true to size (ex, 1x2 is actually 1" by 2"), or are they the slightly-smaller-than-advertised size (ex, 1x2 is actually 3/4" by 1 3/4")? Thanks!
In reply to lumber sizing by KSchmalz (not verified)
tracysmith
Mon, 12/26/2011 - 15:20
Thanks for the Question
It's a great question and the answer is a 1 x 2 is actually 3/4" x 1 1/2" - usually. Those dimensions can be different depending on where you are in the world and where the lumber is from. It also depends sometimes on the grade of lumber but generally, those are the dimensions. When I post the dimensions for the plan, the 1x material is actually 3/4" and the width is usually a 1/2" smaller than listed, ie a 1x4 would be 3/4" x 3 1/2". Hope that helps!
Guest (not verified)
Sun, 02/19/2012 - 11:22
LOVE this!!
Hi! I was wondering what you used as far as stain? I LOVE the color! I would go perfect with my living room!
In reply to LOVE this!! by Guest (not verified)
Lady Goats
Sun, 02/19/2012 - 11:55
The stain they used
It's at the bottom of the post
"We used water based Minwax in Coffee and then applied a coat of furniture wax by Minwax to add a bit of luster."
Guest (not verified)
Sun, 02/19/2012 - 16:58
thanks! I must have missed
thanks! I must have missed that!