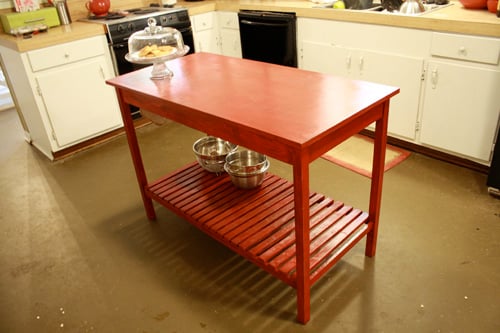


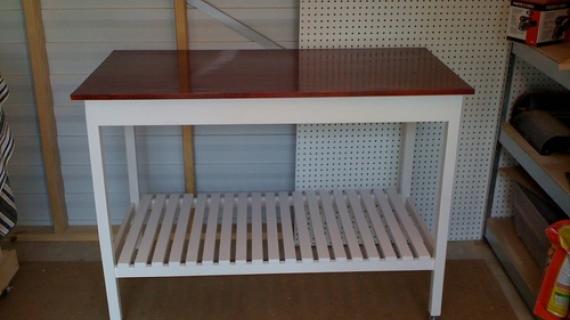
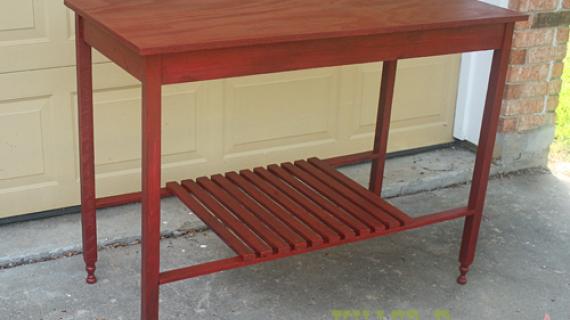
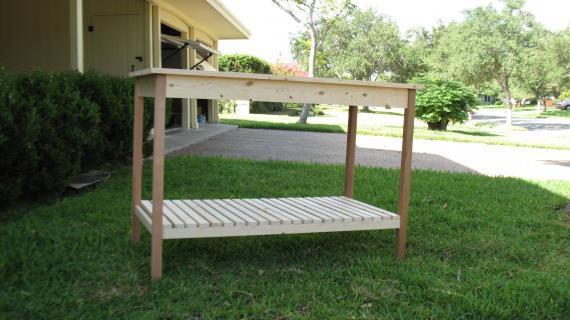
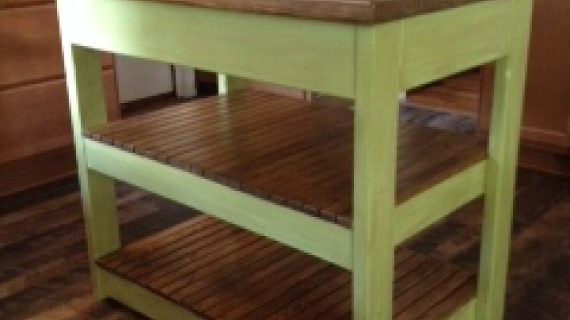
Looking for a super-simple kitchen island project, that's also affordable? For about $25, you can build this easy island inspired from the Clara's Table plans. Preferably you'd use a Kreg jig to hide the holes, but if you intend to paint it, then you should have no problem building it the easy way and just filling in your holes.
Keep your costs down by choosing furring strips for your 1x2's and buying the cheap whitewood boards.
Preparation
• 1 - 2'x4' project panel
• 2 - 2 x 2 x 8' boards
• 2 - 1 x 4 x 8' boards
• 7 - 1 x 2 x 8' boards
• Project board for top does not need to be cut.
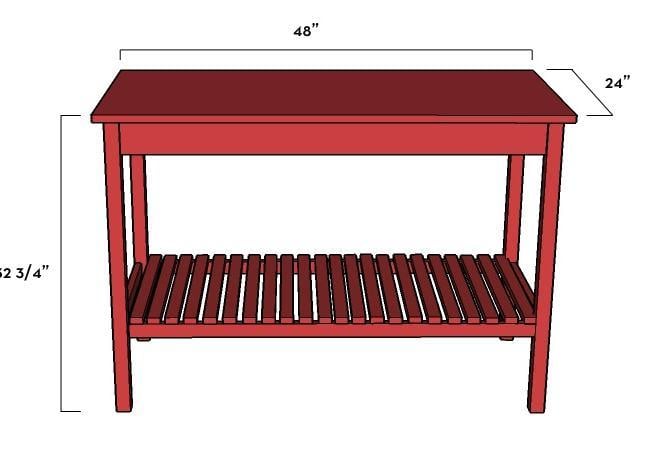
• 4 - 2 x 2 @ 32" (legs)
• 2 - 1 x 4 @ 19" (end aprons)
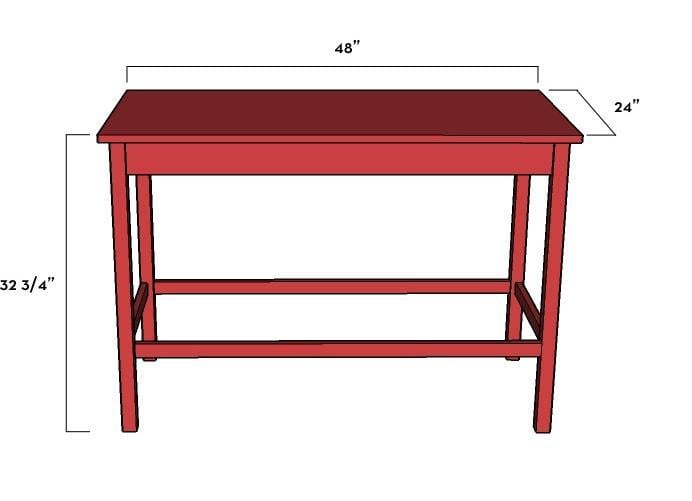
• 2 - 1 x 4 @ 43" (side aprons)
• 2 - 1 x 2 @ 19" (bottom end shelf supports)
• 2 - 1 x 2 @ 43" (bottom side shelf supports)
• 22 - 1 x 2 @ 21.5" (bottom shelf slats)


Please read through the entire plan and all comments before beginning this project. It is also advisable to review the Getting Started Section. Take all necessary precautions to build safely and smartly. Work on a clean level surface, free of imperfections or debris. Always use straight boards. Check for square after each step. Always predrill holes before attaching with screws. Use glue with finish nails for a stronger hold. Wipe excess glue off bare wood for stained projects, as dried glue will not take stain. Be safe, have fun, and ask for help if you need it. Good luck!
Instructions
Step 1
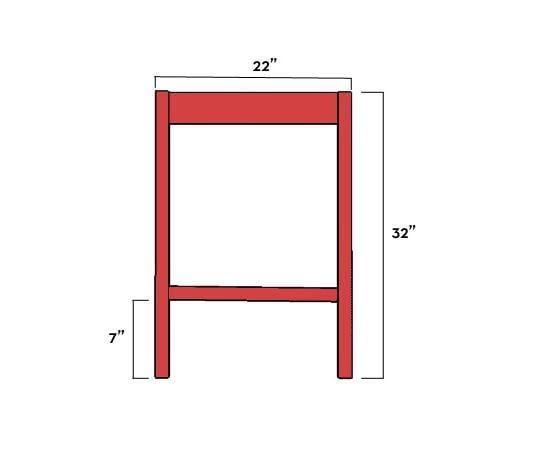
If using a Kreg Jig™, pre-drill your holes (2 on each end of the back side of the 1x4, 1 on each end of the back of the 1x2, 1 in the top interior of the 2x2) Build your two ends by attaching the legs to your aprons. You can adjust the height of the bottom shelf to your own specifications. I chose 7" from the bottom to line up the bottom of my 1x2 apron.
Step 2

If using the Kreg Jig™, pre-drill your holes in the side aprons (two on each end of the interior side) Connect your end pieces with the two side aprons.
Step 3

Attach your top. If using the Kreg, lay the the project panel topside-down on the ground, then flip your frame-base upside down onto it, centering it onto the panel (about 1.5" in on all sides). Secure with pocket-hole screws. If using the traditional method, place the panel on top of your frame, centering it (about 1.5" in from each end). Countersink your screws into the 2x2 legs. Use glue on the top of the frame for added security. If you'd like to secure it even more, measure where your aprons are located and hammer in a few finishing nails to keep it in place while the glue dries.
Step 4
Attach the lower side shelf supports so they are flush with the end shelf supports. Mine are 7" up from the bottom.
Step 5

It is always recommended to apply a test coat on a hidden area or scrap piece to ensure color evenness and adhesion. Use primer or wood conditioner as needed.

Comments
AlexWS
Tue, 03/29/2011 - 14:58
Yup, gotta do this now.
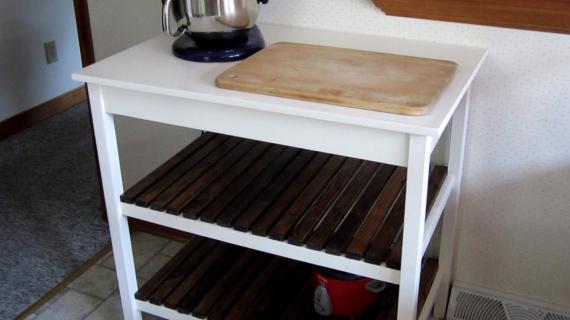
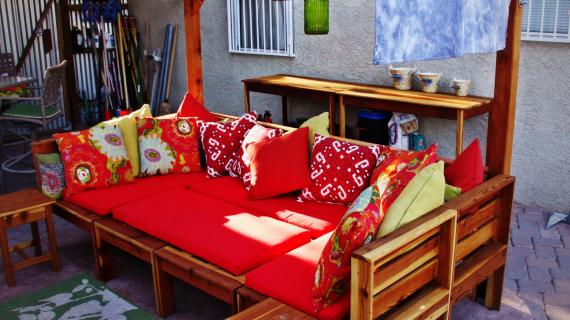
Our kitchen is lacking in counter space yet has an abundance of floor space. I think I'll use mineral oil for the top and make it a giant cutting board/prep surface.
Amazonqt20
Tue, 06/28/2011 - 03:32
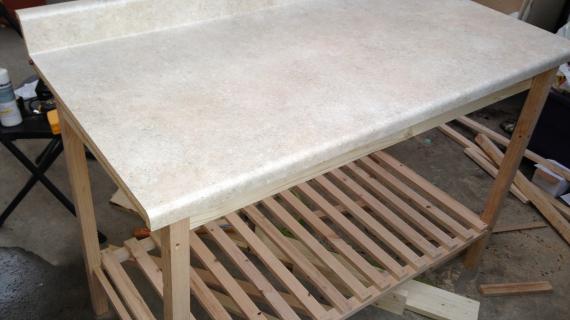
You can also use a slab of
You can also use a slab of granite, soap stone or travertine as a top surface. Plus it won't be as expense as doing your whole kitchen. Put it on when you are not needing a cutting surface. That will also keep it nice!
kylihoot
Wed, 03/30/2011 - 18:16
Project panel?
I love this! Where did you get your project panel? I can't find anything like that at my lumber yard.
In reply to Project panel? by kylihoot
dan-k
Wed, 03/30/2011 - 19:44
Check the plywood section
Big box stores usually have a selection of precut plywood in different sizes for smaller projects. Or you may want to check in the hardwood board section to see if they have glued up panels. I know menards carries them.
JES
Fri, 04/01/2011 - 20:43
Project panel
I found these at the Blue stores here in Maryland. They were across the aisle from the expensive select wood, next to the edge-glued panels and rounds for table tops. Costs about $30.
I used one for an island top and it has been holding up fine. I put several coats of clear poly on after sanding. Don't cut on it though -- use a cutting board for that. Hope this is helpful?
In reply to Project panel by JES
Jake
Sun, 07/08/2012 - 10:23
Project Panel vs Plywood
Project panel is the way to go. I got my 24x48x3/4 at Lowes for $23. The 3/4 plywood of the same size and quality was less expensive but when you add the cost of edging it was more expensive, more work, and more risk of mistakes.
brookifer86
Sat, 06/25/2011 - 21:25
Panel Alternatives
You could also choose to plank across the top instead of using a panel, perhaps with 1x4 furring strips or some larger boards.
Guest (not verified)
Thu, 09/01/2011 - 09:03
i need it wider
I would love to make this table but i need it wider than 24". How do I adjust everything to make it wider? Do i just add the additional inches those affected pieces?
Please help, i really want to make this. Thank you
In reply to i need it wider by Guest (not verified)
brookifer86
Thu, 09/01/2011 - 09:31
Widening Table
Yup, all you'd need to do would be to add inches to the side aprons (both top and bottom) and the bottom slats. To make it easy, if you're making it 36" wide, that's 12" wider than 24", so you would just add 12" to the side aprons and slats. The difference would still stay the same. So you'd still get that 2" overlap from the table top to the apron and the slats. Of course, I would recommend measuring distances on your actual piece step-by-step as opposed to doing the cuts all at the beginning just in case. Sometimes your actual measurements differ slightly from the plan measurements.
AbyH (not verified)
Tue, 01/31/2012 - 15:51
How much weight can the shelf hold?
Assuming I follow all wood recommendations - whitewood, furring strips, etc.
Do you think the shelf will support 160+ lbs of weight?
Wondering if I can make the shelf high enough to store 3-4 (5 gallon) buckets underneath it (on the floor) and then 4 more on the shelf. . . I need more countertop space in my kitchen and I have a lot of buckets with flour, sugar, etc (ranging from 20-40 lbs depending on what is inside) that would be nice to have nearby.
MichB (not verified)
Tue, 06/19/2012 - 11:39
How much weight will this table support?
I'd like to use the shelf for cookbooks and the top to hold my microwave...will this table support that?
brookifer86
Tue, 06/19/2012 - 11:49
Weight
Well I'm not an engineer so I can't make any guarantees, but solid wood is quite sturdy. I think it should be more than capable of holding some cookbooks and a microwave. I used to sit on the top of mine, so it can at least hold about 120 pounds!
Jake
Tue, 07/03/2012 - 13:55
Add a Drawer?
Brooke or Ana, any thoughts on how you would add a drawer to one side?
Jake
Sun, 07/08/2012 - 10:19
I want to Eat Off of It
Just a question. What precautions should I take if the plan is to prepare food on the top?. Are there stains or paints to avoid? The plan is to have a portable cutting board but the food will be held on the top and to the side while prepping happens.
Mschrys79
Sun, 02/02/2014 - 07:21
Quick question
Hi! I think I'd like to make this for cutting fabric but I need the top panel to be 36 x 60 could I just buy a bigger top but leave the other measurements the same or would it not be sturdy enough to handle the larger top??
dryphi
Wed, 03/07/2018 - 21:20
Question and suggestion
Hi Ana, great build. I can't wait to make one.
1. What do you mean by "1 in the top interior of the 2x2" in step 1? Where does this go? What is it for? This was the only direction I didn't understand the first read-through.
2. Looks like your first image got cropped off somehow. You can't see the "3" on the left.
3. Has anyone made one of these with a drawer(s) in the front? Seems like it would be fairly straightforward to add and would really complement the functionality.