Cabin Collection Single Bed

The free plans on this website are made possible with advertising and affiliate links.  Thank you for helping us keep plans free.


Difficulty
Intermediate
| Print this plan

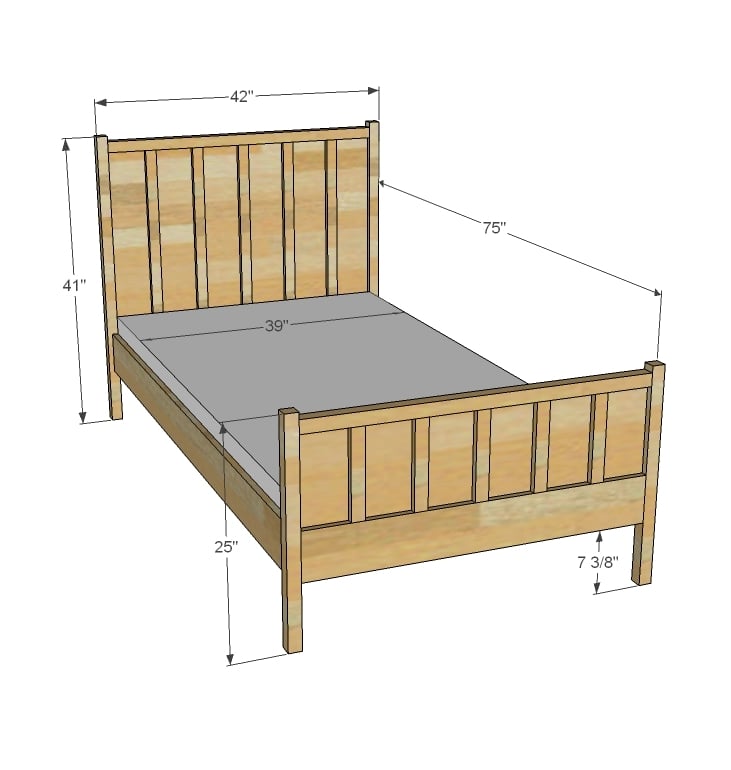
This simple bed can be used alone or with the Cabin Bunk System.  Features a paneling look for added character, and an compact design for small spaces.
Collections

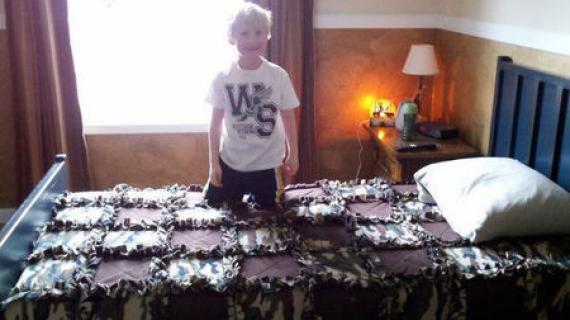
Well, it's taken me much longer to kick this flu than expected, but hopefully, we've said goodbye to the dreaded influenza for the year.  I'm so excited to complete this collection of plans - The Cabin Bunk System - but also note, this bed can be used on it's own.  One note, you may wish to use hardwood 2x2s for the legs for added strength.  I know what it's like to have kids jumping on the bed  :)

Thank you again for your patience with me, and I'm really looking forward to being back to work full time!  Enjoy the plans.

Dimensions
Fits twin sized mattress. Can accommodate a standard box spring or use without box spring.

Preparation

Shopping List

1 - 1/2 Sheet of 3/4" Particle Board

2 - 1x6 @ 10 feet long
5 - 2x2 @ 8 feet long (you may wish to use hardwood 2x2s for the legs)
2 - 1x2 @ 8 feet long
7 - 1x3 @ 8 feet long
Common Materials
2 inch screws
1 1/4 inch finish nails
120 grit sandpaper
primer
wood conditioner
paint
paint brush
Cut List

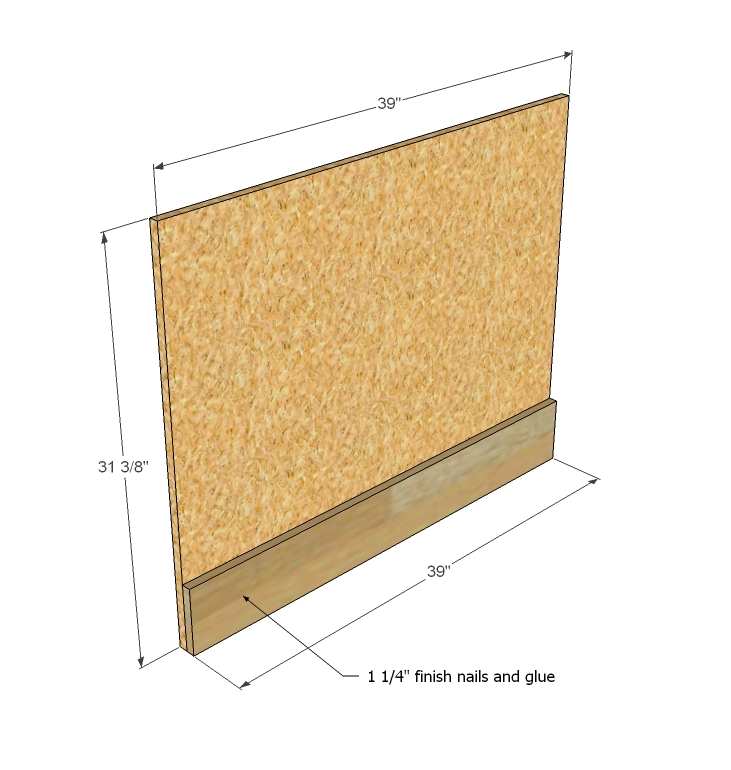
1 - 3/4" Particle Board @ 39" x 31 3/8" (Headboard Panel)

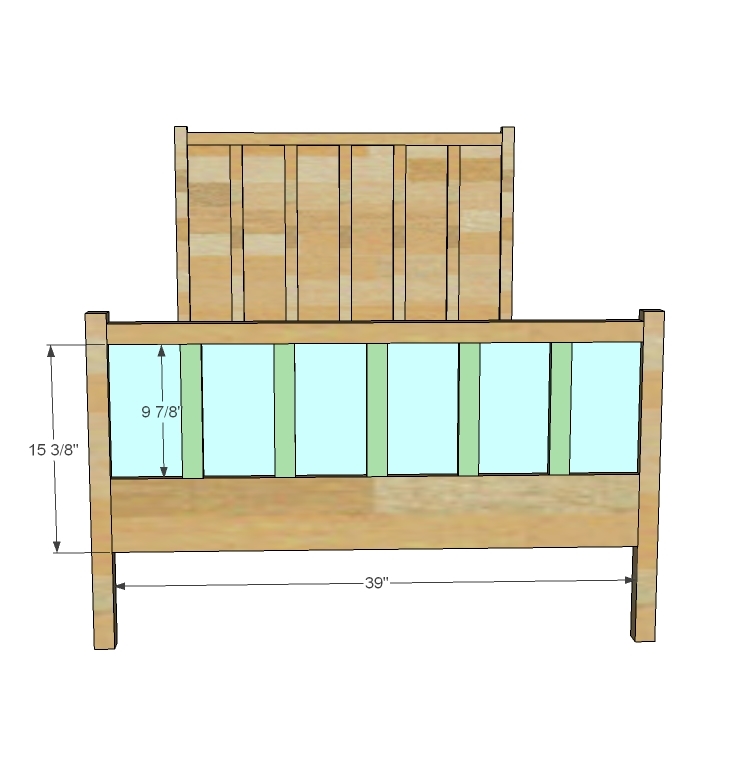
1 - 3/4" Particle Board @ 39" x 15 3/8" (Footboard Panel)
2 - 1x6 @ 39" (Bottom Trim)
2 - 2x2 @ 39" (Top Trim)
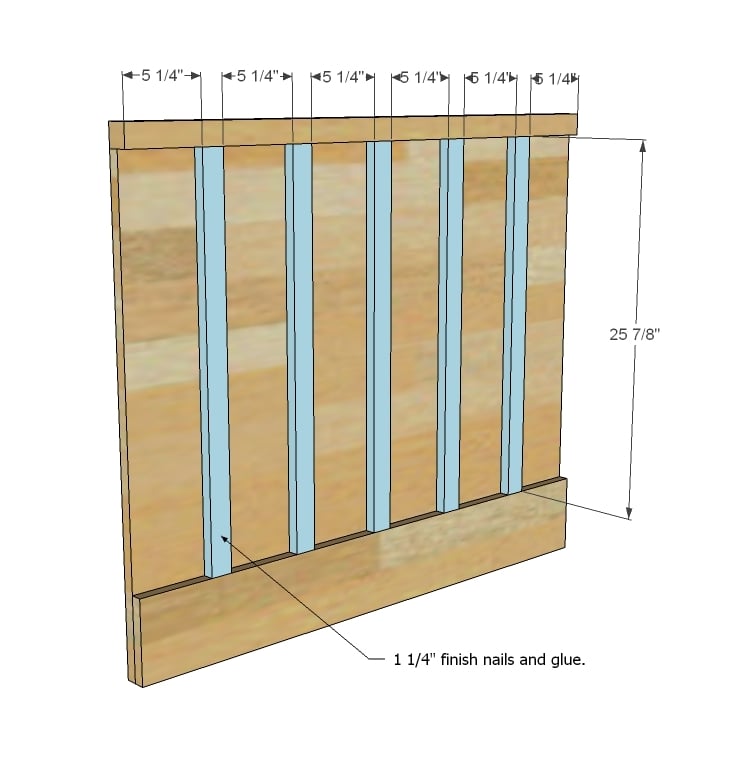
5 - 1x2 @ 25 7/8" (Panel Trim, Headboard)
5 - 1x2 @ 9 7/8" (Panel Trim, Footboard)
2 - 2x2 @ 41" (Headboard Legs)
2 - 2x2 @ 25" (Footboard Legs)
2 - 1x6 @ 75" (Siderails)
2 - 2x2 @ 75" (Cleats)
14 - 1x3 @ 39" (Slats - you may need more or less)
Tools
Tape Measure
Speed Square
Pencil
Safety Glasses
Hearing Protection
Kreg Jig
Drill
Circular Saw
Brad Nailer
Power Sander
Level
Drill Bit Set
General Instructions

Please read through the entire plan and all comments before beginning this project. It is also advisable to review the Getting Started Section. Take all necessary precautions to build safely and smartly. Work on a clean level surface, free of imperfections or debris. Always use straight boards. Check for square after each step. Always predrill holes before attaching with screws. Use glue with finish nails for a stronger hold. Wipe excess glue off bare wood for stained projects, as dried glue will not take stain. Be safe, have fun, and ask for help if you need it. Good luck!

Instructions

Step 1

On the headboard panel (I just build a bed yesterday that is very similar, and used cheapo particle board for the panels because it's really mostly decorative) use 1 1/4" finish nails and glue to attach the 1x6 base trim as shown above.

Step 2

Now drill pocket holes along the top edge (and the side edges too for step 4) approximately every 8-12 inches and attach the 2x2 to the top as shown above. Drill the pocket holes set for 3/4" stock.

Step 3

Now just use your 1 1/4" finish nails and glue to attach the 1x2 trim boards as shown above.

Step 4

And you should already have pocket holes drilled from step 2, so just attach the legs with 1 1/4" pocket hole screws and glue.

Step 5

Step 6

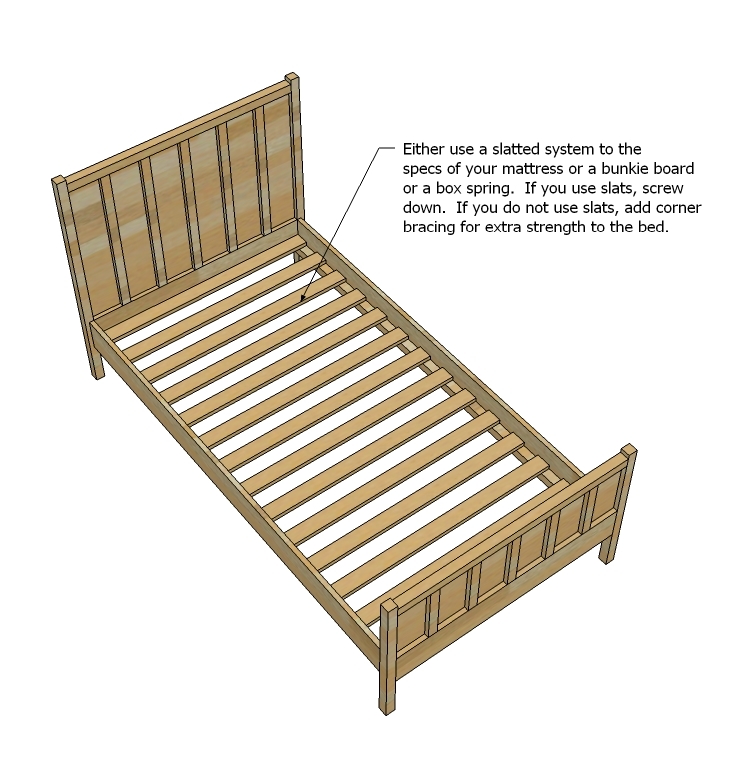
Now add the siderails. The easiest method is to drill pocket holes from the insides of the siderails and attach to the headboard and footboard. A stronger means would be to use brackets, available at most hardware stores.

Step 7

Now add the cleats to the insides of the siderails. If you are not using a box spring, you may wish to put your cleats at the top of the siderails, just don't forget that your slats will take up 3/4". Use glue and 2" screws. Also, for added support, you can attach the headboard and footboard to the cleats with screws too.

Step 8

Now lay the slats on top of the cleats and screw down with 1 1/4" screws. If you are using a box springs, you will not need the slats. Be aware that some mattresses are firmer than others, and you may need less or more slats.

Finishing Instructions
Preparation Instructions
Fill all holes with wood filler and let dry. Apply additional coats of wood filler as needed. When wood filler is completely dry, sand the project in the direction of the wood grain with 120 grit sandpaper. Vacuum sanded project to remove sanding residue. Remove all sanding residue on work surfaces as well. Wipe project clean with damp cloth.

It is always recommended to apply a test coat on a hidden area or scrap piece to ensure color evenness and adhesion. Use primer or wood conditioner as needed.

Comments

Kelly Varner (not verified)

Wed, 04/06/2011 - 20:20

Ana! I just adore you and this bed is fabulous, and I will most likely make  it into a bunk bed for my girls... but I have a another question. Can you do a tutorial on how to make pretty doors for my house?? I want something other than the standard 6 panel door from Lowes but don't want to spend a fortune. Is this possible?? 

lovelymommy

Tue, 10/04/2011 - 13:03

I have seen several pages looking for something like this, it is just great!!! thanks for sharing.

Labine37

Tue, 10/04/2016 - 17:46

Hi Ana,


I've made 3 of these beds for my boys, and I'm really happy how they turned out.  What do you do for the pocket holes?  I read putty, but when you go to stain, it'll show like flat no wood grain.  Is there something else you would do apart from the putty?  


Thanks a bunch!