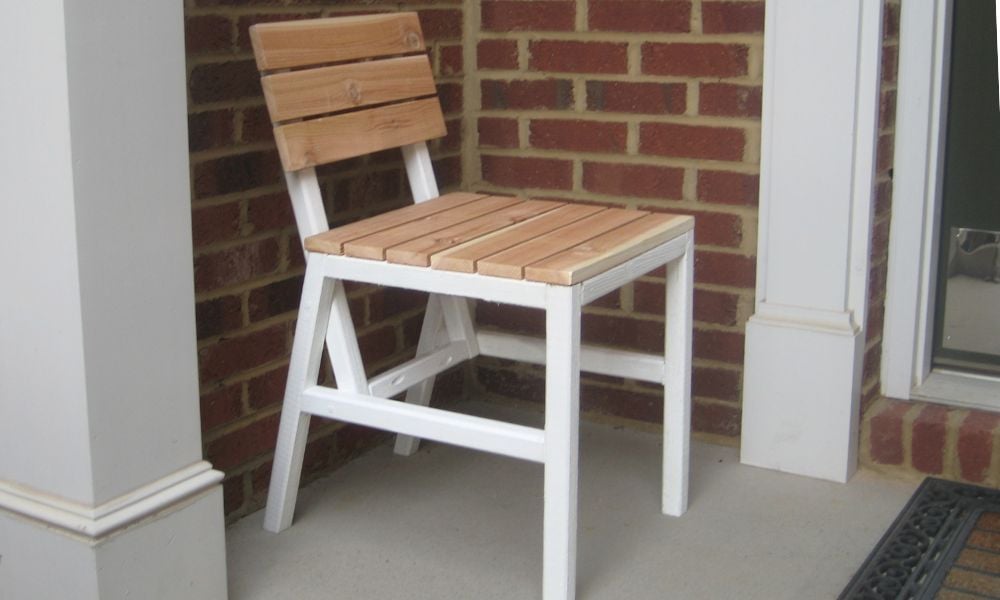


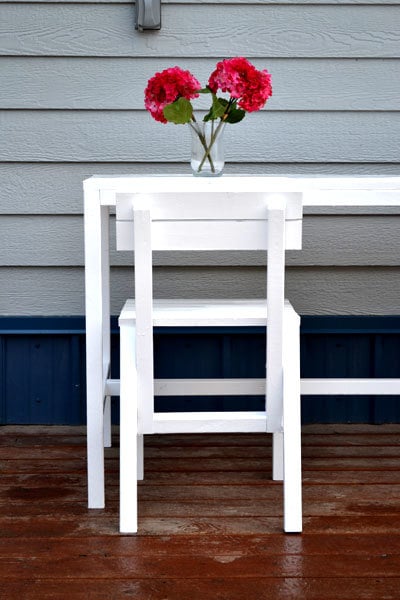
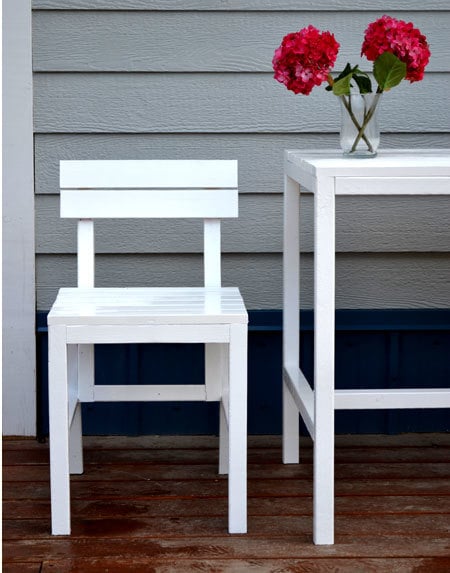
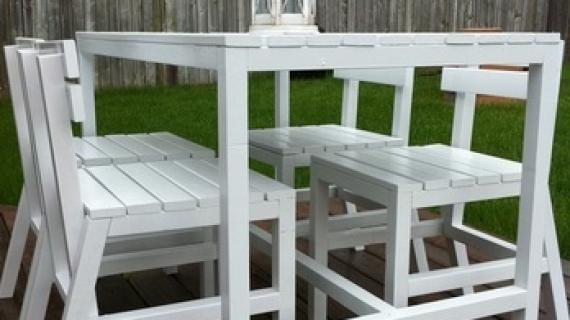
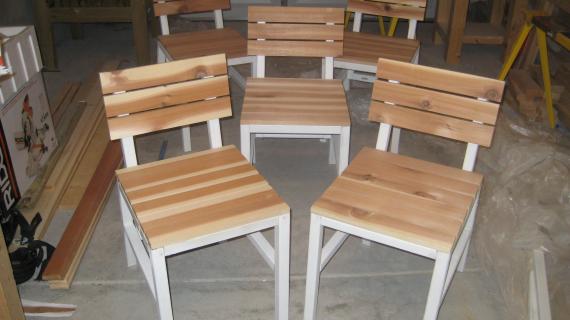
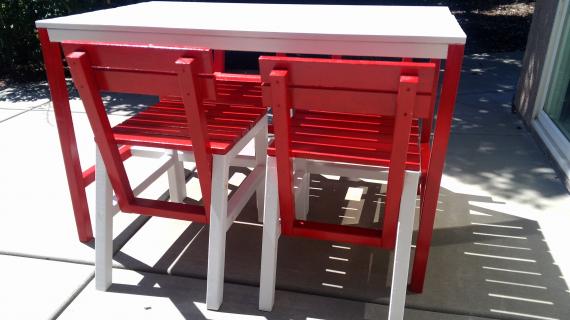
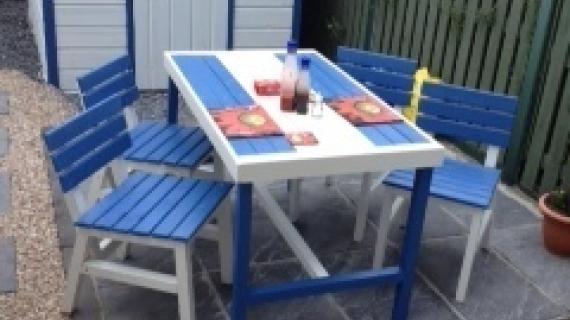
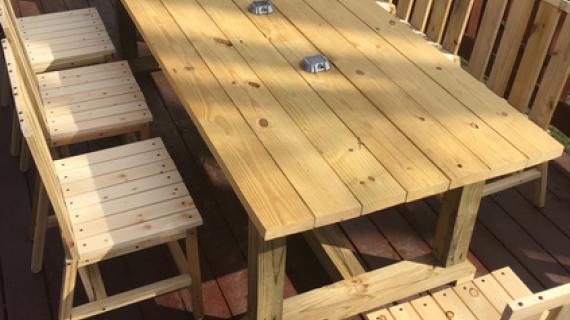
Build your own outdoor dining chairs with free woodworking plans from Ana-White.com
This modern style outdoor dining chair is both easy and inexpensive to build. Features slatted seat and back, additional base supports, its sturdy and stylish!
Step by step plans with detailed diagrams, shopping and cut list with lots of reader submitted photos.
 .
. 
Preparation
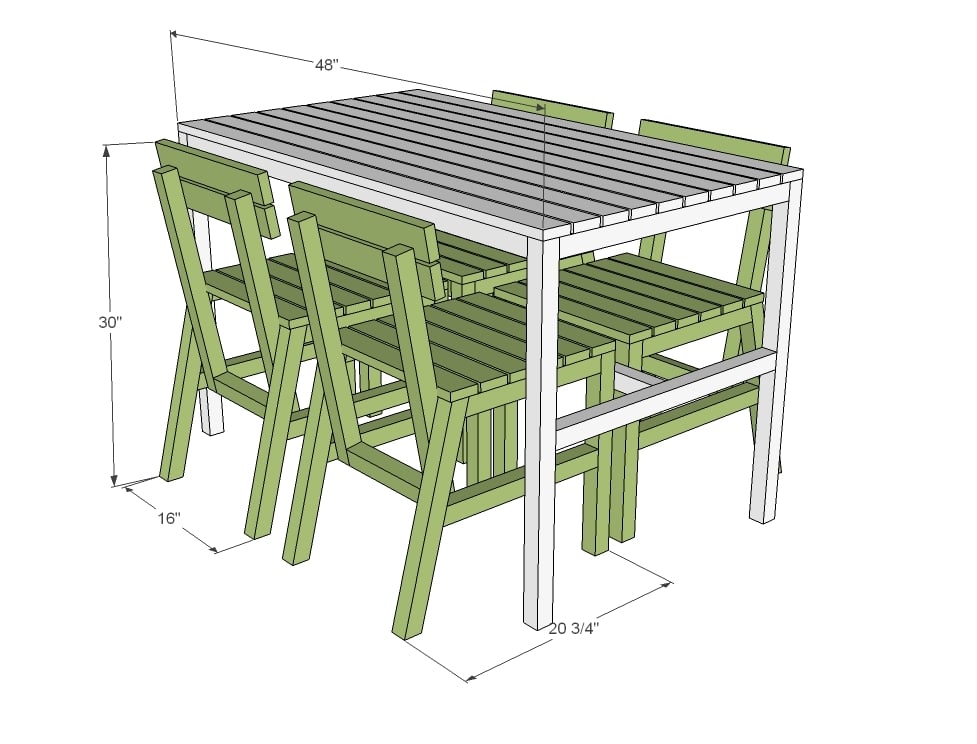
- 2 - 2x2 @ 8 feet long
- 2 - 1x3 @ 8 feet long
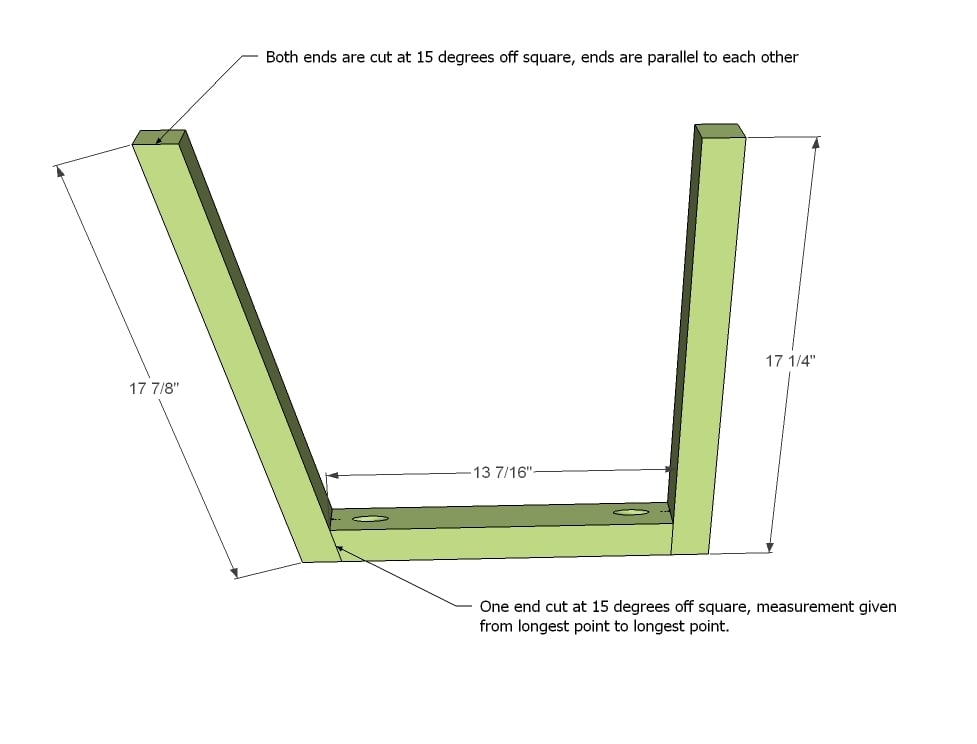
- 2 - 2x2 @ 17 7/8" (Back Legs - both ends cut at 15 degrees off square, parallel to each other)
- 2 - 2x2 @ 13 7/16" (Side Aprons - one end cut at 15 degrees off square, longest point measurement)
- 2 - 2x2 @ 17 1/4" (Front Legs)
- 1 - 2x2 @ 13" (Front Apron)
- 8 - 1x3 @ 16" (Seat Slats)
- 2 - 2x2 @ 15 5/8" (One end cut at 15 degrees off square, longest point measurement given)
- 2 - 2x2 @ 20 1/2" (Back Rest)
- 1- 2x2 @ 10" (Back Base Support)


Please read through the entire plan and all comments before beginning this project. It is also advisable to review the Getting Started Section. Take all necessary precautions to build safely and smartly. Work on a clean level surface, free of imperfections or debris. Always use straight boards. Check for square after each step. Always predrill holes before attaching with screws. Use glue with finish nails for a stronger hold. Wipe excess glue off bare wood for stained projects, as dried glue will not take stain. Be safe, have fun, and ask for help if you need it. Good luck!
Instructions
Step 1
Before we get into the actual plan details, let's talk about joinery. I have decided to add pocket holes to diagrams for those of you who use a Kreg Jig, but that does not mean that you have to use pocket holes. If you do use pocket holes for this project, set your Kreg Jig for 1 1/2" stock and use 2 1/2" pocket hole screws. I find it hard to add more than 1 pocket hole on a 2x2 - certainly not impossible, but I find wood starts to split out and such - but you need to make up for the lone screw with lots of glue.
Step 2
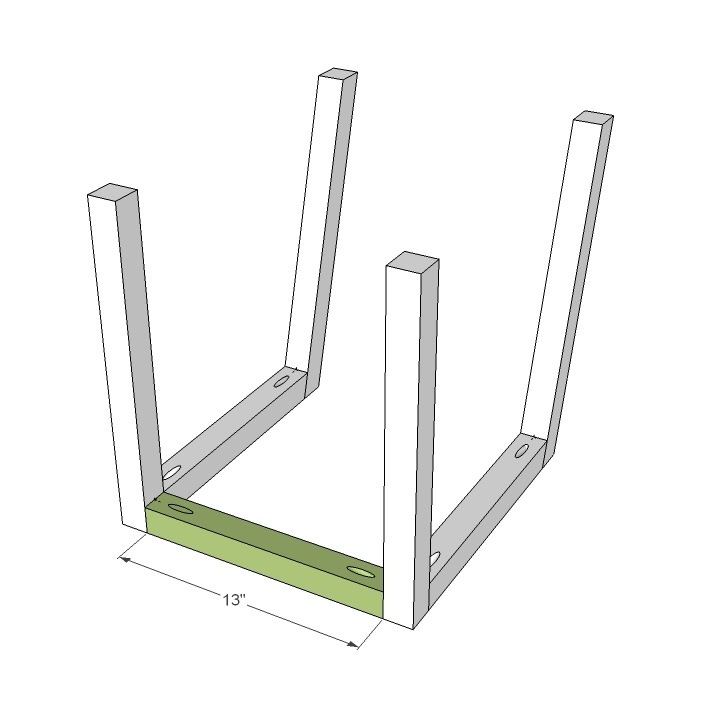
Then attach the two legs to the center as shown in the diagram.
Step 3
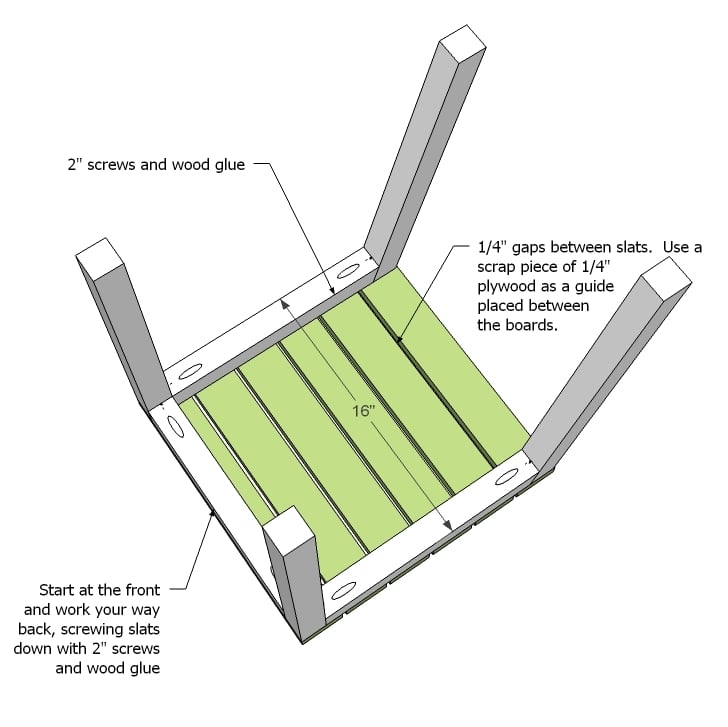
Now the slats. My trick is to use a piece of 1/4" scrap plywood as a spacer as I screw down the slats. By screwing from underneath, you will not have to worry about holes in your seat.
Step 4

In the original Harriet Chair Plan, we put the supports in first. But I found this left little room for my drill - not a problem for the original Harriet Chair with the solid seat, but with the slatted seat, you need considerably more screws, so I choose to add the support after the slats. Measure carefully and attach in place.
Step 5

Step 6
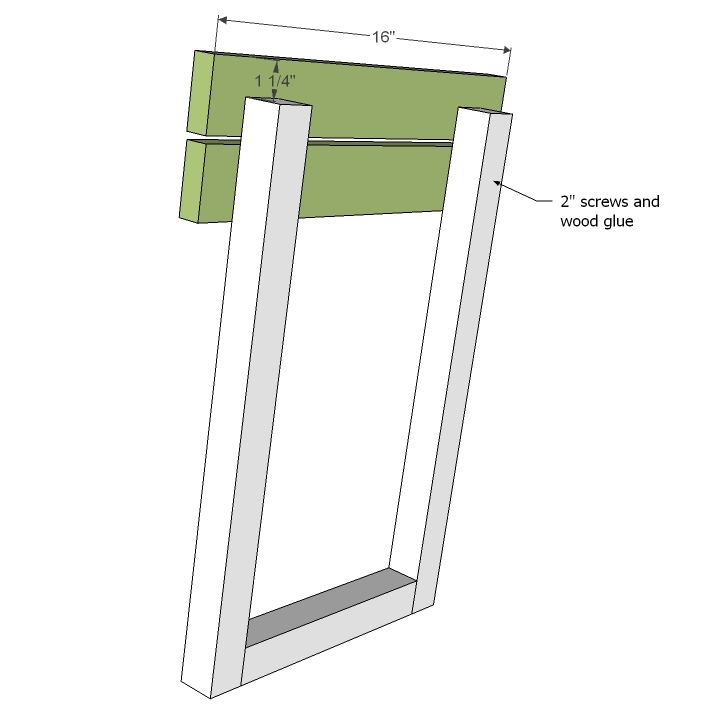
And add the back slats. The overhang should be 1 1/2" on each end, 1 1/4" to the top. Leave 1/4" gap between the slats. There is no reason why you could not add additional slats if you wanted - I really considered three back slats.
Step 7

And the fun part. Attach the back to the seat.
It is always recommended to apply a test coat on a hidden area or scrap piece to ensure color evenness and adhesion. Use primer or wood conditioner as needed.
Comments
mycreativeescapes
Fri, 04/29/2011 - 05:53
Beautiful
We are re-doing our patio - and this whole set would be perfect for it! Thank you for your constant inspiration!
Denise (not verified)
Fri, 04/29/2011 - 05:58
Love your site!
I am so glad I found your site. The furniture and plans on here are great, and the pictures and step-by-step instructions are amazing! Thanks so much for sharing! You do beautiful work!
Denise
http://www.etsy.com/shop/rattydaddydinkdum?ref=si_shop
lekk (not verified)
Sun, 05/08/2011 - 21:38
it is a good design.
it is a good design.
lekk (not verified)
Sun, 05/08/2011 - 21:39
this project i love it very
this project i love it very much.
Alli (not verified)
Tue, 05/10/2011 - 12:24
I just got a Creative
I just got a Creative Projects email from Lowes with a chair that looks mighty similar to this one! Just wondering if you're doing plans for them, or if they have a mind-reader?! :)
http://www.lowescreativeideas.com/idea-library/projects/Build_A_Stylish…
Guest (not verified)
Sun, 04/15/2012 - 10:13
Miter Saw Question
I just built the Harriet Table as my first project and love it so much! I'm now moving on to the chairs, and am a little intimidated by the miter saw. I am borrowing one, and am unsure when you say 15 degrees off the square, does that just mean I set the saw to 15 degrees? I'm very new to all of this! Thank you so much!
Guest (not verified)
Sun, 04/15/2012 - 10:14
Miter Saw Question
This is just my second project (my first was the Harriet Table, which I love!) and I am a bit intimidated by the miter saw. When it says 15 degrees off square, does that just mean I set the saw to 15 degrees? I'm very new to all this and scared of messing it up! Thanks so much!
claydowling
Sun, 04/15/2012 - 12:08
Messing Up
Don't worry, you'll mess up somewhere. You'll also figure out how to recover. It's part of the learning process.
As for the setting for your saw, most of them put a 0 at square. So setting the saw to 15 would indeed be fifteen degrees off square in that case. The angle doesn't matter in a huge way, so long as you use it consistently.