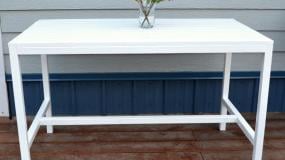


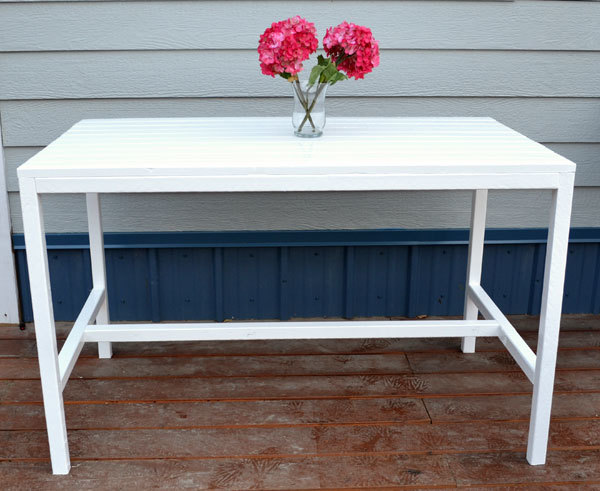
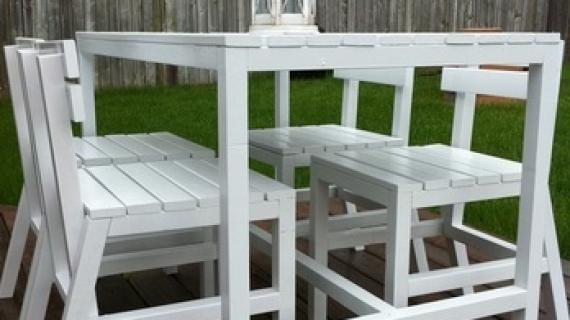
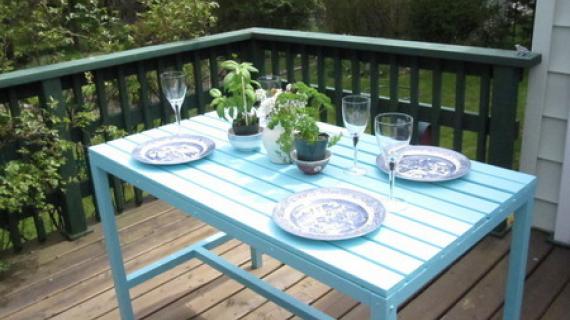
A simple, inexpensive outdoor table with modern styling that you can build in an afternoon. Seats four and features a slatted top and bottom stretcher.
The goal really with this design was to create a simple modern style outdoor table, compact design, for less than $20 in lumber - or essentially, to leave no excuses on the table - pun intended - for having a solid wood stylish outdoor table to dine on this summer.
Preparation
- 5 - 1x3 Boards, 8 feet long
- 5 - 2x2, 8 feet long
- 2 1/2" self tapping wood screws or 2 1/2" pocket hole screws
- 2" self tapping wood screws
- 7 - 2x2 @ 24 1/2" (Ends/Supports)
- 3 - 2x2 @ 44 3/4" (Sides/Stretcher)
- 4 - 2x2 @ 29 1/4" (Legs)
- 10 - 1x3 @ 47 3/4" (Decking)
From the 2x2s, cut one 2x2 @ 44 3/4" and two 2x2 @ 24 1/2" from three of the 2x2s to conserve lumber.


Please read through the entire plan and all comments before beginning this project. It is also advisable to review the Getting Started Section. Take all necessary precautions to build safely and smartly. Work on a clean level surface, free of imperfections or debris. Always use straight boards. Check for square after each step. Always predrill holes before attaching with screws. Use glue with finish nails for a stronger hold. Wipe excess glue off bare wood for stained projects, as dried glue will not take stain. Be safe, have fun, and ask for help if you need it. Good luck!
Instructions
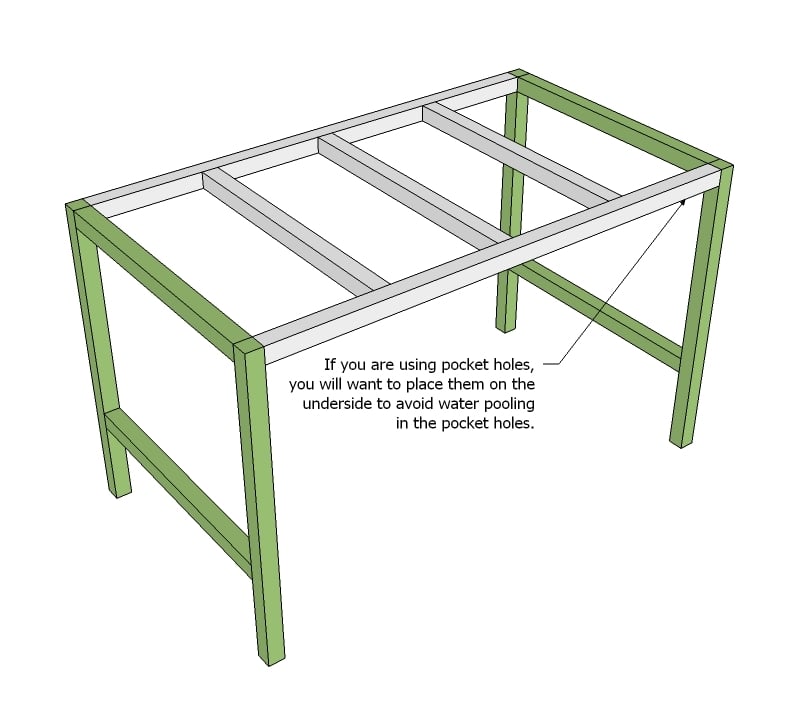
Step 1
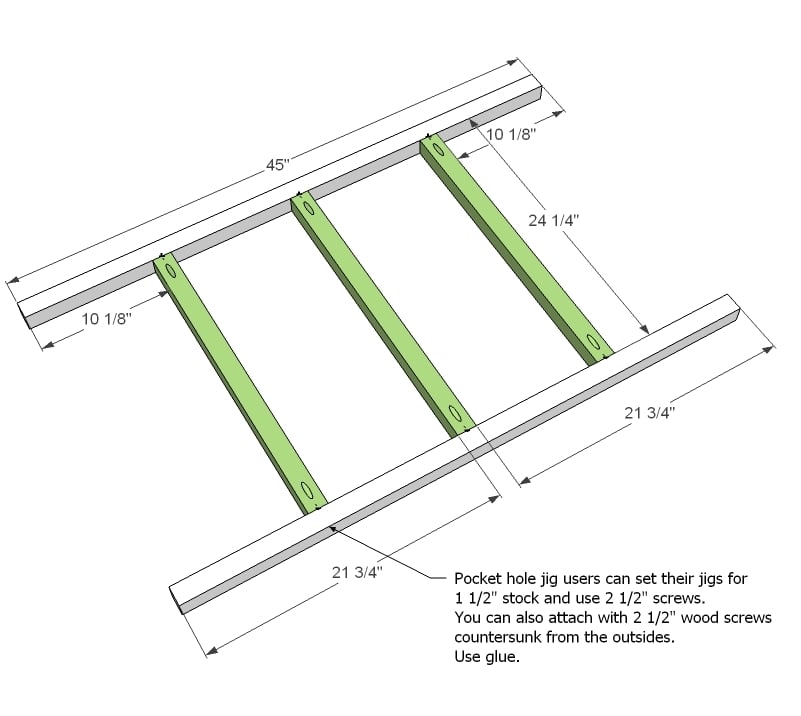
Begin by building your tabletop frame as shown above. Mark the placement of all joints and either use the Kreg Jig to drill pocket holes or a countersink bit to drill holes from the outside. Attach with 2 1/2" screws and wood glue.
Step 2

Now the legs . . . build two of these in the same manner as the tabletop. If you are using the Kreg Jig, remember to keep your pocket holes to the bottom, as water could pool in exposed pocket holes, and potentially destroy your table.
Step 3
Now simply attach the tabletop frame to the legs. I just turned the whole thing upside down and got my drill out :) Use glue and 2 1/2" screws.
Step 4
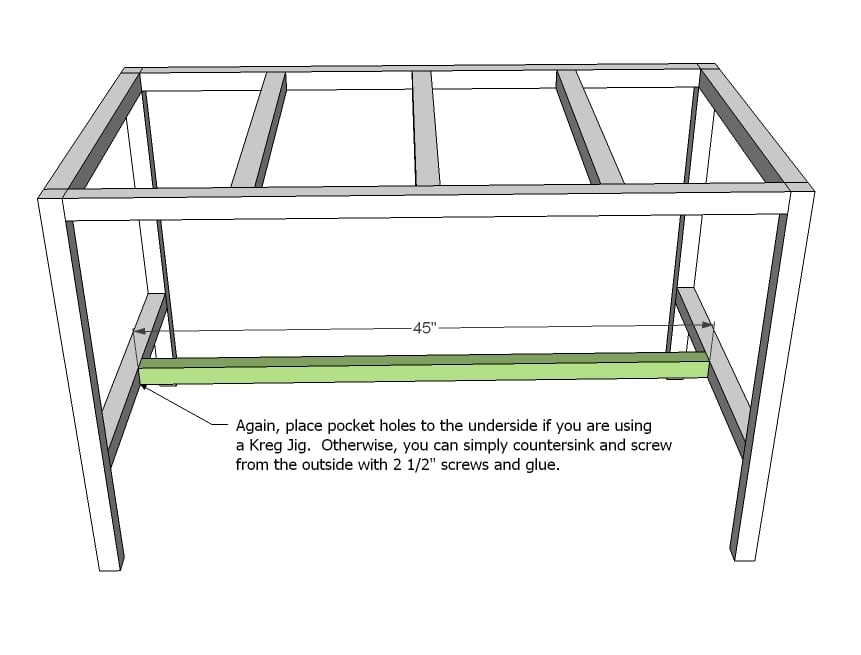
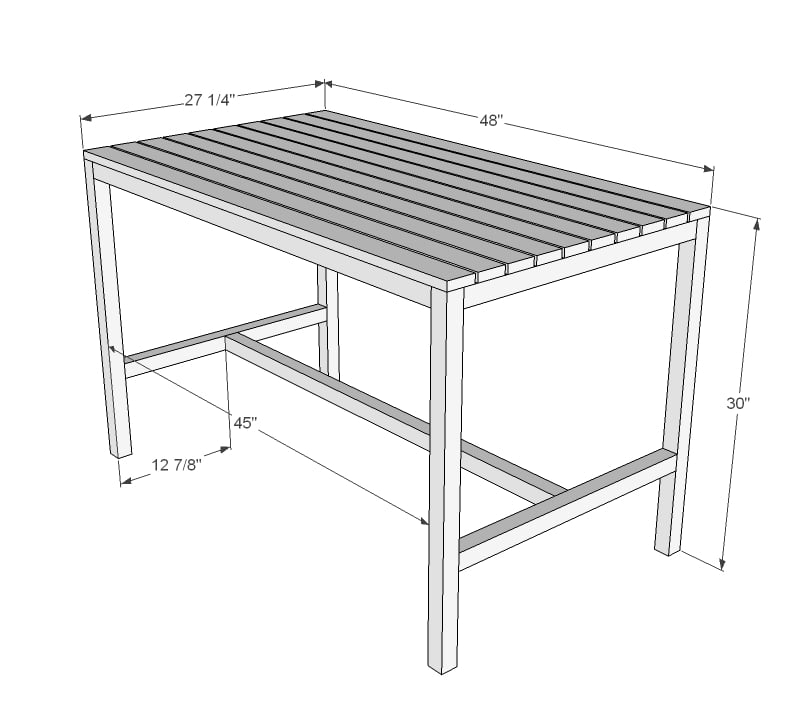
The stretcher really helps to keep the base square, and to keep the legs stable. Center the stretcher on the end boards and attach with screws and glue. Check out the dimensions diagram for center measurements - it's 12 7/8" from the outsides.
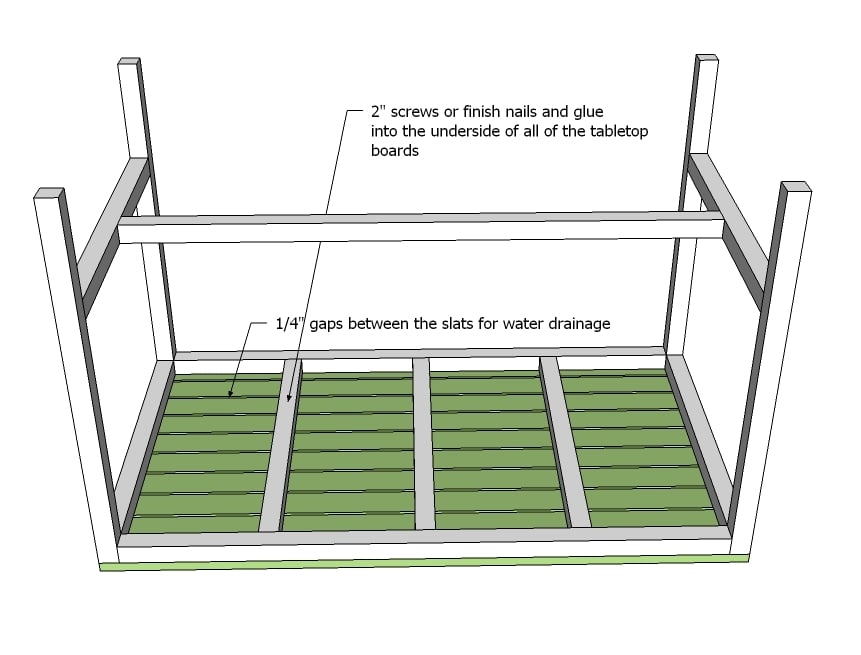
Step 5
It is always recommended to apply a test coat on a hidden area or scrap piece to ensure color evenness and adhesion. Use primer or wood conditioner as needed.
We primed and sprayed High Gloss Enamel Ultra Pure White by Valspar on, two coats. If you do not have a sprayer, you may consider painting your boards - decking especially - before assembly, as it is very difficult to get a pretty paint job on a slatted design such as this.
Comments
Shelldon (not verified)
Wed, 04/27/2011 - 09:59
only just found your blog,
only just found your blog, really like what you're doing. you may have come across this before, but instead of wiping with a damp cloth, wipe down rather with spirits. wiping with any water will cause the grain to rise which will effect your staining/tinting. of course you could just rub the grain out with a finer sandpaper but wiping with spirits is so much easier :)
Cynthia D. (not verified)
Wed, 04/27/2011 - 10:35
I recently found your
I recently found your website, and I LOVE IT!!! OMG! I was just asking my hubby to make a tiny table for a 'weird area' in our house, and this will do just nicely!! Of course, he will have to 'adjust' the measurements, but this is what I have been looking for!!! THANK YOU!!! I have checked out the rest of your ideas, and I must say, "YOU ARE SO TALENTED AND CLEVER"!! Love your work!! I have told many friends about your site also!!! GREAT JOB!!
leigh7911
Wed, 04/27/2011 - 11:12
Perfect!
Your table - as always - looks great. :) I have recently been debating the best way to build a kitchen "island" (really, a cabinet open on one side so I can store the trash and recycling cans under) and I think that with the slight modifications of a solid top and the stretcher bar being moved back, this is it. Thanks!!
traciecook
Wed, 04/27/2011 - 13:53
Question on shopping list
Do you need 10 1x3s? Based on the cuts, it looks like you could get away with 5. I just want to make sure I have the correct list! Thanks!
In reply to Question on shopping list by traciecook
Ana White
Wed, 04/27/2011 - 15:16
Thanks for the catch!
Really appreciate the note - will get this changed, you are so right.
traciecook
Wed, 04/27/2011 - 17:02
Glad I could help. I was
Glad I could help. I was wondering how that could come in under $20!
Cindy (not verified)
Wed, 04/27/2011 - 18:58
Revised list
Hi - If it is changed to cut 5 (not 10) 1x3's, is the shopping list changed to buy 3 1 x 3's instead of 5? Did I figure that right?
bhoppy
Mon, 05/02/2011 - 05:46
decking
I made this table over the weekend and you need the 5 1x3's to get the 10 slats for the top.. I actually bought 7, enough for a chair too but ended up using the extra 2 for the table because the boards were a bit warped. I didn't realize it until I laid them all out on the top and noticed the gaps between the boards. I'm so glad I had the extra so I didn't have to make another trip to Blue to get more. It was also a bit difficult to find the 2 1/2 inch pocket hole screws. The first Lowes I went to, the guy looked at me like I was an alien.. he sent me to Ace... Ace was clueless Luckily we have 4 blue stores within 20 min and I found them at the second one:-)
mamalecia11
Mon, 05/09/2011 - 11:27
The cuts versus the measurements on the instructions.
Ana, I built this table and had all kinds of trouble due to measurement differences. I think I need you to explain to me how to read this. I must be doing something wrong.
For instance on the table sides/stretchers on the cut list it says to cut them 44 3/4" but on the actual plans it says they are 45" long. Also the cut list has you cut the end supports 24 1/2" but on the plans they measure 24 1/4". It made enough difference that I couldn't place my top slats the distance suggested. I did adjust and get everything together and I love the table but I am still confused about what I did wrong.
Thanks, Alecia
mamalecia11
Mon, 05/09/2011 - 11:30
The cuts versus the measurements on the instructions.
Ana, I built this table and had all kinds of trouble due to measurement differences. I think I need you to explain to me how to read this. I must be doing something wrong.
For instance on the table sides/stretchers on the cut list it says to cut them 44 3/4" but on the actual plans it says they are 45" long. Also the cut list has you cut the end supports 24 1/2" but on the plans they measure 24 1/4". It made enough difference that I couldn't place my top slats the distance suggested. I did adjust and get everything together and I love the table but I am still confused about what I did wrong.
Thanks, Alecia
Del
Sat, 09/10/2011 - 21:54
Harriet table
I do not know how to get 10 3" wide boards with a spacing of 1/4 between them into a space of 27 1/4".
Is the nominal width of the boards different than the real width?
Delfino
angeladixon25@…
Tue, 04/30/2013 - 14:32
Outdoor table
na
arocks36
Sun, 07/19/2015 - 14:21
Longer?
How much longer do you think this could be extended? I'm looking to build a somewhat long desk for the ofice to replace a computer desk and printer stand. It's a pretty large printer and the computer has two monitors. I'm think of something minimalist like this, or maybe the saw horse table.
What do you think?