


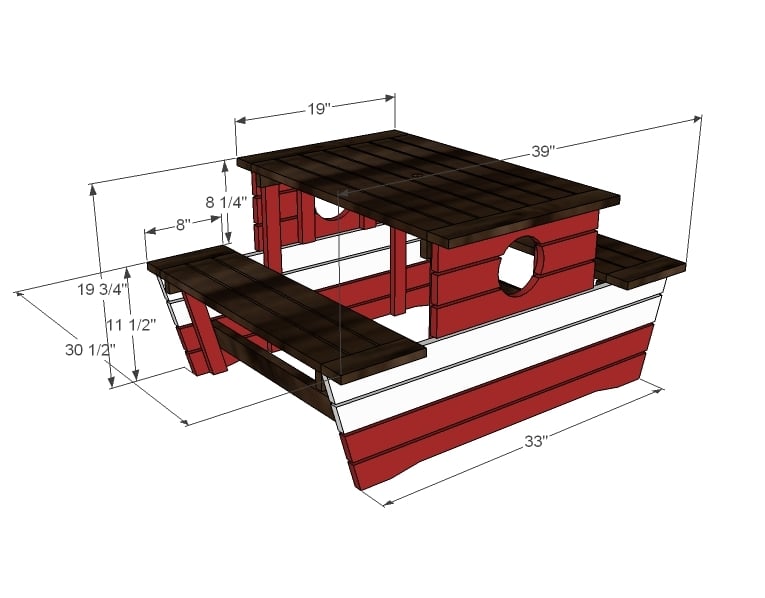
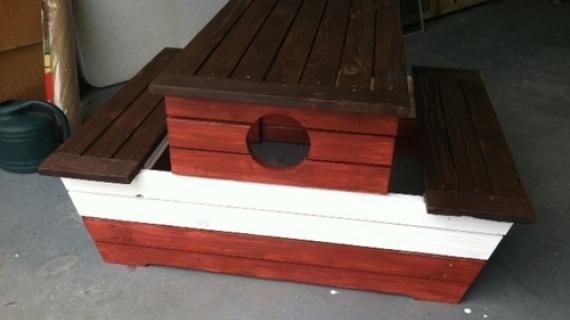
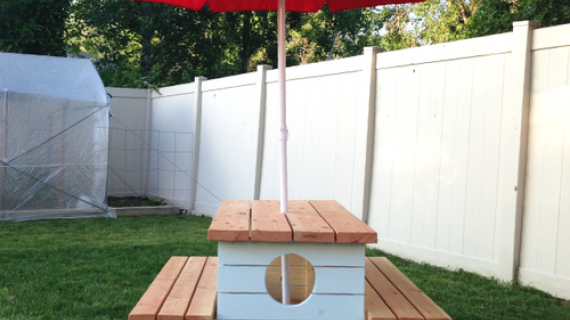
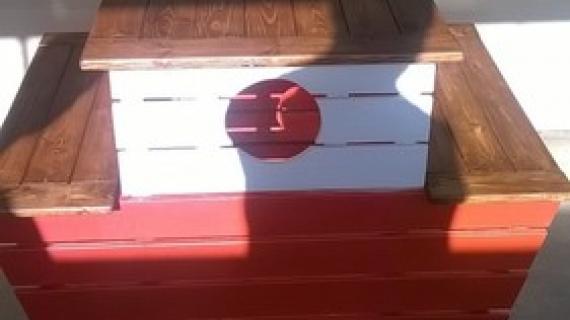
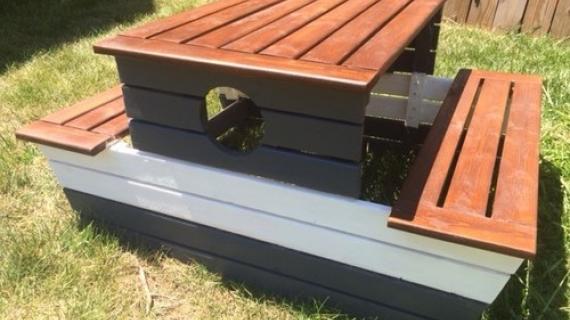
A picnic table that looks like a pirate ship! Add an umbrella and every day dining is literally a breeze.
Preparation
10 - 1x3 Boards, 8 feet long
6 - 1x3 @ 18" (Porthole sides)


Please read through the entire plan and all comments before beginning this project. It is also advisable to review the Getting Started Section. Take all necessary precautions to build safely and smartly. Work on a clean level surface, free of imperfections or debris. Always use straight boards. Check for square after each step. Always predrill holes before attaching with screws. Use glue with finish nails for a stronger hold. Wipe excess glue off bare wood for stained projects, as dried glue will not take stain. Be safe, have fun, and ask for help if you need it. Good luck!
Instructions
Step 1

The most difficult part of this project is going to be getting those boards cut just right - namely this circle. Cut your six boards straight, as shown above, 18" long. Lay out with 1/4" spacing between the boards and draw a 5" circle on the boards. Then cut the circle parts out of each board with a jigsaw. You will need to do this on both sides.
Step 2
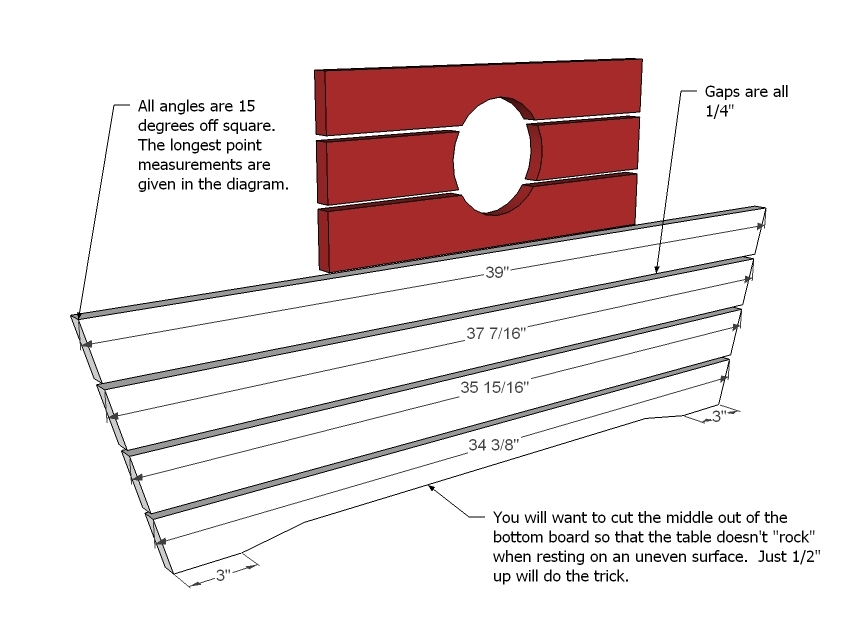
Now space the remaining side boards out, 1/4" appart as shown above. Notch the bottom out 1/2" up as shown above with a jigsaw so that the table will sit flat, despite uneven surfaces. You will need to do this on both sides.
Step 3

To the top board, add the top cleat as shown above.
Step 4
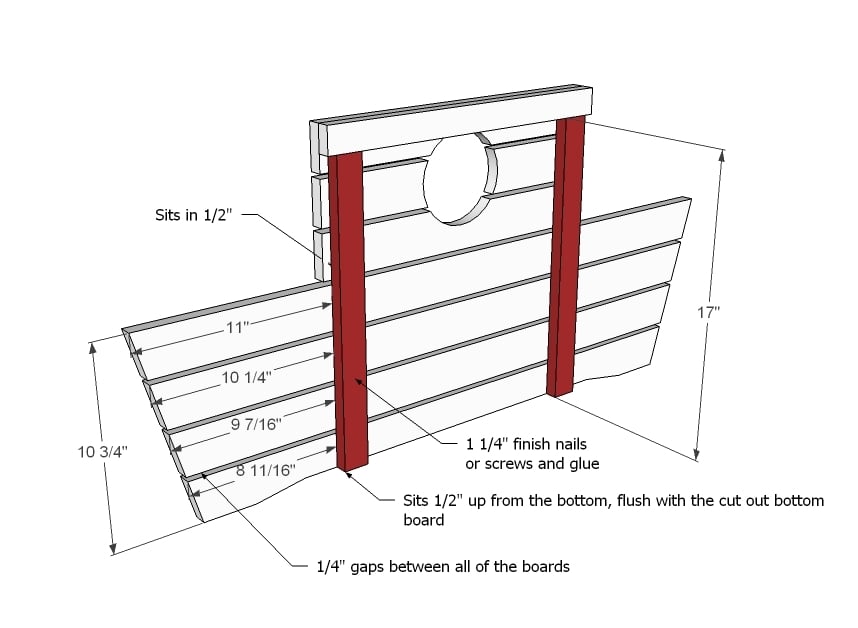
Now it's time to assemble the sides. Start at the top and work your way down, keeping a 1/4" gap between all of the boards as shown above.
Step 5
Step 6

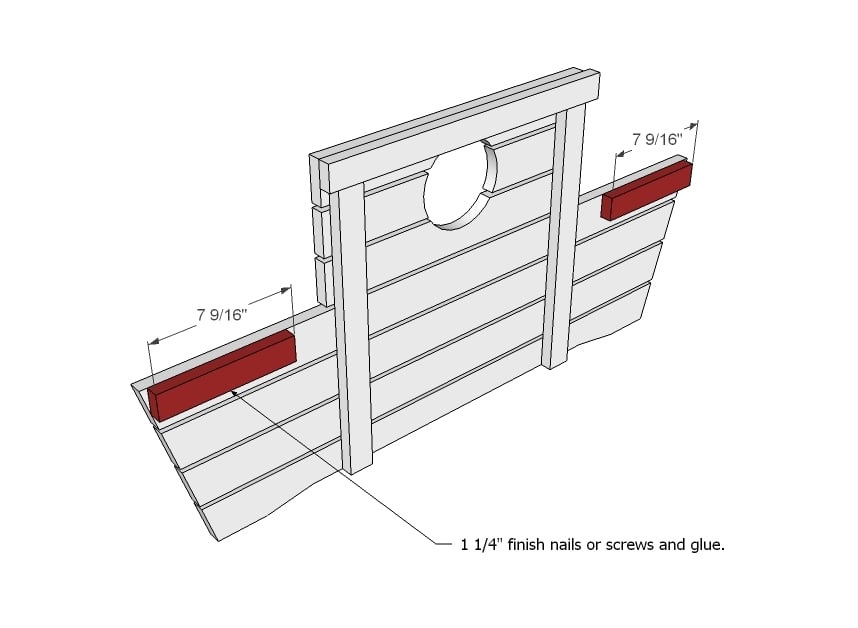
Now we need something to keep the ends in place. Add the angled cleats as shown above, and the cleats around the portholes. Again, 1 1/4" fasteners and glue.
Step 7

If you have a Kreg Jig™, consider building the top and seats first, and the adding to the top. But if you don't, here's how you can still get those breadboard ends. Screw (predrilled holes) and glue the breadboard ends to the top as shown above. The top will overhang 1/2" on both ends. Seats will sit flush.
Step 8
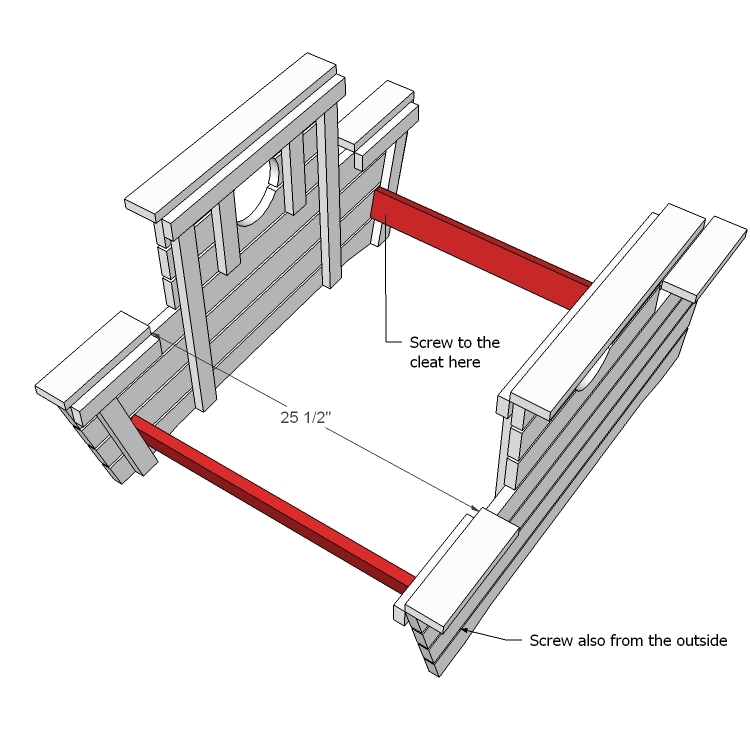
Now join the two sides together using the base support boards as shown above. Screw to the cleats and also to the sides.
Step 9

And finally, attach all of the top boards as shown above. Carefully predrill holes and use 2" screws and glue. Adjust for square.
It is always recommended to apply a test coat on a hidden area or scrap piece to ensure color evenness and adhesion. Use primer or wood conditioner as needed.
Comments
Guest (not verified)
Fri, 04/08/2011 - 11:52
Love It
My husband saw this in the Pottery Barn Book and loved it, but we have a girl and I think she needs a more girly one... but I thought it was cool that you made the plans for it.. We were just talking about about a week ago.
pcole6765
Fri, 04/08/2011 - 12:14
Very cool. Painting it pink
Very cool. Painting it pink and purple would make it girlie.
Guest (not verified)
Fri, 04/08/2011 - 12:18
Picnic table
Very cute... You should go on design star on hgtv.. When they cast for the next season...
Tsu Dho Nimh
Fri, 04/08/2011 - 13:38
Looks like a tugboat!
Looks like a tugboat!
http://alloveralbany.com/archive/2009/09/15/tugboats
brooke
Fri, 04/08/2011 - 15:50
Love it!
If I can get through my massive list of Ana to dos already I am going to make this for my son. You always amaze me.
Farm Marm (not verified)
Fri, 04/08/2011 - 21:14
OMGoodness!
I have two little boys and this will be perfect for the summer! It will go great next to the kiddie pool! Thanks Ana! U ROCK!
I Pay Outside … (not verified)
Sat, 04/09/2011 - 09:22
LOL
This is just too stinkin' cute. Does your mind ever sleep? You are an amazing woman!!
mommy can make that
Mon, 04/11/2011 - 17:10
tip for cutting the hole
This is such a cute project! I want to make it even though I think my boys are a bit too big for it. I was looking over the plans and was thinking that it might be easier to cut the hole if you go ahead and lay out the sides, attach the top cleat and the center supports for the sides then trace your bowl and cut it out with your jigsaw. Just a thought since that does seem like the most difficult part. I can't wait to try this one! Thank you so much for these wonderful plans!
ndanner
Sat, 06/14/2014 - 16:14
Help
Could someone PLEASE help me...I have a question about the measurements. Thanks!