
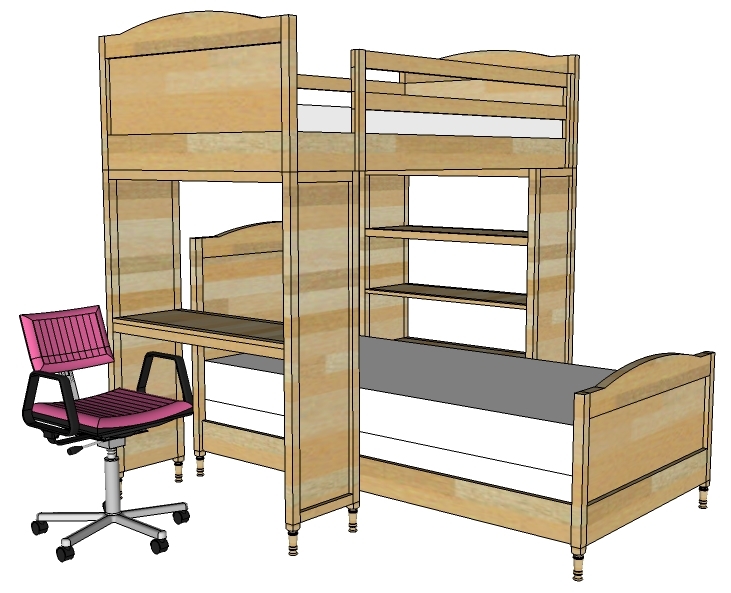

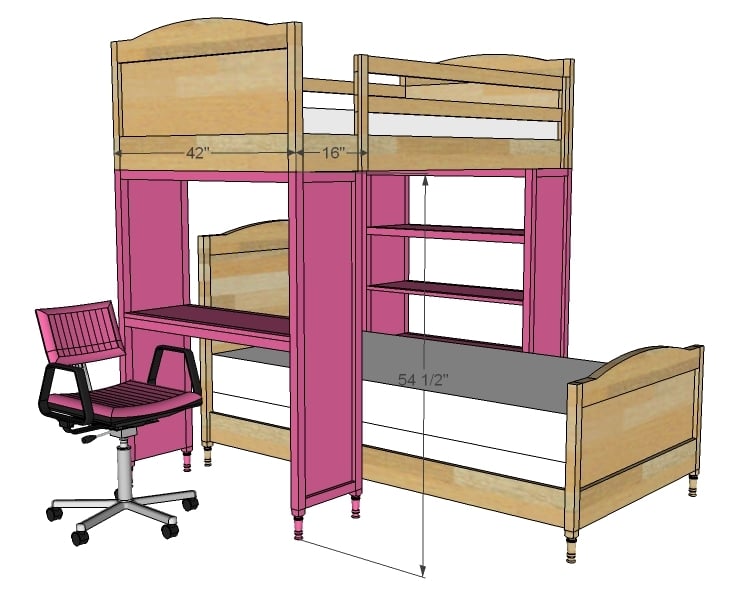
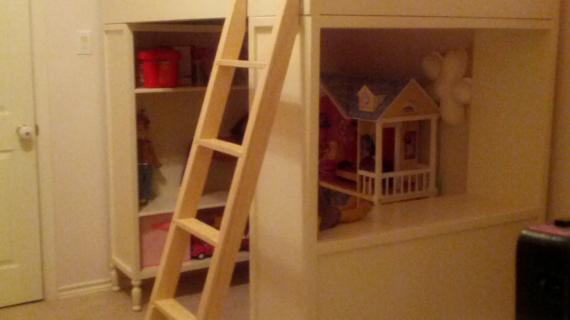
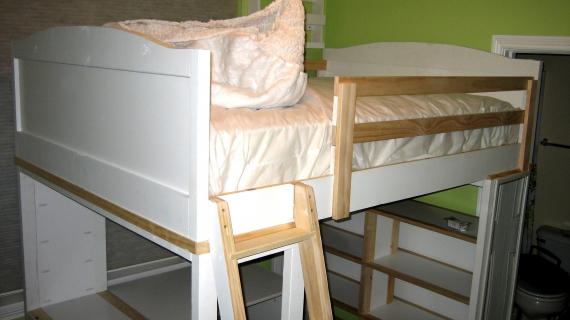
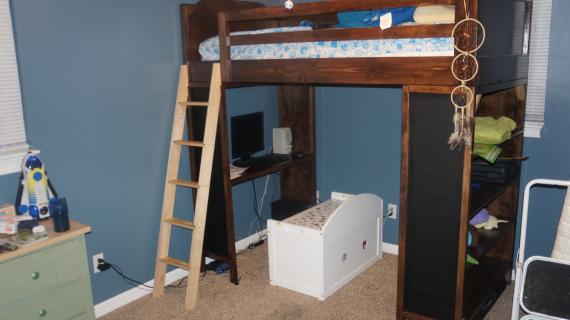
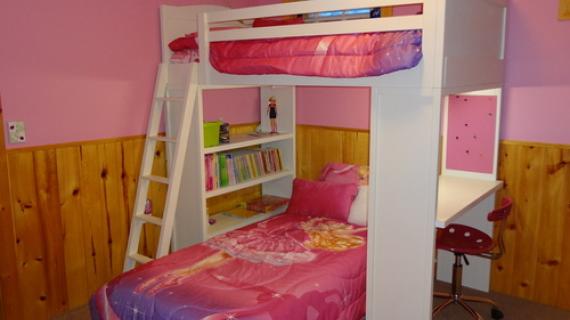
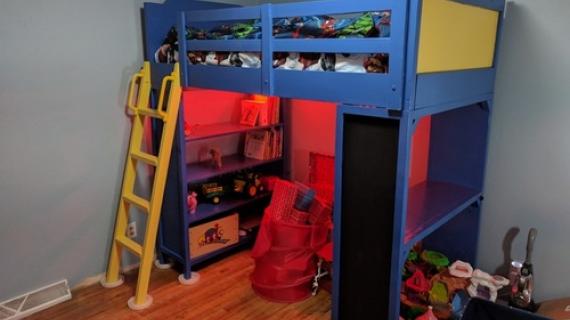
Free furniture plans for a desk or bookshelf designed to support a top bunk. This project plan can be used to create twin over twin bunks, set perpendicular. Bookshelf features three shelves, desk features one desk height shelf. The desk is a perfect spot for homework - store bedtime books within reach in the bookshelf.
If I were to build a bunk bed system, this would be the plan that I use! Inspired by Pottery Barn Kid's Catalina Bunk System, I love not just the little extra girly touches, but also the simplicity of this design.

Preparation
1 - 1x12 @ 12 feet long
4 - 2x2 @ 8 feet long
1 - 1x2 @ 8 feet long
4 - decorative feet, 1 1/2" diameter, 6" tall
In addition, for the bookshelf
1 - 1x12 @ 12 feet long
3 - 1x2 @ 8 feet long
2 - 1x12 @ 50" (Sides)
4 - 2x2 @ 50" (Legs)
4 - 1x2 @ 11 1/4" (Cut to width of 1x12s)
4 - 2x2 @ 39" (Top/Bottom Trim)
1 - 1x12 @ 39" (Desktop)
For Bookshelf (in addition to the above)
3 - 1x12 @ 39" (Shelves)
6 - 1x2 @ 39" (Shelf Trim)


Please read through the entire plan and all comments before beginning this project. It is also advisable to review the Getting Started Section. Take all necessary precautions to build safely and smartly. Work on a clean level surface, free of imperfections or debris. Always use straight boards. Check for square after each step. Always predrill holes before attaching with screws. Use glue with finish nails for a stronger hold. Wipe excess glue off bare wood for stained projects, as dried glue will not take stain. Be safe, have fun, and ask for help if you need it. Good luck!
Instructions
Step 1
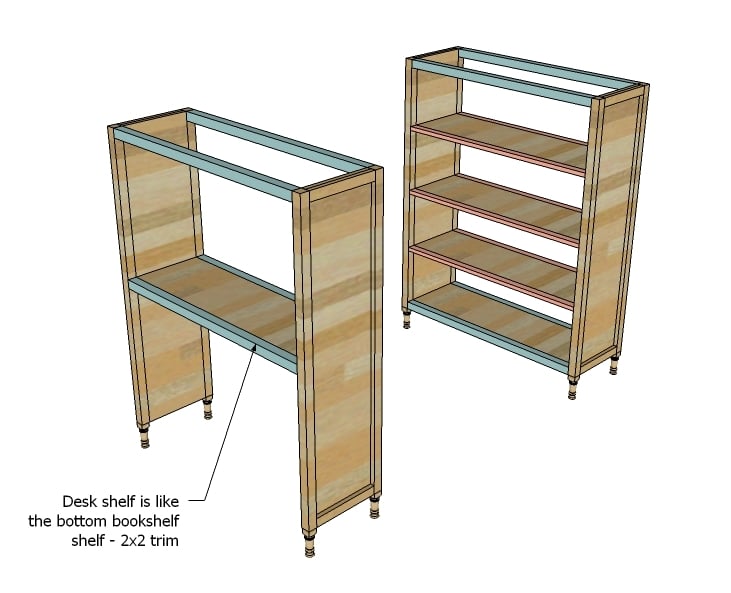
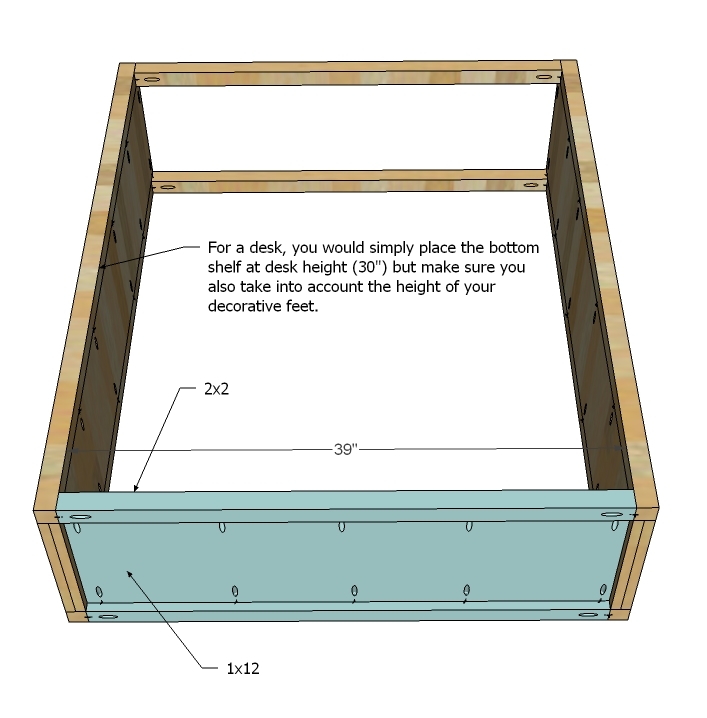
This diagram shows the difference between the desk and the bookshelf - there really is minimal difference. It's all in shelf placement. Make sure you use 2x2s to trim out your desktop for a stronger desktop.
Step 2
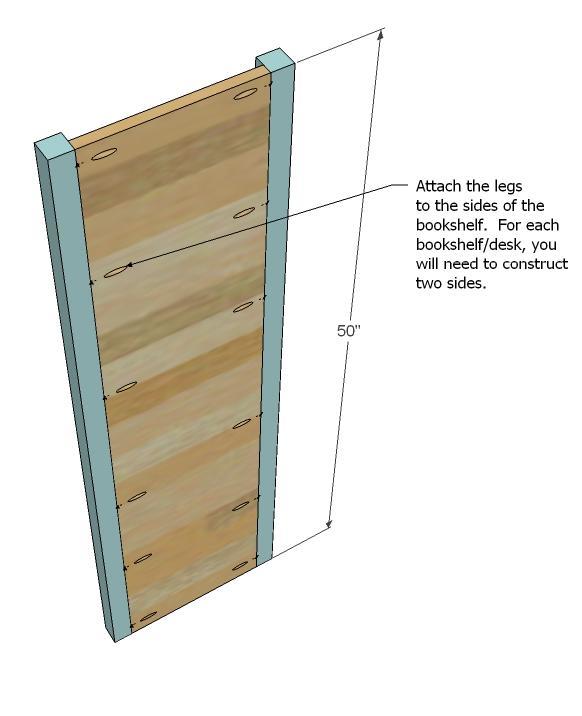
You will need to build two sides per bookshelf/desk. I show this diagram with pocket holes, if you use a Kreg Jig. While you can attach the legs to the side panel with standard screws (you'd want 2 1/2 to 3" long ones), I'd take a second to consider how much you are saving by building for yourself and invest in a Kreg Jig - it'll make your projects faster, easier, stronger.
Step 3

Since 1x12s are notorious for being slightly different widths, take a measurement and cut 1x2 trim pieces to fit. Nail on with 1 1/4" finish nails and glue as shown above.
Step 4

Next join the two sides on the top as shown above. One thing to consider when you use pocket holes is how to place your pocket holes for the strongest joint and to avoid splitting. Because the holes are pointed downward (as opposed to upward) in this instance, it will be much more difficult for you wood to split out on you. Always consider how you can place your screws in such a manner to create the strongest joint - but also in discreet locations.
Step 5
Step 6

For the bookshelf, build shelves, but this time, use 1x2s. If you are planning to place heavy objects on the shelves, use 2x2s instead (just like the bottom shelf). Attach to the sides.
Step 7
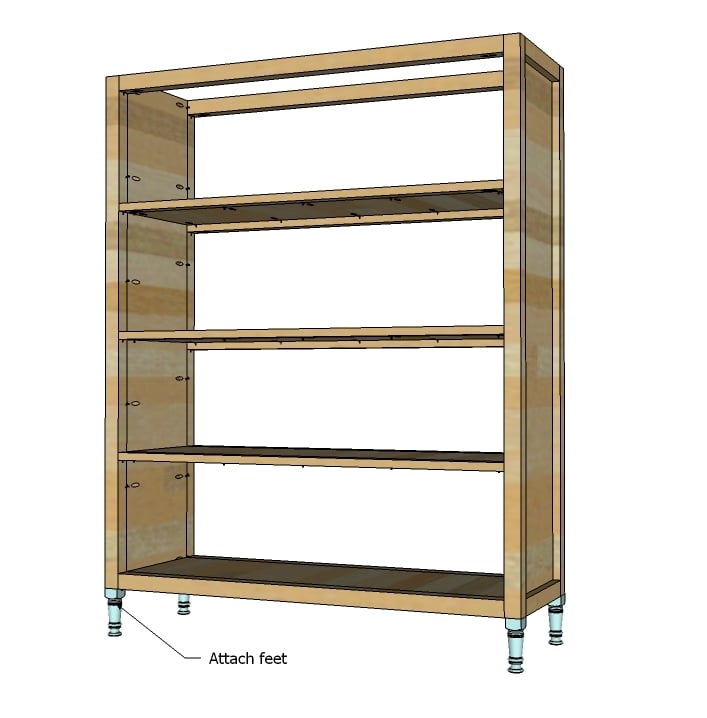
In the final step, add your decorative feet. Follow the instructions given by the manufacturer.
It is always recommended to apply a test coat on a hidden area or scrap piece to ensure color evenness and adhesion. Use primer or wood conditioner as needed.


Comments
ferbit
Sat, 05/07/2011 - 08:57
Ana White, you're killin' me! LOL
My oldest has been drooling over this girly loft system for so long! She stares at the photo in the pbteen catalog! LOL
Thank you so so so much for drawing up this plan! It's so PRETTY! Is it easy enough to convert this to a full size loft plan by simply making all of the 39" cuts 54" instead? Or are extra supports needed?
Thank you!!!
tracysmith
Tue, 03/06/2012 - 00:25
Decorative feet
Where did you find feet for this.. or where could you? I've looked at HD, Lowes, Rockler, Architecutredepot.com, it's very frustrating to try to find some that will work with those dimensions. Thanks for any input you can give me.
claydowling
Tue, 03/06/2012 - 06:17
Google is your friend
Note that there aren't any photos of feet here, so the feet you're looking at are a sketchup model and nothing more. But google just pointed me to http://www.tablelegs.com/ which seems to have a good selection.
Lanie (not verified)
Mon, 06/25/2012 - 10:13
bed
We are making two of these beds at the same time, and now that we have mastered the kreg jig we are booking right along. We did decide to skip the feet and just make the sides 6 inches longer, had I known that before I purchased the wood I would have used 1x12x10s and not in twelve foot lengths, since that gave me some scrap, now, what can I make with those 30 inch scrap pieces? :)
Mindy (not verified)
Wed, 11/14/2012 - 14:53
Desk is a little wobbly
I am in the process of building this for my daughter as a loft bed. The desk is wobbly without some reinforcement. I added a 1/2 in plywood panel on the back side of the knee hole to make it more stable. I will probably put a sheet of plywood on the back of the bookshelf as well.
Thanks,
Mindy
dylan (not verified)
Fri, 01/04/2013 - 13:12
plywood or dimensional lumber
Can you substitute ripped plywood for the 1x12s? This would be a big cost savings.