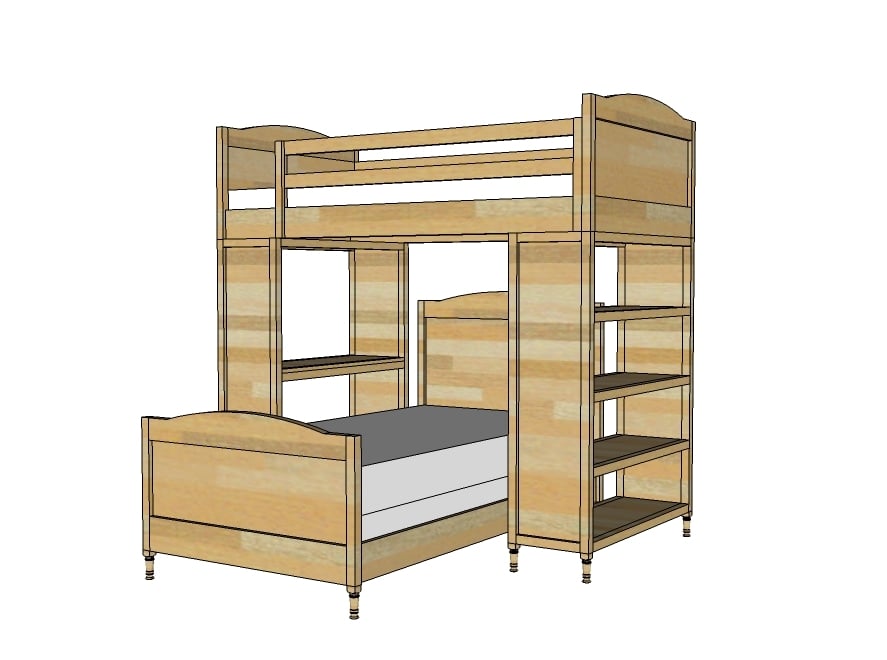


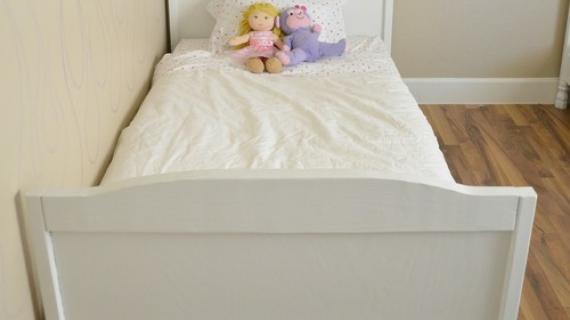
A girly bed that is part of a bunk system with desk space and storage. Super easy to build, features an arched top and decorative feet.
Preparation
4 - Hardwood feet, 1 1/2" diameter, 6" long
4 - 2x2 @ 8 feet long
1 sheet of 3/4" plywood, MDF or particle board
1 - 2x6 @ 8 feet long
3 - 1x6 @ 8 feet long
1x3s for the bed slats - approximately 7 - if you do not have a box spring or bunkie board
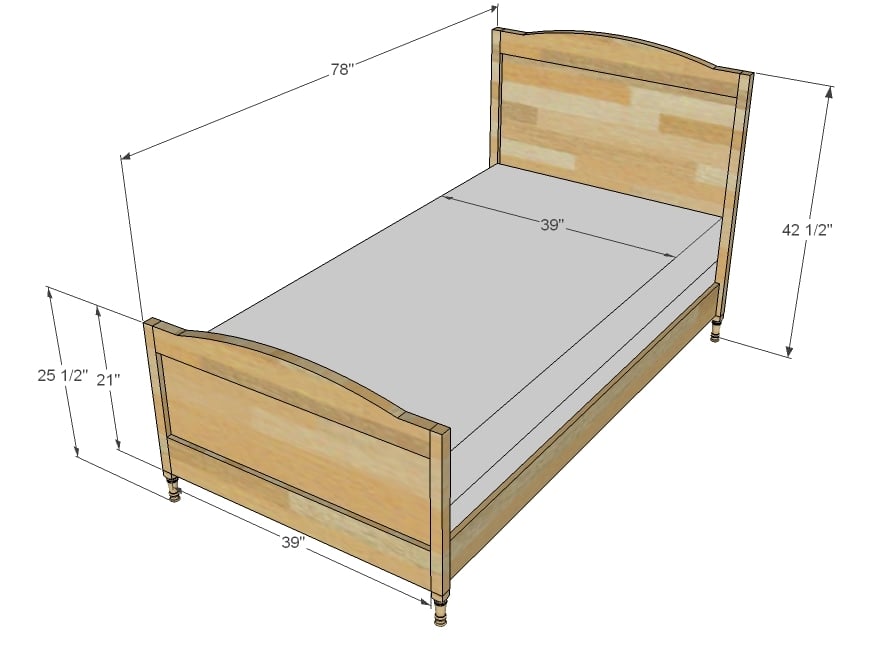
2 - 2x6 @ 39" (Headers)
1 - 3/4" plywood, MDF or particle board @ 39" x 17 1/2" (Footboard Panel)
1 - 3/4" plywood, MDF or particle board @ 39" x 34 1/2" (Headboard Panel)
2 - 1x6 @ 39" (Bottom Trim)
2 - 2x2 @ 21" (Footboard Legs)
2 - 2x2 @ 38" (Headboard Legs)
2 - 1x6 @ 75" (Siderails)
2 - 2x2 @ 75" (Cleats)
14 - 1x3 @ 39" (Optional Slats)


Please read through the entire plan and all comments before beginning this project. It is also advisable to review the Getting Started Section. Take all necessary precautions to build safely and smartly. Work on a clean level surface, free of imperfections or debris. Always use straight boards. Check for square after each step. Always predrill holes before attaching with screws. Use glue with finish nails for a stronger hold. Wipe excess glue off bare wood for stained projects, as dried glue will not take stain. Be safe, have fun, and ask for help if you need it. Good luck!
Instructions
Step 1

Cut your headers. Now this is going to be easier said than done, since we are using 2x6 headers and a jigsaw. Test out your jigsaw cuts first on a scrap. When you are satisfied, carefully cut out the headers as shown above. Sand the finished edge with a sander until smooth.
Step 2
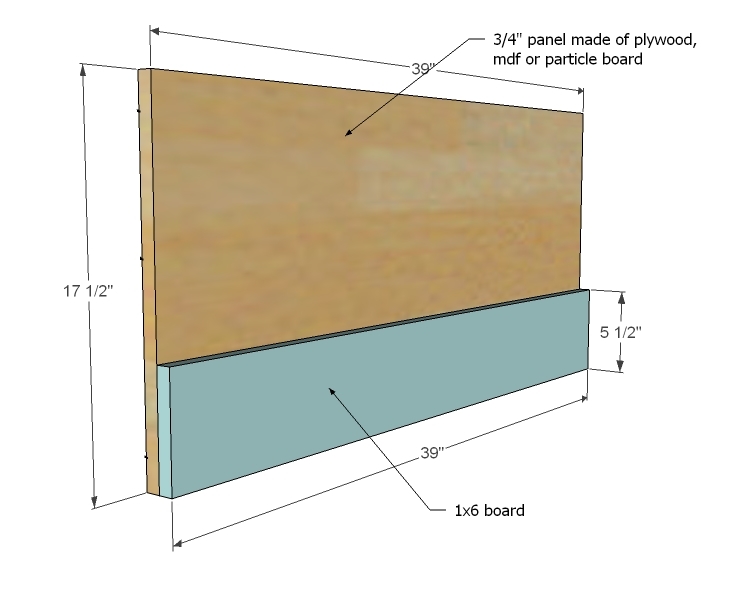
On you footboard panel (and headboard to in a minute) attach the 1x6 base to the panel with 1 1/4" finish nails and glue.
Step 3

Now attach the 2x2 legs to the panel and header as shown in the diagram. I recommend pocket holes, set for 3/4" stock and 1 1/4" pocket hole screws, but this joint is not a high stress joint - the weight goes from the siderails to the legs and down - so you could use glue and 3" screws countersunk.
Step 4
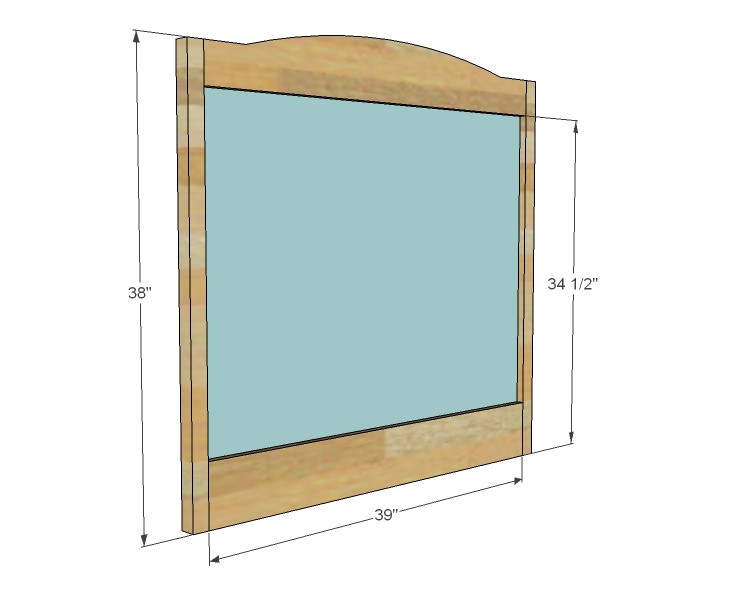
Build the headboard in the same manner as the footboard.
Step 5

Step 6
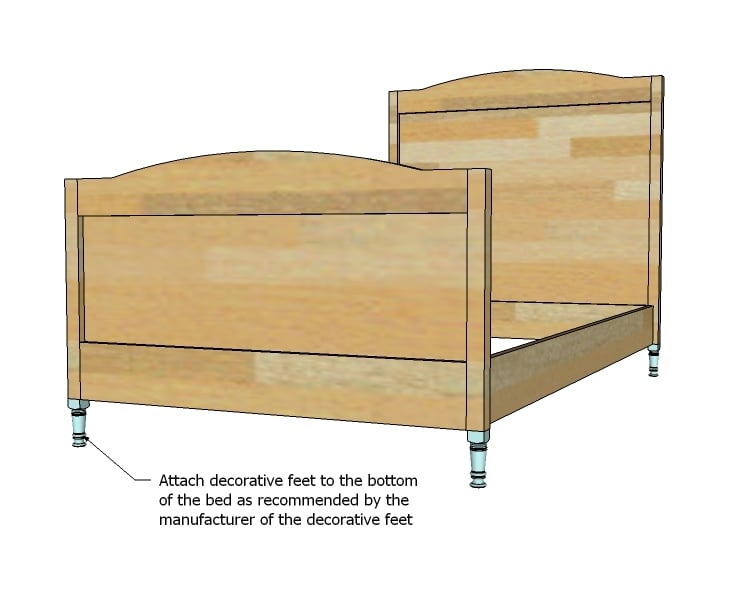
Add the decorative feet to the base of the bed.
Step 7
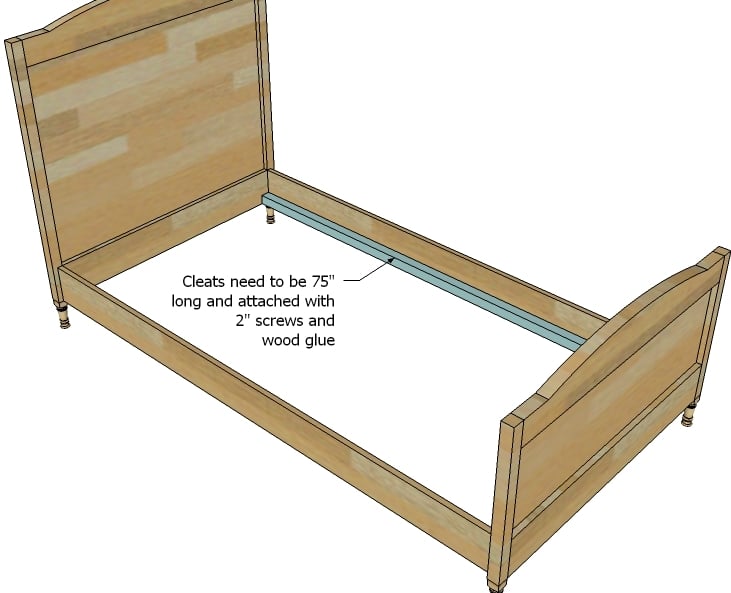
Now add the cleats to the inside of the siderails. If you are not using a box spring, you may wish to bring the cleat up - up to 1" from the top - for a mattress that sits higher. If you are using a boxspring, attach cleats flush to the bottom of the siderails.
Step 8

Now lay your slats on the cleats and screw down.
It is always recommended to apply a test coat on a hidden area or scrap piece to ensure color evenness and adhesion. Use primer or wood conditioner as needed.
Comments
Guest (not verified)
Thu, 05/26/2011 - 11:35
top portion of bed?
Is there is a link for the plans to the top of the bed?
zackburnet
Thu, 02/27/2014 - 08:10
Outstanding woodwork guide
hey Ana , I used to try to make this bed with my own plan but failed ,
seems like your plans are easy to follow and understand , thanks for sharing