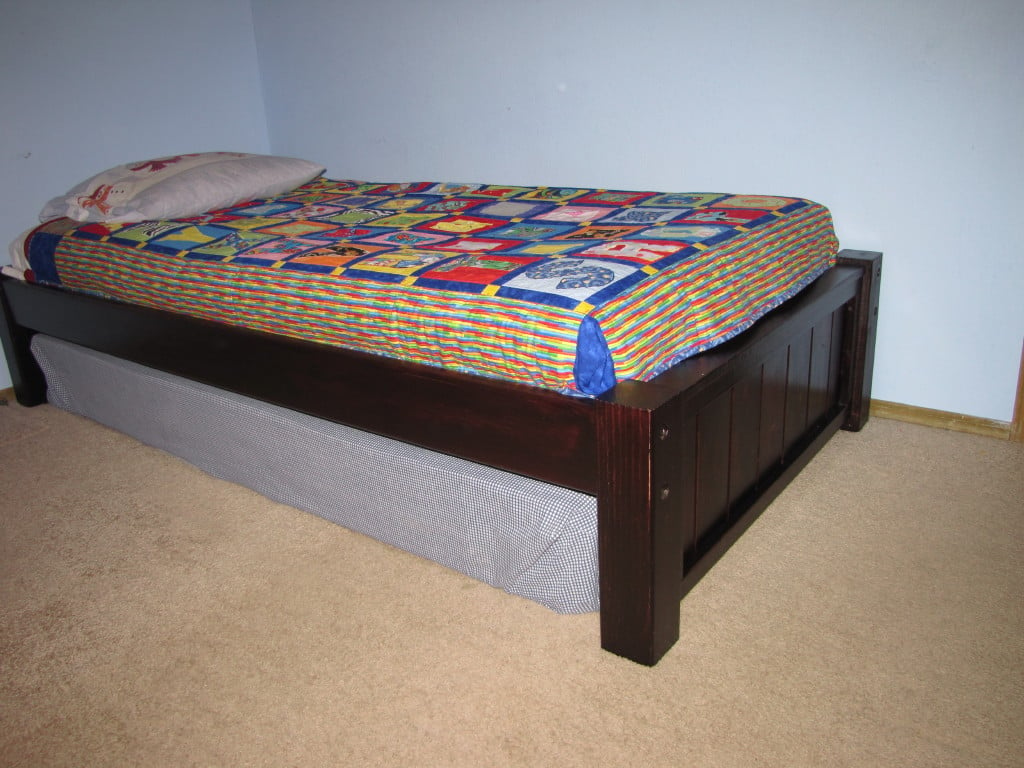


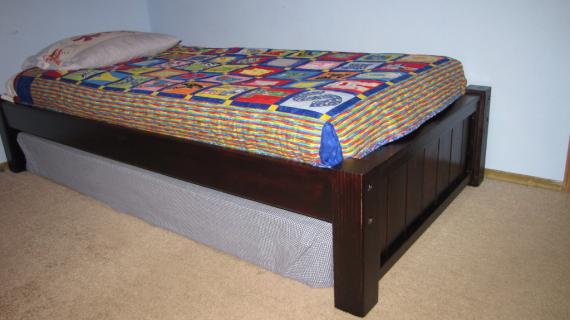
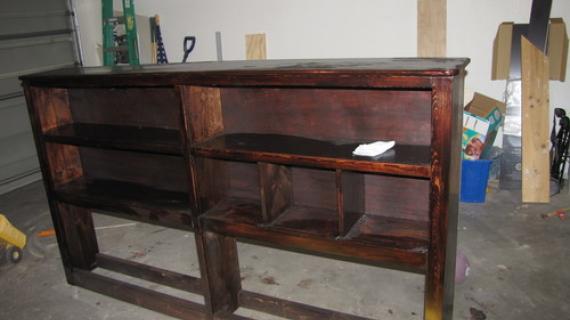
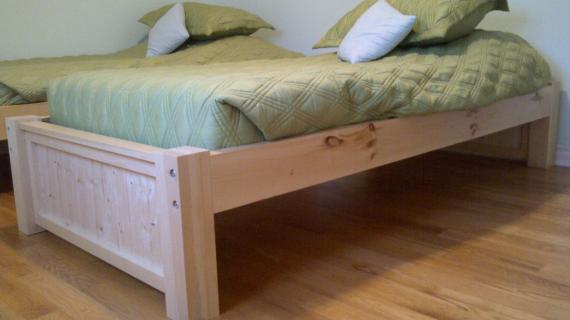
This is beginning of a collection I'm working on for my son's room. For this bed I did reuse some parts of his old bed, so I will tell you about some other options you could do. I will be starting on his bookshelf soon, then move onto the trundle bed. This bed also can be used with the bookshelf that I did with the cozy corner twin collection.

Preparation
4 - 1 X 2 @ 8'
8 - 1 X 3 @ 8'
1 - 1 X 3 @ 6'
2 - 2 X 6 @ 8'
1 - 4 X 4 @ 8'
2 - 2 X 2 @ 8'
Your choice for the headboard and footboard panel. Either 3/4in. plywood, tongue and groove lumber as seen, or you could use furing strips of your size choice, whatever you choose it will be sandwiched between trim pieces.
You will also need:
8 5in carriage bolts and 8 washers
8 - 1 X 2 @ 34 1/2" (top and bottom trim pieces)
8 - 1 X 2 @ 10" (side trim pieces)
2 - 1 X 3 @ 34 1/2" (header for headboard and footboard)
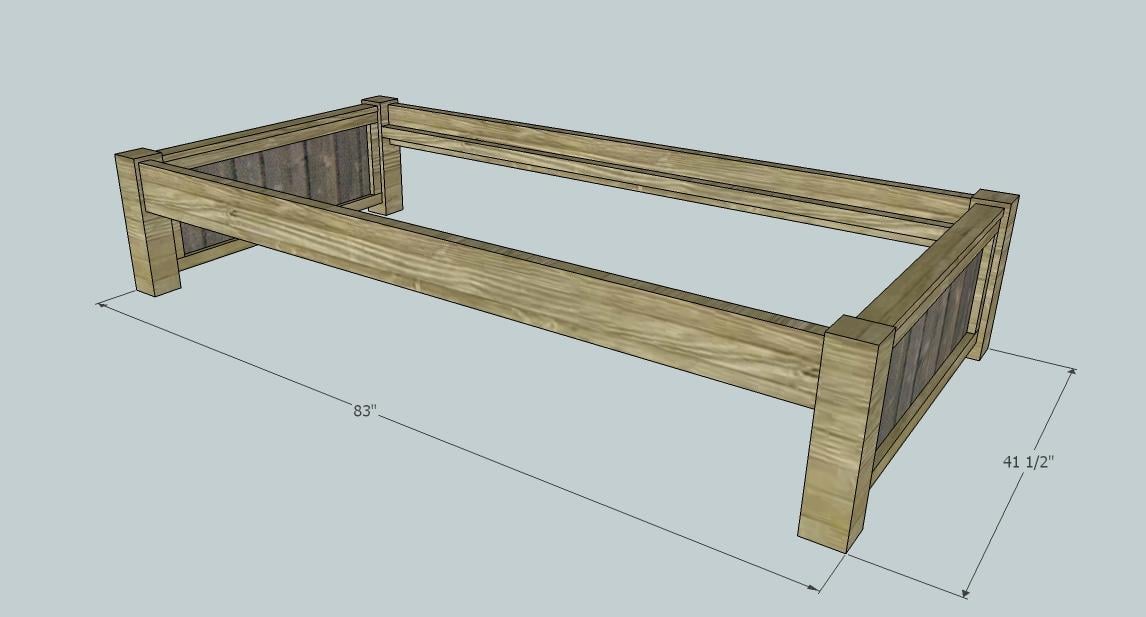
2 - 2 X 6 @ 76" (side rails)
2 - 2 X 2 @ 76" (slat support rail)
4 - 4 X 4 @ 16" (legs)
15 - 1 X 3 @ 37 1/2" (slats - dbl check your measurements with your bed put together just to be certain.)
The panel for the footboard and headboard will need to be 34 1/2" X 13".


Please read through the entire plan and all comments before beginning this project. It is also advisable to review the Getting Started Section. Take all necessary precautions to build safely and smartly. Work on a clean level surface, free of imperfections or debris. Always use straight boards. Check for square after each step. Always predrill holes before attaching with screws. Use glue with finish nails for a stronger hold. Wipe excess glue off bare wood for stained projects, as dried glue will not take stain. Be safe, have fun, and ask for help if you need it. Good luck!
Instructions
Step 1

After you have determined what you are using for your panel, make sure it measures up to 34 1/2" X 13". Once that is done you will begin sandwiching the panel between the trim pieces. Glue the front trim pieces on, you may want to clamp them down. After they have set, flip the panel over and glue and screw the backside trim in place, using 2 in. screws. (This insures all the filled holes will be on the inside of the bed, yay!)
You will be making 2 of these one for the headboard and one for the footboard.
Step 2

Center the header for both the headboard and footboard. Glue in place and attach with either finishing nails or screws. (Depends on how much you want to fill)
Step 3

Attach legs to the panel. The panel will measure 1/2" from the top of each leg and will be centered from side to side. Glue first to hold it in place the screw in place through the 10in. trim pieces both front and back. I used 2 1/2in. screws.
Step 4
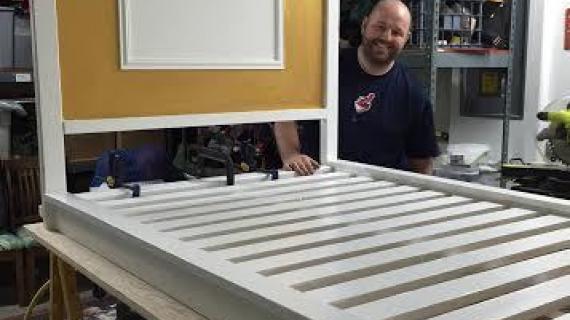
Attach 2 X 2s to the 2 X 6 using glue and woodscrews. Place to 2 X 2s at the height you would like my picture shows it up higher than I actually did. I actually placed mine all the way at the bottom of each 2 X 6.
Step 5
Step 6
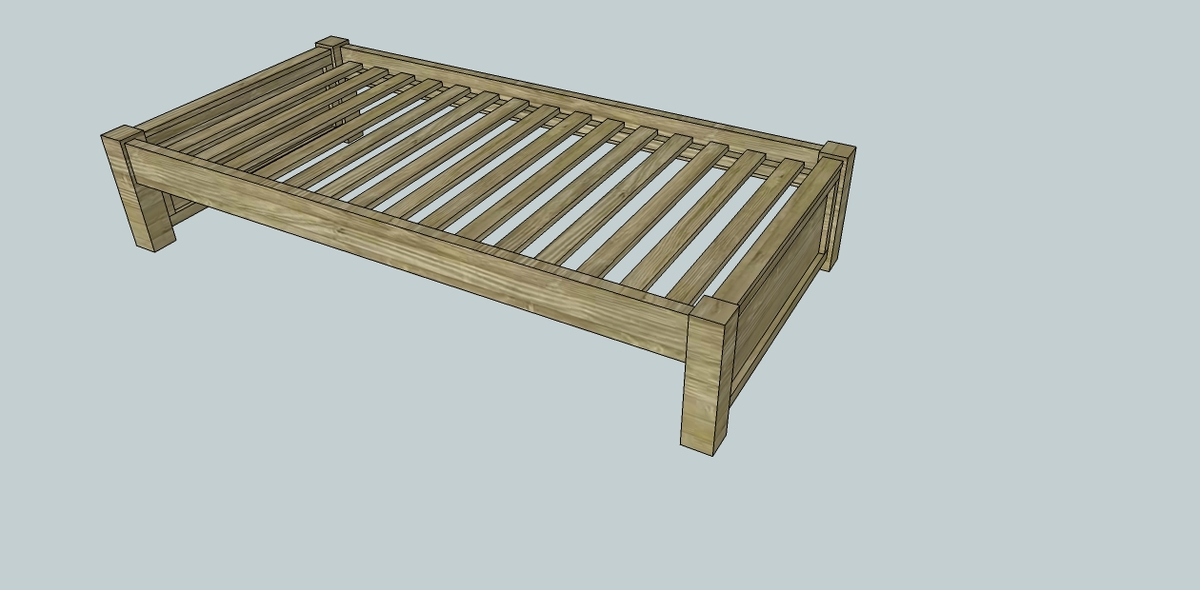
Assemble your bed and double check the measurements before cutting the slats. You will cut 15 slats they will be equally spaced. And now you are done.
It is always recommended to apply a test coat on a hidden area or scrap piece to ensure color evenness and adhesion. Use primer or wood conditioner as needed.
Comments
DTeague
Sun, 08/21/2011 - 05:04
Better explaination of using bolts.
First mark on all your 4 X 4 and 2 X6 exactly where you want the bolts for predrilling. On the outside of the 4 X 4, we used a woodboring spade bit to make a large enough hole that my socket wrench could fit in. Also you make the depth deep enough to make the washer and bolt flush or a little inset. You can mark you desired depth on the drill bit with tape. The spade as a sharp tip that you can place right on your mark. After that you predrill the center of the hole with the appropriate drill bit for the bolt all the way throught the 4X4. Then double check (or triple check) your marks on the 2 X 6 and predrill those. After that you should be good to go.
AlexE (not verified)
Sat, 05/05/2012 - 17:41
We did two for our kids!
We did two for our kids! Thank!